















Latent diffusion improves image generation efficiency by performing the diffusion process on compressed latent representations from a Variational Autoencoder (VAE) rather than directly on high-resolution images, reducing computational load while enabling training of higher-resolution models on lower-end hardware; this approach maintains model capacity by preserving essential information in the latent space while significantly decreasing the number of operations required per layer due to reduced spatial dimensions.
Latent Diffusion Models with U-Nets: A PyTorch Deep Learning Tutorial
Added:Proficiency in PyTorch, including writing custom training loops, working with tensors, and defining neural network modules.
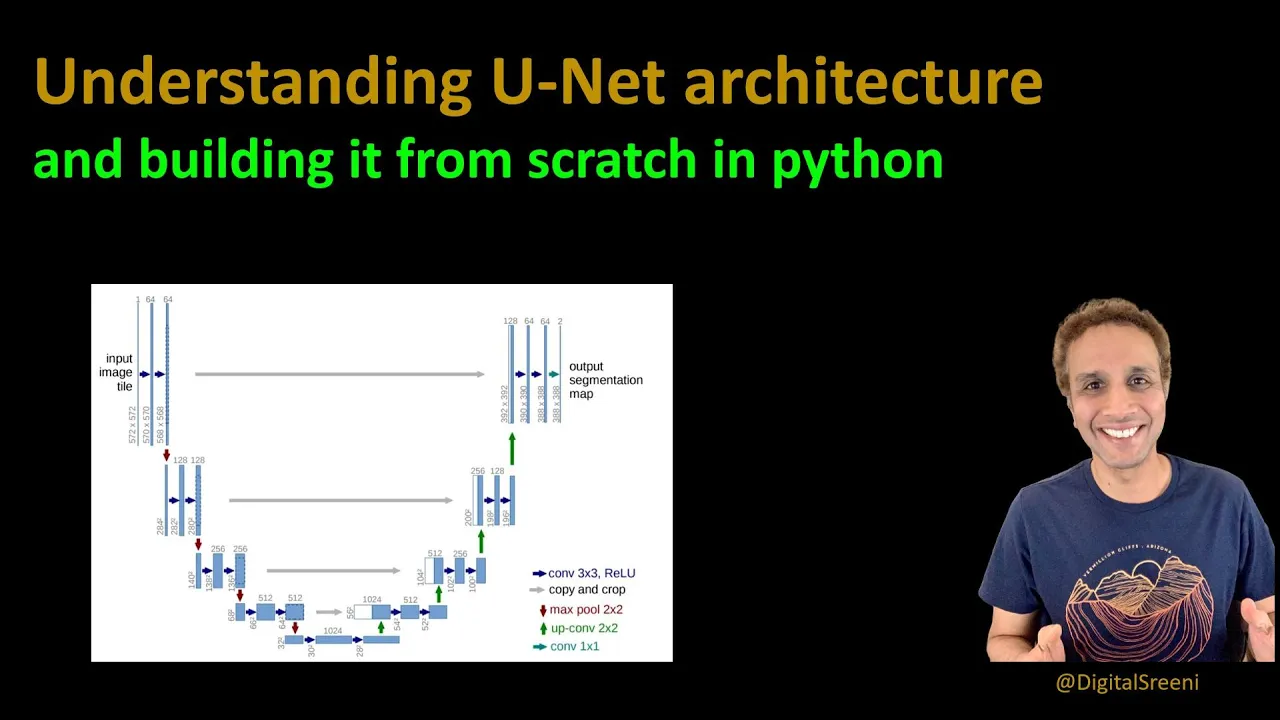
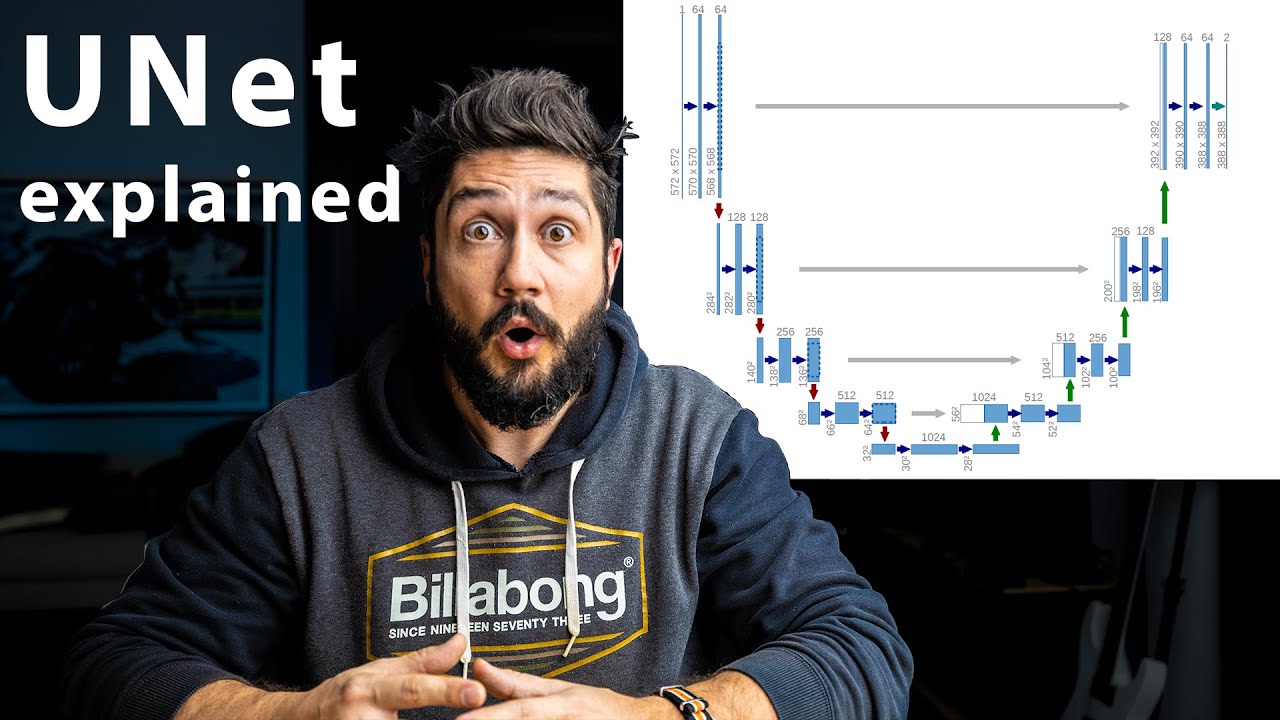
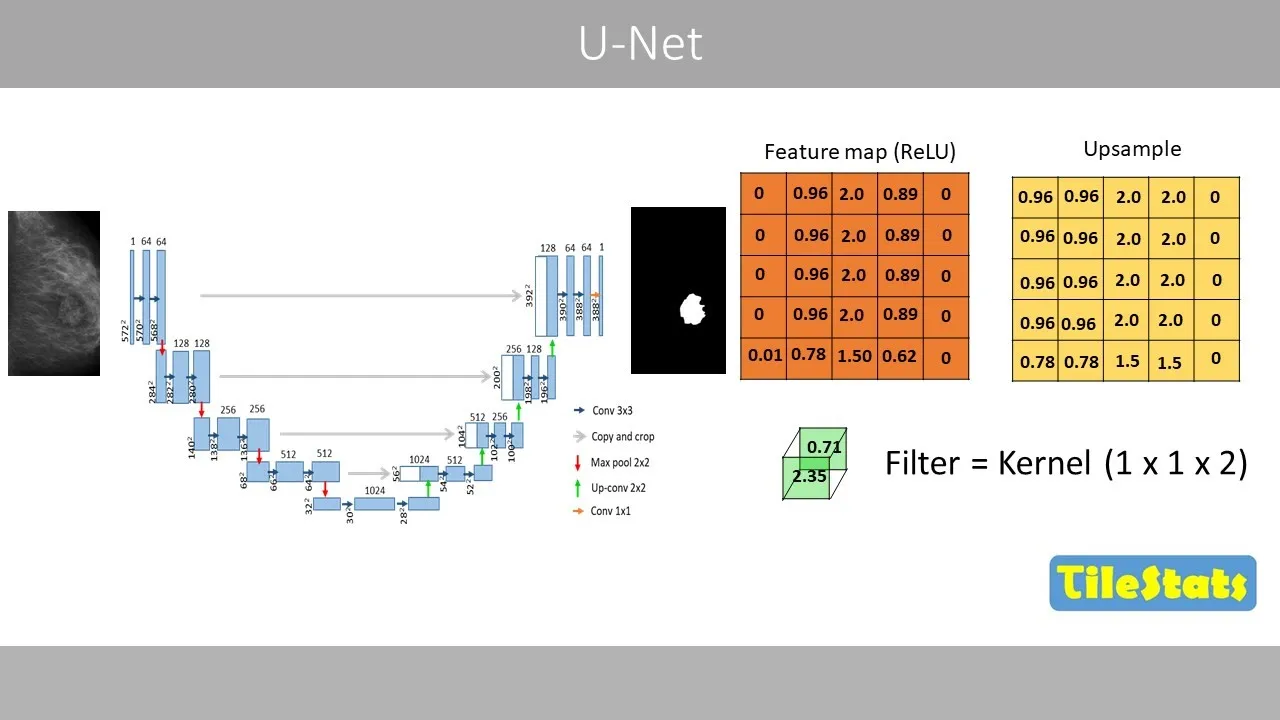
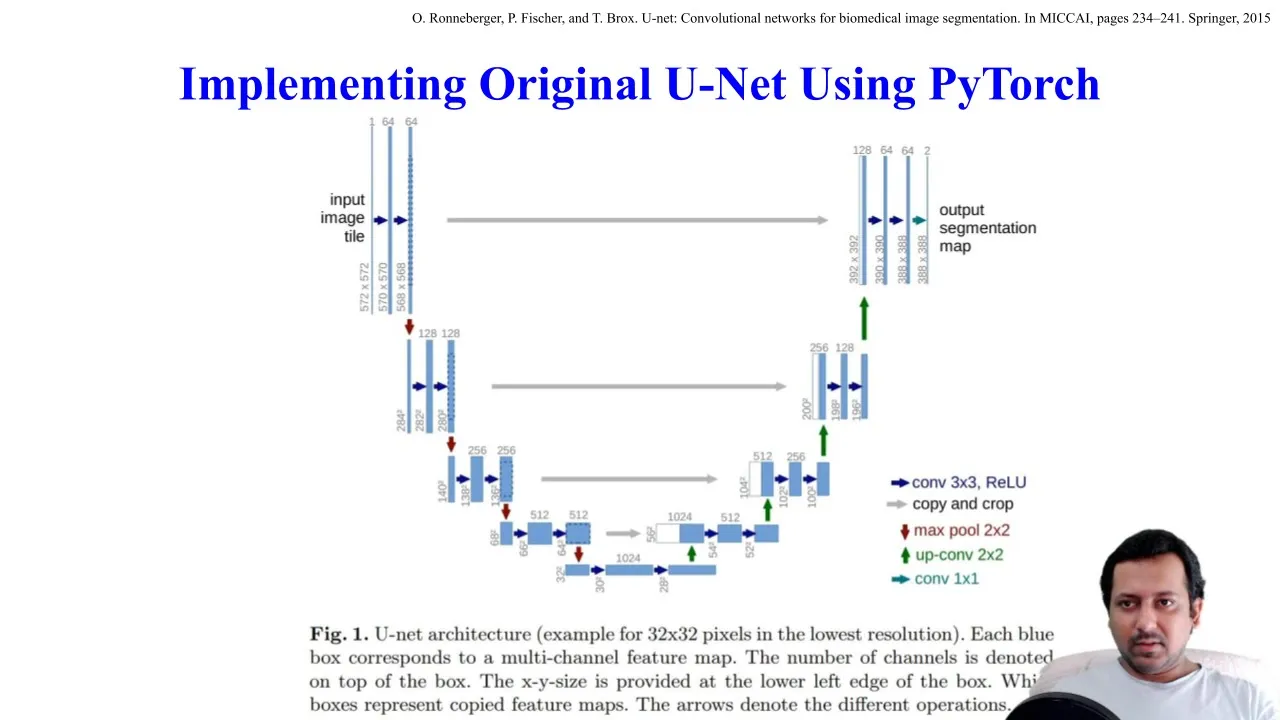
Understanding of Convolutional Neural Networks (CNNs) and the U-Net architecture, specifically encoder-decoder paths and skip connections.
Fundamental concepts of Variational Autoencoders (VAEs), including latent space representations, reconstruction loss, and how encoders compress high-dimensional data.
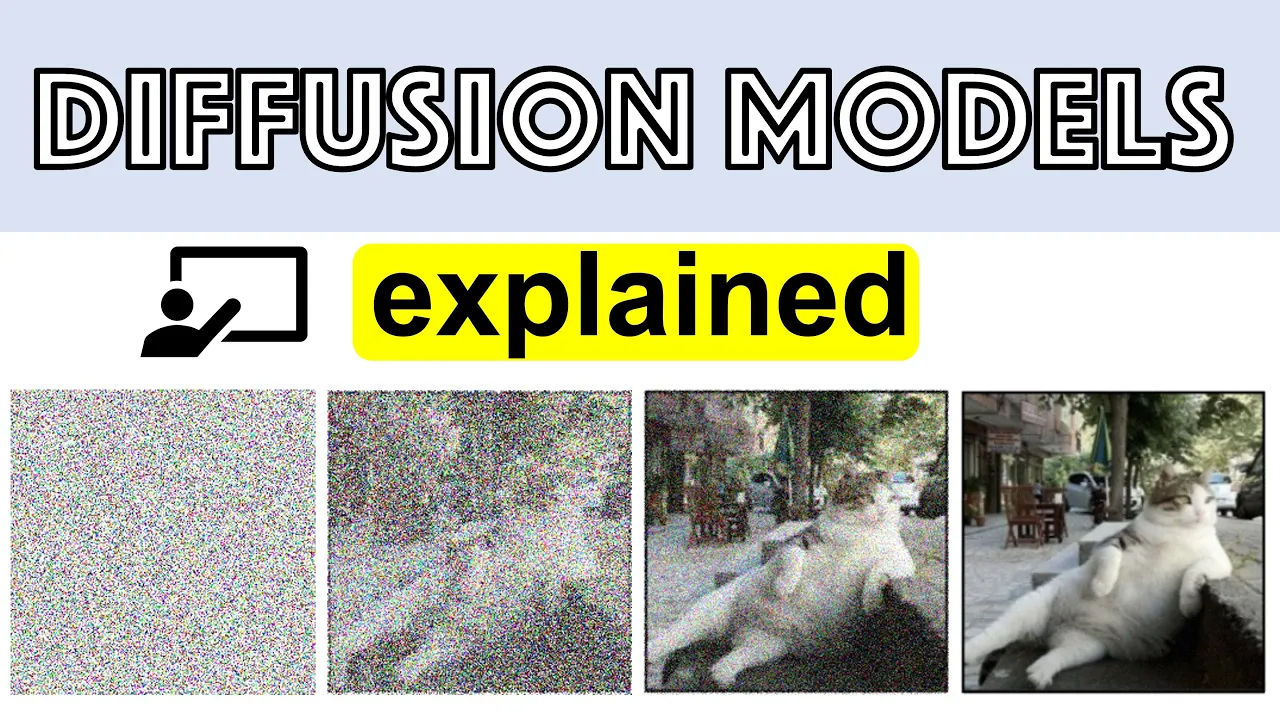
The basic mathematical intuition behind Generative Diffusion Models, specifically the forward (noising) and reverse (denoising) diffusion processes.
Implementing Classifier-Free Guidance (CFG) and text-conditioning using cross-attention mechanisms to transition from unconditional to text-to-image generation.
Exploring advanced diffusion sampling schedulers (such as DDIM, DPM-Solver, or Euler) to drastically speed up image generation during inference.
Fine-tuning Latent Diffusion Models using parameter-efficient techniques like LoRA (Low-Rank Adaptation) and ControlNet for spatial conditioning.
Optimization strategies for production deployment, such as mixed-precision training (FP16), model quantization, and utilizing PyTorch compile for faster inference.
2.6K views55likes13:53Original Release: 2024-08-25
hello my name is Luke and welcome to this pytorch tutorial Series in this video we're looking at latent diffusion models if you're new to the Channel all the code you see here is available in my GitHub repo Link in the description and this video is a part of a larger pytorch tutorial series that you can find on my channel so we've looked at image diffusion before process of noising and deising images in order to generate new images but in this video we're going to look at a different type called latent diffusion where instead of diffusing on the image itself we're diffusing on the compressed latent representation of the image from an auto encoder or a variational auto encoder so it's been a little while since the last tutorial video where we looked at transforma based large language models going forward what I'm going to do is go back over some of the algorithms and methodologies we've seen before and look at more complicated or more complete versions of them that might be actually more useful in a real world situation as well as looking at other tools and libraries and environments that have been created for deep learning around pytorch in order to implement some of these more complex ated more real world Solutions using deep learning we're going to start to see that in this video as well so as I said the only real difference between latent diffusion and image diffusion is that we're diffusing on the latent representation from a variational order encoder rather than the image itself now why might we want to do this well basically because the latent representation of the image has a lower number of spatial dimensions and therefore throughout our model we have to do less computations less calculations at any stage throughout our model so if these spatial resolution of our image is lower we have to do less steps per layer of our convolution therefore our forward pass might be faster or we could potentially train higher resolution image generators on Lower End Hardware so in the image diffusion video the last Model we trained was on Cipher 10 which is an image data set of 32x 32 pixel images that was quite a large model it took quite a long time to train but it was only 32x 32 with lat diffusion in this video we're going to be able to train a 256x 256 sized image generator just by using the simple trick of training on the latent representation of a variational auto encoder instead of the original image itself now the size of our model is in the number of parameters is probably going to be the same because the complexity of the model will be the same that latent representation should still contain all the information from the image especially if we want to decode back to the original image from the latent representation the complexity of the distribution and the amount of information contained within our model is going to be the same so it's going to have the same number of parameters but we have to perform less computations at each stage because spatial resolution or the number of dimensions of our input is small the first stage of training our lat and diffusion model is to convert the images to the Laten space representations you could do this during training so load an image from our data set pass it through the encoder of our vae pass that representation you know noise it up pass that through a D noising model or a more efficient way to do it is to pre-process our data set convert all the images to their light representations so we're not doing it multiple times over the epox during train training so the extract features notebook here just outlines a basic way of doing that so we're actually going to use a pre-trained variational auto encoder from hugging Face's diffusion Library so we looked at hugging face in the large language model video where we looked at the tokenizers and we're going to get more into hugging face and its tools and its pre-trained models and IT pre-written training code sometime in the future so make sure you stay tuned for that but in this video we're just going to look at its pre-trained and pre-built variational Auto encoder model so we don't have to do that ourselves so you'll need to install in faces diffusers and from that diffusers models we're going to use the auto encoder KL so an auto encoder trained with a K Divergence loss which is what a Vie is and note that that variational auto encoder we're going to use downsamples the input image Space by a factor of eight so we're going to be using 256x 256 sized images down sampling by a factor of eight will give us 32x 32 spatial dimensions for our latent space and this particular model we're using has four channels in the latent variable space so Auto encoders KL is the actual model architecture but we need to load some pre-trained weights and we're going to use the pre-trained weights from stable diffusion so stable diffusion is a latent diffusion model and we're going to use its variational Auto encoder in order to encode our images and then decode them later on the stability AI St vae ft EMA and EMA is the exponential moving average so it's not the original weights they were also keeping track of an exponential moving average to sort of smooth out any noise in the training procedure so that will download the pre-trained weights it'll only happen once first time you run this move that to our device and we'll get our vae on our device so in order to load the images we'll just construct a basic image folder data set and then use that to create our data loader so we'll process a batch of images at a time and then individually save those to file that extraction Loop just looks like this here we have our vae we pass that just through the encoder with the encode function this will return a pytorch distribution I think it's just a normal distribution which we need to sample from so mu and sigma will go into that we'll sample from that distribution and then you can see here we're actually multiplying the resultant latent variable by some magic number this magic number actually comes with stable diffusion training this is basically just rescaling the lat and variables to be closer to a standard normal distribution because we're going to be using standard normal distribution noise when training our diffusion model we want to make sure the magnitude of the latent variables is similar to standard normal noise or else the noise won't have too much of an impact on the actual latent variables until the noise value is sort of cranked right up because this vae was trained to be really good at decoding the images back to the original image it was only very lightly regularized with that K Divergence penalty as we talked about in the vae video if you want to make sure your vae can encode and decode the image with a really high quality output decoding you can't regularize it too much or else you'll lose too much information and won't get back that high quality sharp image so for this vae I think the latent variables like plus or minus 20 within that distribution whereas a standard normal distribution Sigma is one we get like plus or minus 3 so we need to scale it back down so it's a similar magnitude range as our noise or as I said the Laten variables will overpower the noise you won't get that nice forward diffusion process of gradually removing the information it'll happen very quickly at the end in any case we get our latent features we detach them pass them to our CPU and then we save them one at a time just numpy save so pretty straightforward once we've done that the rest of the procedure is pretty much exactly the same as image diffusion we use our forward process to noise the images pass them through a diffusion model get a unno image and so on and so forth I already covered cold diffusion which we're going to be using here again in the previous video so I won't go through that here only real difference I've made to the code here is in the actual unet model itself I've actually pulled this model from my pie torch diffusion GitHub repo it's a bit more complicated than the previous unit we saw but really the general gist is exactly the same the only real difference is how we're constructing the unit and the procedure for that and also the introduction of some attention layers in the actual unit we talked about adding the tension to CNN models in a previous video so how we can cast the tension between spatial regions within the feature map within the layers of our CNN so that we can combine information across the space regions of our feature Maps quicker than a normal convolutional layer would do that I won't go into this too much here it's a bit of a different method I'm not using P torches multi-headed attention layer it is kind of easier to just use a convolutional layer instead of trying to reshape and use linear layers we also tend to down sample the channel Dimensions quite aggressively when we're using it for images which is something you can't really do with just a multi-headed attention layer from pytorch I'm also doing the reshaping in a bit differently here you can see I'm using einom Einstein notation it's going to be a whole another video so I won't go into that in too much detail here we also have another type of attention called linear attention or Global attention or channelwise attention with the spatial attention that we covered in the previous video we're querying different spatial regions so that each spatial region can kind of look at what's happening in the rest of the image as we spoke about in that video quite computationally expensive to do the self attention with images because even for low resolution images or low resolution feature Maps say 32x 32 that equates to 1024 queries is equivalent to a sequence of 1024 embeddings just for a low resolution image so what linear or channelwise attention is is instead of querying across spatial regions we're querying across channels so that each channel will sort of query what's going on in all the other channels kind of already happens with a convolution because each convolutional kernel operates across all channels but technically we are also mixing spatial information but less directly so it's not as good as direct self attention across spatial regions but it's sort of more efficient at higher resolutions where we have less channels and more spatial regions so what we tend to do and what I'm doing with this unit here is for large feature Maps we're using this channel wise attention and for smaller feature Maps we're using the self attention so you can see I have a variable here called self attention resolution basically feature Maps Above This resolution we're using that Global linear channelwise attention and for Resolutions equal to or less than this we'll use that self attention that spatial self attention but apart from that it's pretty much the same as what we saw before the only other real difference we've made is in our data set again we just loading those latent variables that we've already created with a very simple data set here just loads each of the latent variables and then we use that to create our data loader the rest of the code is exactly the same a cold diffusion process when generating the latent variables is exactly the same that will be generating latent variables not images here and again I talked about that in the previous video when constructing our model it's the same channels in will be the number of latent channels which as I said will be four in this case image size is just the size of our latent spatial Dimensions as I said will be 32 dim out is the number of channels out dim here is the base Channel width and then dim multipliers are what to multiply with to expand the Channel width as we get deeper into the unit same as the other unit we saw in the previous video I've actually already pre-trained a model as per usual this model here only has 35 million parameters so it's not really a big model still the training procedure is exactly the same again except we're using latent variables that we've already created instead of the images the noising and everything else and the loss is is exactly the same this model I trained for 600,000 iterations good thing I've already pre-trained it cuz it took a few days of training in order to get these 600,000 iterations and that might seem like a lot of training but in the literature similar models for similar data sets are actually trained for up to a million to 2 million iterations so this isn't really that much training compared to how long these are usually trained for and again 35 million parameters isn't even that much not looking the retrieved state-of-the-art here we're just looking at how these lat and diffusion models are trained so once it's trained again we can load our vae our pre-trained vae the parameters have already been downloaded so we won't need to do that again and what we can do is is just generate some new latent space representations for some fake images instead of generating images we'll be generating latent representations so we provide our seed noise same as before as well as our unit c diffusion process now will be creating fake latent variables not fake images and then with those fake latent representations we pass those through our decoder we need to rescale them to the original magnitude and we'll get our fake sample hopefully our realistic looking fake image so we can do that we have 500 iterations as well in our diffusion process so quite a bit more in the previous videos when we were just doing simple diffusion on fashion amist and Cipher 10 so it takes a little bit longer here so we've got our images and we can have a look so quite a bit noisy not great again it's not state-of-the-art but again we need to train for longer with a larger model however as you may have noticed I had actually a scale factor in front of the initial seed here so one technique to improve the quality of images is actually to scale down the magnitude of the initial seed noise making it closer to the mean of the noise zero as a result we sort of get less outliers and the resultant image is less noisy also less variability and complexity to the images so if I do 0.8 we have a look at those images so quite a bit less noisy but you can probably notice there there's less diversity between the images and we can go even further and scale them down some more have a look at these now so less detail but also less deformities and less Randomness in the images this is one technique that you can use sort of improve the quality another technique is actually to use the exponential moving average of the weights while training so as you can see the vae that was used for stable diffusion had an exponential moving average as well but also when training the unit there was also a copy of the parameters that was being constructed using an exponential moving average in order to create more stable less noisy weights so here I haven't done that just to make it less complex but in any case hopefully you got something out of that to see how we can now do latent diffusion train a model that can generate larger resolution images in a sort of two-stage way even when using sort of lowend Hardware I'm only using a 2080 TI here so you can get much larger gpus and much more compute but light and diffusion helps us train a more efficient diffusion model in the next video I'd like to show how we can use image Transformers to replace the unit with Laten diffusion and construct a Transformer based lat and diffusion model so if you're interested in that make sure you subscribe and stay tuned for that next video thank you
Up Next
100:35
Stable Diffusion Code Explained: High-Resolution Image Synthesis with Latent Diffusion Models | ML Coding Tutorial
@TheAIEpiphany
57.4K views•2022-09-01

57:48
Secure Multiparty Computation (MPC): Foundations & Challenges
@SimonsInstitute
7.3K views•2015-05-28

13:03
Bypassing Tor Censorship: Bridges and Pluggable Transport Guide
@Coding_ForEveryone
397 views•2024-06-11
18:41
Neural Networks Explained: Math, Layers, and Learning Fundamentals
@3blue1brown
21.9M views•2017-10-05
Related Study Plans & Knowledge Roadmaps
Structured learning paths in Artificial Intelligence
artificial-intelligence
Aligning LLMs: DPO, TRL & Custom Datasets
01Foundations of Python & Machine Learning
02Transformers and Large Language Models (LLMs)
03Aligning LLMs: SFT and RLHF
+ 3 more learning modules
24h6 modules
Explore Roadmap
artificial-intelligence
Federated Learning: PyTorch, Flower & Privacy
01Python & Machine Learning Foundations
02Deep Learning Basics with PyTorch
03Introduction to Federated Learning
+ 2 more learning modules
35h5 modules
Explore Roadmap
artificial-intelligence
Securing LLMs: Guardrails AI & NeMo Gateway
01Introduction to LLMs, Python, and APIs
02Understanding LLM Vulnerabilities & Threats
03Defending LLMs with Guardrails AI
+ 2 more learning modules
15h5 modules
Explore Roadmap
artificial-intelligence
Building Recommenders: Two-Tower & Vector DBs
01Foundations of Python & Machine Learning Basics
02Introduction to Recommender Systems
03Deep Learning & Representation Learning
+ 3 more learning modules
75h6 modules
Explore Roadmap