
![FastAPI Tutorial For Beginners: Build Python REST API (Part 1) [2026] #learnpython #fastapi](https://i.ytimg.com/vi/ivOGr53Lb1c/maxresdefault.jpg)








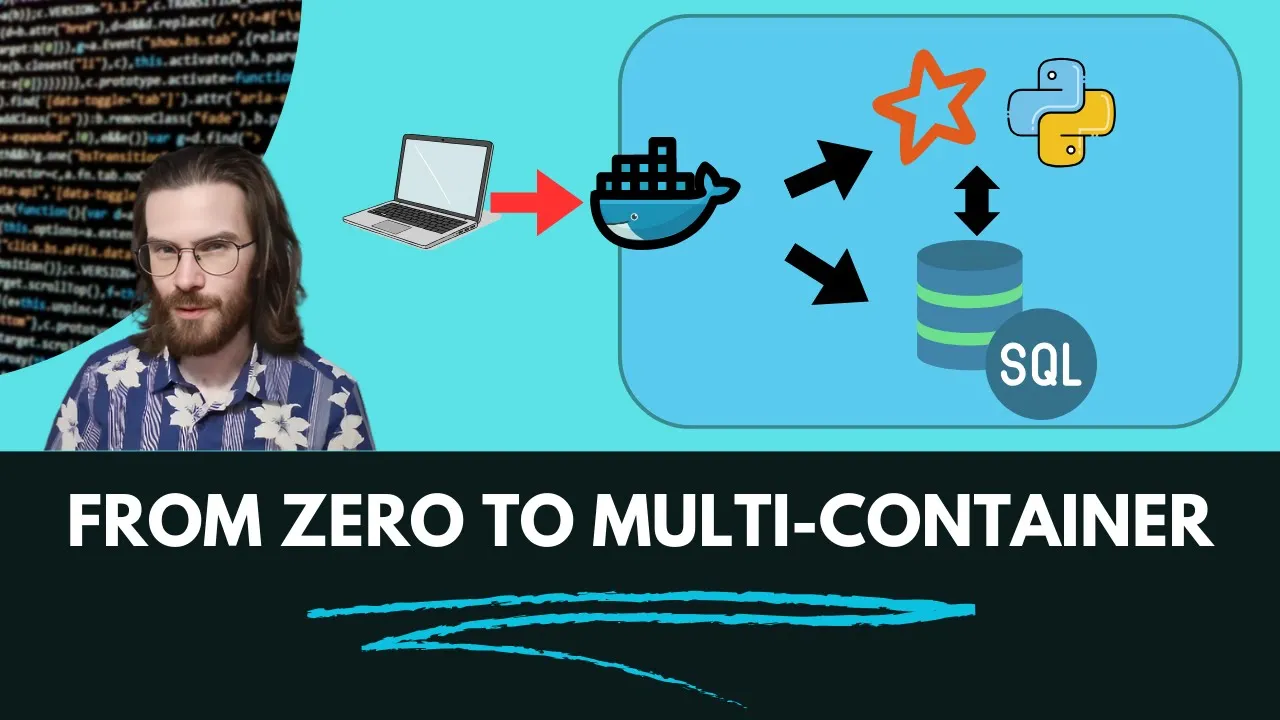










To dockerize a FastAPI application, create a Dockerfile that installs dependencies before copying application code to leverage Docker's caching system, then use docker-compose to manage the container with port mapping and volume mounts for development. The key steps include: creating a virtual environment and installing requirements, writing a Dockerfile with FROM python:3.9.7, WORKDIR, COPY requirements.txt, RUN pip install, COPY . ., and CMD uvicorn app.main:app --reload, building the image with docker build, and running it with docker run -d -p 8000:8000. For development, use bind mounts (volumes) to automatically reflect code changes without rebuilding the image.
Dockerize FastAPI with Docker Compose: A Step-by-Step Guide
Added:Basic proficiency in Python programming and the fundamentals of the FastAPI framework, including routing and asynchronous endpoints.
Understanding of CRUD (Create, Read, Update, Delete) operations and basic NoSQL database concepts, specifically MongoDB document structures.
Familiarity with using the Command Line Interface (CLI) or terminal for navigating directories and executing scripts.
Fundamental awareness of virtualization concepts and what software containerization aims to solve in software deployment.
Optimizing Docker images for production using multi-stage builds and security best practices, such as running containers as non-root users.
Deploying and scaling containerized applications using orchestration platforms like Kubernetes or AWS ECS.
Configuring automated Continuous Integration and Continuous Deployment (CI/CD) pipelines using platforms like GitHub Actions to build and push Docker images.
Implementing persistent data strategies, system backups, and clustering/replication configurations for MongoDB in a containerized environment.
13.7K views154likes39:47Original Release: 2021-12-03
hello youtube welcome back to my channel so in today's tutorial we are going to go ahead and learn how to use docker and docker compose to build uh to to build our first api application so this first api application is a to-do list application that we built a couple of months ago using fast api and mongodb so in today's tutorial you're going to use this application to build a docker container using docker and docker compose so let's get started so uh this if you're interested tutorial on how to create this api uh using mongodb and first api then i'm going to leave the link in the description or you can just click the cartier app to access that video so it's just a single video and you can access it and watch that video and learn how to build an ipa and api using first api in mongodb so once you're done you can now go ahead and actually uh put this in a docker container using and run it to the docker compose okay so let's get the first thing you need to do is to clone this repository so i'm going to go ahead and really clone this repository so i'm going to copy this i copy the link for the repository and i go into my terminal so i'm going to make a directory here make that i'm going to call it uh first api uh first api to do just like that just like that and call the first api to do and press enter so i'm going to change directory into my first api to do okay so i'm in that directory you can see that directory has nothing inside of it so the first thing i'm going to do i'm going to create a python virtual environment well to create a python virtual environment is different from one operating system to the other so if you're on windows or macbook i'll leave a link in the description on how to create about a virtual environment for your specific specific operating system in this case i'm going to do it for linux and if you don't if you don't create a virtual environment feel free to skip this step so to create a virtual environment it's like quite very simple what you have to do is simply have to type in python 3 and then dash m hyphen m v and v and then v and v and then press enter we're going to create this going to create the first virtual environment called ee lv env and that's we're going to install all our python packages okay so i'm going to go ahead and actually check if the vector environment is created and here's the screen creating and you can see the folder of that virtual environment here okay so i'm going to go actually activate that virtual environment so env first last pin was slash activate okay just like that and it's going to activate my battery environment and again the virtual environment is activity when you can see the name of this virtual environment folder in parentheses in front of the line within the terminal so great now that you have done creating the virtual environment let's go ahead and actually create a folder called app so i'm going to make the and i'm going to call it up okay just like that and you can see we have that app folder in there so i'm going to change the directory into my app folder in my output up folder i'm going to clone my github repository so i'm going to say git uh clone and then i'm going to paste the command that's what i have copied from my github repository i'm going to do space and then add a dot okay that means that i want to copy all of the folders into the app uh link to the app uh folder instead of creating another folder so just going to press enter and that is going to go ahead and actually clone that repository on our machine so i'm going to create a terminal do an ls you can see i have all that repositories in there so i can go ahead and navigate one directory back and i'm going to go ahead and actually open a visual studio code okay so i'm doing ls i'm going to open visual studio code or feel free to use any editor that you're using so yeah in case you haven't created virtual environment until this point is also fine you can also install the python uh python or packages which are green and global python environment and which i'm going to show you just in a second so let's say wait for visual studio code to open up my visual studio code is ready and has opened up so i'm just going to close this for now and i'm going to go into my app and in my app i'm going to move this into the roots directory the txt filament of it in the roots directory i'm going to move the readme file into the root directory i'm also going to move the git ignore into the roots directory as well so in in our project there in our app directory which is this app folder we will have config models routes schema and then dot main okay which is just up to delete the application itself and all the others have moved them into the roots directory so i'm going to turn this into a python uh package i'm going to say unless scope in it and then let's go that by just like that uh yeah so once that is created you can see it here now we need to go ahead and actually go and install all the python packages for now so i can do clean my terminal for now and i can do a ctrl and s and you can see i have the requirement.txt for that so i'm going to do a pip you can do pip3d install uh or pip in windows it says pip and now you can use pip or pip3 it will also work so install but if your needles make sure it's pip3 install uh and so on to install dash r and then requirements.txt and i'm going to simply press enter it's going to go ahead actually install all the requirements that we need for our project okay so the requirements uh we did we got this requirement to building the projects uh so you can watch that video as i said the link is in the description so you can see these are the requirements that we need to start our application okay i'm not going to go ahead and explain to you how to create this application since you've already done a go so it's already done uh we are done with creating that application right it doesn't really make any sense to um for me to show it again the video is there you can just watch the video and the link is in the description so you can see the requirements are all being installed and once that's done we can go ahead and actually uh begin to culture all the requirements download install first api uh if you have installed pymongo you have installed uh uv con and other stuff like that so great so now that you've done let's try to uh uh to run applications you have to say uvicon make sure that you're out of the app file okay of the app folder make sure that you're not inside of the app folder okay make sure in the roots directory and then you have to say up uh up dot dot main and then up dot me and then colon uh up okay just like that and then if you're trying to run this this uh starter developments but this should give us an error and you can see the error here and it has some input error so let's go ahead and actually fix those input errors i'm going to go into my my routes and i'm going to go in here now this is going to be uh from two one directory box we have to keep one two because so you have to keep two dots before uh sorry two dots because you're installed you're inputting this from one directory back also the config you have to put to that because instead of importing this from one directory back the same for the schemas you have to put one directory back then you can go into our main.pipe uh from routes you are installed inputting from the current directory so let's check the other uh here we don't need any unity we're not inputting from any directory so that's fine and here i also uh you know departing from any directory so that's also fine so let's go ahead and actually try to run up again and to see if you get that error of the inputting uh importation error so let's run this again and everything works okay so we can just go to localhost output 8000 and try this also you can go type in here uh local post at port 8000 localhost column eight thousand that's eight thousand like this then you can press enter and let's see uh what you get we get back an internal server error so let's check what the error is all about so the l is about our authentication field there is one authentication field is because uh this is not my password right so i have to keep my actual password and my password is called uh code with prints okay this i just seen the password for now and after this tutorial i will change my password so don't use my password okay it will be changed so make sure that you have atlas already installed and again if you understand the roots of this project make sure that you go back and watch the previous tutorial okay so now that you have that i'm going to just exit out of this create a terminal and start my development server again since i didn't use the reload flag okay so i'm going to make a request and now you can stick back i get back there their responses so if i do first slash docs it should take me to the docs and i can see the first api swagger ui documentation so that shows that everything is set up and everything is working great so now i want to do some changes to this i want to go and do some more little modifications to my application so i want to go in here i want to open a new type i want to search for dot uh env python so search.env or python so just go to pipe.org and you can call me description google and make sure you bring it to this website and i want to install this dot env because i want to use a an environment variable on uh on uh on the dot env file so i'm just going to close my uh server and then paste that command to install the requirements uh that requirement right there so it's going to install the uh uh it's going to install for us python.env oh and once that's installed i'm just going to now make sure that i update my my uh my requirements file because i just installed a new library since then this is the last step we're going to install so i just update my requirements txt file so great so now that you have that in there i'm going to create a dot env file right here so i'm going to create uh multigrade.env just like that and i'm going to go into my database and i'm going to copy all of this code right here i'm going to copy all of this make sure i cut it out and i'm going to go into dot env and i'm going to create i'm going to create database underscore connection underscore url and this is going to be equal to what you have just got from there and again the strings are not like using double quotes it's not compulsory you can uh decide to leave the double quotes out but i'm just going to leave it in there so go back to the official documentation of uh of uh info you can see what we need to do right now we need to go ahead and actually import this so we need to import this i'm going to copy this and just paste it here so make sure i just exit out of that paste it in here so i'm going to do okay i hit ctrl v instead of ctrl ctrl c instead of ctrl v so i'm going to go ahead and actually paste that one more time and then i'm going to go ahead and actually copy this part it is going to be a config copy that and this is going to return to us a dictionary of all the all the other call the secret keys and other passwords and other settings from the config file so i'm just going to do um config dot get sensor dictionary and i'm going to get this specific uh this specific variable here so i'm going to copy this copy this and then move it in here so paste that in so i'm just going to now i didn't copy it properly so let me just go back here and i'm making sure that i copied properly so i'm just bring this here url i'm going to copy that and i'm going to come in here and i'm going to paste it in there yeah so it's going to get us that your outreach is going to get us this specific uh configuration okay so now this is going to be a secret key because it contains my password so i don't push this to github so i'm going to ignore this by pressing dot e and v and it's going to ignore that specific file when i push it to github so once that's done let's try to run our application again to make sure everything is working so it is going to bring down that command uh sorry create a terminal uh make sure i run the right command so i'm going to uvicon and then run the command again and then we can try this out again on my uh my local machine so i try it out and everything still works so great so now that you have that setup let's go ahead and actually write a docker file to dockerize our our flask application or simple flask application so that's what you need to do you need to create a file called docker file so just let me just close everything for now minimize everything in the root directory list with the file called docker so make sure that is capital d and everything is small later afterwards okay so the first thing we need to do is to import a python image so again say python and i'm going to say i'm going to get python 3.9.7 okay i'm going to get python 3.9.7 and then what i'm going to do i'm going to create a working directory so i'm going to say working work da and the work that is going to be for slash users i'll make sure it's lowercase class users for slash source for slash and then um first lash i'm going to say application okay so let me just explain to you this just in a second so now you can see useful slash users for slash uh source this this directory already exists so you can read the block of your recommendation and you notice that this directory already exists so i'm creating a new directory inside of the source directory i'm going to call it application and that's where you're going to store our application so now what i need to do i'm going to copy my uh requirements i'm going to copy my requirements dot txt file and i'm going to copy into the working directory which is going to be the current selector just have to do full stop and then first slash so i'm copying the requirement.txt which is this requirement file and make sure that you've already updated the recommendation before doing this that's why i updated it previously so we are copying the requirements.txt file into the current working directory and the current working directory is users for slash source for slash application so once that's done what i'm going to do right now i'm going to go ahead and actually specify a command so this command is going to be run the run command i'm going to say pip install i'm going to install uh hyphen hyphen no under catch and i'm going to say no cache the and this is going to be uh let's say hyphen r requirements dot txt i'll make sure i get txt txt and text okay so now that's done we can go ahead and actually copy everything uh copy everything from the current current directory on our local machine into the current into the working directory on the on the docker container so copy everything which is going to be everything here you're copying into the work current working directory in our docker container and the working directory is users for slash so uh source for slash application once that's done you can go ahead and actually run the command so one thing i want to explain to you is you can see that uh you can see that i have first of all i copy the recommend.txt file and then i did the installation so i did this part before copying all the other folders into my working directory on my docker container the reason for this is that this work uh this working everything else from here consists of your app also and your app you might make changes but from time to time if you make changes from time to time doesn't mean that you want to install the libraries from scratch again every time you want to run your docker container so that's why we have to make sure that you install everything before copying this this is because docker has a caching a caching system so if you put this code above it if you could it's this code above uh if you make people put it maybe somewhere here then uh every time you make changes to your your your application docker will detect that change so docker was that uh make sure it copies all the files and then and installs everything again from scratch so that is going to take you time and that's not what you want to do in most cases what you want to do is that you want to copy the comments to this file and then install everything and then copy every other file meaning that even in the future if your files are changed what would the what and if your file if your application file changes and your requirements files remain the same then what docker will do docker would just start from here due to it has already cache uh all these other parts so what it will do it will just copy all everything from the uh current uh from the all the changes into the current tracking directory without necessarily having to install all these parties again so once that's done i hope that's clear for you so make sure that you follow this specific order just to save time whenever you're running a docker application so i'm going to do a command and this command is going to be as follows i'm going to say uh this command is going to be the same command that you're going to that you've been using uh sorry that you have been using in the terminal so if i bring back my terminal and i show the command that you have been using to an application it's your vicon app mean that this this command that you're going to specify here so each word is going to be in its own courts and then and this would be in its own course like that so i'm just going to say i know that you can also use uh let me just create a terminal you can also use hyphen hyphen reload just like that and that will still work and uh docker will reload sorry the first api will we will reload whenever i make changes so i'm going to say uvicon uh vcon and then space and then another another another i'll make sure i keep a comma here and then you have to say app dot main and then up until there's app and then what you want to do i want to say uh i can specify the host also i can say that i can say hyphen hyphen host you're going to run this on localhost at what i haven't tried this on all like means that you can accept all uh all ip addresses such as saying 0.0.0 and then you have to say i'm going to pay a port so but on which this is going to run on my dock application is going to run on and the port is going to be uh about 80 but uh sorry put eight thousand so we're going to run this on port 8000 and it's going to accept uh running on all rp addresses so that's all we need to run out to create a simple docker uh container so now that you have created docker container we can run this docker container uh manually just by ourselves or you can create a docker file uh docker docker compose file to run it so let's try to see how we can run this manually so i'm just going to uh correctly i'm going to do sudo and if you're on windows you don't have to do sudo and one thing before you get into this docker section that you have docker make sure you have docker installed on your computer you also have docker compose installed in the computer okay so these are the two things that you must have docker and docker compose installed okay and if you're on windows uh feel free to to skip this uh pseudo okay so it's from my macbook and uh guys who are using linux and uh yeah so if you're on windows feel free to skip the sudo thing okay so i guess say build and you're going to say that's t if you want to say build you can do the hyphen hyphen and help and then you can see all the help options that you have using the build command so i'm going to put in my password so with my password in i can see the different flags that i want to use but the flag that i'm interested in in this time is going to be the t flag so i'm going to use the t flat for this i'm going to play the terminal i'm going to the pseudo docker uh build build and i'm going to say hyphen t i'm going to call this first api first api first api and to do and then i'm going to run this from our current directory it means our current directory is going to look true and it's going to file this docker file so make sure that when the roots directly where the docker file can be found okay so i'm going to now press enter and this is going to go ahead and actually build my docker container docker image basically so you can see it's going it's going ahead to build it so this is going to take a bit of time so i'm going to be back when this is completely done [Music] so [Music] [Music] so yeah so guys i'm back and you can see that it has successfully installed uh that created that docker image so let's try to see all the existing docker image so i'm going to do sudo meter docker sudo docker and i'm going to do a image ls so it's going to show us the list of all the existing docker images on my machine right now so one of the images that you expect to do is the first api application right so you can see that first api image has been created so great so now that we have that created let me just create a terminal for now and i can go and actually do sudo docker run and then i can run this i'm going to run it in a detachment so if you do hyphen iphone help you can see all the help options so you can run this in you can specify the let me just scroll up here so you can specify the port you need to unleash to run on you can specify uh you can write it on uh the touch mode you just need the attachment so you're going to use the detachment which is the the d flag you're also going to specify the port using the p flag so i'm going to play the terminal and i'm going to do sudo uh sudo darker run and i'm going to do it in detach mode sorry detach mode uh the touch mode and i'm going to specify the port on which this to run on so i'm going to specify port i'm going to say eight thousand uh uh eight thousand i have a column and then eight thousand just like this and just do eight thousand again so what this specifically means that on the local machine so this specified the port on the local machine in a local machine you'll specify that on the docker container right there you'll specify that uh the the application should run on on port 80. so now on on on a local machine which is the current computer that i'm running on i want also to open port 80 and connect port 80 on my local machine to put 80 on the docker container okay and then i want to answer the name i can just say first api api to do just like that and then i can simply press enter and this is going to go ahead and start that first api for us so this is going to get started and it's going to connect both 80 but 8000 on our local uh machine which is a current computer and on so we put 8 000 on on the docker container on this one this is the port on which the docker the first api uh application run so let's check this out to make sure that it's all working so i'm in my browser right now i can just do another refresh again to see if i can get that response so you can see i can get the wrist i can get it again and you can see it all work so even if i try to do i can go ahead and try this out and i can execute this you can see i supposed to get some to do say because i've added some to do so you can see it all works so now that you have that working means that the docker container is running so now i can go ahead and actually do a pseudo docker compose ps so i can do a pseudo docker uh docker ps so i guess do a ps and you can see it's running on this is the information of the running docker container you can see this is the information and it's running on our local machine so no not the name of the docker container here so we can the name of the docker container is this party uh the name of the docker container um the name of the docker image rather so let's check it's like the new docker image which is fast api so let's go ahead and try to stop this docker from running so into sudo docker again if you're on windows and uh make sure that you don't use the pseudo so they say docker and then say stop uh stop and then you're going to f5 first first uh first sorry the name of the docker image so it's the name of the docker image is this one here so i'm just going to copy that uh sorry there's no docker image it's this one right here so i'm going to copy copy that and then i'm going to go ahead and paste it here and then press enter this is going to go ahead and actually stop that docker image first so this is the name of the docker image is usually at the end and has this uh name so if you do it again sudo ps you can see that we don't have any running image so great so now that you have stopped that docker image this is tedious to do to repeat these commands all the time that you want to run a docker container so let's go ahead and actually do this using a docker docker docker composer which is a better and much uh preferred way of running uh docker containers so let's go ahead and do that someone in the terminal i'm going to create a docker windscreen docker hyphen uh docker hyphen and this is going to be docker hyphen i'm going to call it uh uh dogger hyphen compose dot yaml i'm going to create a yamaha file so local no so instead of this file what you need to do we need to create a version so i'm going to create a docker version that you want so version i'm going to use version 3 so now that you specify the version of the docker compose that you want to use now let's go ahead and create create a service so we're going to create local docker composer system called services so we're going to create a service to run our application so i'm going to call this service api and that's simple uh make sure that after every line you do a tab so after every line you do a tab just like to show indentation so that if the uh the service the api is under services we have to do indentation to show that and under services you're going to have built and you're going to build it from the uh the current directory and then for now we're going to go ahead and actually specify the port so i'm going to say ports pause and i'm going to specify the port as a an array so you can provide in an array you can write in an array here just like this or you can provide it by using this specific syntax so this syntax you can use is going to be uh let me just uh tap this it's going to be this hyphen enables with five but uh put eight thousand to put eight thousand just like that so i want to put eight thousand because both yeah this is for the local machine and this is for the uh which locomotion is my computer and this is for the docker container image or docker container okay so that's basically what you need to do so once you have that you can go ahead actually run this docker compose docker compose docker compose a file okay so what you have to do it's a docker compose and then you have to do a couple of compose app and then you have to run it in a detach mode just like they run the docker container so i'm going to now clear all of this i'm going to do sudo docker hyphen compose and make sure that you have docker compose installed on your machine or this contract so look at compost i'm going to run it in a detach mode i can also do hyphen hyphen help in case you need help with the option to see what options you have you can do docker compose hyphen hyphen help and then to provide you that help option so you can see uh the dogger compose help option is here so now you can read through it and see what you want to do so what else we want interested in is to do docker compose app to create us to start our docker call container so i'm bringing to the terminal do sudo docker uh docker hyphen compose and i'm going to do compose and i'm going to do app and i'm going to run this in a detach mode so i'm going to specify the d flag and then run this this is going to start made the docker compose container uh in a detached mode so you just have to wait for this to start and you can see it's creating that uh it's creating the network and then building the api and stuff like that it's building our service basically because the api is one of the services that we have in here so just wait for this let me go back to the terminal and see the progress of this so just have to wait for this to get done and then we can continue with our video [Music] [Music] so guys you can see my docker my dogger composer will build the docker image so you can see that the name of that image is first api to do underscore api underscore one so it takes the name of your folder which which you're working on so you're looking in this folder a roof directory or the folder in which uh the docker compose file is found and then the underscore the name of the service and then underscore one since you're building only one service okay that's why it's saying underscore one so great so now that we have the the docker image is already created it's running so we can just go ahead and try to check if it's running so let me just make a uh try to execute this and see if it's running so let's make a request and you can see it's running so even if i just try this out and i try to execute this we get back our list of all to do so you can see it works perfectly so you can even make if you have time you can go and try to create a new and then post the data if you want let me just try this out and then i'm just going to post this random data and it's going to post it so if i get back here and i do get all i can see i have that that to do here so you can see it works fine so great now that we have that let's go ahead i'm going to go into my app and i'm going to go into main so instead of main here i'm going to go into main here and i'm going to go let me just go into my routes and i'm going to go into to do so in the industry in this to do instead of pretending all these to do let's just make a change instead let's return a simple we say message and i'm going to say uh i'm going to say a hello world okay just save that and then i can go back here to the front and again try to execute this it's supposed to written to us hello world instead of the list of but it still returns towards the list of to those so why why is the chain not being reflected well by if by creating an image it doesn't keep track of these changes that you make in your file means that if i may want to make to keep track of these changes you have to go to the terminal and then i'm just click this and i'm going to do a docker compose docker hyphen uh compose uh down so i'm going to now bring that my docker image down so once it's going to bring it down what what you notice is that it doesn't keep track of all these changes so how do we make that how do we make sure that they keep track of all these changes for flow for you to keep track of all these changes you have to rebuild the docker image for this to work so we have to go ahead and actually specify the rebuild for the docker image to work if i take it back to the terminal and you can see that you can specify that by saying here uh docker compose build order compose app build heavy knife build so you have to rebuild your image in this manner okay for this to keep track of to reflect the current changes that you have so how do we make sure that uh it's docker automatically it automatically detects these changes right so let's just come up here so i'm just going to compose an app on the screen to try to run this again and let's see what is going to happen so i'm just going i'm just going ahead and building my image again so i'm just going to make a go to the to the front end refresh this uh refresh this and then i'm going to go ahead and actually make a request again so let's see what it happens this time so i'm going to go refresh this again so it says that let me just see uh let me just come here and docker compose uh this it says done but it doesn't uh if you try to make the request we get an error okay now it's working i don't know why that's what's happening so let me just go ahead and try to try this out again and then make a request let's see what is going to return to us it's going to return to us a list of all these uh to do's so we get back a list of all this to do so meaning that for us for for this needs to reflect you have to use to have to rebuild the docker image again from scratch so uh you have to now do a docker and then you have to say app and then hyphen hyphen uh build again and this is going to go ahead and as the commander suggests it's going to go ahead and build that docker image again and when docker that docker image is built that's when you'll be able to see these changes so let me just go ahead and rebuild this one more time then i'll show you something so let's just wait for this to be built and when it's built i'll be back so guys you can see that the local image is built and it's been running is running in an interactive mode so one thing you can see that whenever you come in and look closely you can see that i copy the requirement the txt file is using the cache right so it's even if you want to install all the requirements using the cache because the requirements have been changed that's and then later i copied everything and then did all the copying so that's why i told you that you have to specify the order you know that i explained this to you to earlier right here we specify copy dot dot after this other copying of the file another installation right because it's the docker by default using caching which saves us a lot of time during rebuilding of our docker containers so now once this is done let's try to refresh this i'm just going to be refreshing this and i'm going to try this out and i'm going to execute this this is going to return to me just a simple hello world as expected so now the docker image is built so every time you have make changes you have to rebuild this and this takes a couple of time so how do we make sure that we keep or we can automatically keep track of this so we have to do some we have to create what is called a bind mount okay a bind mount we have to create something called a bind mod and a bind mount you just create a volume a bind a bind a bind amount volume okay so i'd say volumes and then you have to specify the current directory meaning that on the localhost uh the docker should work out for changes in the localhost and this they should be updating a source user uh user so the user for slash source first for slash application just like that and you want to do this in only read only mode so because docker can only read the file and not write it so that this this is for security reason because uh it it doesn't make sense that docker application will be right in your files like you usually do not do that you only read the file from here and that's where i specify r or which is read only so once this docker container is set up let's go ahead and actually rebuild uh sorry the volume is set up let's exit this i'm going to exit this and then let's go ahead and do a darker down and then i'm going to bring that that docker and i'm going to rebuild it again with this volume okay with this volume this volume will help us to keep track of all the changes and uh let's wait for this to do to drop to bring down this docker docker container and then we'll rebuild this container again so once that is done i'm going to do a docker app again i'm going to rebuild this and i'm going to run it in interactive mode so i'm going to run it in uh sorry detachment okay going to run this in the touch mode and this is going to create down.docker file again from the scratch so let's wait for this to get created so now once you're done you're done rebuilding this docker container again and you're right running it in interactive mode so let me just go ahead and see uh uh if actually we didn't actually make any changes so let's see if you keep track of changes so let's go ahead and let me go to routes okay i'm going to route and then hello world uh let's say uh this is called uh code with underscore code with i'm just saying prince just like that so this is called it prince okay now that you have a bind mode running in a full environment volume let's try to run this again and it simply just simply returns a simple hello world means that it does not keep track of the changes despite of having a bind mode okay does it really keep track of the changes let's find out so i'm just going to create a terminal and i'm going to type in this command so we can go into the docker container so sudo uh docker docker and then uh i'm going to say x this execute and then i'm going to execute it in interactive mode it mode and then i'm going to say first api and to do underscore api underscore one which is the name of the docker docker service that you want dogger container i didn't want to say bash we need to go into the batch terminal of this docker container so let's run this and then let's see if you're able to get access to the bus uh with the bash terminal of our docker so we are in and then you can do an ls you can see i have these files in here so let me just change directory into my app and then do an llc i'm going to change directory into routers so and then let me change into and let me just do a nano and just cut this and then uh to do and we can see that let's scroll up here and then let's see let's see if it keeps track of the change so you can see hello world this is called red print so let's go back ahead let me make some changes here this is print code read code with uh maybe let me just remove prints for now and then let me save this and then i go back the docker container i run that command again and then let me scroll up to the section uh here where is it it's up here so you can see uh uh coverage print still exists so it says according prince this better first deleting copy prints i should reflect these changes let me see uh if it does again let me see if it reflects those changes yeah so you can see it right those things say hello world this is called width and there's no prints so that the files in the docker container on a docker container image change but it doesn't reflect the change on the web application so if i do a get here i just get back hello world and this reason why is this happening the reason why this is happening is because we don't we didn't if i go back to docker docker file we didn't specify the reload flag meaning that if there's any change then our application won't reload and this is very logical because running this on a docker container we don't expect the docker container to make changes unless we make those changes so how do we override this to make sure that our app reset automatically now we can do this in two ways you can keep the reload flag here meaning that whenever the application the files change then it will reload start the first first api application all over again but we don't run that and we can override that using uh in this command so what you can do here we can override that in uh by specifying the command command attribute so we can do you just have to say that uh command and yes by passing the console say command and the command is going to be uh you have to say uv gun uv uv cone and then app dot app.main let me show you explain update main and then we want to get up and then you want to say uh iphone iphone host is going to be 0.0.0.0 then you have to specify the iphone hyphen and specify the port and the port is going to be at localhost at about 80 000. so great and then you have to specify now the reload flag which is down there i have nothing reload so this command here is going to overwrite the command from here so this is going to override this right here okay so this one you can do it or you can also specify the reload flag if you want but docker images definitely do not have changes so it's better just to keep in a docker compose file and that's why i'm doing it this way so uh everything is fine so now we just have to now build bring back our docker bring down our docker compose so i'm going to exit out of this and then i'm going back to my normal terminal and i'm going to do a sudo.com compose down just like that i'm going to bring that that that that docker uh image and then i'm going to now bring it up again to see if those changes take place so now that my my uh logo compose is down let me just do it again.compose a pseudo docker iphone uh compose should i get a spelling right i'm going to say app and i'm going to write this in a detach mode and i'm going to press enter it is going to start my my my docker again uh so let's go ahead and let's wait for this to uh to start and once this is created we can go ahead and choose to see if it keeps track of those changes so i'm going to go in here and then i'm going to go to my developments uh my sorry my api make a request and let's see what we get back we should get back this is simple hello world as expected so great and let me just go back to my uh this file here and i'm going to change it so i can let's say the let's say prints just like that and i'm going to go back in here and wait for a while and then let's try to make a request again let's see if he keeps track of those changes and restart this right here you can see it keeps track of those changes and restarts the server so now i'm going to return this i'm just going to remove this and we simply return my to-do and then uh to do is okay once that's done we can just go back in here and then wait a bit of well and then do a request again and now that should now return for us all out to do so now our docker our docker uh image is now keeping in track of this and being in a sync uh uh is being in sync with the uh uh our local machine so whatever changes we make to application it will automatically update and uh keep track of those changes so guys that's all for this tutorial and i hope that this gives you a basic foundation of how docker works and how you can use docker compose to run your docker images so guys thanks for watching i hope you enjoyed this through so far if you did give it a thumbs up and subscribe my youtube channel for more videos like this see you in the next one keep safe
Up Next

35:00
Deploy Machine Learning Models with FastAPI: A Step-by-Step Guide
@StatsWire
1.8K views•2024-08-27

12:54
Triumph of Orthodoxy Icon: Byzantine Art & History Explained
@BenCallan
2.1K views•2024-08-06

9:49
FastAPI vs Flask vs Django: Choosing the Right Python Web Framework
@TechWithTim
302.5K views•2024-05-26

1:42
Game of Thrones Opening Credits: A Cinematic Analysis
@gameofthrones
46.3M views•2011-04-18
Related Study Plans & Knowledge Roadmaps
Structured learning paths in General & Interdisciplinary Studies
general-studies
Elevator Engineering: History, Physics & Cities
01From Hoists to Safety Brakes: The Dawn of Vertical Lift
02Hydraulic vs. Traction: The Engineering Physics of Elevators
03Modern Speed, Safety, and Algorithms
+ 2 more learning modules
12h5 modules
Explore Roadmap
general-studies
Rubber: Material Science, History & Geopolitics
01Origins of Natural Rubber & Mesoamerican History
02The Chemistry of Natural Rubber & Vulcanization
03The Geopolitics of the Rubber Boom & Colonization
+ 2 more learning modules
12h5 modules
Explore Roadmap
general-studies
Containerization: Evolution, Logistics & Trade
01Ancient Trade & Bulk Cargo: Amphorae to Barrels
02The Industrial Revolution & Cardboard Packaging
03The Containerization Revolution: Malcom McLean
+ 2 more learning modules
12h5 modules
Explore Roadmap
general-studies
Textile Tech: Evolution, Labor & Global Impact
01Pre-Industrial Textiles: Handloom & Cottage Industry
02Mechanization: The Spinning Jenny to the Power Loom
03The Factory System & Global Labor Transformation
+ 2 more learning modules
10h5 modules
Explore Roadmap