


![[C#] (C sharp для Unity) | #10 - Методы.](https://i.ytimg.com/vi_webp/3j8XLuYx_7I/maxresdefault.webp)

![Unity Быстрый старт. Физика, коллайдеры и rigidbody [OLD - 2014]](https://i.ytimg.com/vi/XSPg58ZnajI/maxresdefault.jpg)




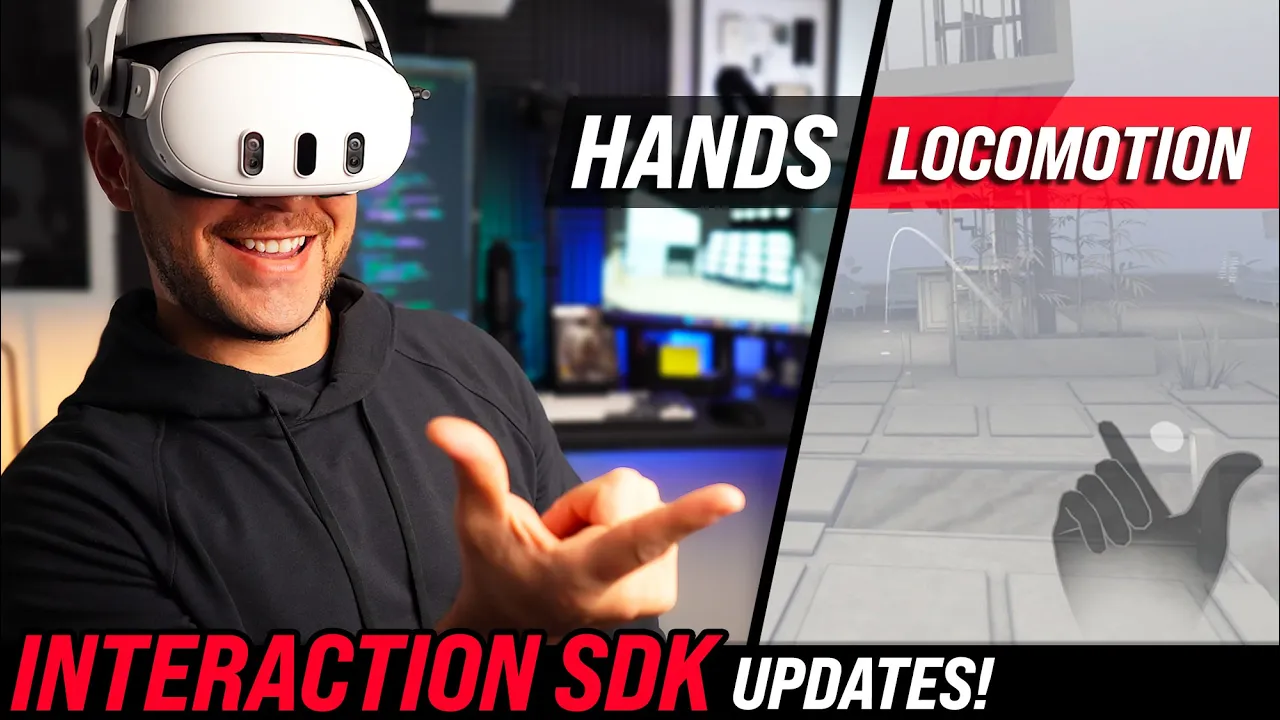


![[Unreal Engine 4 VR]: Rendimiento y optimización - Rift & Quest 2](https://i.ytimg.com/vi/UUnDmAuhazo/maxresdefault.jpg)




This tutorial demonstrates how to set up VR development in Unity using the XR Interaction Toolkit 2.5.x, covering essential VR interaction patterns including grabbable objects (with velocity tracking, kinematic, and instantaneous movement types), socket interactors for object placement with layer mask filtering, and teleportation systems (anchors and areas) for navigation—all achievable without writing custom code by leveraging the toolkit's prefabs and components.
Building VR Worlds with Unity's XR Interaction Toolkit
Added:Basic familiarity with the Unity Editor interface, including GameObjects, Components, Prefabs, and Scene management.
Fundamental C# programming concepts (variables, methods, and event-driven programming) within Unity.
Core 3D mathematics and physics concepts, such as vectors, transforms, Rigidbody physics, and colliders.
An understanding of basic virtual reality concepts, including head-tracking, spatial audio, and controller input mapping.
Advanced XR interaction design, including implementing hand-tracking, custom locomotion systems, and complex physical UI elements.
VR performance optimization techniques to maintain target frame rates, such as draw call batching, light baking, and occlusion culling.
Developing multiplayer VR experiences using networking frameworks like Unity Netcode for GameObjects or Photon.
Deployment workflows and platform-specific optimizations for target VR platforms, such as Meta Quest standalone versus SteamVR.
47.2K views1Klikes30:23Original Release: 2024-07-01
hello and welcome to this video we're going to be taking a look at building VR games in unity where we look at how to set up the editor for VR development installing the XR interaction toolkit and some common practices and techniques that are going to assist you in your VR game development Journey this video is going to assume you've got the unity Hub installed and you're all signed in and you're ready to go ahead and click on new project I'm going to be using the latest LTS version which is currently 20223 22 F1 but that may be different for you by the time you get to watch this video and that's okay there is a VR core template that you can use and that's all set up and ready to go for you but we're going to be using the 3D urp template so we can see how you can set it all up from scratch don't have that yet so I'm going to go ahead and download it I'm going to give my project a name I'm going to call this creating VR welds give it a location an organization and go ahead and hit create project so I'm going to go to my project settings and if you haven't got this already you can go to file build settings and then click on player settings at the bottom of this we've got XR plugin management and we're going to click on install XR plug-in management if you click on it again you'll see we have our build targets across the top and we have our plug-in providers in a list in the bottom if you don't see your build Target across the top and it just means you need to install it through the Hub so going back to the hub you click on installs and you find it install in the list click on the Cog and then add modules and then you can select what additional modules you'd like to install once they're installed you can go back to Unity and you'll see under XR plug-in management your target is available across the top I'm going to be testing this in the editor and I'm going to be testing it on a meta 2 so I could choose either Oculus or open XR in this case I'm going to go for open XR and whether at this point you select open XR or Oculus as a plugin provided really depends on your specific project needs open XR is designed to be a universal standard for virtual reality and augmented reality supports a wide range of devices across different platforms and that makes open XR a great option for developers aiming for broad compatibility and future proof in their applications so I'm going to go ahead and choose open XR and then once the project has restarted you see the project validation window has opened up and we got a couple of warnings one's the interaction profile which we'll I'll talk about in a minute and then the other is about switching to XR pose control instead of open XR post control so let's go ahead we'll hit fix all and the editor is going to take care of this for us we've got one left here and that's our interaction profile that's one we can do it's super easy to take care of we're going to go to our open XR and we just need to tell the editor about our interaction profiles an interaction profile within XL plug-in management refers to a set of configurations that Define how input devices like controllers interact with the virtual environment so we need to tell it what controllers we're going to be using so we're going to hit the plus and select the Oculus touch controller profile as I mentioned I'm using the meta Quest 2 so that's the windows Mac Linux settings taken care of for if I want to play in the editor when I want to build on my device and I'm using the Android settings I'm going to need to just do the same as well so make sure I've got open XR selected and I'm going to put an interaction profile here exactly the same Ulus touch controller profile back an XR plug-in management also going to make sure that on Android I've got open XR checked this video is going to utilize the XR interaction toolkit package from munity and that is available through the package manager which we can get by going to window package manager we want to select the unity registry and we'll start typing in the search box XR interaction and you should see it pop up you can think of the XR interaction toolkit as a framework designed to simplify the creation of VR and AR applications that gives you a set of tools and components for handling the common XR functionalities such as interacting with objects navigating around the VR space and UI interaction so we're going to go ahead and install this package additionally with the XR interaction toolkit come some samples we're going to use the starter assets which contains a set of inut actions and also a great demo scene that we can take a look at so we'll go ahead and import starter assets and lastly we'll be taking a look at the XR device simulator and this is great for VR developers because it allows you to iterate faster because you don't have to keep taking the head set on and off to just quickly test something in play mode you can use the XR device simulator which is going to speed up your workflow and also if you're just looking at get into VR development and maybe you don't own a headset yet then this is also a great option to test things out we'll leave this to later but for now we'll go ahead and import it all done here so we'll go ahead and close the package manager if we navigate to the project window we'll see we've got the samples XR interaction toolkit select the start assets folder you'll see here we've got the demo scene we'll go ahead and open that up so here we are in the demo scene and this is going to be great for just showing showing you the capabilities of the XR interaction toolkit you have areas where it shows you how you can grab objects and the various ways that they can be grabbed you have poke interaction examples gaze interactable objects an example of how you can interact with the UI in VR and some climbing as well so this is definitely a good place to start gives you the opportunity to go through the hierarchy and see how these things are put together we will be starting a scene from scratch in a second let's just jump into the scene actually in VR in the editor and have a look around and have a look at some of the VR features here we are our demo scene you can see my headset's being tracked my controllers are being tracked too along with the ray interactors which are the white lines you can see coming out from the controller and using the left thumb stick I can navigate around and whilst holding the thumb stick up to move where I look is where I go and you can see when I move I get a black vignette around the edge of the frame and that is the tunneling vignette which is designed to reduce motion sickness in VR on the right controller if I use the thumb stick left and right I can do a snap rotation and pressing up on the thumb stick will allow me to activate the teleporter where I can use the teleport anchors to snap to specific areas and it's these areas that you can move to in the scene that teach us how various objects within the XR interaction tet work for instance this area shows us how we can grab objects and the various different movement types for instance we have velocity tracking where it collides with objects in our scene and then on the other side we have an object controlled by kinematic movement which will pass through 3D objects in the scene here we have some examples of the Poke interactors and you can see on the controllers we've got these little spheres on the end of a cylinder these are our poke interactors and these will allow you to touch these buttons inside the VR World moving M over to the Gaze interactable objects you can see if I look at this Cube it will respond by showing me a sphere and next to that we also have a couple of different other modes such as gaze assisted and gaze select and Auto deselect or if I look at it it will change to hovered and then selected next we can move over to our UI section where you can use the ray interactor to control various elements of UI so using the trigger on the controller I can point at the slider here and move it left and right but what's also cool is you can reach out in the world with your controllers that contain the pokeing tractor and actually press on the UI within the 3D space and lastly in the scene we've got some climbable objects such as this ladder here so you can reach out to the rungs of the ladder you'll see them highlight we can then grab them and then climb the ladder as we would expect to in the real world so there we have the demo scene and it gives you a good idea about what functions are available within the XR interaction toolkit but while this scene's great what we want to do is be able to build our own scene from scratch and we're going to be leveraging the XR interaction setup prefab from this scene because it contains all the necessary VR component set up ready for us which is going to speed up our development process but we can go through this in more detail in the next section so I'm going to go ahead and create a new scene and it's just going to be a basic urp scene go ahead and create and then we're going to drop in a quick floor so we've got something to see where what it was standing on we go ahead and create a 3D plane call it floor we're going to use some of the XR interaction toolkits prefabs in order to speed up our development we want to drop in now our XR interaction setup into this scene which is the prefab that contained tracking for the headset and the controllers and the setup for The Locomotion and we can do that by going to our samples XR interaction tool kit click on the prefabs on starter assets and we're going to drag and drop in our XR interaction setup that's going to place it in our scene there we can bring it up and we'll go ahead and delete the main camera because we don't need that in our scene and then this is now has given us what we saw in the demo scene which is the rig set up ready for us to go we've got the input action manager set up with all the actions signed we've got the event system which allows it to listen for input system UI actions and then we've got the XR origin which contains all your components for tracking your controllers in your head and also The Locomotion system as well and if you want more information on some of the game objects in here and their components then check out the ebook which goes into a deeper dive and and breaks down what you try of these does and how it works and we'll give you a deeper understanding about what's going on but for now we've got our our interaction setup in the scene we're going to need to do a little bit of set dressing we're going to need to create a couple of 3D objects that is going to assist us in grabbing we'll start off by making a table so we're just going to create a 3D object and we'll create a cube this is going to be our table put it at zero and then we just want to manipulate that a little bit just so we've got something to put our grabbable objects on call it table and if you're familiar with packages like probuilder this would be great for this so you can rapidly create a prototype 3D scene I'm just going to use some of the default preted objects for the sake of the tutorial let's give this a little bit of color so I created some materials in advance so we'll go ahead and put our floor in and put a material on the table now we're going to think about the object that we're going to pick up so I'm going to create an empty object and I'm going to call this grab object and I'll put it at 0000 0 and inside there we're going to create another 3D object we're going to put a sphere and it's going to be quite big because it's it's default scale but let's say we want it to be 20 cm across so we go 0 2 22 now we can see our object we're going to I'm going to select my parent I'm just going to place it on top of the table now the reason I've placed my sphere inside a mty game objectives because as you're prototype in your VR games you might not have the artwork ready in which case you're going to be using prototypes like this you don't really want to be putting all your scripts and components on your art asset because it makes it difficult then later on to change it because you then have to copy all the scripts across to your new artwork so if you put your artwork inside an empty game object you can then put all the components on the parent so to make this object grabbable we're going to be clicking on ADD component and we'll go to XR and we'll just start typing grab and we see we have the XR grab interactable popped up in the list we'll go ahead and put this on our object and you see it's going to add in the rigid body and the XR grab interactable component as well we need to tell our XR grab interactable about the collider that is going to allow grabs to happen we've got collider on our sphere at the minute but again this is on our artwork and it may change later so we could create another empty object in our scene let's say we just wanted to use the sphere shape of a collider we could go ahead and create a 3D object which is our sphere again remember our object was currently 20 cm across so we'll change it to0 2 but we only want to use this as the collider so we'll rename this object as collider and then we can remove the mesh renderer and remove the mesh filter so now we have a separate collider that we can again change dater depending on the shape of our game object that it gets put in here and back on our parent object where we have our XR grab interactable we could go ahead and drop our collider into the collider's list so this is the collider that's going to be included When selecting and interacting with this interactable if we just left that empty then what will happen is the xile grab interactable will look at the CH objects and use those colliders so at this point this object is now grabbable inside virtual reality it's going to be using the movement type of instantaneous so when we grab it it's going to track our controllers but it's going to collide through objects in the game World which is something you may want and that might be okay for your game we also have velocity tracking which applies the velocity and angular of velocity of the user's input device this means that the object will continue to move according to the speed and direction in which the controller was moving at the time of the interaction and also allow it to collide of elements in the VR world and then lastly we also have kinematic and in this meod the object follows a set of physics rules but without considering external forces like gravity or collisions so I'm going to set mine to a velocity tracking so it can collide with the table and then we can test this out in VR by clicking on play any the edit here we are now in VR because we're using the XR setup interaction prefab we have all the functionaly as we did before in the demo scene so I can use a controller here to distance grab the sphere on the table and as well as a distance grab we've also got the ability to grab it directly with the controller as well so it's very quick and easy to set up the grab interactable and you'll notice when you look through here that there's many more features you can check out a great one is the attached transform so if I wanted to grab the sphere in a very specific location and orientation and I can create a transform inside my object which would be the grab point and I would assign that transform there so maybe like the handle of a gun or something and available to us are the interactable events which we can tap into to create custom functionality so we have events for when it's hovered when it's selected and when it's activated all sorts of events that we can use to create custom functionality so that's how easy it is to create an object that can be grabbed in the next section let's have a look at creating an area where we can place this grab object leveraging the power of the socket interactor to create that interaction first of all I'm going to need to create some artwork for my socket interactor so going to go to my 3D object and this time I'm going to choose a cube I'm going to move it into position on top of my table and make it the size of a little platform in which the sphere can sit on so we'll go ahead and make this a lot smaller there we go so this is now my socket tractor go ahead and give it a material and I'll go ahead and rename it socket art now remember this item could actually change later on going to create a parent let's go so we create empty and we'll call this socket interactor blue go ahead and drop it inside our artwork if we go to position and go 0 0 0 it's going to center it in the middle of our artwork where we can pull it out and now we can drop in our artwork inside that object and everything is nicely centered then on our socket interactor blue we're going to go to add component and we're going to start typing socket and you should get the XR socket interactor pop up can now click this and it will apply that as a component this socket interactor is part of the XR interaction toolkit and it's going to act like a holder or a slot that catches other objects essentially allows objects to snap into place and stay attached until they are removed and this is some functionality that you see in a lot of games not just VR but in VR you might be challenged with finding an object like a key navigating to a lock and then placing that key inside a lock and then that would cause something to happen in the XR interaction tet the tool that allows that to happen is the socket interactor and the way you control whether something is allowed to go into the socket interactor you would look at using the interaction layer masks first of all in order to allow the interaction to occur between the grabbable object and your socket contractor you need to put a collider onto your socket interactor to to know when that Collision has occurred so we're going to go to add component and we're going to add a box collider on in this instance because it matches the shape you can see it's it's quite big so we'll go ahead and make it about the size of the Cube we put in there which was three and we'll go 3.3 just to make it a square and then we're just going to bring it up a bit so it sits above our little platform so as soon as our sphere enters that socket interactor as soon as the sphere goes in here it's going to allow the socket interactor to grab hold of that object once we release and then on the box collider just need to make sure we check is trigger now what will happen now if we put our sphere inside the box and we release it's going to be grabbed where the socket interactor so let's jump into VR and see this in action now if I reach out and pick up the sphere and place it inside the socket you can see we get a highlight of the object then I can release the sphere and it will snap straight to that position you can actually specify a custom position for the object to snap inside the socket interactor so let's take a look at that now earlier in the video we saw the XR grab interactable and it's attached transform the socket interactor has one of those two so to finish off this interaction we can go ahead and create an empty game object and we're going to call this attach point and we'll bring it up a little bit the sphere sits there and looks like it's hovering the center of the sphere will be around there so just bring it down a touch back up to our socket interactor we can drag and drop our attach transform into the attach slot play again now you can see that our highlight has actually moved to where our attached Transformers now when we release our Cube actually moves to that new position and then just like the grab interactable the socket interactor contains the interactor events so one on Hover and on select select being when the object is is placed inside the socket interactor and hover being when your hand is reaching in so you'll be able to then leverage these events and create custom interactions for instance if this sphere was a piece of a puzzle that requires placing inside a certain area in order to Grant you a reward then you could use the select entered to control that interaction but at the moment this socket interactor accepts everything that's going to be placed inside of it if this was a puzzle you would only want one certain object to be placed inside so what we can do is is we'll give our sphere the blue material select our sphere in the scene we'll duplicate it and we'll move it over and let's give this a better name so we have red sphere and we'll have blue sphere and we'll do the same for the socket interactor we'll duplicate that move it across to the side and we'll call this socket intertractor red let's create a quick material I'll give my red intertractor the red and my red sphere the red material so now you can quickly see how this puzzle may work you you would only put the red sphere inside the red socket inter in the blue sphere inside the blue one but at the moment you could put the red in the blue and and vice versa there's no controls there yet what we could do is we could go to our sphere under the XR Grabber interactable you see we have the interaction layer mask you can use this to assign our grabbable object a layer so we could go and add a layer to this see we've got interaction layers we could put this on its own layer and we could call this red interactor and then go back to our red sphere and then set the interaction AMR to Red interactor you'll see it's highlighted everything but we don't want that to be the case so quickly set it to nothing and put it back on red interactor and then on my my red socket interactor we'll put it on the same layer mask and put it on nothing and red interactor so now only an object on the same interaction layer mask will be able to go inside this socket to make the socket give you that visual create a green material and on my red interactor I can assign the red to can't hover mesh material and if something can go in there we'll assign it the green green so now that we've got our objects assigned their interaction layer masks we do just need to tweak our XR interaction setup a little bit we need to be able to tell our hands that can pick up the red interactor layer because we've effectively added a layer so we go to our XR origin and find our controllers so we got the right controller here and it's direct interactor you can see we've got the interaction layer mask set to default but it's not checked as the that we can select the red interactor so we'll mark it as red interactor in fact it should be everything that your hands can interact with so we'll make sure it's everything and the same for our array interactor as well so we can if you want to do a distance grab and put that on everything you may want to change this later if you don't want your interactors to interact with a certain layer you can use your interaction layer Master to turn it off and we'll just do the same for the left controller find the direct interactor and make sure it's on everything for now and the same with the array make sure the Red interactor Stick let's test this out in VR I can pick up my blue sphere and that goes inside the blue one let's see if it'll go inside the red one no it it doesn't because it's recognized that it's not on the correct layer if we try and use our red one we take it to the blue socket interactor blue socket interactor is not set up yet for its interaction Layar so it should be accepted but let's see now if the red socket interactor accepts the red sphere given that they're both on the same layer we place this in and you can see there that the Highlight is showing we haven't set the color of the Highlight yet but it's recognized it is a valid layer and will be acceptable to the socket so now if we wanted to set our blue one to only accept the blue interactor we do exactly the same interaction layer mask add a layer call this blue interactor put it on nothing and then select blue interactor so this now only accepts interactable objects that are on that layer so now we can go ahead and we can give our hover mesh material the green material so it shows green and the reason it showed gray when we had the red one was probably because we didn't actually make our material green so make our material green here we'll put our blue sphere on exactly the same layer so now it's on the blue interactor layer and we'll just double check our hands to make sure that that's gone on Okay so left controller direct interactor still set to everything you see a blue interactor stick so that's good quick test in VR you can see here we're getting the green visual to indicate it's a valid socket and then we also get the same with the red but then if we try and swap them you can see that the interaction layer masks don't match up so nothing happens so hopefully now you can see the power of this socket interactor and how it can be used to create puzzles within your VR game and for this next section let's have a look at how we can create some teleport points that will allow you to navigate around your VR world and place the player exactly where you need them to be we're going to be using the functionality of the XR interaction toolkit to create our teleportation and with the XR interaction tget there are two ways in which the user can navigate the scene we can give them the ability to teleport anywhere within a certain area that's called a teleportation area or we can allow them to teleport to a very specific location and that's called a teleportation anchor both are very easy and quick to set up and we're going to have a look at the teleportation anchors so we're going to create an empty game object in the scene and I'm going to call this teleport anchor I'm just going to put it at zero for a second and on this component I'm going to add the teleportation anchor if you don't see it just start typing teleportation anchor now we can see it's put a volume in the scene so we can place this anywhere around and the user will be able to utilize the function of the provided XR interaction setup which includes The Locomotion system and you can see it's got the teleportation provider already set up for us part of that prefab so then when we push up on our right thumb stick on the controller it'll activate the array and then we'll be able to point at the teleportation area and then when we release it will move us to that location to help us see where this is in our scene we're going to go ahead and create 3D object and we'll just make a cylinder again let's put that a zero and we'll scale it down like so and then we can put it inside our teleportation anchor and just make sure it's in the right place now with this you can point the user in a very specific Direction so if we wanted them to be facing this way then we can use the forward Direction and the teleportation configuration if you do want them to face a specific way we can say Target up and forward and then we can aim our teleportation anchor whichever way we like so we'll just place this over here again teleportation anchor comes with the interactable events so we can create some custom functionality by plugging into these events as a when required to conclude the setup of this we're just going to make sure the interaction layer mask uh is just set for everything for a second because we want to make sure it interacts with our rays and from here it should be good to test out VR so back in play mode I still got the ability to move around with my left thumb stick and I can turn with the right stick with the snap turn and then push up on the thumb stick to activate the teleporter then as soon as the ray enters the teleport area the ray turns green indicating this is a valid teleport point you've also got the directional indicator showing you which way you're going to rotate when you go into the teleport area and if you release the thumb stick you will teleport to that position we saw there that my activator was hovering slightly above the teleport anchor and that's because of the collider that's on that cylinder at the moment it's using a capsu collider go ahead and remove that captal collider let's go we can use a box collider on there which fits that object much better so when we hit play and I push up again on my thumb stick you can see that it's now sitting on the surface of that teleport point and then you can go ahead and create custom artwork for what's displayed it's your teleport point and the minute we just got it to it as a cylinder but you could have whatever you wanted to make it more Visual and engaging and then what you would simply need to do at that point is to create a prefab of your teleport anchor if you wanted to and then you can just duplicate them around in your scene to allow the player to move around to very specific locations and this might be a great way to show players where important aspects of the environment might be give them a good indication of where they need to be and what they need to interact with and as you can see already in this video I've had to hit player a couple of times now and just quickly test that functionality is working and when you're developing and iterating quickly you might not want to put the headset on and off all the time and that's where the power of the device simulator comes in so if you to navigate to the sample assets and earlier when we imported all our packages we brought in the device simulator you can go ahead and just drop this straight into your scene and then now when you hit play you can see I'm now using the device simulator I'm able to look around my mouse as if I was looking around with the headset and I have a panel on the left which gives you all the controls and all the keys required to activate the different buttons on the controllers so if I wanted to try and pick up the sphere here and place it in the socket I can use the Ty to talk on my controllers see now I'm moving with my left controller and the you can see in the picture the button for grab is G so I can go ahead and pick up my sphere and move it into my socket and then let go of G and it's put it into the socket so I can test out my socket interaction so then if you wanted to test out the teleportation anchors we could look at one over there press y so we can use the right controller and then to activate our up stick we can just hold down W and then we can move around you can see our teleportation anchor working there and then we can release up key and then move and at first this might feel a little bit slower but then you soon get used to the Keys and with which ones you want to press to activate different parts of the functionality but it just allows us to test very very quickly if you wanted to allow the player to teleport anywhere then rather than a Teleport anchor you would use a Teleport area and we can turn our floor here so this entire Blue Square we can make available to the player so that they can teleport around anywhere they want to in order to do that we can create an empty game object I'll call this teleport area make sure it's at 0000 0 I'll go ahead and drop my floor into the teleport area and then on my parent game object can go ahead and add the teleport area component set my air mask everything you can see we're using our device simulator here I'll toggle the right controller you can see now I can teleport anywhere in my level so that now gives us three methods of moving and navigating for our scene movement on the left thumb stick where you can use the axis to move backwards and forwards and use your head to steer or we have our teleportation anchors now we have our teleportation area which is allowing the user to go all the way around our little level here while maintaining some very specific points using the teleport anchors so up till this point we've managed to create objects you can grab and place into certain areas with logic about what can go in which socket interactor we also taking a look at the different ways of navigating of the scene we've got our continuous movement controls on the thumb sticks we've also got the teleport anchors and the teleport areas and we've done all that so far with no code all just using the buil-in features of the X our interaction toolkit which really showcases the power in very quickly developing VR games the fundamentals of navigation and grabbing are all there for you and then you can just tap into the events of the objects that you want and create csom functionality from there so we've got our little demo scene here let's take a look at how we can now build this to our headset so to get started the first thing I'm going to do is remove the XR device simulator from the scene and then if we go back to the file and bring up the build settings and you want to make sure you're on the Android platform if you're not you can go ahead and change it and then you may need to revisit the project validation after you've done that because there may be some project settings that will need fixing you can hit the fix all which will take care of it also need to make sure that your device is plugged in and it's in developer mode and then you can select it from the Run device list and also that the scenes in build is the current scene that you're in the last thing we need to do is a quick adjustment to our player settings if we go ahead and click on the player settings it'll bring it up under XR plug-in management select open XR and we just want to make sure that the meta Quest support is ticked because we're building for I'm building for the quest and you'll see here we've got a warning which we can go back to the project validation and you'll see here it's warning us that the screen space ambient occlusion render feature results in a significant performance overhead this one isn't able to be fixed but if we wanted to take care of that we could go to our graphics and where it's got the urp by fidelity renderer there we can double click it which will select it in the project and then you can go to the High Fidelity renderer um this is the current renderer that we're using so we can go ahead and remove that if we wanted to and in fact at this stage you could swap out the current render that's being used so up in the graphics we can change that to the performant so we can drag and drop the performant in there and hit continue and then under quality we can change it to performant for our Android which is going to use our performance settings which will be more optimized and then we can always increase quality in detail as we progress with our game but I always like to start off with the performant renderer so once we've added the quest to the open XR settings and we've changed the performant renderer we can now go ahead with our device connected go ahead and build and run which will be prompted to save it and then it will build and deploy to the headset so here we are in VR you see I've got my controllers all being tracked my headset's being trapped as well you can see just like in our game we can grab objects and put them in our socket interactors and then we can use the thumb sticks to teleport around the scene using the teleport area we can go anywhere we want to and then using our left controller we can use the continuous move and where we look is where we go with the tunneling vignette as well so I really hoped you've found this tutorial useful as I mentioned earlier there is an ebook available that goes over a lot of of the components used in the XR interaction toolkit and VR development that explains it all in Greater detail feel free to take a read of that one and hopefully you've seen the power now of the XR interaction tool kit and just how easy it is to create the basic functionality with absolutely no code thank you very much for watching
Up Next

33:00
Digital Twin in Unity: Franka R3 Setup with ROS 2
@henval
380 views•2025-11-20

12:54
Triumph of Orthodoxy Icon: Byzantine Art & History Explained
@BenCallan
2.1K views•2024-08-06

9:49
FastAPI vs Flask vs Django: Choosing the Right Python Web Framework
@TechWithTim
302.5K views•2024-05-26

1:42
Game of Thrones Opening Credits: A Cinematic Analysis
@gameofthrones
46.3M views•2011-04-18
Related Study Plans & Knowledge Roadmaps
Structured learning paths in General & Interdisciplinary Studies
general-studies
Elevator Engineering: History, Physics & Cities
01From Hoists to Safety Brakes: The Dawn of Vertical Lift
02Hydraulic vs. Traction: The Engineering Physics of Elevators
03Modern Speed, Safety, and Algorithms
+ 2 more learning modules
12h5 modules
Explore Roadmap
general-studies
Rubber: Material Science, History & Geopolitics
01Origins of Natural Rubber & Mesoamerican History
02The Chemistry of Natural Rubber & Vulcanization
03The Geopolitics of the Rubber Boom & Colonization
+ 2 more learning modules
12h5 modules
Explore Roadmap
general-studies
Containerization: Evolution, Logistics & Trade
01Ancient Trade & Bulk Cargo: Amphorae to Barrels
02The Industrial Revolution & Cardboard Packaging
03The Containerization Revolution: Malcom McLean
+ 2 more learning modules
12h5 modules
Explore Roadmap
general-studies
Textile Tech: Evolution, Labor & Global Impact
01Pre-Industrial Textiles: Handloom & Cottage Industry
02Mechanization: The Spinning Jenny to the Power Loom
03The Factory System & Global Labor Transformation
+ 2 more learning modules
10h5 modules
Explore Roadmap