







![[건설안전기사 필기] 3️⃣과목 '건설재료' ✨필수이론 10강✨](https://i.ytimg.com/vi/WNqkwe2Al7g/maxresdefault.jpg)






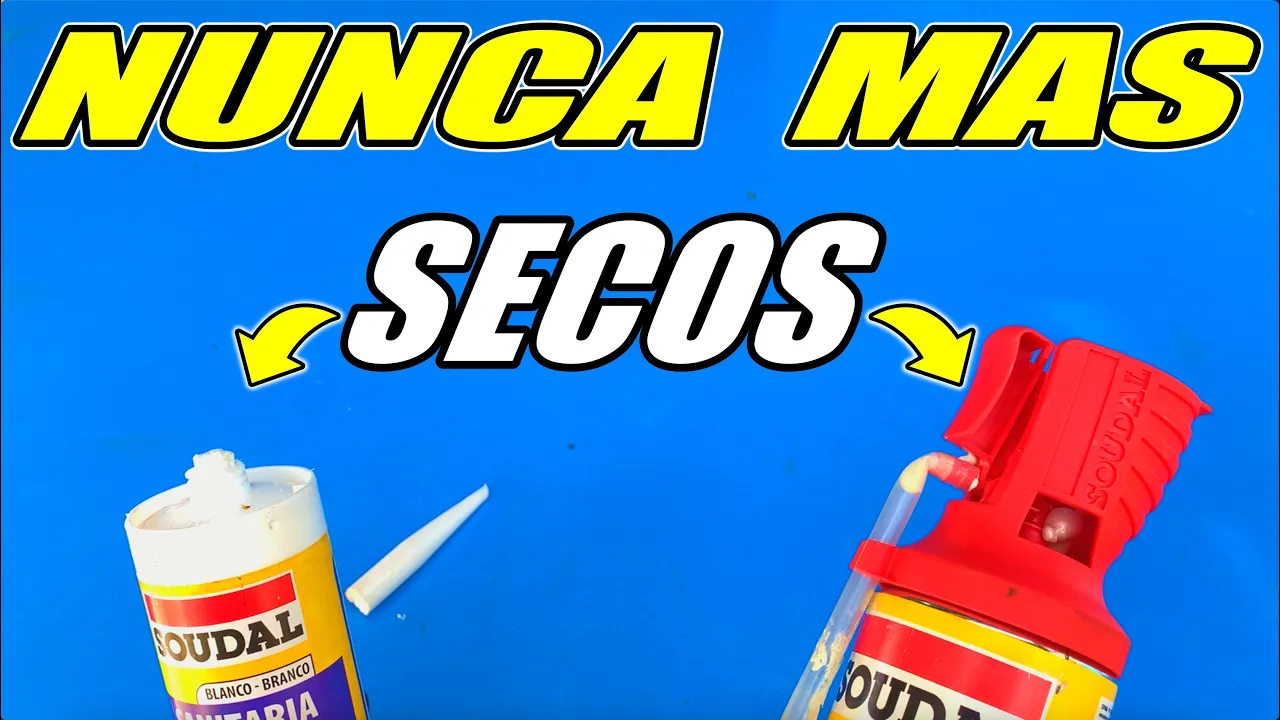

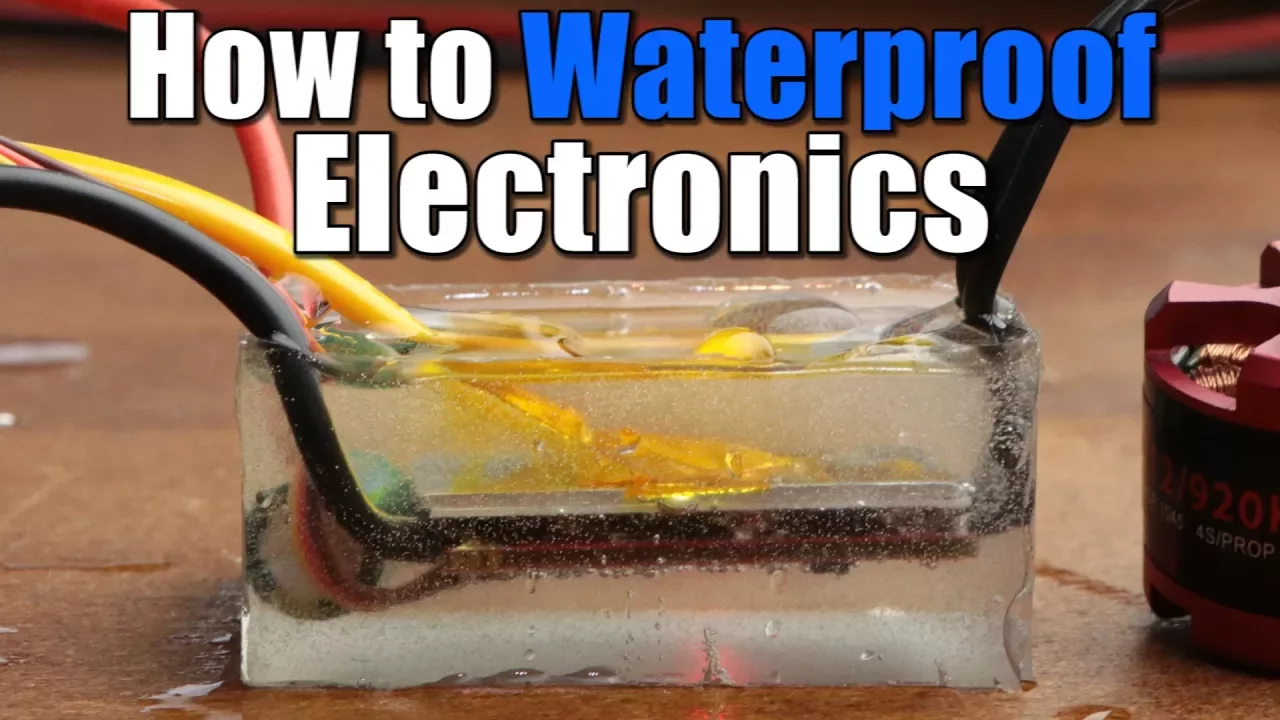





To create a waterproof underwater electrical connection, use a multi-layer approach: first make wire nut connections and saturate with potting compound, then fill the PVC housing with 100% pure silicone, seal pipe joints with PVC glue, and finally apply multiple coats of Pawn Shield epoxy waterproofing compound to the exterior surfaces. This comprehensive method prevents water infiltration that can cause electrical switch failure within 5-6 months, extending service life to 15+ years.
How to Create a Waterproof Electrical Connection
Added:Basic electrical circuit principles, including the dangers of short circuits, grounding, and the electrical conductivity of water.
Wire preparation and joining techniques, such as stripping insulation, crimping, and soldering electrical conductors.
The physical properties and curing behaviors of polymers, specifically PVC, silicone adhesives, and epoxy resins.
Methods for testing seal integrity, such as hydrostatic pressure testing and insulation resistance testing using a megohmmeter.
Advanced encapsulation and potting techniques using specialized polyurethanes or marine-grade silicone compounds.
National Electrical Code (NEC) standards and Ingress Protection (IP) ratings for wet, damp, and submersed installations.
Principles of galvanic corrosion and how to select marine-grade materials (like tinned copper wire) for long-term underwater deployment.
51.9K views171likes49:40Original Release: 2014-06-21
hello and welcome to another episode of Ken's training today's training what we're going to do is we're going to create an underwater electrical connection and make it waterproof the situation is this I've got a fountain outside in the The Fountain the water trickles down and ultimately ends in what we call a fountain Vault just a an area where the water collects where goes for the suction side of the pump recirculate um gets pumped and then just gets recirculated through the fountain now what's happening is is that I need to make an electrical connection that's going to be submerged in water in the vault and the way that I do that is with a uh this here is a float switch just a like a Sump Pump float switch and uh it originally comes with this type of a a connector here on the end and then uh this would uh uh your sump pump would be connected into here in line with this and as the float were level was to rise it would close the switch and it would allow the sump pump to turn on and discharge the water until it came down and then the uh switch would uh um the the circuit would open and the pump would shut off for a some but that is not my application what I am doing is I'm using this switch here for the water makeup so in other words when the water level declines the switch opens and it uh turns on the goes to the water level sensing controller and allows the fill valve which is a solenoid control valve to start adding water into the fountain and as the water level comes up then the uh switch here closes shutting off the water for the makeup so this is how my situation works and what's happening is is that um we go through one of these floats about every 6 months and then we perform an autopsy on the float by taking a hacksaw cutting it here we remove this and we find that this is filled with water so what's happening is is that normally I'm making up the electrical connection here underwater this is one that I've cut out uh from previous and I'm using this material here which is called potting compound now potting compound is supposed to be the um the recommended product to use with um with an underwater connection but what I believe is happening is is that the the the water is getting in in you know permeating through the potting compound going through into my uh my conductors down inside the jacket here and ultimately making it over to my switch which is right here and it's just so it's just leeching its way inside of this uh so cable inside the switch and then ultimately water's getting in there and it's killing my connection so I need to create this this end over here that's going to be underwater and there's going to be another line uh just like it coming on the other side so here's the two wires this here is in a classroom environment uh I'm going to be out in the field doing this job I'm just for I'm giving you the understanding about what I'm going to be doing out in the field then we'll go out and do it but I need to create this underwater and have this 100% liquid tight and the product that I've been using solely which is potting compound rated for the this connection isn't cutting the mustard I'm I'm getting I'm getting contamination I'm getting water into my switch and supposedly the water is not supposed to permeate through this line so the only thing that's left is just this connection so how am I going to do that now this is the first time I've made this particular um uh care all I've done in the past is done this which is just a potting compound wire neted connection and then saturated with Po and compound making supposedly a waterproof joint but now what I'm going to do is this okay I've purchased PVC pipe this is 1 and a qu PVC pipe right here and two end caps also what I've purchased hang on let me just put this up here uh is I purchased these what's called strain relief plugs these were like $4 at the home Depot the PVC uh was like you know $5 so what I'm going to do is this I'm going to take my my new float switch okay hang on I'll just I'll just use this as a demonstration this is from the old wire but the new float switch looks just like this I'm going to feed this through the strain relief plug here into here and then on the other side I'm going to come through I'll show you through another strain relief plug here and then just let that go bring bring this down let that go then I'm going to go ahead and make up this connection here uh just like I have in the past which is just like this then what I'm going to do is I'm going to um hang on one second drop that okay so once this connection is made up actually here I can show you like this once this connection here is uh made up hang on put this like this hang on I got to lo I got to open this up because it's a little fat okay once that's made up like that then I'm going to put this and I'm going to I'm not going to have it so so big here I'm going to make sure the wire nuts are in tight and then I'm going to push that into here and I'm going to I'm going to glue this with PVC glue put this cap on right here so that this this joint here is all completely capped then I'm going to fill this whole thing with a 100% pure silicone make that nice and smooth and flush then I'm going to cap off the other end here so that that's going to be capped glued seal tight and then this whole thing's going to be in there nice and tight then once that's done I'm going to uh sand this whole thing down and I'm going to cover the entire thing with um Pawn Shields let me show you that okay here's the pawn Shield I purchased this at Home Depot online this uh particular one is sold like this and it's a two-part epoxy mix so you have to mix that up so and now what I'm going to do is I'm and I've used this for uh making repairs to the cement Fountain before I've never used it for an electrical connection like this but it is it is a waterproofer made for fountains made to sit in a bath of water like a swimming pool a pond or a fountain so and they even on the picture here you can see that it's rated for Fountain use and then here's a a swimming pool or something anyways this is like $80 for this uh one quart so what I'm going to do is I'm going to sand this all down give it a coat of epoxy two part epoxy let that cure out and then I'm going to give it another coat sand it down again and then give it another coat of epoxy uh unless I do it with I think I'll read the directions maybe you can give it the second coat within a certain time frame you don't need to resand so the point is is I'm going to be completely waterproofed on the inside with potting compound then 100% silicone glued with um PVC glue glued shut tight my strain relief valves uh were going to be uh not valves but these connectors are going to be tight cinched down and then and then uh Pawn Shield two coats all over the exterior of this trying to seal up any little penetration of water here here and here that should do it that should give me 100% waterproof joint I hope this is my first first time making this connection this is my intention and uh that's it um next video shot will be actually down in the vault where I'll be making the connections also while I'm here in the classroom environment I wanted to show you how the potting compound works all right so basically the potting compound comes in a kit like this from Granger and I should mention the price so let's see from Granger the potting compound is part number two 5 Ellis and Larry 049 this package here was about $43 um oh and the float switch that's the part that I'm using is part number six Paul Nancy umbrella 4 and that is $27.41 for the float switch now on the potting compound when you open up the box it comes with uh just some some gloves so you can work with gloves a mixing paddle spoon right here this cleaner right here which is cable cleaning pads cc3 so whatever it is that you're going to put the potting Compound on they want you to First clean it it's like an alcohol once you open this thing up it's like an alcohol swab so you're going to completely clean the surface and get it ready then you get this packet here which actually has the potting compound mix in it labeled 3M Scotch cast potting kit 2136 so you take take that open that up and this is what you have inside now it's a two-part it's in it's in one baggie here and so you've got your hardener and your resin over here so there's a there's a strip down the center right here that's preventing the two from mixing so the directions are on the packet there but basically what you're going to do is you're going to take and open up this this uh seal right here mixing this whole thing back and forth like that then you can cut the tip off and then you're good to go and apply your potting compound so while we're in the classroom environment I just wanted to explain what the potting compound look looks like um because I'm not sure the video quality when Once I'm down in the vault it's going to be a little dark and there's an echo because it's I'm surrounded by concrete okay so that's it and the next shot will be down in the all right one last thing while we're in the classroom it's going to be this is the silicone that I'm going to use after the potting compound connection has cured and I pull it into the PVC piping I'm going to uh use this silicone here uh let me show you what that looks like hang on so basically it's a GE Silicone I think this is $8 a tube and the important part is is that it's 100% pure silicone um this particular one is black it doesn't matter what color you choose uh but basically the I'm just making sure that it's not just cocking it's 100% pure silicone so it's the more expensive of the two products and also supposed to be uh 100 it's supposed to be a premium waterproof too it actually says the words right on it right there premium waterproof anyways I just wanted to show you that those are the products that I'm going to be using and we continue all right so here's the top of the fountain obviously I got the fountain off just before I go down but basically I pulled back the grate and I'm going to uh go down this ladder right here and then into the Vault right there so I just want to show you from the top perspective okay so here I am down in the vault and I've got my connectors right here so this here is one side that's going to the uh uh to the float uh control so I just fed Through the Wire and so I've got the end right here ready to be connected on the other end which is going to my float I just fed it through the connector and then I've got so I've got these two wires here I'm going to strip these back get these prepped and I just have to make sure that when I'm done uh uh that I can take this and slip it over because ultimately it's going to go inside of here in a bath of 100% pure solicone so that's where I'm at right now I'm going to strip these back and get these wire nutted and prepped for the potting compa okay here is my wire nutted connection right there nice and nice and tight and I got it close to here so that way when I pull show you when I pull this over it and I pull this in here it'll sit inside of that in a nice bath of silicone really well so I won't have to worry about that all right so that is the wire Ned connection before I put the potting Compound on I'm going to just do some testing to make sure that my float switch is controlling my solenoid valve appropriately uh because I don't want to break that connection um once I put the potting Compound on that's it I'm I'm home free so uh I'm going to just do some testing off camera and then I'll put the potting Compound on okay the uh float switch has passed the tests and the float switch is operating the Sol the solenoid valve correctly which is exactly what I want I'm ready to apply the potting compound for personal protective equipment I put some gloves on and I'm wearing some eye protection just to protect myself a little bit the first thing I'm going to do is open up the um cable cleaning pad CC number three so I'm just going to open that up it's got like a solvent on that it's got a good smell to it too it's pretty strong I give you a lot of this I I I don't have a large area I probably won't even need that much I'll put some of it back in case I do need more keep it keep it clean and out and contaminated but basically I'm just going to clean this entire deal here I don't want to get too much on the uh cord so I'm only going to go out to like about here to here ultimately and I'm just going to try to clean everything inside here as well as I can and pretty much that is it I'm going to let that sit for a minute I'll wipe that down with a towel just before I put the other stuff so I'm just going to put that to the side for a moment use a towel to wipe the solvent off of my hands now I'm going to take the potting compound which is like this I'm going to now uh try to open up this Center section here okay here we go it almost feels like you're going to break the packet but it's it's opening up that interior section joining the two compartments together okay I can feel it opening right there and let me make sure it's fully opened okay it is now the two compartments which were separated are now opened I'm going to take the flat stick that came with it and I'm going to move the product from one side to the other and back again I'm going to do this a couple times uh and I'm just going to keep mixing this up I'm also going to knead it together like this just in a halfhazard matter just to get this fully fully mixed so I'll go ahead and it's just up against a wall here where I can get pretty much all of that out all right and now I'm going to go back again the other way I want to try to get that hardener and resin just mixed up just as just as good as I can get it mixed up but I don't have all the time in the world here I've got to get this thing prepped and ready to go within a reasonable short period of time no longer than a minute Max so pretty much this is it I'm going to push it all to this corner here and we're going to get ready to rock okay so pretty much that's ready to go now I'm going to just take a towel on my connection that I have right here I'm just going to dry that down trying to get that solvent dry and that's good now I'm just going to take a utility knife get a corner of this like that okay now I'm actually going to be applying the the potting compound so here we go going to try to push that out hold on okay it's right there all right now it's right at the tip or I can now put that in right there now I'm just going to saturate this whole area now again I don't want to go too crazy this Pro product is getting warm by the way it's warm to the touch there's a chemical reaction there's heat I can feel it on my hands so I'm going to try to get this and there's a smell to this product as well all right now this is supposed to be all by itself a nice waterproofer but as you know as I explained earlier I was having those problems and here I'm going to try to correct those problems it's awfully thick to work with so I'm just trying to keep it as small in here as possible I don't want too much to go out and keeping it nice to the cord there as tight as I can get it anyways all right all right now that is just about good just get a little bit more on there all right that's pretty much all the product I'm going to use I'm just going to put another glove on and then use the smoothing stick to try to uh smooth it out hang on a second gloves G me a hard time there it is okay so now I'm just going to try to use this stick here trying to keep my hands cleaner and I'm just trying to smooth that out get it all the way around this product alone is supposed to be the enough of a waterproofer but it's just wasn't working out for me for my application it wasn't enough so that's why I'm taking these extra steps here all right I don't want to keep working this to death it's just it's awfully thick so it just keeps rolling off all right and pull that back a little bit there I don't want it to go up the cord too too much trying to keep my cord kind of clean cuz it has to go in those strain relief um and it's got to be as smooth as possible to make that connection trying to make that also a waterproof connection as well okay all right so pretty much that's it I'm just going to tie this off so it doesn't touch anything and leave that overnight to let it cure out so pretty much that's it for now over and out all right welcome back we now have the the potting compound is cured it uh we just waited about 3 hours or so this stuff is if dries pretty quick it's you know it is an epoxy okay so now that that's completed I'm ready for my next step which is to uh glue together a section of this um pipe and then put put some um 100% pure silicone which I have right here in a cocking gun ready to go and and then bring that into there and let that cure out so um basically that's where I'm at right now so what I'm going to do first is I'm going to uh glue this joint in right here so just like any uh joint that you're going to glue uh I've done my primer right here and here we go we're going to do this right now so first it's the primer primer around here okay that's good to go now the glue get the glue ready now of course once I do the glue I only have seconds so here we go going around there and now go inside of here drop that down throw that in give it a Twist and then hold and now I'm just securing that making sure that's good and tight all right I cannot twist it that feel feels totally solid that feels like a good good joint right there nice and well made up okay now that I've done that what I can do now is I can fill this cavity well let me just get this a little bit tighter right about to here and I'm going to pour my put my gun down here and I'm going to fill the bottom of that cavity and then push this into to the uh silicone so now I've got my silicone and I'm going to push this in there and I'm going to get a good amount of silicone in the bottom let's see how much we got there okay we're doing pretty good let me release that pressure all right let me just leave that up here for now and and make sure that's going all the way around all right that's looking pretty good let me just put a little more in there all right I'm going to stop right there and now I'm going to depress this all the way in there like so I got a little bit of silicone coming back on me here but that's okay that's not harming anything okay I'm not even tight here yet that's just hand tight just to hold that in all right now I'm going to go ahead and uh silicone up this section right here just try to keep that wire in the center is what my goal is going to be okay let me get that pressure off of there now I'm just going to pack that in with my finger so basically I got potting compound and now I've got silicone all right let me see if I can't just get that to stay just like that all right pretty much that's it I tried to keep the I'm going to try to keep the wire directly in the center cuz when I pull this cap through I want that that uh wire to be direct in the center to have it feed in as easy as possible but that is looking perfect I'm going to leave this uh set up overnight and I'm going to let that silicone cure out then tomorrow we're going to come back and we're going to glue up the other side so you'll see the following steps come tomorrow hello tubers welcome back to our video which is creating an underwater uh electrical waterproof connection um now when I first showed you the step in which I was on I put black silicone in here now you'll notice this is clear silicone and I'm going to explain why that is what happened was this is the tube of black silicone that I had used the expiration date if you can zoom in on that says that it expires on September 2012 this is 2014 so I know that this tube expired 2 years ago but when I when I poured it out here it is right here I did a a little tabletop example I thought that as long as it was going to be liquid it was going to be okay it turns out that what's happening is is that it never hardens it just stays in this liquid format at so basically what I had to do see here's an example here's a two here's some clear silicone and you'll notice how this is one day old you see how rock hard that is that's the way silicone is supposed to harden up not like this so anyways mine was never setting up properly because it was expired so what I had to do was I pulled this whole thing out and then I took paper towels completely had to wipe WIP away all the silicone and then just start over from scratch the same way that you saw before but this time with this tube which is clear silicone and the expiration date on this one is uh December 2014 so it still has 6 months worth of life I've already I already poured it and it's already hardened up after one day because it's proper silicone so I never ran into an expired tube of silicone before so that set me back on this project but if you to take away anything from this video do not use expired silicone double check your dates on that so this tube has to the rest of that tube has to go into the trash I got no use for it it doesn't act like silicone it never hardens up on me now let's get back to our waterproof connection now that this is all cured up we already know that I glued this joint right here my next joint to glue is from here to right here so here we go I'm going to I'm going to do that joint right now here's my primer first I'm going to wipe and get this nice and primed up there plus I'm going to do the same over here I'm going to try to show you the audience that as best I can all right there's that now we're on to the glue once I do the glue I only have 30 seconds I don't have much time so I've got to be somewhat quick I can't uh be dilly-dallying here so here we go I got my glue on my stick we're going to do it right now first I'm going to glue here now I'm going to glue inside of here real well put that down push that in give it a Twist and then hold I'm going to hold that for at least 10 seconds and I'm going to let that set up just proper all right there it is I can tell that I've got it because I I'm trying to twist it and it is not twisting so I've got a real good uh joint right there so right there I'm glued I'm glued here I'm totally solid now I'm going to just pull this back here a little bit and see if that will come out actually that's that's Sil ConEd in right there I'm going to leave that alone now on the other side I still have a little bit of uh hole there so what I'm going to do let me just quickly uh cap en close my uh my glue and my primer cuz I'm done with these products gluing and priming is completely done I'm just just going to put those aside for the time being now I'm going to take a little bit of silicone this is that clear silicone that I just purchased I'm just going to stick it down in here to try to get that in there a little bit I think that's about all I'm going to get out of that all right so let me release this and bring this into play right here and I'm just going to go ahead and cap this glue's got a strong smell to it down here all right so let me uh go ahead and get that nice tight okay so that one's tight let me get the other side tight and let me just get a wrench on that and I'm just going to tighten that up right there hang on it's slipping off a little bit let's use this tool all right that one's set up and that one there is set up so both of those are good so we know that we're totally waterproofed from here to here the whole thing is waterproof to this point from here to here now technically or theoretically we should even be waterproof here and here well I don't know about waterproof but definitely a good joint uh cuz it's because that's pinched in on the so cord but we want to be 100% cuz we don't want to come back and revisit this so now what we're going to do is I'm just going to dry this out clean this out rather like so all right so this here is some Emory cloth uh basically sandpaper but it says aluminum oxide uh 52 on the back side here so basically all I'm going to do now is I'm going to rough up all the way around here including the cord cuz this is where my Pawn Shield my next product is going to go so I'm just going to take and scuff up or rough up this surface all the way around this here so I'm going to try to do that real well and I'm going to do this on both sides so um this is going to take me a couple of minutes so I'll go off camera while I rough this up okay tubers we changed the location on to on top of the Vault the uh the fumes were just too much you know to to make up the pawn Shield product which you purchased at the Home Depot um you have to use a denatured alcohol that stinks plus from the glue project here the the the fumes were just getting to us cuz there's not enough air circulation down in the vault so we came out here on top of the Vault now I've already sanded down the sections that I told you about from here to here from here to here and I also sanded down really well not that I need it but if I have extra Pawn Shield I'm going to touch this joint and this joint so I sanded them down I took a rag with some denaturate alcohol I wiped everything down really well so this is 100% clean on the on the whole deal all the way around now here's our uh Pawn Shield it's already mixed up ready to go so I'm not going to give you instructions on how to how to mix that up but um if you purchase Pawn Shield you the the directions are with that so now I'm going to just completely saturate this whole joint right here with Pawn Shield which is a two-part waterproof epoxy now I have used this product in the past on my um water fountain so if you go into my YouTube channel and you see that you'll see where I've done that with the water fountain and you'll see the excellent waterproofing results I've had with that it looks like the weakest link is going to be right there where I'm going to have to build that up with some Pawn Shield hopefully you can see I'm totally getting that in there and that's that's totally f in that up nicely all right so as I want that to harden up as a two-part epoxy this hardens up real well mind you this is just coat number one I will be putting two coats on this now I have plenty of Pawn Shield so I'm just going to go ahead and get this joint and the other joint right now all right there's that one and just getting the other one here okay now I'm going to work my way back over to this side here just kind of holding it near the bucket so if it drips it just kind of drips in the bucket doesn't really make a mess anywhere there's my phone let me just put that to voicemail and I want to go on the cord nice and well I did also sand the cord down now the purpose of sanding is to rough up and scuff the part that I want the pawn Shield to attach to so if you rough it up and scuff your surface you'll get that much better adhesion all right let me just observe What's Happening Here make sure I've got it all the way around I see a little bit of a break right there I'm going to go ahead and touch that all right so pretty much I'm done at this point in time I have to just wait for this to harden out uh and then give it a second coat and if I have to because I really want this to uh cure out extremely well I may even come back for a third coat if I if if that's what is necessary to make this all just the way I want it to be put a little extra material in there all right I'm going to leave that like that cuz I can tell that that's really curing out that uh seal right there I'm just going to leave that like that I got a little Pawn shield on my bucket here so basically that's it for now tubers we're just going to let this um uh Harden out and then uh just come back for coat number two I can't remember what the directions say it might be 1 to 3 hours or within 8 hours so I'll I'll double check the directions on that give it the second coat when Pawn Shield tells me that it's okay and um and once we're done with this we should have a waterproof joint but we'll resume once we get to that all right so here is the the electrical connection that we're ready to put the second coat on now it's it's working out best for us to leave it kind of like this where we got it suspended just but kind of held on by the grate there and then underneath if there's a uh if it's going to drip it's going to drip into this uh plastic bag so um we're actually going to it's so it's been given one coat we're going to give it one more coat like this then we're going to let that cure out we've oh by the way we've waited about an hour to an hour and a half right now it's tacky but it leaves no residue on your fingers so it's acceptable for a second coat you uh if you waited more than 12 hours you'd have to sand it down we don't want to get into that we want to produce as less work for us as possible so uh you can kind of see how on the second on the first coat how it kind of is uh blotchy the way that um it's not full coverage and especially there on the cord you can see that blotchiness the section right there where I really wanted to get good though that top section that that really looks nice uh but we're going to go ahead and uh give this the second coat here the camera angle may not be the best only because we want to leave this in that position position where it's at right now so I'm just trying to explain what we're doing uh so I'll try to get you some footage of that when we get to it okay so here we are now applying the second coat and we'll try to show you that after it's been put on to see how much thicker it got but pretty much this is just like painting that's all it is just trying to get in the cracks and CRS is get everything nice and uh sealed up what we're trying to do is waterproof that's the name of the game here we're all into waterproofing so there it is right there with the second coat you can see how nicely tan just there's a few SP I see some blotchiness on the so cord on the top there but generally speaking though this is filled in really nicely and we're just going to finish uh touching this up here and then uh letting this uh settle out for another hour and a half and then giving it uh flipping it over and then getting the other side that's basically the process though okay welcome back to the final episode of our how to create an underwater electrical um connection that is waterproof 100% waterproof so here is the final product of all the work that we've been doing you'll notice that the the the great detail in in in any potential uh water source problem that could potentially get in there uh is completely sealed with the uh product that we have here which is Pawn Shield so let me just recap on the entire project when we when we took the so cable and we we brought it through these uh stress relief grommets uh and into the this um uh PVC plastic what I did was I made my my electrical connection with wire nuts and then I used potting compound that I purchased at the Home Depot one package that was $50 then I went and put silicone in the first silicone I put in was actually expired so it was bad so I I had to pull that out cuz it never cured and then I uh purchased a fresh tube at the Home Depot for like 8 bucks 100% pure silicone and then uh poured that saturated that in the plastic housing brought my electrical connection in there and then let that cure out then I uh glued the second uh cap on put that on put some extra um um silicone into the Jo as much as possible I let that whole thing cure out put the grommets on on the strain relief tighten those out then we sanded down even a little bit of Theo cord just to kind of rough it up and sand it down uh everything right here to get the best adhesion on the pwn Shield then we gave it about three coats of Pawn shield and it is pretty pretty pretty so between all of this this waterproof connection this underwater um electrical connection should be 100% waterproof at this time I mean it's it's about as the best uh product that I could possibly give it to to accomplish this now we are protecting the whole reason why we're doing this is to protect this this float switch so what's happening is is in the past when I was making up an electrical connection just before the float switch the water would get through and it would leech actually inside of this so cord leeched right into the switch and then in 6 months later the switch has got water in it and uh and the switch is no longer a switch it's malfunction because of the water so um we know this because when the last switch failed we cut it open like this we took it apart and it's and it had water in it so it's getting water infiltration it wasn't like it was cracked on the housing or anything like that this is a a a a float switch meant for water so and this is the Factory Connection right here so this is should be perfectly fine plus they sell the so cord made to be in a water environment so um the weakest link in the whole system was the closest joint to this switch uh or the closest electrical connection I should say to this switch so with this rather than getting 5 to 6 months of a service life out of this switch I'm hoping I can get 15 years out of this switch at least 5 years would be wonderful compared to 5 months or 6 months so but basically that is the reason why we took all that great care to to create this we want to get longevity out of this because it takes time to empty the Vault out here and take it out of service and put it back in service and everything like that okay I can show you the uh the final resting spot for our um electrical connection here in the vault so we're we're back in the vault and I can show you um the float switch which is right here and it's and it's mounted here's the ceiling right here and um the switch itself I'm working solo here let me uh get behind the camera so I can show you as best I can okay so right there's the final resting spot for the electrical connection I put it on the ceiling because uh when this vault is filled with water it's going to have the least amount of head pressure up at the top ceiling so there'll be the least amount of pressure on there so you want to try to do that as well now one other thing I'm going to note to you is is that when I did the installation right there and also on the left hand side what happened was is is that the so cord which is this cord right here is a little bit more flexible than the um Pond Shield so I saw a crack right there when I went and did the installation cuz the so cord kind of uh it you know kind of bent over a little bit and it cracked just the um the seal going around there around that grommet so just as an extra precaution I just since I'm going going through all this trouble so I went and put a dab of pure silicone on that side and on that side there now let me move that cord so you can kind of see a little better but it's all the way around and that's that so anyways and here's how the float switch now is going to operate so basically it's real simple when the water level comes up it'll shut off the makeup water and when it comes down right there it'll uh make up the water so the water level should be approximately here during most operations which is below the level of that switch uh when the water shuts off at the end of the day it'll come up though and it'll probably saturate this here so that will be completely submerged in water during uh off peak times and such so anyways that's that uh is the conclusion I wanted to show you the uh final product thank you so that concludes this video I want to thank you for watching the video if you could please click on the like button to give me some extra likes and also check out my YouTube channel it's called Ken training and um I have more videos about how to waterproof fountains using Pawn Shield we used it as the waterproofing for the fountain itself where there was cracks and stuff like that so you can see that on one of my videos as well and that's it for now and thank you for watching for
Up Next

8:45
ROV Tether and Power System Design for Voltage Regulation and Efficiency
@NickSopwith
5.8K views•2014-03-30

30:32
Ultrasonic Transducers: Resonant Frequency Measurement and Horn Design
@imajeenyus42
229.9K views•2017-02-22

54:16
Polymer Environmental Degradation: Mechanisms & Stabilization
@iit
1.8K views•2012-07-10

33:39
How a Student's Question Saved a NYC Skyscraper from Collapse
@veritasium
22.8M views•2025-04-26
Related Study Plans & Knowledge Roadmaps
Structured learning paths in Engineering
engineering
Building Acoustic Levitators: Physics & Arduino
01The Physics of Sound and Standing Waves
02Piezoelectric Transducers and H-Bridge Drivers
03Arduino Programming: Generating 40 kHz Signals
+ 2 more learning modules
14h5 modules
Explore Roadmap
engineering
Building Peltier Cloud Chambers: Particle Tracks
01Cosmic Rays & Cloud Chamber Physics
02Thermoelectric Cooling (TEC) Fundamentals
03Custom Liquid-Cooling Loop Design
+ 2 more learning modules
18h5 modules
Explore Roadmap
engineering
Yagi-Uda Antennas: Modeling, Build & VNA Test
01Introduction to RF and Antenna Fundamentals
02Yagi-Uda Antenna Design Principles
03Antenna Modeling and Simulation in 4NEC2
+ 2 more learning modules
18h5 modules
Explore Roadmap
engineering
ECG Monitor Design: Op-Amps, Filters & Noise
01Electronics & Breadboard Basics
02Op-Amps and Instrumentation Amplifiers
03Bioelectricity and ECG Fundamentals
+ 2 more learning modules
18h5 modules
Explore Roadmap