


















The MangoPi MQ Pro is a RISC-V based development board that offers a Raspberry Pi Zero form factor alternative, featuring the Allwinner D1 chip with Wi-Fi, Bluetooth, and 40-pin header compatibility for Raspberry Pi hats. While it is less powerful and more expensive than the Raspberry Pi Zero, it provides a viable option for developers experiencing hardware shortages, as it can run Linux and supports the same ecosystem of accessories.
RISC-V MangoPi MQ Pro, ESP32 Audio Board, DIY Haptics Review
Added:Basic understanding of microcontrollers (e.g., ESP32, Arduino) versus Single Board Computers (SBCs like Raspberry Pi) and their respective use cases.
Familiarity with Instruction Set Architectures (ISAs), specifically the difference between proprietary architectures (ARM, x86) and open-source architectures (RISC-V).
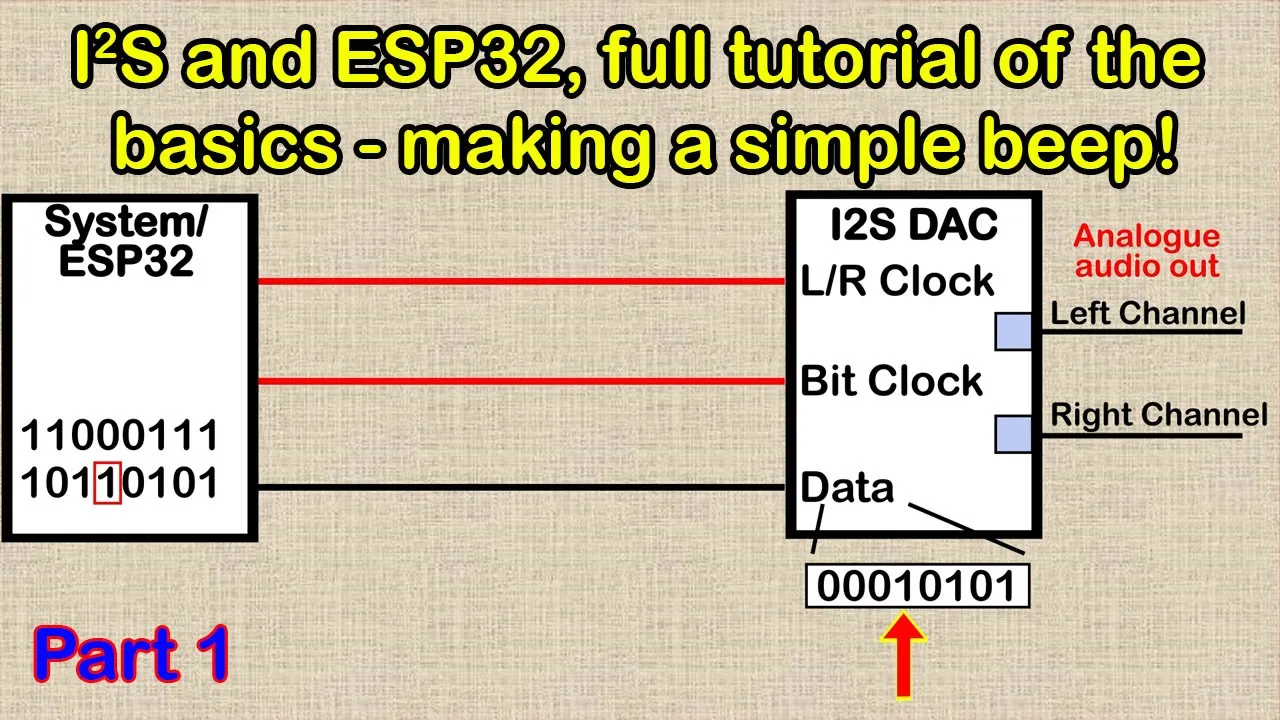
Fundamental concepts of digital audio interfaces, such as the I2S (Inter-IC Sound) protocol, Digital-to-Analog Converters (DACs), and audio amplification.
Principles of physical computing, including pulse-width modulation (PWM), rotary encoders, and closed-loop motor control used in haptic feedback systems.
Compiling and running custom Linux distributions (such as Debian or Alpine Linux) tailored for RISC-V architecture on SBCs.
Developing digital signal processing (DSP) applications on the ESP32, such as real-time audio filtering, voice-over-IP, or smart home audio streaming integration.
Implementing advanced closed-loop control algorithms (like PID controllers) to program custom detents, physical barriers, and tactile sensations on brushless motor-driven haptic knobs.
Designing custom Printed Circuit Boards (PCBs) to integrate microcontrollers, audio codecs, and motor drivers into compact, consumer-grade DIY hardware products.
15K views96likes26:56Original Release: 2022-04-13
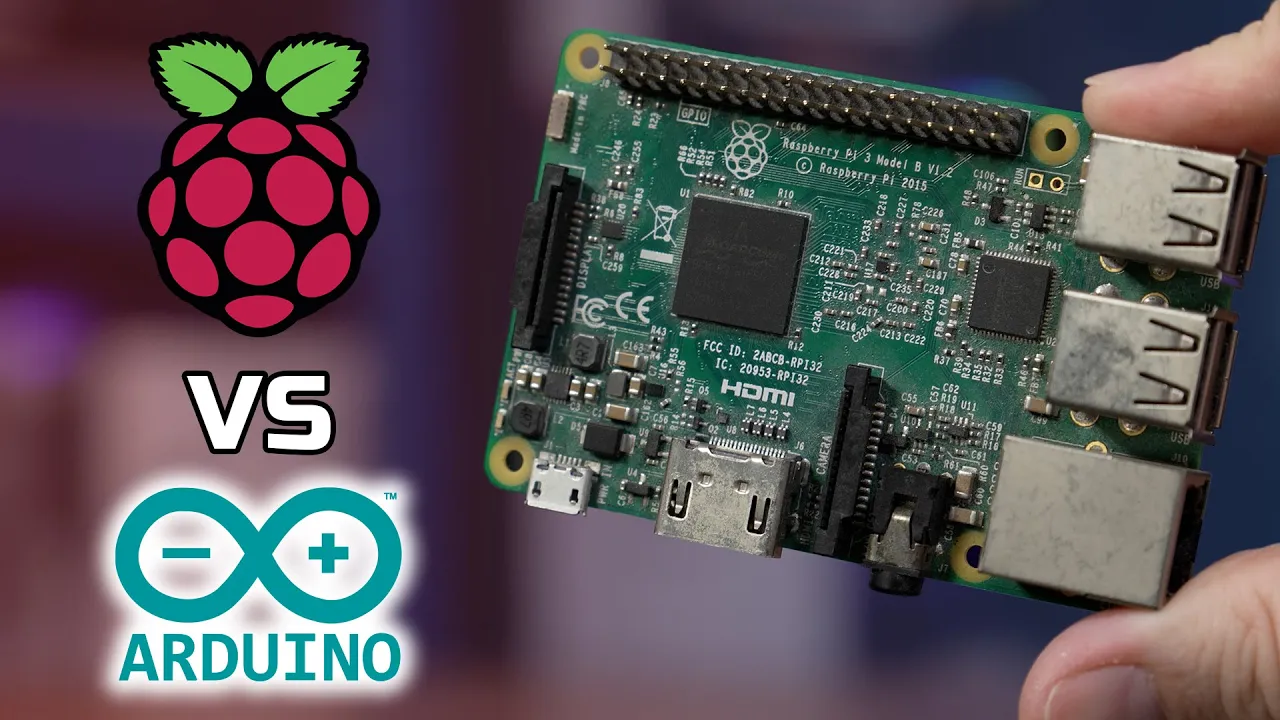
greetings folks and welcome to the electromaker show this is your midweek roundup of all things maker and embedded and lovely now this week we are looking at a risk 5 raspberry pi zero it's not from raspberry pi but it's a very cool looking little board we'll also be taking a look at an esp32 based audio kit this is on crowd supply along with a bunch of other cool products and projects from the week so let's get on with the show [Music] now we're beginning this week's show with that risk five raspberry pi zero now as mentioned this isn't actually from raspberry pi this is another mango pie board we actually talked about a mango pie board on crowd supply quite recently on the show but this is the mango pie mq pro which as i mentioned has the raspberry pi zero form factor and a couple of other things about it that make it not so much unique but kind of desirable now especially and this is reported on cnx software and as you can see this is very much looking like a raspberry pi form factor board um and uh there's a few things about it that are straight off the bat worth mentioning um this is not as powerful as a raspberry pi zero and it's not even as good value as a raspberry pi zero um as it says here it can be purchased for around twenty dollars uh now um it has now showed up on aliexpress as well i did a quick search before the show it's around forty dollars on aliexpress at the minute and there's only three listings um so i'd wait a little while before going on aliexpress just to be sure if you are interested in getting this board um but uh yeah let's quickly just talk about what it is as you can see it's the all winner d1 chip um it's a risk five based chip um and this comes with wi-fi and bluetooth as you can see there's also your sd card slot here this runs uh the uh tina linux i believe it is called which is an open wrt based version of linux but there's also a debian build for it as well and as you can see here we have a camera connector two usb c ports one for host uh one is on the go um and a mini hdmi port here as well if we just spool down you can see the bottom and there's another display connector um but yeah as always as with cnx software um it's very thorough all of the details you need to know are right here um oh and of course the ubiquitous 40 pin header and which means it will be as far as i know compatible with all raspberry pi zero hats um yeah i mean there's not all that much more to say about this it is exciting because it is a risk five board and it's in a well-known form factor it's definitely the cheapest as far as i know risk five development board you can get right now at least that can do all of this stuff that has a display um you know that isn't very much spool it up from your own development board type of thing um so i'll leave a link to this in the description but as previously mentioned um they've said it here as well uh the price is around 20 probably a few dollars more than aliexpress at that price it does not compete against the more powerful and better supported raspberry pi zero but here's the key it probably won't suffer from the same shortages um if you can't get a raspberry pi zero right now if you can't get a raspberry pi at all right now and you want a small form factor board and you don't need 3d acceleration or a gpu or anything like that um this board will run linux um will work with all raspberry pi zero uh um hats and things i think maybe don't quote me on that um and uh yeah and it's just another one of those moments where this is a new board on the forefront it's kind of cool i really like the look of this board i'm very tempted to get a hold of one myself um although i have been curbing my uh uh collecting tendencies lately because i have a lot of hardware sitting around by this point that i haven't really got the time to play with anyway um i'll leave a link to this in the description of the video now this next section is a bit of a two-for-one because sparkfun recently put out the latest version of that emg system which is called mioware this is version two um and this is essentially the way that you can make your body talk to an arduino or any other microcontroller um we've talked about a few projects like this in the past a few of them have shown up on funding websites um but this is particularly interesting because it's a product showcase but it's also a very in-depth tutorial as to how to get started with these things and it also brings up a very important point that i don't think is talked about enough when it comes to connecting sensors to yourself and then connecting those sensors to a computer but before we get to that let's go through this in order so first things first here is the myoware muscle sensor and it is one of the uh various things that sparkfun have just updated in this set so you have the muscle sensor itself there's also a power shield a link shield an arduino shield and an led shield which presumably is just for getting uh direct visual feedback for when you're actually out in the field as it were as you'll see a lot of these things have a lot of tiny little lipo batteries attached to them and of course the idea of this kind of stuff is not that you'd spend all of your time at home plugged into the arduino and then the arduino goes into a computer no the idea is that you can wear these when you're out and about and the whole point of this kind of stuff is that it is portable um so yes there is a sparkfun product showcase for them and of course they are all available and these things will also all be available in the electromaker store by the way just to put that out there if you want to support the show you can buy them from us now i'm not really going to go into the tutorial here other than to say it is incredible um if you can see on the right hand side of the screen me scrolling down you will understand just how much there is here it goes through every detail of every single one of these little shields and components what they can do how you can use them um and then way way way down here is where you actually get into things like how to attach them to your body example code for them um and yeah this is all arduino ide compatible it all can work with an arduino uno as you can see here um uh but it does mention one thing that i think is super important and something that i haven't really seen mentioned all that much when it comes to diy biosensing emg any of this kind of stuff and that is when you're attaching sensors to your skin and those sensors are going to be attached to an arduino and that arduino is going to be attached to a computer there is a risk however small that you can actually get an electric shock as it says here um it's suggested to use an usb isolator to prevent noise in the inputs and safeguard against electrical shock now noise is probably the more likely issue you're going to face here if you're doing any biosensing thing it actually goes on to say here um if you have a wireless mouse and keyboard it's worth using that and the muscle sensor sensitive enough it can also pick up a signal from the trackpad or the keypad on your laptop um when it's running on the power um another thing it says by the way that you could do in order to make yourself safe here is just to use a laptop running on battery power and that's not attached to the wall um but i think it is something important that is not said enough is that um when it comes to biosensing it's a really exciting thing to do um attaching things to your body and then attaching those things to an arduino to gather that information it's especially exciting for me because i love the concept of data sonification and i i've been doing a little side project where i take fit data which is actually collected from my watch turn that into midi data and put that into ableton the idea of being able to do that in real time and attach biosensors to myself and have an arduino running mozzie or whatever which has a little synthesizer on it and literally turn the what my body is doing into music really appeals to me but if you are going to do something like this take this advice here and the advice of many others who have talked about this and do it safely don't attach your body to something that might be that is attached to the wall without putting some kind of isolation in between anyhow if you are interested in this and the sparkfun kit looks fantastic i haven't had my hands on any of this kind of stuff i'd love to get a hold of some and have a little fiddle with them um and maybe it's something we can give away on the show in future no promises i'm looking into it um but if you are interested in this these look like a very well put together little set of uh components and i will leave a link to this sparkfun tutorial in the description of this video if you are enjoying the electromaker show there are a number of things that you can do to help us the first is to subscribe to the electromaker youtube channel um it does make quite a large difference when you are subscribed to a channel you watch rather than not um there's magic in the background in the algorithm and all that youtube nonsense and the same goes for being someone who takes notifications for shows if you click all here you'll get notifications in the top corner and as you see i have notifications from electromaker here these are browser notifications and only when you're on the site of youtube unless you set them to be otherwise something i wouldn't recommend and the final thing is yes all youtubers ask for likes but if you do like it please do click that you like it it lets youtube know that you like it and if you like it hopefully other people who like things that you like will like it too if youtube decides to show them to them because they might like it or something so those three things you can do on youtube are free and if you would take the time to do them that would mean a lot to me um also if you want to support the show financially we have a shop on electromaker.io i won't spend much time talking about it here you can see from the names scrolling across the top of the screen that we stock a huge amount of stuff we do not have a patreon we do not run adverts on our videos we don't ask for donations but we do have a shop so yes thank you for your time let's get on with the rest of the show it is time once again for the mystery box competition and if you aren't sure exactly what a mystery box competition is well there's a competition where i have a mystery box of things provided by the lovely people at mars electronics and basically every week i put my hand into the box at random and i give something from the box away at random and this week i have a development tools kit from silicon labs i'm always giving away something from these guys before ah wicked okay we've given away one of these on this show before this is the blue gecko express bgx 13p evaluation kit and this is the system on chip from silicon labs which is similar to the esp32 it's not it's just it's a wireless chip it's also a system and chip with a bit of a built-in power um let me just see if this is open so i can show you the chip that is a sealed bag i'm not going to open a sealed bag that is for the winner to open i will find the documentation and we'll take a very quick look at it before we find out who has won this so here it is uh this is the board that um is in this box here but as i said it's sealed and it is a essentially a bluetooth five evaluation kit and this is the little silicon labs chip the bgx 13p is a bluetooth 5 chip um and this board here has all the things you'd expect from an evaluation board it has a way of attaching um other add-ons from silicon labs i think that's what this edge part here is and then of course there's a usb it's programmable over usb you have a couple of leds and buttons that are assignable and of course a bunch of nice gpio um and if you are interested in knowing more about this i can leave a link to the silicon labs documentation in the description um and uh one of the things i like about this um that a lot of these kind of bluetooth boards have um is a when you get it you can just straight away you know plug it in and run it to the terminal and there is an app a mobile app to allow you to sort of just evaluate how this thing might work and control it over the app um and you can use that app to also a perform over the air updates and then there's all of a simplicity studio and silicon lab stuff i believe that simplicity studio is one of the free ones from silicon labs it's an eclipse-based ide i think their tool train is free don't quote me on that i'm not as familiar with actually working getting into the weeds with silicon lab stuff as i am with other stuff um but yes anyway this is the board that we are talking about this is the bluetooth five evaluation board from silicon labs and we're going to be giving it away and how does that work well it's completely at random that's i i love the idea of this mystery box competition a box of mystery things that i don't even know what all of the things are in here i've been very disciplined and not looked inside it um i occasionally catch a glimpse but um uh uh yeah the the prizes are randomly sent to us and we randomly give them out to commenters on the show you don't even have to say anything specific in the comments for the mystery box prize we just take all the comments from the previous week's episode and choose a winner at random and that's what we're gonna do right now and your winner this week is eduardo lira which is kind of funny because i talked about him on last week's show he's one of the nxp cup people and one of the teams on the nxp cup um and with that in mind i have no doubt you're going to put this little bluetooth unit to great use and the comment reads we've got a shout out thanks new blog episode is coming out soon and we will be returning to that blog that vlog and all of the other vlogs from the nxp cup in the coming weeks but for now congratulations eduardo i'll be in touch with you as to how we can send this board out to you and uh yeah let's get on with the rest of this week's show moving over to the section of the show we call funding website things because we look at things on funding websites sometimes on kickstarter uh frequently on crowd supply and this week is no different in fact this week is quite special to me uh if you're new to the show um uh you might wonder why i always kind of say you know why i like that and it's because pretty much since the show has started i have given almost unfair precedence to uh audio projects anything that uses audio especially things that are sort of synthesizer based i was a musician long before i was a tech writer and now youtube speaking person and yes this is no different this is the esp32 audio development board on crowd supply and you may have noticed my eyes flicked to the right just to check that i hadn't got that wrong but that is indeed the name of this project quite simply esp32 audio development board a portable open source esp32 powered audio development platform with a touch screen and support for bluetooth and wi-fi connectivity now the esp32 element of this is of course quite self-explanatory they are very powerful chips they are dual core and they have wi-fi and bluetooth um and the fact that by very virtue of the fact that they are dual core it means that you can do quite a lot of things that uh you know require work to now the esp32 element of this is somewhat self-explanatory very powerful dual core wi-fi and bluetooth system on chip and in fact we'll be talking about them again later on in this very show they are ubiquitous for a reason um however i really do like the form factor of this there's a lot of very handy things you can see here so for example there's the touch screen which is kind of obviously quite a big thing we have your uh micro sd card slot here but left and right here you'll notice that these are um screw terminals and that's because you can plug this directly into speakers and that's because that's by virtue of the technology that they're using in order to decode the signals from the esp32 and produce the audio um so if we talk about that bit first maybe so right here as you can see a dual i squared s stereo dark or is it i i 2 s let's get so confused i squared c i squared s i 2 s if someone knows the definitive answers to that please correct me in the comments below um but yes it is a stereo dac a maxim integrated max 98537 with a built-in class d amplifier um and if that sounds familiar to you it's because the wildly popular little adafruit breakout boards which are i2s dax which have speaker amplifiers in them use the exact same chip and in fact they're used in a whole bunch of different builds and they're really quite fun really quite fantastic little things for the money and but this is built right into the board and so that means yes when you get this board essentially you can get it and then just plug it into a couple of speakers as you see here and you're just ready to go um you could make an entire project with just this board and a couple of speakers using the touch screen as the input and having the speakers on the side put it into an enclosure you can make a visual synthesizer that connects to via wi-fi and bluetooth to get samples off the internet i don't know just pull that idea out of nowhere um so yes i'm not going to go into too much more detail right now simply because uh this is a pre-launch project it will be launching on crowd supply soon there is a lot of information as to how it can be worked and i literally just now noticed the battery attachment that's really cool um anyway um there's a yeah there's a whole a lot of information about uh how it compares to other boards that are similar to kind of the to this and there will be a miniature version of it too which looks quite nice as well um this isn't the first esp32 audio board we've talked about on crowdsupply we featured them on the show before but this one is interesting it puts a fresh spin on it and we'll definitely be coming back to it when it goes live for now if you'd like to get that information before i have time or remember to circle back around to it you can always enter your details into the box here now we're going to talk about a project on the electromaker website and usually this is a fantastic opportunity for me to talk about one of our community members and of course we are now able to celebrate those community members with the electromaker of the month competition uh where every month people can win prizes from us for their ingenuity uh this time it's a little bit different because the project is by well me yes this is the long awaited getting started with thingy tutorial that i've hinted at a few times i want to make it very clear it seems at the minute like this is the thingy 91 show i know i've been talking about it quite a lot it's kind of a complete coincidence i have a lot of enthusiasm for this board and then behind the scenes other things that electromagnetic that i have nothing to do with mean um that yeah we have a competition with the thing in 91 it's being talked about in the electromaker educates video which is coming out soon um but yeah it's a bit of a coincidence really i just happened to finally get around to sit down and doing the very basic getting started with thingy tutorial and so um i did make a video to go with it it's um a little bit different to the electromaker show it's a lot less waffling and a lot more focused just going piece by piece through what you need in order to get the thingy 91 up and running but there is also a full written tutorial if you are interested in it um this is not a programming tutorial if you want to get into developing for the singing 91 that's going to come later i will be doing another tutorial which is more to do with setting up visual studio code and all that kind of things this is literally getting the thingy 91 registering the sim uh putting the pre-made firmware from nordic semiconductor on it so that you can get to the point where you are getting lovely data up into the nrf cloud like you can see just here um and as i said at the end of this tutorial a nice little bonus i noticed is that any data that does turn up in the cloud you can set a time frame and just download it as a csv files um which is pretty handy because before i get into the weeds of actually um doing proper development with the thingy 91 it's nice to just gather some data from it and do something with that data and csv format is something i'm already kind of familiar with but anyway um this is the first of what i hope to be many uh projects that i'll be actually finally putting up on the electromaker website taking part in the community and maybe helping a few other people learn um if there's anything that you are kind of super interested in seeing a tutorial in this style from do let me know in the comments of the video um because yeah it's it's something that i have to make time for i have to fit around all of my other work but i i'm so happy to do it um that yeah if you are wanting more tutorials in a similar style do let me know anyway i will leave a link to this project by electromaker ian whoever that is in the description of this video moving over to the smart knob now this is something that um i noticed a while ago um someone suggested i put on the show a while ago and for some reason timing probably it never actually made it on so i wanted to put it on now even though this is now a few weeks old um this is really quite amazing um it looks like a rosary encoder right he's turning it around he's pressing the button but this uses a brushless dc motor which means that um it can add well whatever haptics you want you can add detents to it you can have multi-rotation with detents um there's a lot of very interesting things that can be done with it and the thing i love about it is that this is just a completely open source open hardware project you can head to this github description here and get some uh get all of the information you need in order to make it your own um i really love the way that these kind of projects uh are cropping up now this is a very high level version of something that we talked about on the show a couple of times in fact the runner-up of this week's last week's last month's electromaker of the month um simply stuck a rotary encoder on top of a joystick and created an entirely new kind of input system just by combining two simple components this takes something that is on the surface quite simple brushless dc motor and a switch and turns it into one of the most interesting looking inputs that you can get right now i mean what you just did there a moment ago just blew my mind slightly like presses a button pulls it back and then yeah look that's that's snapping to the that's snapping to the center he pulls it it's snapping back to the center and all that movement's so nice okay i am gushing now um this is a really lovely project and it represents something that i like so much this diy approach to creating new ways of interfacing with technology that feel a little bit more human um we are moving away from analog connections to things and those big clunky switches you see on things and that felt so nice they are going away and sort of with good reason because capacitive touch in the various other ways that you can uh work with things it's so much harder to break that stuff and in some situations it just makes more sense financially as well but yeah i love that people are still working on new and interesting ways of combining the old ways input felt to be new things we can do with technology um and yeah um if there's any projects like this that you see that kind of fit with this do let me know because um i'd love to sort of put together a collected section of things which fit like this maybe an article or something that just talk about um 10 cool different ways people are working with inputs and outputs with microcontrollers this definitely will be high up on that list anyway i've waffled a little bit here but i'm sure that's not a problem um i will take this link and i will leave it in the description of our video and you can head over to scott bazer's channel um and watch this video it is fantastically well explained and as i previously mentioned you can head to uh the github for the project here it is completely open source we are now moving over to the dave's garage youtube channel which is a a channel we have featured on the show once before i can't remember exactly why it's one i go back to quite a lot um i think a lot of people found his channel while he was talking about quake 3's inverse square algorithm and that makes that game so very quick dave's a really interesting person because he's an ex microsoft employee and in fact some of the videos on his channel go into um annoying windows uh quirks and how they're basically his fault he's now retired and spends his time uh uh maintaining a fantastic youtube channel and today we're going to look at his video introducing the esp32 now there are a lot of esp32 tutorials out there but i thought this one was definitely worth a mention just because dave is has a very good way of explaining things he is um a very very experienced engineer obviously he's been working on microsoft products time immemorial and is now retired as i may have already mentioned um but he gives a great introduction into the esp32 and why you might want to use it um and then as you get through the video um he talks about different esp32 boards he uses a couple of different esp32 boards as examples including one from m5 stack and then as you can see here goes into installing platform io and talks about why you might want to use the arduino tool chain for esp32 rather than espressif's own sdk it's just a fantastic project and as it says yeah you can learn the esp32 in 15 minutes and this is a very basic um getting through and hello world and getting it all working um one of the things i really love about the way dave does stuff is that um he's not scared to make mistakes during his tutorials and i think that's very valuable because if you make a mistake during a tutorial you fix that mistake and if you fix that mistake in front of your audience then your audience learns learns how to fix that mistake if they come across it so many beginner tutorials give you just the information you need to get going but if you run into any snags and you're a beginner then you have no idea what to do um but yeah this is one of many channels many channels this is one of many videos on dave's channel i really like um dave's garage is probably a channel some of you guys know already um but yeah if you've got yourself an esp32 and it's been sitting there and you haven't really thought what you want to do with it um this is a fantastic way to get up and running with it dave is a very easy to follow person um and uh yeah just a solid esp32 tutorial which i will leave a link to in the description of this video moving on to what might not seem like much of a new story but given how long pi was the default username on the raspberry pi operating system it sort of is it's an end of an era um raspberry pi has now ditched the default pi username now as you may remember for various type for a long time for time immemorial and pi was the default username in fact for most of the raspberry pi i spooled up in my early years pi was the default username raspberry was the password and to my shame i never changed those things and that is exactly why this change has come because in short having a singular username for all of these different devices is a massive security risk so what happens now is when you first boot a raspberry pi it boots into the pi os wizard which is actually a separate environment from the desktop environment and you must create a new username and password at this stage now if you work with headless setups don't worry you're still covered in the raspberry pi imager you can set a username and password ahead of time as well this also works for raspberry raspbian light no it's not called that anymore raspberry pi os light if you are loading the light version of the os but you do have a screen you will get a terminal version of this wizard setup and again you can always do this um by putting a file in the boot sector that has all of those details in as well there are many tutorials about that um for a bit more detail than uh the news posts that i've written here you can also um head out to the blog that i linked in the news post and this is just a report from simon long as to why they wanted to go through and make these changes um and uh yeah as i mentioned it already goes through all of the different ways you can do this um and one other thing that is worth mentioning um it says in the same blog post um they now have some experimental support for weyland which is a different window system from the x-window system if that's something you're interested in looking into you'll find more information in this blog post but be warned it is experimental finally this week a wonderful article on hackaday about the trenton computer festival um which is the oldest computer festival in the world not necessarily the best known um but yes the article itself goes into a wonderful amount of detail about this uh what looks like a wonderful event it's not an event i've been to in person and i doubt i'll ever be able to it's a wrong part of the world for me um but yes there's so many wonderful images here that just excite me in various ways and the write-up goes into uh yeah just everything from the talks that they have there through to um what happens on the floor i found this to be a really interesting device um there's a video of this separately i managed to find which is this is a beanbag hurling machine made by some school kids um they also had a talk from um that uh guy who's been making his own semiconductors at home and i forget his name sam zeeloof yeah if you haven't heard of this guy he's fascinating um but why am i telling you about a computer festival that you can't necessarily go to unless you're in the right part of the world that's because finally after so many years of running and so many talks that were never recorded until recently they've started recording their talks and putting them on youtube so like so many in-person festivals they also had to deal with being remote during the pandemic and the ongoing pandemic um and so uh they are actually now well set up for recording talks it just happens naturally and as you can see there's a huge amount of information now on this youtube channel all the talks from here and there's just such a huge variety of different kinds of talks it seems so open but also so focused at the same time um yeah i i i massively suggest that you head to the hackaday article in the description from there you can find links out to the trenton computer festival website which in and of itself is a very fascinating website talking about the history of their um the computer fair and all that kind of stuff and of course the youtube channel for a massive amount of talks it's just it just goes on and on and on and presumably there's going to be a huge amount more added to it i don't even know where to start with this but i feel like this is what i'm going to be watching um instead of the television that i don't own for quite some time so that is the end of the electromaker show for another week thank you so much for joining me and thank you for all of the support you are showing this show be it by subscribing on youtube or buying things from the shop and especially by getting in touch and telling me your feedback um recently i've had a bit of an uptake in people actually reaching out to say what they love about the show some things they don't like about the show so much the things they'd like to see on the show um and it's it's just wonderful it's just wonderful to hear such direct feedback about the show i love reading all of the youtube comments and but comments that are actually specific are just wonderful and again as i've said before my email address is ian at electromaker.i if you want to send me an email just to maybe say a bit more at length uh what you'd like about the show or not or uh or how much you hate it when i say uh please email me um you can do that anyway um yeah that is a show for another week i will be back with you next time with more information more giveaways all of the stuff that we love doing here at electromaker but for now i hope you have a safe fun and creative week and i'll chat to you next time you
Up Next

55:01
Bioelectrochemical Process: Sustainable Energy & Wastewater Treatment
@dibrucollege1963
136 views•2022-08-02
20:08
Hollywood Fantasy Orchestrator RPG Expansion Pack Tutorial Walkthrough
@HighResolutionJapan
1.1K views•2024-03-08

9:49
FastAPI vs Flask vs Django: Choosing the Right Python Web Framework
@TechWithTim
302.5K views•2024-05-26

1:42
Game of Thrones Opening Credits: A Cinematic Analysis
@gameofthrones
46.3M views•2011-04-18
Related Study Plans & Knowledge Roadmaps
Structured learning paths in General & Interdisciplinary Studies
general-studies
Containerization: Evolution, Logistics & Trade
01Ancient Trade & Bulk Cargo: Amphorae to Barrels
02The Industrial Revolution & Cardboard Packaging
03The Containerization Revolution: Malcom McLean
+ 2 more learning modules
12h5 modules
Explore Roadmap
general-studies
Textile Tech: Evolution, Labor & Global Impact
01Pre-Industrial Textiles: Handloom & Cottage Industry
02Mechanization: The Spinning Jenny to the Power Loom
03The Factory System & Global Labor Transformation
+ 2 more learning modules
10h5 modules
Explore Roadmap
general-studies
Pharmacology: Botany, Patents & Biopiracy
01Foundations of Ethnobotany & Traditional Medicine
02The Birth of Synthetic Chemistry: Aspirin & Penicillin
03The Battle Against Malaria: Quinine to Artemisinin
+ 3 more learning modules
12h6 modules
Explore Roadmap
general-studies
Writing Surfaces: Papyrus, Parchment & Paper
01Ancient Foundations: Clay, Stone, and Egyptian Papyrus
02Parchment, Vellum, and the Rise of the Codex
03The Chinese Rag Paper Revolution and the Silk Road
+ 3 more learning modules
9h6 modules
Explore Roadmap