
















![How Resident Evil Requiem PC Path Tracing Amplifies The Horror [Sponsored]](https://i.ytimg.com/vi_webp/jC98WaHzd4I/maxresdefault.webp)





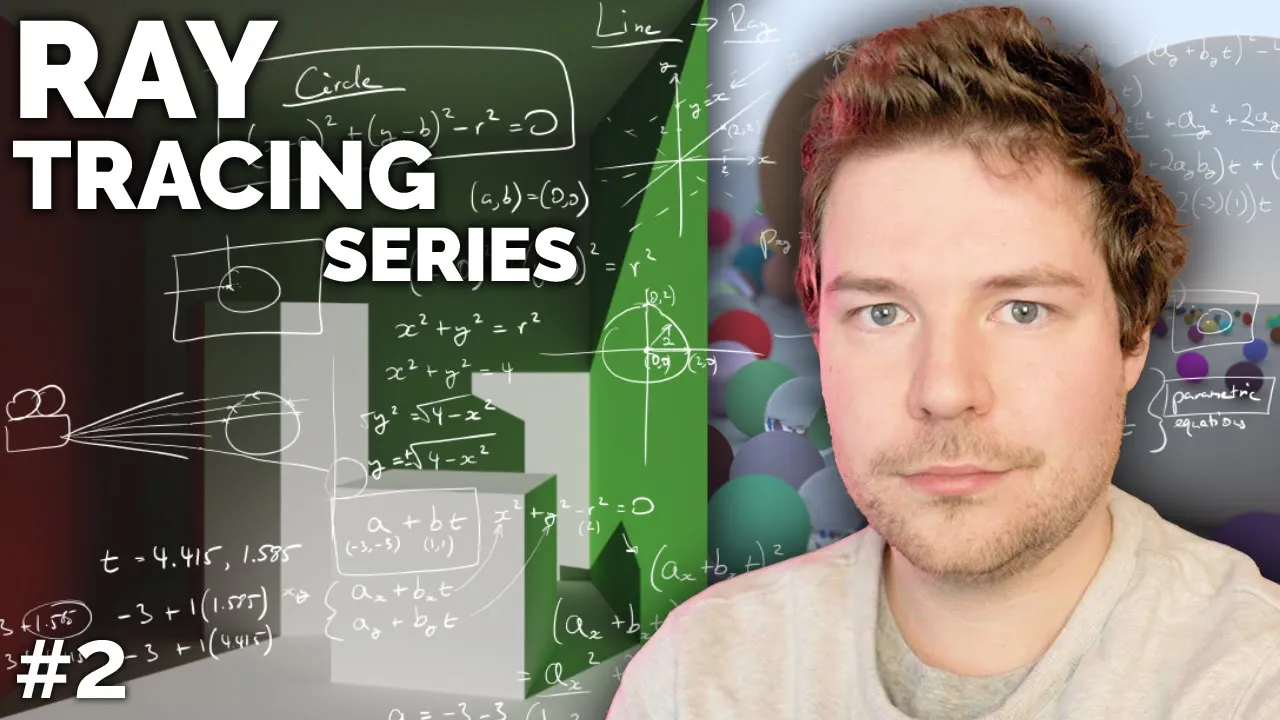
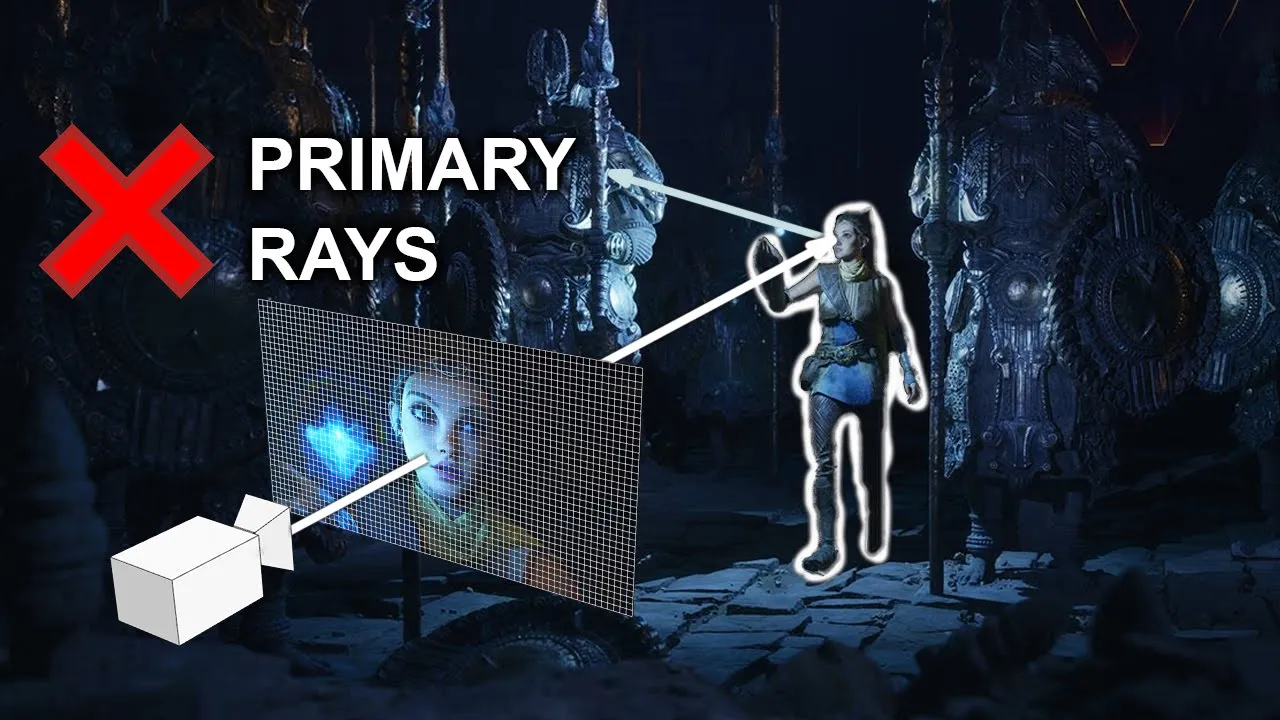
Ray tracing is a rendering algorithm that simulates light paths by casting rays from the camera through each pixel of the viewport into a 3D scene, determining which objects are visible and their colors by solving geometric intersections (such as ray-sphere intersections using quadratic equations) to create realistic 2D images from 3D models.
Ray Tracing from Scratch: A Step-by-Step Implementation Guide
Added:Proficiency in C programming, specifically understanding structures, pointers, and basic memory management.
Fundamental linear algebra, including vector operations such as addition, subtraction, dot products, and vector normalization.
Geometric mathematics, particularly the algebraic equation of a sphere and solving quadratic equations to calculate ray-sphere intersections.
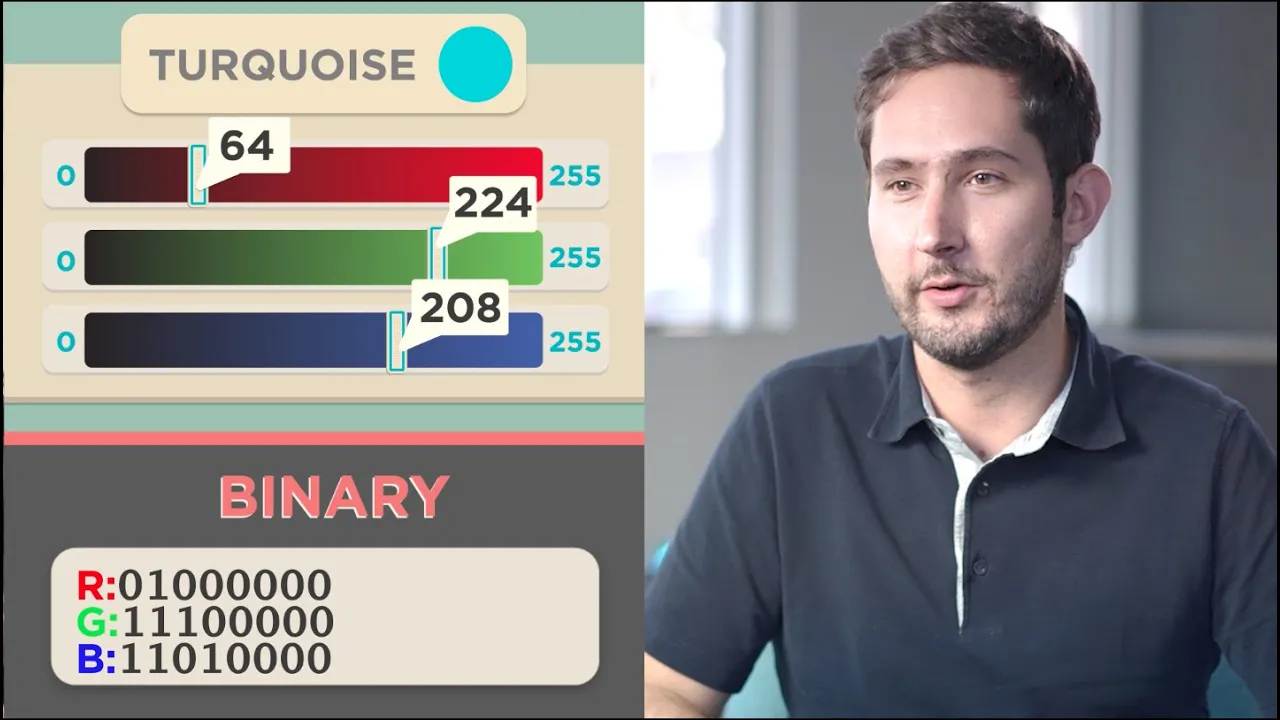
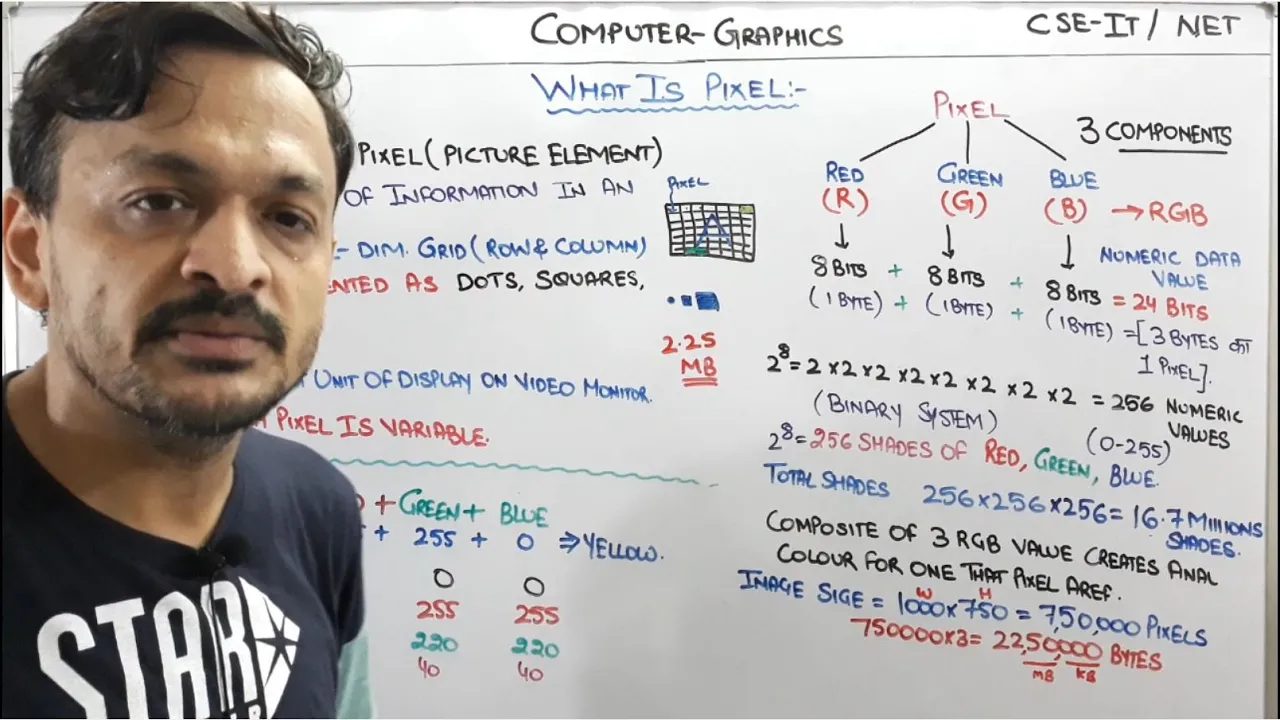
Basic concepts of digital imaging, including pixel grids, RGB color representation, and writing raw image files (like PPM).
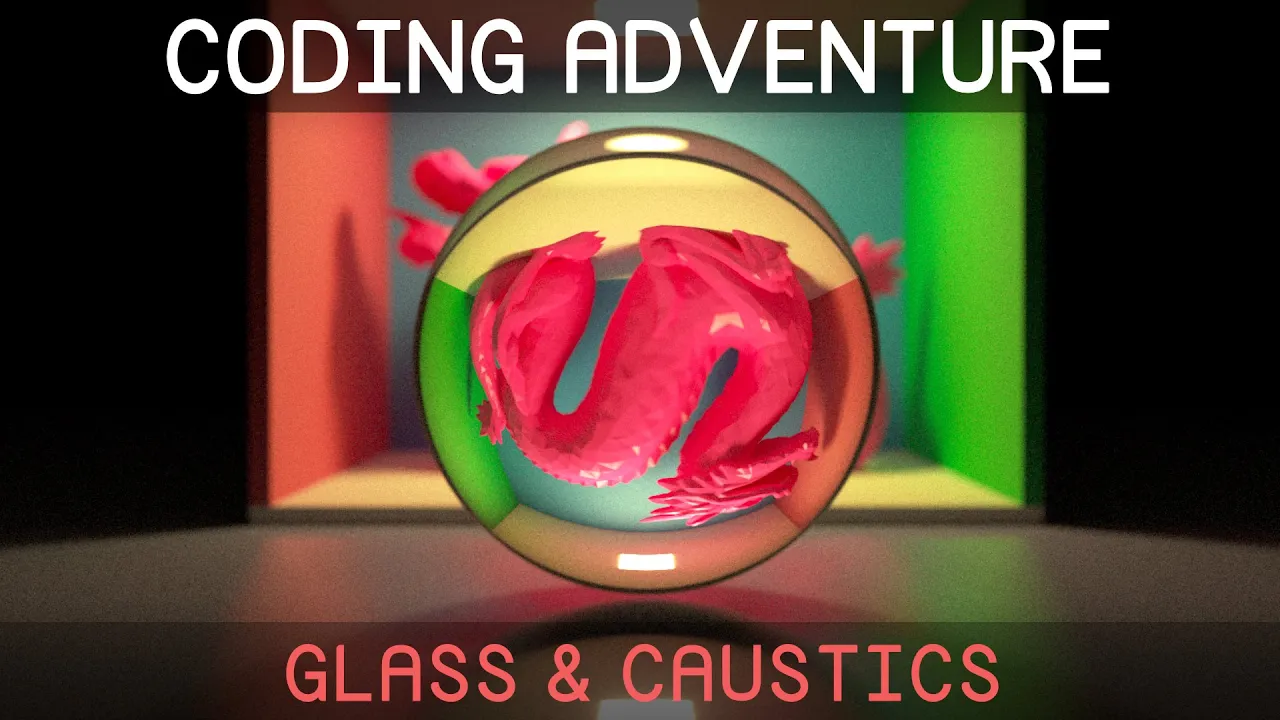
Implementing recursive ray tracing to support specular reflections, refraction (glass), and shadows.
Expanding geometric rendering capabilities to include planes, triangles, and loading complex 3D polygon meshes.
Optimizing rendering performance using spatial partitioning structures, such as Bounding Volume Hierarchies (BVH).
Transitioning to Monte Carlo Path Tracing to simulate photorealistic global illumination and soft shadows.
Leveraging GPU acceleration through modern ray tracing APIs like OptiX, Vulkan Ray Tracing, or DirectX Raytracing (DXR).
205 views5likes1:27:26Original Release: 2024-08-17
hello everyone welcome to another video in my channel and in this video we are going to discuss about a very popular algorithm which is used to Rend a graphics which is called rate tracing so rate tracing is a very popular algorithm used to render realistic looking three-dimensional graphics on screen and it's extremely popular in the gaming world not just gaming world but anywhere in any place where rendering is required so in this video we will try to understand the basics of retracing its internals how it works and we'll try to render one very simple scene using R tracing from scratch so at the end of this video we should be able to render a scene like this with a few spheres I chose spheres because it's the easiest shape to render and it's mostly used in R tracing 101 so Yep this is something which we are going to render from scratch so without further delay let's get started okay so first let's have a look at our environment setup so I'll be using C for this so the entire Tracer that I'll be building here will be built in C and for drawing on screen like drawing pixels on screen I'll be using uh relip like I have done in my past projects so you don't have to necessarily use rip even if you choose to use any other thing still you can follow this video uh you can use any other Library which allows you to draw bit Maps or you can even you can even render bit maps by hand you can write your own bitmap printer but as of now for this video I'll be sticking to really because really provides some pretty cool functions to generate images from pixels so I'll start with a simple rip template you can get this template from this repository I have mentioned about this in one of my previous video I'll put a link to that video in the description this template is compatible both with Linux as well as Mac OS so right now I'm on Linux it's a very simple relip project structure there is a include folder which has which has various relip files you can delete all of those we don't except the Ray lip.
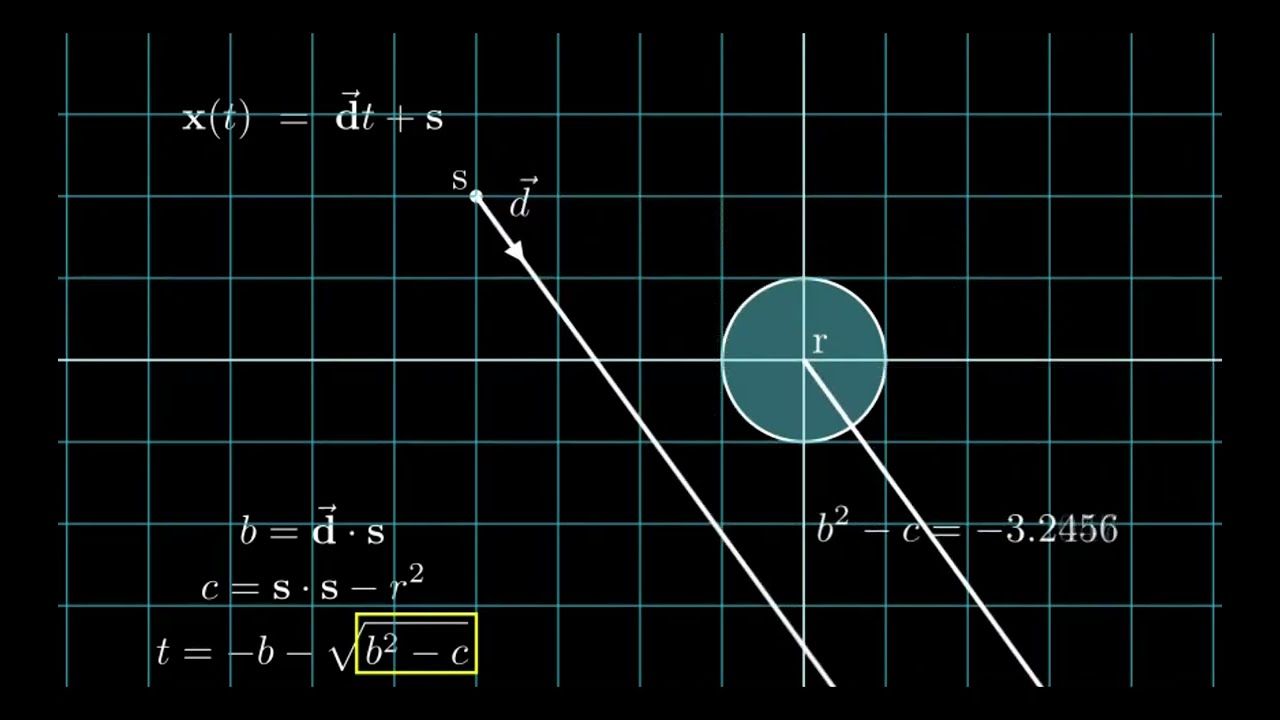
and Ray math.h you can get rid of Ray ji. and f. actually I'll actually I'll do it right now because we don't need those in this project these should these two should be fine and and we also have uh lip doin this is again not required for Linux because because as a prerequisite to setting up this template you need to install ra on obuntu and the instructions are me mentioned here how to do that okay so that's it so let's let's set up a very simple ra project which allows us to print things on screen that is print pixels on screen so for that I've created a main. c so what I'll do is I'll start with I'll start with including ra.h and that's it for includes as of now and I'll start with defining the default FPS which is which will be 60 frames per second and then I'll and then I will Define my main method where I'll initialize the window it will take a screen width and Screen height and a label and set Target PS okay and we do have to Define this constants as well so let's define them like the screen WID and the screen height to find screen so as of now I'll Define both screens BD and height as 800 and now I'll generate a blank image so for that I'll do image image equal to each color and the width and height will be the width and height of our screen we will give it the background color of white so the color values take a alpha Channel as well so I'll just make it 255 the other thing that I'll do is I will create a tiny function which will allow us to draw a pixel on the image that is a pixel on the image that we just created wi screen draw pixel color C image star image and here we will simply call Image draw pixel which allows us to draw a pixel at any position and we [Music] will simply draw that pixel with color C and that's it so this might look very very trivial right now like uh and as well as redundant but we will soon see why we need a separate function uh we will soon make some Transformations here and that's the reason I'm defining a separate function for just printing a pixel so another thing after the other thing we'll be doing is we will export this image to a file and we will call it.png or out.png whatever I'll just simply call it 4.png as of now and and we will return zero that's it so that's a pretty simple really uh project it does nothing but it simply has a few methods for generating an image and also Let's test it out once we will just draw let's say at 10 comma 10 we will draw pixel of color let's say red let's do it few more times so that it's big enough for our eyes to catch okay so we are missing the image parameter and we'll just send our reference to image right that's it and let's just change the coordinates so we'll make it 11 12 and 13 so we should get a tiny tiny Dash like thing or a line and to compile this I have created a tiny make file so this make file comes with the the template itself but I have made certain changes so I've just made a certain customizations so on building it simply builds the project on on the Run recipe simply runs the program which is as usual and the show recipe actually shows the image depending on on which platform you are you are using a particular we are using a particular image viewer so on Mac OS we are using open and on Linux since my desktop is genome or gnome the image viewer I'm using is iio genome EOG and yep so the Gen recipe simply runs everything and shows us the image right so let's try to run this I'll do a m gen and if you see we have got a tiny red uh Dash here it's not visible that clearly but there is a tiny red Dash over here which means our printing by pixel on the image is working and it creates a it creates a o.png right actually it's okay to get rid of this usual stuff like the screen size and stuff let's try to generate once again and we still have this image being generated even on removing the screen setup and everything which is good okay so that is our basic setup and now we know how to generate the image on on our disk we have an easy way to open it view it compile it and everything thing so now let's dig into the r tracing algorithm so what rate tracing does at the core is it tries to paint a given three-dimensional world or a three-dimensional scene onto a two-dimensional plane which is our computer screen right so that is what it tries to done so so our screen our computer screen is intrinsically a two-dimensional plane and we need to render the three-dimensional objects that we see around us on this thing so how do we do that so it's pretty much similar to how we paint a picture on a canvas right so let's say we are outdoors and there are there is a nice scenery like there is a very beautiful landscape and we want to print it so we see whatever reaches our eye and we try to interpret that and we try to draw it so let's say there is a simple landscape for now let's define our landscape so this is what we are viewing so let's try to draw a simple landscape so let's say we have some mountains over here excuse my sloppy drawing but it's just an example okay so this is a very simple landscape and let's say we have a canvas over here so let's say this is our Canvas OR this is the the surface where we want to draw this screen and we are the painter right so so I'll just quickly mark this this is the canvas so now how do we draw this landscape on our canvas and let's say we don't know how to draw so one very simple way to achieve this or to draw this even without knowing how to paint or anything is we come up with a net like structure through which we can see and that that net has got a grid made on top of that so it you can consider it as a tiny window through which you are looking at the landscape right and that window has got certain grids so let's kind of Define our net that I'm trying to mention so let's say this is the net like structure or this is the window which has got grids so let's define a few grids how many lines are those 1 2 3 4 5 six so it's six rows and let's make it six columns as well 1 2 3 4 5 right so what we are now doing we have placed this net like structure or this window of grids in front of our eyes and through this net we are trying to look at the landscape so one now one clever trick that we will apply is we will divide our canvas as well into this grid of six rows and six columns so let's do that now it does not need to be a square or it can have basically pretty much any Dimension because your can can be of any size right and so can be your viewport so now what I do is let's say since I want to draw this landscape on this canvas and now what I do is I start my painting with this top leftt toplift cell right so what I do is I go to this top left cell and I come back to this net and I look through this net to this landscape and I try to figure out what is the color of the light that is reaching my eyes from this cell so let's say this cell maps to this portion of the actual uh scenery or the actual landscape so I try to figure out what is the dominant color that I can see from this particular cell of the landscape and I draw that particular color or I paint that particular cell on the canvas using that color so let's say the dominant color that I see from this cell is let's say green so I paint this cell on my canvas as green so I paint this as this as green so let's say again and I and I keep repeating this process I go pixel I go sell by sell across the viewport so then sorry I go cell by cell across the canvas so next I want to paint this this cell of the canvas so I again repeat the process I come back to my viewport or to my window of grids and I look through this particular cell and try to figure out what is the dominant color that reaches my eye through this cell let's say this maps to this portion of the landscape and I figure out I try to figure out what is the dominant color of this portion let's say it's red so I try to or let's say it's blue so I what I do is I paint this thing as blue right so this is how slowly we will have a mapping we will basically we are trying to map this landscape onto this canvas using our viewport using whatever color we are seeing through the particular cell so every cell on this canvas is being mapped to a particular cell on the viewport and the color reaching through our eye from that cell on the viewport determines what color the canvas will be painted at that particular cell so this is pretty much how rate tracing is also going to work right so in a not so knif way if I try to Define this algorithm from a bird's eye view what I am doing pretty much is I'm positioning this Frame as required in front of my actual landscape and I'm looking through the through the frame and for each cell on the the canvas I'm pretty much finding out find out the map cell on our viewport I'm calling this grid as our viewport and then determine the color coming from that cell of that viewport and we paint the cell on canvas with that color so yep it looks kind of simple but it's not at all that simple and we'll try to find out how we can determine what color color reaches our eye from that particular from the particular grid on the viewport right this is the core of the r tracing problem where we try to determine which ray of light so what is the dominant color of that ray of light that that's coming out from that particular cell is and this is not at all simple because a number of factor will determine the color of the the day coming out of that particular cell what is the ambient light so light is a whole separate domain that determines the color of the day that's coming from an object and hitting our eye so that's the next thing we will try to figure out that is determining the color of the light that's reaching from that cell okay so now that we have these basic components that is our our canvas our viewport and the scene now let's map this to our to our 3D scene setup so the first thing that we will now do is set up our 3D coordinate system and make certain assumptions regarding our world so let's do that so first let's get rid of this so now let's set up our 3D coordinate system just like any other 3D coordinate system we'll have 3x's let's so this is our y axis this is our x-axis and this is a z-axis right so what we are assuming over here is that this is our origin so let me quickly Mark the origin so this is the origin 0 comma 0 comma 0 and this origin is the location where our camera is placed so camera is pretty much our I which is seeing the landscape this is the one which is the camera is the one which is receiving all the Rays coming from our world the convention that we want to follow is this way is the positive Y axis this is positive z-axis and this is positive xaxis so if we go this side it's so if we go this side this is X if we go down it's Y and if we go this way that will be negative Z now remember this is completely different from what the convention that's followed on digital screens because on uh digital viewports or cian planes the origin is usually located at the top left corner which I have mentioned in my previous videos and so uh y increases downwards it and Y decreases upwards and X increases towards the right which is fine the actual difference is that the location of origin is changing over here so in this case the origin is at the center which is not usually the case origin is usually at the top left corner but we will make certain ch changes in the code to account for this so that so when we draw the pixel on our image we convert it to the digital screen system from this coordinate system right so now that we know our coordinate system okay let me get rid of these dotted lines okay so we have our coordinate system the part which is missing still is the viewport that is our net with grids or our window with grids so let's add that quickly so just as in our physical world analogy the net was placed just in front of our eye even here the viewport will be placed just in front of the camera let's place the viewport somewhere over here and again the height and width of the viewport will be parallel to Y and xaxis so this is our viewport you can imagine that it has got grids but I'm not drawing the grid right now and so let's call the width of the viewport as v w VW and let's call the height of the viewport as VH so let's also assume that this viewport is placed at a distance of D from the origin so this let's consider this point as the center of the viewp put as well which aligns with the center of our coordinate system that is the origin and the other thing that I would do is so that it's clear what I'm going to do is I'm going to erase this part of this solid line and I'm going to do a dotted line let's do a dotted line okay so the origin perfectly coincides with the center of the viewport and the viewport is placed as at a distance D from the origin and now what we need to do is we need to choose values for VW VH and D so a standard value for VW VD V H and D is 1 so if we if we assume that v w = to v h = to D equal to 1 that's kind of a standard value because it makes the viewing angle for the camera to be somewhere around approximately 53° which is a very standard viewing angle how it becomes 53° let's do a quick calculation so this becomes a right angle triangle remember this is the center point of the viewport so if this this becomes a right angle triangle let's draw a triangle and what we are trying to do is calculate this angle so that is if if field of view is denoted by fov equal to Alpha so this angle is half of alpha right so this is half of Alpha and what we are trying to calculate is pretty much this so once we have half of alpha alpha will just be the twice of that value so this length pretty much here is is half of VW right so what I'm trying to say is this is our triangle I'm just changing the orientation of the triangle and let's say this is our half of alpha this is 90° so the opposite of half of Alpha is the height of this triangle which is half of VW now VW is 1 so this is half so this is half and the base is pretty much D so this is D and D is 1 so we know tan of half of alpha is basically half / 1 which is half so half of alpha is tan inverse of half and this value in degrees is somewhere around if I quickly do tan inverse of half that is pretty much math do 8 and 0.5 if I take the degrees if I convert this into degrees it's somewhere around 26.5 so it's approximately and so it's approximately 26.5 de and so Alpha = 2 into 26.5 so it's Alpha is roughly equal to 53° that's how this entire this if I draw another so that if if I just dra a dotted line so that's how this entire degree entire angle is 53° right so now that we have established the view Port our viewing angle the other thing that we have to do is we need to find out a way to map the cells or the grid cells on our canvas to the cells on our viewport so let's do that next okay so let me again quickly remove all those things now the things that we know is VH = to VW = to d = 1 and our field of view equal [Music] to is almost equal to 53° right so these are the things that we have established or we have assumed and now what we need to do is we need to somehow convert the canvas pixel coordinates to viewport pixel coordinates so again each cell on canvas is pretty much the pixel on our screen like our pixel on our image so what we are trying to do essentially here is convert the location or the coordinates of each pixel on the canvas or each pixel on a screen to their corresponding coordinates on the viewport or rather their corresponding position or offset on the viewport so let's do that so let's assume our canvas this is canvas this is our canvas and its width is CW height is CH and we already have our viewport here which is VW in width VW VH in height so along CW and CH so first let's consider CW right first let's consider how we can map this width of the canvas to the width of the viewport one unit of this canvas along CW will pretty much be VW by CW right because that's like from unitary method along the width one width of CW will correspond to this value VW divided by CW that pretty much we are scaling and then if we want to find out a particular VX that is the x coordinate of a particular cell on the viewport that will pretty much be VX equal to CX into VW so what we basically did over here is we found out what will be the VX offset or the X offset on the viewport of a particular Point whose x coordinate is CX on the canvas right and we can do the same thing for VY so VY equal to Cy into VH by CH so what we found out over here is the Y offset of a particular point on the viewport whose corresponding Point's y coordinate is Cy on the canvas right that's what basically we did a mapping from the canvas to the viewport so now we know for a point x comma Y which positions Ray we need to consider on the viewport okay so now that we have established our viewport assumed the viewing angle as well as we know how to map our canvas pixels to viewport pixels or canvas cells to viewport cells let's see how we can determine the color of the ray coming out from one cell of the viewport right that's that's the primary thing that we are after so now what we'll do is we'll try to presentent our camera so let's say this is our tiny camera okay and let's just consider another r going to our camera and it's meeting let's say somewhere over here and this is a tiny cell of the viewport and let's say it's intersecting on some object over here and let us consider that's a tiny sphere let's say this is a sphere and its color is blue so now we what we have to do is we need we want to trace this this Ray that's coming from this object to our camera and we want to determine what's the color of this Ray so this is the primary thing that we are after The Ray that's coming from this cell of the viewport to our camera what the color of a particular object that reaches the camera is determined by a number of things so it's determined by the base color of the object right for example example this object is of color blue but not only that there are several other other factors like the all the lights present in our scene for example there can be directional lights the lights the light rays coming from a very huge source of light for example the Sun that can illuminate this object there can be other sources of light like Point lights so Point lights are the tiny sources of Lights in the world for example Street lamps or bulbs or any tiny source of light that's present in the world so the color of the ray coming from a point of an object to the camera is determined by the culmination or is determined by the resultant light of all these light sources that fall on that particular point of the object right so in so what I'm trying to say in short is the color of an object that we are perceiving or the camera is Perce perceiving need not always be the true color of that object but it can be the resultant color of the various light sources that's present in the scene that's impacting that object but to keep things simple we will simply consider that right now there is no light in the scene and the color of the ray is determined only by the true color of the object which is blue in this case so in this case the color of the cell will pretty much be blue now comes the other question how do we trace this Ray or how do we mathematically Express this Ray that's coming from the object to the camera so one thing we can do is we can try to simulate so as I mentioned there are number of rays there are number of light rays randomly going from one place to another in in our scene right so let's say we have the sun we have some street lights and all those things and from all these all these light sources because we can we can see something because of this light sources because light from these sources hit the object and then the fraction of those light rays which hit the object gets reflected towards the camera right so one thing that we can do is we can try to simulate all the light rays coming from these various light sources that are falling in the object and then we can try to simulate a fraction of those light rays that get reflected from the object to the camera but if we want to simulate all the lights all the light rays that are that is present in our environment then it would be a freaking compute intensive task it will be our rendering will be super slow because we are trying to simulate countably infinite number of rays and it will be very slow and computationally intensive so instead what we are going to do is we are going to to apply a neat trick where instead of tracing a ray that is coming from the object to the camera we are going to reverse trace a ray that has already come to the camera that has already reached the camera from the object so let's try to understand this from a bit lower level the fact that we can see something from this given cell in the viewport means that some Ray from the object in our scene has already traveled in that direction from that cell and has hit the camera right let me repeat this thing what I'm trying to say is the fact that we can see some color from that particular cell or we can the fact that we can see something from that cell in the viewport already establishes the fact that there has there has to be at least one Ray that has traveled from that object or there has to be at least one Ray from some light source in the scene that has got reflected from the object from a certain point on that object and has traveled along that particular cell of the viewport to the camera right and we are going to reverse Trace that R so rather than forward Trace we are going to reverse trace this light Ray this light Ray that's reaching the camera and we we are going to find out the color of that light Ray right so let's see how we can do that so now we'll take some help of vector algebra and we will try to mathematically presentent so since we are reverse tracing we will we will consider that the ray is going from the camera to the object rather than from object to camera and so let's say the direction of the ray is towards this side right the ray is originating from the origin 0a 0a 0 and it's traveling towards this side and let's say the point where this Ray hits the viewport that is this cell this is this point is represented as V right this viewport cell is represented as V so now how we can represent this Ray even more important than how we can represent this Ray is how we can represent any point that is lying on this R let's say this point P lies on this Ray we can write the equation of this point p as P equal to this is origin 0 plus a parameter t v minus o so this is pretty much the parametric equation of this Ray that we have written over here so we took help of vector algebra and we are representing this this Ray that is originating at 0 comma 0a 0 and is hitting the viewport at V using its parametric form so let's try to understand this a bit so this is pretty much the direction of the day so V minus o is pretty much the direction of the day why because the day has originated at 0a 0a 0 and it has it is traveling towards V so if origin is a point V is a point so the direction of the day will be since it's traveling from o to V it will be V minus 0 V minus o right and T is a parameter using which we can move this point P along this R so let's say [Music] so let's say this is a ray and this is our Ray Direction now R direction is pretty much D let's say it is d a vector which is V minus o right and let's say this point is origin and now what we can do using this parametric form is let's say we want to represent P which is at a distance half of D from origin so we can simply plug in t equal to 0.5 which will give us this point which is 0 + or o + 0.5 d right so this is O and this is zero so o plus 0.5d right and if we plug in tal to 1 then we will get this point which is pretty much pretty much o + d right so now we have the parametric equation of this this Ray now Begins the fun part we are going to determine the point of intersection where this Ray hits the sphere so for that let's first get rid of all this thing and do some vector algebra once again so let's say this is a sphere right and this is our Ray right so this is our day which is originating at the origin which is our camera passing through V on our viewport and intersecting with a sphere let's say now there can be multiple cases depending on how the day is intersecting with the sphere at most it can intersect at two places one is here and another is here so this can be one case where the ray completely passes through the sphere another case can be this where it just touches the sphere so basically the ray is are tangent to the sphere at this point right so let's see how we can find out this point of intersection and how we can represent this mathematically so what we are going to do is let's say this is the let's say this is the center of the sphere which is C and for now let's let's say the point lies here which is let's say p the point of intersection right so this is our point of intersection which also means this sorry which also means this this is the radius of the sphere which is r R right this is R so we now have some basic assumptions there is a d which is intersecting with the sphere at a point P the center of the sphere is at C and the radius of the sphere is R so what we essentially know is distance P comma c equal to R right this much is clear so one convention that I'll follow is the points the various points like C and P I will be I will be denoting with capital letters and if when I am denoting a vector I will use the usual Vector notation that is for example for the day I'll use this the vector sign the vector cap right so what we know now is distance P comma c equal to R which I can say is that the length of this Vector so the length of the vector from C to P so if I if I consider Vector from the point C to the point P so that length of that Vector CP is R right so I can expand this and I can say p minus C is R so now what I can do is if I take squared on both sides P minus C whole squ = to r² right now this P minus C like Point P minus Point C whole Square this I can also denote by P minus C so P minus C is a vector dot P minus C right I'm just taking the dot product of P minus C with itself so remember the dot product of a vector with itself always gives gives us the square of its magnitude right so length is nothing but the magnitude of the vector so this much is clear that becomes P minus C square or P minus C do product P minus C = to r² and now the other equation we have with us is p equal to also 0 + t d right where D equal to we know that D is nothing but V minus O Okay this much it's clear now if this is equation one and this is equation two we are going to plug in two in one so let's see how that looks so I'm just going to reduce the font size a bit so that I can get more space if we plug in P equal to o plus TD in the first equation what it turns out is O+ T D minus C do product o plus plus T D minus C = to r² now what we can do is we can simply do once again vector vector do product we can apply the distributive law remember we can we can perform dot product only between two vectors and however we can also multiply a vector with constant if we look at this o minus C Factor o minus C at both the places so o minus C is nothing but the vector going from C to O right so we can simply represent we can simply reduce this to co plus it's a vector TD dot co+ t d = to r² now what we can do is we can do we can apply the distributive block as I mentioned earlier we can simply do Co do Co plus TD Dot Co plus we need to multiply now T once again TD with Co so TD doco plus TD do t d = to r² now let's let's rearrange it a bit what we have got is now we have got a t² so I'm considering This this term t² in multiplied by do product of D with itself right so now I'm considering this this thing so it will be T multiplied by 2 into 2 * by D do Co plus I have got Co cross do producted with Co which is co do Co equal to r² now what we have got essentially is a quadratic in t because essentially these will all give us constants because all remember dot product always gives you a scalar okay so since now this is a quadratic in t we can get two distinct values or we can get the same solution or we can get imaginary solution right which kind of aligns with the actual physical situation here the ray can intersect or this the sphere at one point or it can pass through the sphere in which case it will touch the sphere in two places or it can notot touch the sphere at all right so we will have two solution T1 comma T2 t1a T2 equal to if I write the formula y - B +- root over b^ 2 - 4 a c divided by 2 a right and let's see the terms over here so our a is pretty much this one this one is a which is D do d r b is pretty much 2 into Co into D so finally our c that is C of the quadratic formula will be Co do Co minus r r s y minus R square because we are taking this r squ on the right hand side to the left hand side so that the right hand side becomes zero which is the usual quadratic form right so we have now all our ab and c and we can simply plug it into our quadratic formula and we can get our T1 and T2 now among this T1 and T2 we will always choose the minimum of the two because we always want the nearest T that is the T which is nearest to the camera why so because let's say this Ray for example this Ray this is the camera this is the camera so this Ray intersects here T1 and T2 now you can easily see that this T this T2 will be hidden behind T1 so we don't need to bother about T2 as of now right so at least in this version of R Tracer where we are not considering transparent surfaces and things like that we always need the nearest point of intersection because the farthest one will always be hidden behind so we will only focus on T1 this point the color of the Ray will be the true color of the this surface okay now let me draw a tiny boundary okay so depending on the value of T that we get from solving this uh equation solving this quadratic equation we can divide our entire 3D space into three segments so one value of T that we can get is less than zero right we can always get T to be less than zero so this is a case when the point is like the point of intersection with this sphere is behind the camera so nothing says that the point of intersection cannot exist between the C behind the camera or we cannot have a surface behind the camera right but however in this version of R Tracer again we will we will discard those cases we will discard those points of intersection which occur behind the camera and we will only consider the ones which are in front of the camera so the other case can be 0 less than T less than equal to 1 right so these are the cases where the ray where the point of intersection of the ray with the surface is located in the space between the camera and our viewport right so it's located in the space between the between these two so it is point between camera and viewport right and finally the most common case will be T greater than one which is which is point in front of viewp put so the point is basically located beyond our viewport and that's why it's t that's why T is greater than one so these are the three segments we will ignore T less than 0 and we will only consider the cases where T is greater than equal to Z okay so next we'll see see how we can convert all of these things into C so we have all the basic things required for the for rendering a basic scene with just spars we have the vector we have the vector representation of our Ray the parametric equation we know how to calculate the intersection of Ray with spares and we know which value of which value of T2 choose right so let's see how we can convert it into code and render our scene okay so now let's write some code so the first thing that we going to do is update this screen draw pixel function so remember as I mentioned that in this uh like in this implementation we are considering the origin to be at the center but that's not the case for the computer Graphics screen because there the origin is located at the top left corner which means in our implementation y increases upwards and decreases downwards but in computer Graphics screens y decreases upwards and increases downward so it simply inwards and also the Orin is translated so let's do that so whenever we will draw something on our image using rib we will translate our Orin to the top left corner from the center so for that what we'll do is let's create two variables e x which is translated X is screen width ided 2 + x and in t in s y is green height divided 2 minus y the reason I'm doing minus y is because for y the direction changes and finally instead of plotting X comma y we will plot DX and Ty cool now before moving further we want to Define some utility functions and we will do those in in the header file called easy Tracer do H all these utility functions we'll be using in our main project so the first thing that I want to Define here is a struct to hold points on three-dimensional space so any point on threedimensional Space has got three properties right the X Y and Z coordinates for that I'll create a struct here to hold the points in 3D space and also every point in 3D space is a vector in itself it's a point Vector that is a vector of that point relative to the origin so that's why I will call it vectory right so let's quickly create the struct so as I said will it will have three properties X Y and Z and we will call it V three now we will create another struct to hold the parametric equation or the parametric form of a vector so for that we will do so remember a parametric form has got two parts sorry three parts one is the origin from where the vector is originating the direction that is the direction of the vector and a parameter called T and the final form becomes o plus TD so we will store these three components in this struct so first we will have vory origin vory Direction and FL T and we will call it Ray because we will be representing rays in parametric form and the next thing that I want to Define is a type for our color so our colors will also have primarily three properties that is an rgnb we will do have we do have a property for Alpha but I'll just consider that we have three primary properties that is the color channels so I will simply create a type Dev for that so it will be based on vectory and that's color three and now some functions for addition and subtraction negation of vectors so first let's start with addition so this will be used to add two vectors so we will have V 3 star V A I'll be using pointers here like P so what I'll be returning is a new Vector wherein the properties are the sum of the properties of the individual vectors so V A dox Plus P do X comma v a doy plus v b Arrow Y and v a.
Z plus v b do Z the next thing we are going to Define is a function to negate a vector again it will have only one one parameter and what we'll return is this while create another function which will return a new Vector from a given Vector where each property will be squared this will be pretty useful when we will be calculating things like the magnitude of the vector so let's do that Vector 3 or V 3 so the next function that we'll create will simply return us the sum of the square of the individual Properties or the individual components of the vector so it will be useful while calculating the magnitude of a vector it is simply the dot product of a vector with itself right so let's do that so it will be pretty much again it won't be vory rather it will be float because it's a sum so v x into V X plus v y into v y plus v z into v z and using this now we will calculate we will create the magnitude function so this function will calculate the magnitude or the length of the VOR back three oops D star V and what you would want is first the square of this vector and on top of that we will do square root remember it might seem a bit confusing like the square root of the squar would give us the same thing this square is not a normal square but it's the square of a vector is the sum of the square of the individual components of a vector right and of course square root is not present right now so we will include the math class the math head file math H and that should fix it yep another very important utility function that we will be defining is constant multiplication and let's do that and Float factor is the constant factor with which we will multiply this Vector so what we will return is another Vector sorry it won't be float but rather it will be vect remember multiplying a constant with a vector gives you a vector so what we get is into Factor comma V A do y into Factor comma back a do Z into factor that was simple next we will Define sorry not V three but so we will Define a function that will calculate the dot product between two vectors and this will be a important one because we'll be using it a lot so dot V 3 star v a comma V 3 star v p return V do X into V do X Plus V K do y v p doy plus v a do Z into Vic B do Z the other one we will Define is a function to calculate the C of the angle between two vectors let's define that c angle float CA angle remember the cause of an angle will always be a float so we will have back three star Vic a and Vic three star Vic with B the cost of the angle between two VOR is nothing but the dot product between the two vectors divided by the multiplication of the magnitudes of the individual vectors right so it's pretty much like this let's say we have two vectors A and Vector B then C and let's say they make an angle Alpha then C of the angle between them is pretty much the dot product of them divided by mod of a multiplied by the magnitude of B so this is what we are trying to calculate here so let's do that float dot v a comma v b and that we divide with magnitude of f a multipli with magnitude of v b and one last function we will Define is the function to subtract two vectors so what it will do is it will subtract VC 3 V A and V three v b so what it will do is it will subtract Vector B from Vector a so let's do that and with with our utility functions in place this will be pretty easy so we first will negate so so subtracting Vector B from Vector a is same as adding the negation of vector B to Vector a right so let's do that so first let's calculate the negation of vector B that's negate v b and we'll return addition of v a comma we will send the reference of negative vector cool now we have almost all our utility functions and we will use or we will include this file in our main. C so let's do that cool so next what we'll do is we'll create a function which will determine the direction of our day originating from the origin so remember the direction of our day originating from the origin is not nothing but V minus o right so since the day will pass from one of the cells in the viewport let's say the cell is V and the origin is O then the direction is simply V minus o and this direction we will calculate corresponding to a pixel on our canvas as we discussed for every pixel or cell on the canvas we are going to map that pixel or cell to a cell on the viewport and then we will find the aray that passes from origin through that cell on that viewport right so let's say so this function will call as screen to viewport because actually we could name it something better but as of now we will stick to this name what it will essentially do is it will take a screen coordinate like a screen X comma y right so uh basically the coordinate of a pixel on the canvas right and it will find out the viewport cell corresponding to that pixel and it will try to find the direction of the ray that is passing through that cell from origin or or basically origin is our camera so the day that passes from our camera through that viewport so let's do that screen to viewport not image but in SX so SX and s y is the X and Y coordinate of the of the canvas pixel or the canvas cell and now we will apply that scaling formula so what we'll essentially return is a vector or a threedimensional Point again every point is a point Vector so so what we are going to do is float so we are going to apply that formula which is CX into viewport width divided by screen width so we will just we we are just using the term SX for CX over here so let's do that SX into viewport okay this reminds me we haven't defined the viewport width and height so hash Define viewport Port vid as 1.0 and has Define height as 1.0 and finally has Define camera view four distance as 1.04 so now hopefully it should yeah so now SX into view Port width divided by divided by screen width comma float s y into viewport height divided by screen height and we are going to return this so we pretty much did the same thing so we we are doing we first figured out VX and v y right and the vector will be as mentioned V minus o so basically VX - o x v Yus O Y where o is the origin and the Z will will simply be D because that is the distance between camera and viewport right so that will be the Z component and we don't have to do minus ox and o y because both ox and o y are zero so that's why it's simply this and no subtraction is required next what we are going to Define is remember our scene is going to just contain some spheres so we will Define a struct to container sphere so let's do that type def struct so again the sphere has got three components right the first component is the center of the sphere the second component is obviously the radius of the sphere and third is the color of the sphere right so let's do that so VI three Center float radius and color C color and we will call it sphere underscore and let's define some more constants we will have a v three origin so our origin as of now is not changing so let's create a constant for that and this will simply be 0.0 Dot 0. 0 do comma 0.0 okay and also Define our background color so when our Ray doesn't hit any sphere or any object it will return the background color so let's do that okay so now what I'm going to do is I'm going to go top down right I'm going to start with our main function and start with the entire retracing algorithm and throughout the way I'll be defining certain function stubs or dummy functions which I'll populate later so let me first Define the function stubs right the functions that we'll be using in our entire R tracing Journey so one of the core functions that we'll be using is the function called TR Ray this function will be responsible for tracing a g a single Ray coming out of the camera and going through our viewport into the world so what it will finally return is a color right because at the end of the day we are just interested with the final dominant color of the aray so the first argument or the first parameter it will have is vectory origin I know origin is a constant right now origin is nothing but the location of the camera I know it's constant right now but as still treat it as a parameter as of now so that in future if we want we can change the location of the camera to get a different perspective of our screen or our world the second thing we want is of course the direction of the day right and these I will be explaining in a moment so what it's actually is is the lower and the upper bound on the value of the T which is the solutions of our intersection between Ray and spheres so we will provide some boundaries between which we want T2 exist anything out of this boundary we will reject so T Max we will have something called scene T So this we have not defined yet but this is nothing but our scene and which is nothing but a collection of spheres and we'll be defining it soon so as of now I I'll not Define this function but I'll just leave it like this the other very important function that we'll be using is something called FID get g a sphere intersection V three the parameters it will be taking is obviously the origin again the ray direction of the given Ray a sphere with which it's trying to see whether the day intersects or not and the two values of T that we will be populating so these are nothing but pointers to the to some variables which will get populated by this function because obviously we can't return two values T1 and T2 from this function in C so we will be using pointers right and again I'll leave it as of now I won't be populating it let's quickly Define our scene type so let's [Music] do so as of now our scene will simply contain array of spheres that's why I'm doing sphere tar spheres and I'll call it scene in future we'll have lights as well but as of now it's just all spheres okay now let's get rid of all these things and let's start with our main function top down so first what I'm going to do is I'm going to Define some spheres that is an array of spheres so let's put a spere at zero min-1 and 3 let's give it a radius of one and the color red okay let's add an another sphere we will make it blue another we make it green and a final one we will make it very large so that it acts as the ground we will make it Center very low so that because its radius will be large so that we can only see the top surface of the sphere and we will give it a radius of 5,000 and we will make it yellow right so that's our scene I mean that's our collection of spheres and using that we will create a scene now so scene T scene spheres we will Malo and add now size of [Music] right so now our scene has all these spheres and now we will Loop over all the pixels in our screen that is our canvas and we will try to trace Rays corresponding to each and every pixel on the screen so let's do that so I'll have a x variable which will sweep from left to right of the screen so minus one into so remember our origin is at the center I'll keep repeating this fact so that we don't get confused with the normal computer Graphics screen where origin is on top left corner and X less than equal to screen width by two so we start with negative screen width by two to positive screen width by two that should sweep or that should cover the entire width of the screen or the canvas Plus+ and we'll do the same thing for the height as well we will start from the bottom of the screen and we will go to the very top so minus one into or multiplied by screen by two x sorry y less than equal to screen height by 2 y ++ let's find the direction of the vector corresponding to this pixel on the canvas or the screen so remember what we necessarily will do now is find the viewport cell corresponding to this x comma y pixel on the screen and we will get the direction of the ray originating from the camera going to our world through this particular cell V on the viewport so let's do that V 3 D which is Direction screen to we'll use the screen to viewport function and we'll simply pass it X comma y okay look it will be V three and now we will have and now we will use our Trace re function to determine the color of this Ray so for that we'll first pass origin then D then now for this as of now I'm going to consider all the T's or all the intersection points that lie between or that lie in front of our viewport that is all the t's that's greater than one all the way up to Infinity so we will pass the lower bound of our T that is T Min as one and the upper bound as Infinity of course we can't pass infinity so we will pass something called TMax we will pass a reference to our scene as well and of course it's complaining that TMax is not defined so let's define TMax we will include something called limits limits. H and we will Define T Max as int Max so basically the maximum value for an integer I mean essentially we could have used any very very large value but yeah this works this works and finally what we will do is we will draw this color for this particular pixel we will paint this pixel with this color on the canvas or our screen so draw pixel X comma y comma color remember color three is our definition of the color we need to now type cast it to rib's version of color so we will do care color.
X comma care color. z y color.
z comma 2 55 right and we'll finally pass our refence to our image as well so that is the Crux of our algorithm from a very top view right so next what we are going to do is Define our Trace Ray function so now that we know how the ray tracing works or reverse tracing Works defining the function will be pretty easy for us first let's assume that the closest T that we have found is TMax classic Min finding algorithm and then we will allocate a variable for the closest sorry closest sphere sphere T closest sphere as of now it's null because we haven't found it so basically what we are trying to find is that the sphere on which the closest T lies right so what we'll do is in this we will pretty much Loop over all these spheres and we will see with which sphere our R intersects and we will find we will get the closest sphere we will Loop over all the Spheres so there are four spheres I'm hardcoding it it's it doesn't look good but as of now I'm just hardcoding for we can later make it a variable and convert it into a parameter but as of now I'm keeping it simple then I'll just petch the sphere at this index I'll Define two variables T1 and T2 and I will call I'll get sphere Ray intersection I'll pass origin Ray Direction the sphere and reference to and basically pointers to T1 and T2 so that the intersection function can populate it now let's see if the T that we got is closest T or the minimum T so if T Min is less than T1 and T1 is less than T Max so basically what we are checking is that this T is within our range if that's the case and T1 is less than closest T then what we'll simply do is we'll update our closest T with this T1 and we will make closest spere as this sphere at this Index right and we will do the same thing for T2 as well if t mean less than T2 and T2 less than T Max if that's the case we'll do we will check again if it's the closest one T2 less than closest T then closest T equal to 22 and closest sphere equal to the sphere at this index okay so now we have the closest sphere and for some reason if actually not some reason in all those cases where the r is not intersecting with any of the Spheres we will check if it's still null if that's the case we will simply return the backr color otherwise what we will return is the color of the closest sphere dot color cool and now let's quickly Define the get sphere get ray sphere intersection function again it's nothing but putting plugging in our ABC coefficients into the quadratic formula and solving for them and populating the T1 and T2 pointers so let's store the radius in R remember there was a factor called C minus o that is which we were defining as Co so let's do that so here Center is the center of the sphere so let's define it as Center to origin equal to subtract remember Co means o minus C so let's do that origin comma pointer to sphere.
center now let's define our coefficient so a will be dot of R so let's see what is a once again so a is d. D so R is R direction do Direction so let's do that b is 2 do Center to origin do R Direction so let's do that again two multiplied by again dot product will give us a scalar so we can do normal multiplication when we are multiplying it with two so dot and Center to origin comma array D and finally float c equal to once again dot let's see what was that co. Co minus r 2 so Center to origin comma Center to origin minus r into R multiplied by R that's it and now let's find the discriminant discre disc creant yeah discriminant b² minus 4 a c the classic discriminant formula if discriminant is less than zero we don't have any real solution so we will simply populate T1 and T2 with eax that is no solution at all next and finally we will calculate the two solutions sorry float of the first factor is minus one into B plus sqrt discriminant and we divide this entire thing by 2 into a into a into 1.0 1.0 just to make sure it's float and we have got a T2 which is pretty much the same thing right it's the same thing so I'll just copy paste it make make it T2 and instead of plus it will be minus so minus b + - b² - 4 a c root over and we will return that's our full rracing algorithm in how much 100 let's say let's say 115 lines of code I mean keeping aside the utility functions which anyways we couldn't have avoided is just 115 lines of code okay let's try to compile it now as usual there are some erors let's try to fix them there's eror on line 61 okay and we have our image and it's exactly what we decided to generate three spheres so we have got our green sphere we have got our blue sphere the red sphere and the yellow sphere is so big that it appears to be a flat surface so that's the tiny version of our basic R Tracer with no lighting shading at all it just displays three spheres I know the image doesn't look that interesting but this simple image shows us how the rracing algorithm works at its scoree keeping aside lighting and shading how the basic algorithm Works its internals and how we can use it to generate this image from scratch in next videos we'll try to understand how lighting how we can use lighting how lighting affects the color of a surface and how it affects the color of the r that is bouncing back from the surface to the camera we will consider different sources of light like directional lights point source of lights and things like that we will talk about different types of surfaces or materials like mat objects which disperse light we will talk about shiny objects we will talk about transparent and reflective surfaces we'll talk about all those kind of things in the upcoming videos so yep that's it for this video and hope you all liked it and see you all in the next video
Up Next

24:20
C++ Ray Tracing Tutorial: Implementing Anti-Aliasing in Unreal Engine
@the_engine_room
394 views•2024-01-08

87:26
Introduction to Secure Multiparty Computation with Yehuda Lindell
@fhe_org
7.7K views•2021-02-04

4:55
HTTP Requests Explained: GET, POST, PUT, DELETE
@codecademy
103.1K views•2021-10-07

19:25
Enigma Machine Mechanics: WWII Encryption Explained
@JaredOwen
13.2M views•2021-12-11
Related Study Plans & Knowledge Roadmaps
Structured learning paths in Computer Science
computer-science
Container Runtimes: Namespaces, Cgroups & Go
01Linux Systems & Go Programming Foundations
02The Core of Isolation: Chroot and Filesystems
03Linux Namespaces: Process Isolation
+ 3 more learning modules
32h6 modules
Explore Roadmap
computer-science
Building a CHIP-8 Emulator: Rust & CPU Basics
01Computer Architecture Foundations (Bits & Bytes)
02Rust Programming for Systems Development
03CHIP-8 Virtual Hardware Specifications
+ 2 more learning modules
32h5 modules
Explore Roadmap
computer-science
Building BitTorrent: Go, P2P & Concurrency
01Go Fundamentals & Concurrency
02Networking Foundations & P2P Architecture
03Bencode Parsing & Torrent Metadata
+ 3 more learning modules
26h6 modules
Explore Roadmap
computer-science
Actor Models (C++ Concurrency & Lock-Free)
01C++ Multi-Threading Foundations
02Thread Pools and Task Scheduling
03Atomics and Lock-Free Queue Design
+ 3 more learning modules
45h6 modules
Explore Roadmap