
















This tutorial demonstrates how to use OpenCV with Python to capture webcam video, display frames, and convert color images to grayscale using cv2.cvtColor() with the cv2.COLOR_BGR2GRAY flag, showing the fundamental steps of OpenCV setup including importing cv2, initializing a VideoCapture object, reading frames in a while loop, and displaying them with cv2.imshow().
OpenCV Python Tutorial: Build a Real-Time Grayscale Webcam Application
Added:Basic Python programming proficiency, including writing loops (specifically 'while' loops for continuous frame-by-frame processing) and handling external library imports.
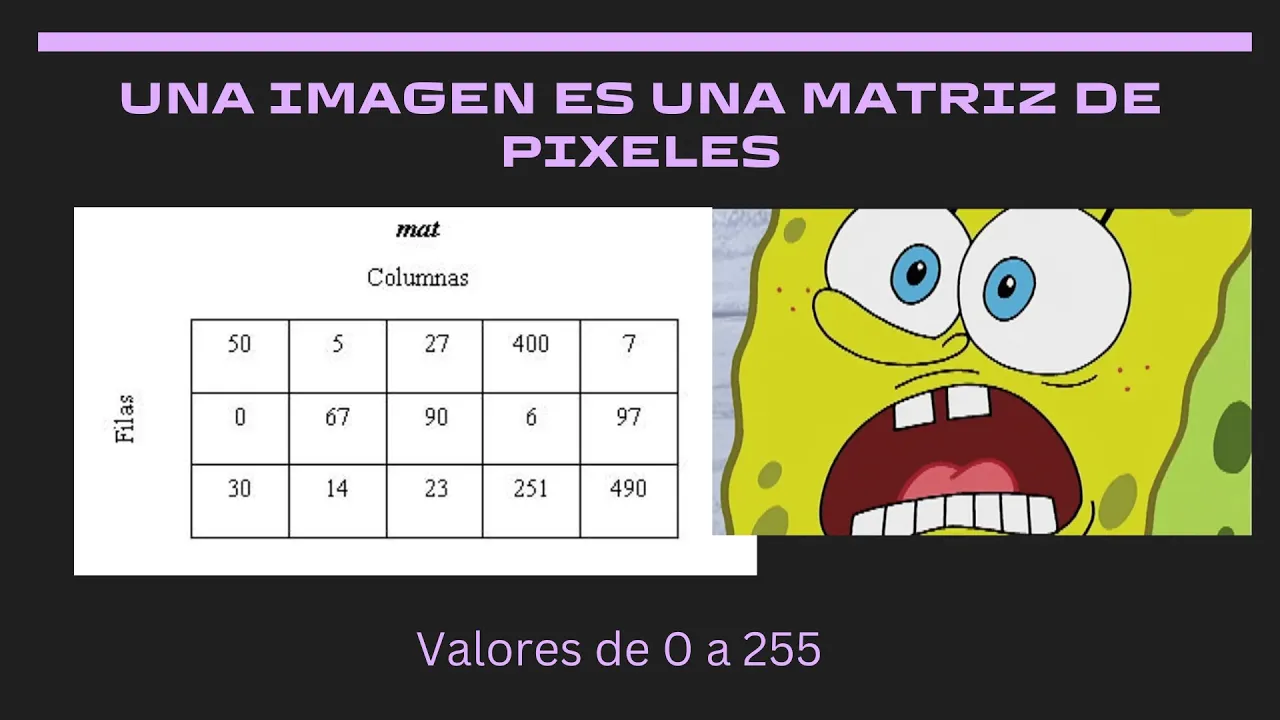
The conceptual representation of digital images as multi-dimensional arrays (matrices of pixels) with width, height, and color channels.
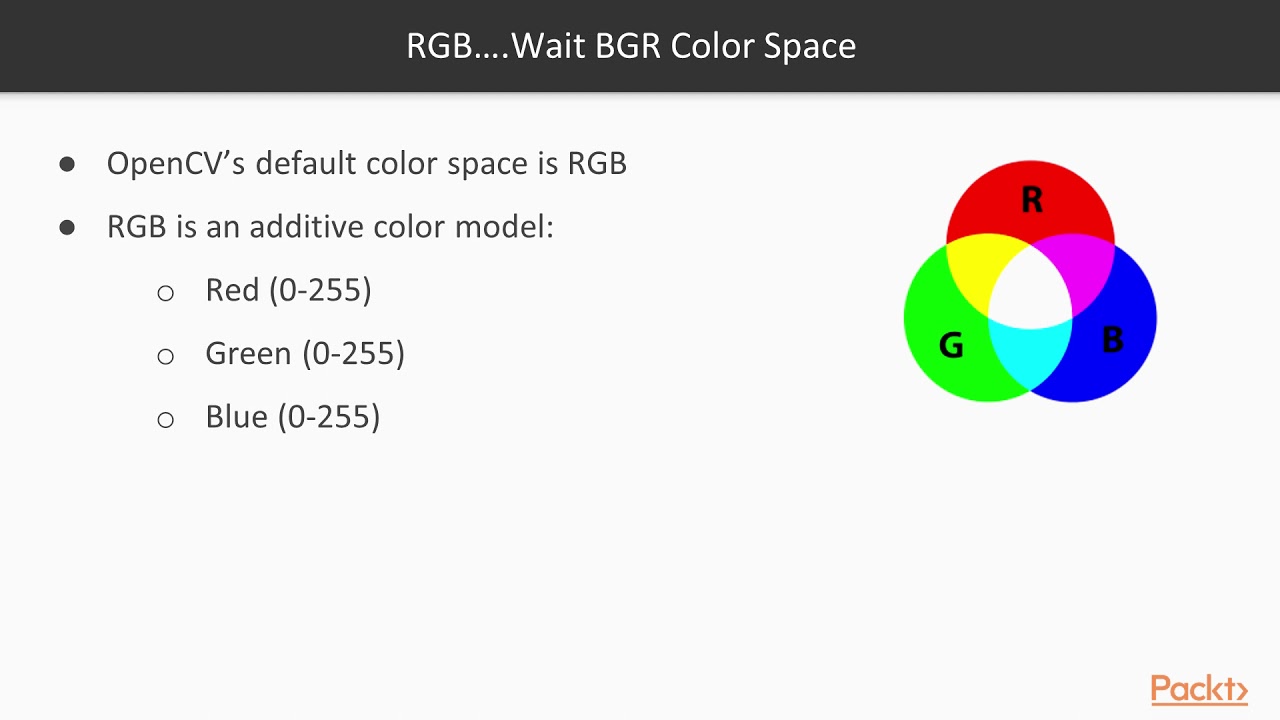
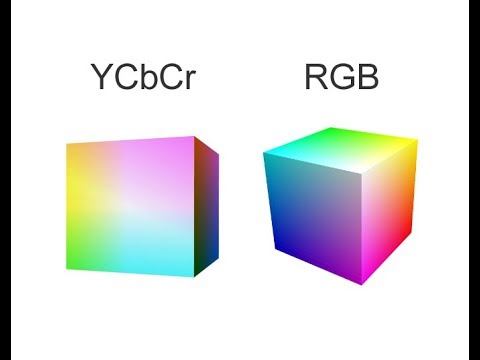
Understanding color spaces, specifically the difference between three-channel representations like RGB/BGR and single-channel representation like grayscale.
Applying fundamental image processing operations on live video, such as thresholding (binarization), blurring, and Canny edge detection.
Learning to draw shapes, text overlays, and dynamic bounding boxes onto real-time video frames.
Implementing basic contour detection and color-based object tracking on the webcam feed.
Saving processed video streams to disk using OpenCV's 'VideoWriter' class with appropriate codecs.
89.2K views1.4Klikes10:24Original Release: 2018-04-08
all right so now it's time to do a quick test of our open CV and actually get it working you know we're actually gonna build something that looks a lot like what you see now where there's two images once in normal color once in grayscale sure it's simple but it shows you the very basics of how to get open CV set up and running so as you may know open CV stands for open computer vision and what this means is we can actually start to write code and even very intelligent code to control our cameras and what things may happen for example if somebody who your computer recognizes locks in a frame perhaps it sends you a text message that might be a useful security camera feature now there's already a lot of these things built in to open CV so Before we jump into that advanced stuff we need to know how this basic stuff works if you want to see a lot more open CV be sure to comment below maybe give us a thumbs up and subscribe on our YouTube channel so join CFE comm slash YouTube because we're gonna be doing a lot more open CV there if you guys want it okay so now let's go ahead and take a look at the guide the guide that we're using is on our blog it's on this URL you see right now once you go to this URL you'll see that everything is pretty much ready for us to go I'm also going to assume that you already have open CV on your system if you don't this guy will give you a couple links on how to get those things installed or you can check the description below now it's really simple so if you even stopped now and went through the code yourself you absolutely absolutely can do that but what I'm gonna do is I'm gonna actually write this the code with you step-by-step and just kind of give you an idea of what exactly is going on then we're gonna run it and take a look at together so I'm gonna jump into my project now this project is a virtual environment I'm actually working in the exact same project that I was working in when I did the installation for my Windows computer so it's not any different it's a really simple setup just a virtual environment with open C B but this will work anywhere you had OpenCV installed right so let's go ahead and import two things we're gonna import numpy as NP now this is an optional import at this time you put it in if you want but you really don't have to and then next what we're gonna do is import CD two of course so we need open CD and then we need to have a capture device some sort of capturing for our webcam now what I'm about to do is going to just take your default webcam so whichever what can that you're using that's gonna be the default that's going to capture from so if you have one in with us meeting it's gonna go from that if it's actually built into your computer it's gonna go from that but there is a way to actually select multiple webcams or one in particular so I'm just going to go off the default to do that we just say cap or like capture device CV to video capture 0 now one thing to note here is even though it's called video capture doesn't mean that you can't take pictures with it because of course as you know videos are just a collection of pictures so we can actually use this to snap photos to so if you didn't want to cult record video for example you could just use this to get snapshots every once in a while something that's pretty cool ok so now what we're gonna do is we're gonna create a loop so the loop is made there specifically for continuous usage of this video so we're still or continuously reading what's going on in the video that's why we use a while loop and it just will stay on until we break that loop so in other words we just need an infinite running wild we can just say while true and then we are gonna go ahead and say rekt and frame equals 2 kappa read so this is reading frame by frame so it's reading every single frame that's happening on our capture our video capture the next thing we're gonna do is we'll just simply display this frame we'll just show it in our computer right now of course this is not in that text guide because the video gives us the opportunity to chat a little bit more about what's going on so I am show now if you're like me I do this a lot because I'm so used to writing IMG you might do IMG show and that doesn't work the only reason I mention it is because I do it all the time and it's something I have to remind myself constantly so I'm gonna give it a name and I'll just call it frame so like default frame and of course it's in the string and then we use the variable frame that's coming from cap Reed okay so I'm gonna go ahead and save this just as is we'll save it open up our powershell and i of course I'm in where my virtual environment is and I'm also in SRC file okay so really simply I'm got my camera test here and all these other things okay so let's go ahead and just run it I'll do Python camera test pi I hit enter and so I see this error it's probably cuz I have the webcam running here so I'm gonna turn that one off yeah let's go ahead and try and run it again I'll just press up hit enter and there we go so I've got my frame showing up this is great this is actually coming from the webcam not from my recording software this coming from OpenCV as you can see with this frame right here it's fairly straightforward but the problem is if I hit X it just stays open so we have to stop that and then also what you may be seeing is just a gray bar here so we have to do two things to account for that specifically now I can also run control C that will interrupt doesn't keyboard interrupt and Python and that will actually break whatever programs being ran so it actually breaks that while that forming but and also with that guide that we have it actually shows you how to break it itself so this right here is what we have to implement I'm just gonna go ahead and copy and paste it in here so the CV to wait key that that portion absolutely needs to be in there so if you were just seeing a gray bar and it just seemed to be hanging that's that's why I'm so I'm gonna go ahead and hit save here and we will run it again oops now we got an indentation error I'm gonna fix the indentation and they copy and paste I have tabs on right now I shouldn't have that I should have it all on spaces okay so I save it and we go back in here run it again and there it is so it's now running but back into the PowerShell we hit Q or sorry not in that in the PowerShell but in the frame we hit Q and there goes it closes so I run it again Q in the frame boom closes now I'll leave one frame showing right now but I can put mini frames so frame one friend to same three and so on and we can run it again and what happens I've got a lot of frames here so when it move it it still is working right so I can actually change any one of these in particular to being a different color or it can do facial recognition on it or I can have all being different colors but but really for the purposes of a simple tutorial we're gonna just change one of these to a grayscale color so it's just gray equals to C B to dot C V T convert and then color with a capital C and it's going to take in the frame or the original frame that we put right here and then is going to do see v2 dot color underscore BG are two gray so this right here this option is taking a default of taking the color so it goes blue green red by default not RGB like you might think and then it turns it into gray so it turns it into a grayscale so I can just grab this and put it in here as gray and I'll still have four frames but now they're just gonna be slightly different so let's actually close out on one of them just with Q that should shut them all down and let's run it again and again I still have four frames coming in here now but now I've got that that black and white frame right through and that's it that's all we wanted to do here thanks for watching I hope you enjoyed this one I realized there was some basics but we want to get you started with somewhere with open CV and that that was the purpose of this now we plan on doing more things in open CV and Python so if you want to make sure that you get everything go to join CF e.com /youtube make sure you subscribe and hit that Bell to get everything and also let us know in the comments what you would like to see in the future because there's a lot of different areas of how we can go such as recording video or you've been taking some snapshots we're also even doing something like facial recognition so look forward to seeing you next time thanks for coming [Music]
Up Next

42:36
Deep Learning Image Classification Tutorial for Beginners (TensorFlow GPU)
@deeplearning_by_phdscholar6925
170K views•2020-09-21

12:54
Triumph of Orthodoxy Icon: Byzantine Art & History Explained
@BenCallan
2.1K views•2024-08-06

9:49
FastAPI vs Flask vs Django: Choosing the Right Python Web Framework
@TechWithTim
302.5K views•2024-05-26

1:42
Game of Thrones Opening Credits: A Cinematic Analysis
@gameofthrones
46.3M views•2011-04-18
Related Study Plans & Knowledge Roadmaps
Structured learning paths in General & Interdisciplinary Studies
general-studies
Elevator Engineering: History, Physics & Cities
01From Hoists to Safety Brakes: The Dawn of Vertical Lift
02Hydraulic vs. Traction: The Engineering Physics of Elevators
03Modern Speed, Safety, and Algorithms
+ 2 more learning modules
12h5 modules
Explore Roadmap
general-studies
Rubber: Material Science, History & Geopolitics
01Origins of Natural Rubber & Mesoamerican History
02The Chemistry of Natural Rubber & Vulcanization
03The Geopolitics of the Rubber Boom & Colonization
+ 2 more learning modules
12h5 modules
Explore Roadmap
general-studies
Containerization: Evolution, Logistics & Trade
01Ancient Trade & Bulk Cargo: Amphorae to Barrels
02The Industrial Revolution & Cardboard Packaging
03The Containerization Revolution: Malcom McLean
+ 2 more learning modules
12h5 modules
Explore Roadmap
general-studies
Textile Tech: Evolution, Labor & Global Impact
01Pre-Industrial Textiles: Handloom & Cottage Industry
02Mechanization: The Spinning Jenny to the Power Loom
03The Factory System & Global Labor Transformation
+ 2 more learning modules
10h5 modules
Explore Roadmap