
































Rust is a systems programming language designed to provide the performance and low-level control of C/C++ while ensuring memory safety through its innovative ownership model, making it ideal for applications requiring high performance and reliability such as command line tools, web assembly, networking, and embedded systems.
Learn Rust Programming: A Beginner Crash Course in 1 Hour
Added:Basic understanding of fundamental programming concepts such as variables, data types, functions, and control flow (loops and conditionals).
Conceptual awareness of computer memory, specifically the architectural differences between the stack and the heap.
Familiarity with using a command-line interface (terminal or command prompt) to navigate directories and run basic commands.
An introductory understanding of what a compiler does and how compiled languages differ from interpreted languages.
Advanced memory management in Rust, specifically focusing on Lifetimes, borrowing rules, and reference validation.
Exploration of Rust's unique Trait system and Generics to implement polymorphism and write highly reusable code.
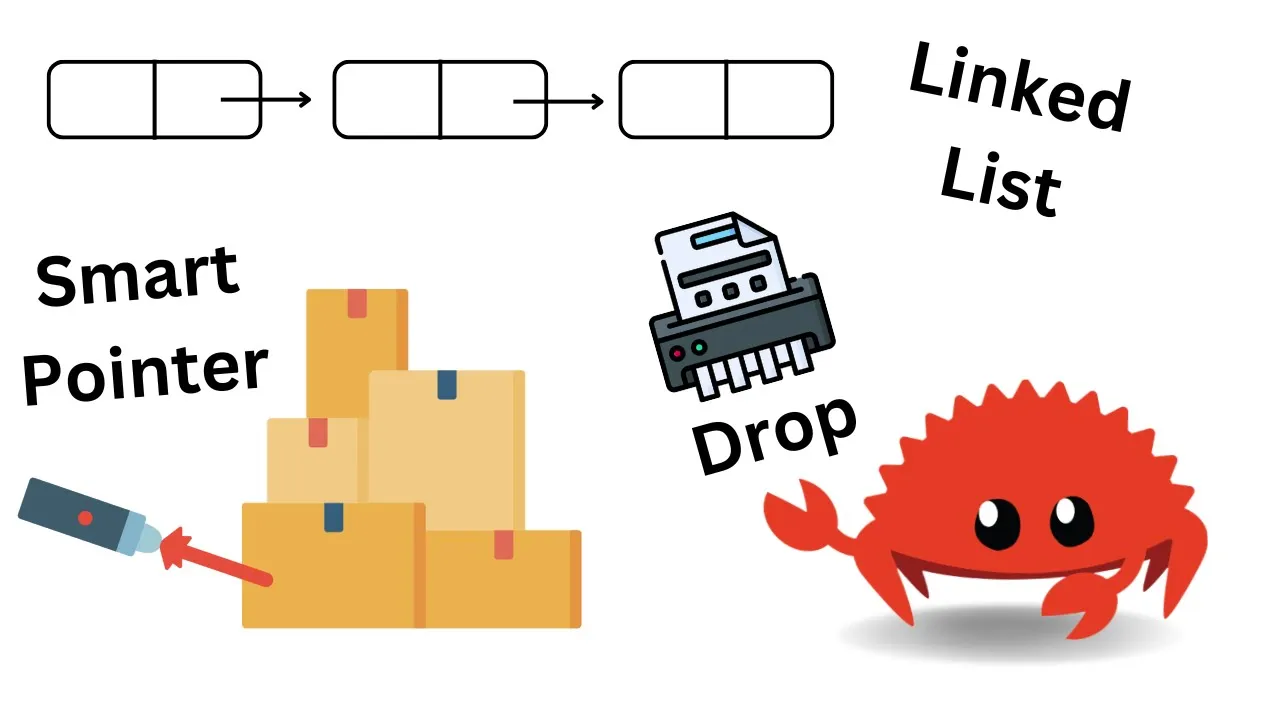
Utilizing Rust's smart pointers, such as Box, Rc, Arc, and RefCell, for complex data ownership scenarios.
Implementing safe concurrency and multi-threaded programming utilizing Rust's strict compile-time safety guarantees.
Building real-world applications, such as command-line utilities (CLI tools), system-level programs, or WebAssembly modules.
49.9K views1.2Klikes59:07Original Release: 2023-12-11
this is probably the most requested topic I have ever had so it's finally here your introduction to the rust programming language this video will be ideal if you have other programming experience but if you decided to learn rust for the first time I totally encourage you to follow this video as rust has a lot of unique approaches to things so what that means is you won't have to essentially unlearn a bunch of stuff from other programming languages now if you are coming from other programming languages throughout this video I will compare and contrast Ross to some of the other popular programming languages as mentioned Russ does things in a unique way and this is what makes Russ so powerful real quick before we get started I did want to mention that I am part of a software development course if you want to get the free intro course I'll leave a link down in the description below and that link will give you $50 off if you do end up buying the full course but you can get started for free and this will give you an introduction to the software development career talking about why you might want to get into software development what is software development and how to break into the care career this course is massive and the way it works is you get the software fundamentals course and this is the foundation once you complete this you get to pick a specialization so I created the backend development track so with the combination of the software fundamentals and one of these specialization tracks you will develop a significant amount of skill that will be very valuable in your software development career I also have a backend specialization intro course which will talk about the software industry but from a backend developer perspective and talk a little bit about a backend engineer's career such as what kind of things to study what to expect to get paid and how to find backend roles All of These intro courses are completely free on course careers if you do decide to give it a go use my link so that way if you do end up buying the course you'll get the $50 off this here is the rust website and you will quickly learn that rust was designed to build reliable and efficient software you'll get them low-level capabilities like you would expect from something like C or C++ without a lot of the dangers roduced from those languages rust has new approaches such as ownership and this will help you create Reliable Software while still having complete control and achieving really high performance so some of the things rust advertises is its performance reliability and productivity and it's useful for various things such as command line programming web assembly networking and embedded systems I believe rust has become very popular for new projects that might be a bit lower level so closer to the computer hardware but since it's a new project they have the opportunity to choose a new programming language compared to something like C++ and because of this rust has become very popular in for example blockchain technology and rust is one of the more popular programming languages for something called Web assembly which will allow you to use programming languages other than JavaScript for web development this unlocks unlimited potential for application development and rust is just a really great way to get started in this new realm of software development so if you're looking for something that will give you the control like C or C++ but have the safety and ease of use that you might expect from a higher level language without any compromise well then rust could be that language for you I will warn before we get started rust does have a bit of a learning curve so be patient as you go through this material there's some new approaches and paradigms you'll need to wrap your mind around but I'll do my best to make it super simple and easy to follow along so let's just get started where do you start with rust so there's two approaches to getting started with rust you can get started in the browser without installing anything just in a playground environment ment this is great for picking up the language without having to download or configure anything on your local machine so anybody can follow along with this video with that strategy so the official rust website does have a playground link or you can use other websites that will have a more IDE like experience repet is an example of a more sophisticated option so in here I can launch a rust program and give it some title such as intro and then create repple and from here I will have a rust project this is what's going to be more consistent with what what we do in this video so if you do decide to go this route I encourage you to find something that will allow you to have different files and a cargo.
TL file this will indicate a rust project and then we can run our code and you can see the output of our code right here hello world and there is an option for dark mode as well just to make sure we're all good here the other way to get started with Ross is to actually install it locally so there are install instructions on the Ros Lang website and this will adjust what it tells you to do based on your operating system so I'm running Mac and it tells me exactly what I need to do to install rust so I'm going to copy this and then from the terminal I will paste this and it should download rust for me now I've already gone through this process so it's going to potentially ask me to overwrite or say I already have it installed but it should be okay rust is installed now great to get started you may need to restart your current shell this would reload your path environment variables to include cargo's bin directory so cargo is the tool we're going to use to work with thrust so you can just go up to Shell and then say new tab or new window and then close out of the previous one now from here you should have the cargo command and I'm going to make sure that's lowercase this will give you a usage response giving you all the different commands you can use so cargo is kind of the all-in-one tool to work with rust it is the package manager it's your project manager where it'll allow you to run your code so you'll be using cargo a lot there's another command which is rust C and rust C is the rust compiler so cargo you can think of it kind of as a wrapper around rust C so it's going to use rust C for you but you can use the compiler directly but that might require a little bit more control on your end so you might have to figure out how to use that I'm going to use cargo for pretty much everything but I will show you how to use rust C real quick to take a rust file and compile it and run it I'll start by opening a code editor we're going to be using visual studio code and I'll put this in full screen and just for a real quick example we'll go to file new text file and just type exactly what I have here we'll say FN main two parentheses so Left Right parenthesis and then a set of curly braces as well and then here you'll say print line with an exclamation mark parenthesis and a semicolon inside of the parentheses we will put quotes and say hello world this is a very basic example of a function it's called Main and we're going to save this and just call it intro. RS for example where you save this is totally up to you we're just going to run it real quick and then we'll go into creating an actual rust project so a file is useful if you just have a little bit of stuff to do but if you're going to be doing more complex stuff you'll probably want to launch a project but just so you can see both of those capabilities I wanted to cover both of them in this video so once we have this we will open a terminal you can do that from Visual Studio code and say rust C intro. RS and it will create a file called intro which you can run with/ intro when we hit enter we get the response hello world that's the most basic example of how to execute this code we'll talk about what all the syntax stuff means and how to build on it in this video so don't worry about it too much right now I just wanted to show you how to get started really quickly more than likely you're going to want to create a rust project so we're going to create a project from the terminal you can put this anywhere it will create a new folder I'm just putting it in this new folder that I used to organize my different languages so I have this rust folder but you don't have to do that and we'll say cargo new and then give our project a name we'll call it first and you can of course name this whatever you want once you decide what kind of project you want to make so this is going to make a first directory so you can look into that to see what's there and you'll see that we have a source folder and a cargo. TL file most likely you're going to want to work with this inside of an editor so I'm going to open it in Visual Studio code so now this is what your editor is going to look like and we can open source and then main. RS main. RS is going to have your main function exactly like what we created earlier now the way you'll run this you'll notice for me is this run button will pop up and I can hit run by default that probably isn't going to happen maybe Visual Studio code will prompt you to install some extensions but if not you'll want to go search for those extensions and get them so we'll go over to the extensions section in Visual Studio code we will search rust and I have a few rust extensions not sure if you need all of these but I downloaded the rust extension the rust analyzer which gives rust language support and then rust syntax you can configure any of these by opening the command pallet and going to user settings I turned off rust analyzer inlay hints because they'll give you type pins for parameters and I just found it a little disruptive you can leave it on though if you want to try it out the rust default formatter should be set and then editor format on Save set to True with all of these settings what it should look like is I can go in here I can actually I don't want to do it within the string but outside of the string hit save and it will reformat this will help us keep our rust code very clean now most of the work we'll be doing will be in main. RS but I wanted to quickly go over what these other files are first up we have Target this is going to have are compiled code so you don't have to go into this and Tinker with it these are really just build artifacts and compiled code these will be generated when you compile your code so you can delete it and then when I run you can see that comes back the dotg ignore that's forg so if you want to set up a git repo it already has it set up to ignore SL Target the cargo. TL this is going to describe our project so you can have all the package information here and then any of the dependencies which we'll talk about at some point in this video the cargo. loock file this is just going to lock in any of those dependencies to specific versions but overall you don't have to worry about that file much either the main two you're going to be working with will be the cargo. TL file and the main. RS file so we'll keep main. RS open and we will close this panel and you see I have this run button but I also wanted to show you how to run it from the terminal you will say cargo run and this will comp compile and run your program so you'll see these three steps compiling finished and then running if we run it again you don't see the compiling section this is critical to understand when you're working with a compiled programming language you have your rust code and this is compiled into something the computer can understand the compiling process doesn't run your code you only have to compile your code once when ever there's a change but if we went and changed our code again we would need to recompile so to show you do this I will introduce the concept of a variable we'll say let name then an equal sign and then your name in quotes and then inside of this print line instead of world you can use curly braces and put in name so this is just a more complex program I'm not trying to make this super basic but I also want to ask if you are already familiar with the basics be patient with me as I go through some of them just so those who are still learning can figure it out as they go now when we run we should get the compiling step again because we changed the code now first thing to learn in Rust is that this here is not called an assignment while we are kind of assigning a value to a variable this is typically called a binding in Rust this establishes who is responsible for that memory and where that data is stored all that's done behind the scenes so for us it just looks like an assignment but just wanted to mention that terminology up front now by default variables are immutable so what that means is we can't go in here and give name a new value this will complain and you'll see the compiling error you can hover over it cannot mutate IM mutable variable name so the fix for this is to label it mutable with mut then we can change the value of the variable so when we run now we should get hello new and that is the output we get so let's take a moment to talk about printing data you see we have this print Ln exclamation mark and then some stuff in the parenthesis this looks like a function call it's a a little bit different technically if you hover over print line and you can do this throughout you'll see that you'll get information on the type and this is actually a macro which is slightly different macros can be made to expand into other things and macros are indicated by the exclamation mark so whenever you see an exclamation mark it's called a macro so the code for a macro will expand at compil time and be something else other than just what we have here that's all we really need to know about these macros we you don't need to understand what they are converted into but if you ever want you can right click and go to definition and get a better idea of what it looks like so it's doing a lot of more complex stuff behind the scenes this macro will allow us to pass as many arguments as we want to this call so we can substitute in values in the curly braces or an alternative structure you'll likely see is after the quotes you'll see a comma and then the variable you want printed this is going to give us the same result so it's also possible to substitute in multiple variables say we have a first name and then we'll create a last name as well and if we're not going to change these we don't need to label them as mutable so we'll just say let first and let last be Curry can't even spell my own name and now you could put in another set of curly braces and a comma and last and we'll change this one to first so we have hello first last and this doesn't give us any surprises but you might be curious when we should put the variable here versus when we should put it in the curly braces because you can just leave it in here like so and then you don't have to pass it as a separate argument the explanation of when to use which is if you're just using the variable Name by itself then you can put it in the curly bra but if you need to do any operations on it call any functions calculate any values or anything like that then you will need to have that as a separate argument for example we could say last dot to lower case and this will lowercase that string so what that means is the last name Curry is going to have a lowercase c as you'll see here this call would not work in the curly braces directly and you can see it's interpreting half of it as a string or something it's getting confused it doesn't know what to do with this so anytime you need to do anything extra you put it on the outside you'll also have the ability to do various formatting so for example you'll quickly learn about arrays let's say we have data and you can create an array with square brackets which will allow you to put multiple values in here if you just want to quickly see what the value of data is and print it out to the terminal without having to create any functions or Loops you can do that very easily inside a print line so let's clear this up we'll just have this string and I'm just going to keep it simple and put curly braces passing data now it's going to complain by default because it doesn't Implement some trait and we'll talk about that in a little bit more detail later the main thing I wanted to mention is that you can format this with colon question mark and this is how you say you want to format it in debug format debug format is basically a way to display the data in the terminal but you're not going to get any custom control of the way that data is showing up so it's not really ideal to be used for terminal based applications instead just as you're going through development and you want to see some data you can use coing question mark so when we run this we should get a pretty nice representation of of this array and you can see that output right here so we've already learned a lot of interesting things we learned about variables how they're immutable by default we learned about macros we learned about passing data to the print line macro either in the cly braces or as a separate argument we learned how to invoke functions to change that data such as lower casing it we learned how to create a basic array and how to print that data to the terminal very easily these are all some of the basic things you'll need to do and as we start learning all the different things we can do we can start building more complex applic so what would be a good ideal first application to build I would say a terminal based guessing game this is what is actually recommended by rust and I'll show you that in just a second but basically this will give us practice with a lot of different things it'll give us practice with variables reading input from the user Some Loops and output so here on the page we are looking at the Rust book this is kind of like the rust documentation however it's formatted like a book and this is actually a physical book you can buy but the entire thing is available as an ebook so you don't have to buy it you can just go and read it on the rust website and we've pretty much already gone through the introduction the getting started hello world and how to use cargo a little bit and then they jump right into applying all of this information to programming a guessing game and when you watch this video I want you to understand everything that this book is talking about so we're going to go through a similar exercise this will basically show you how the language is used before you jump into all of the details so that you might not understand how to use within a larger context so we've already set up a new project we've talked about printing data now we're going to create a game and this is going to be an example used throughout this video we will take breaks throughout to talk about major Concepts the first major concept I want to talk about is strings because there's a little bit you need to know about strings when it comes to working with them in Rust so here in this example we have two strings first and last and then we're print lining the first name this is one way of working with strings and it Works totally fine this is called a string literal and the easiest way to remember literal is you can think you're literally typing the value in the code and this is going to be a constant value that's in the executable that's one type of string so if you just have a static string that you want to refer to in your code this is exactly how you can do it however there's an alternative approach to Strings and that is if you need a more Dynamic string that you could add to or get from the user read from a database where you don't know what that value is ahead of time that's when you need the other type of string so I want to show you how to do that now to create the other type of string it's going to be a capital S string and then colon colon from and then in from you will put the typical string value so End quotes Caleb and this is going to create an instance of the string type so you can hover over this and learn more about the string type it's the most common string type that has ownership over the contents of the string it has a close relationship with its borrowed counter part the Primitive Str Str which is pretty much what we'll have with the other type so if you hover over this you will see ansign St Str and the way you read this is an an sign means it's a reference an Str Str is you could say a string slice to elaborate on this just a little bit more when we manually type out the string like I mentioned a string literal that is a string that's going to be in the executable and we can reference that location that's where the and sign comes from so we are referencing that string and that's a specific type of string called a string slice so this is what I'm talking about these are some of the things that you have to kind of wrap your mind around when you get started with rust meaning there's a bit of a learning curve but once you get it figured out you're going to love rust and it's going to help you write a lot more secure safe programs so now we've seen how to create both of the string types we first have an instance of string capital s and then we have a reference to a string slice and sign St Str those are the two main types just as a quick reminder use the string type capital S if you don't necessarily know the value ahead of time or it might change or you need to get it from user input or you just need a little bit more Dynamic if you're just hard coding a value then the simple type of string will be fine such as what we did here for the last name so let's build on that to learn how to get input from the user if we're getting input from the user we don't know what that string value is going to be ahead of time so instead of saying from and then passing in a value you could say new and just keep it empty so we're creating a string but that value is going to be empty at first so let's say let name be string new and then when we print name we should basically see nothing and when you run that you'll just get an empty string in the terminal but but now we've set it up so that we have a variable that we can modify based on what the user can type in so if we wanted to ask the user for their name we would print line and just say hey what's your name now reading from the user going to look something like this we're going to use the io library and then invoke the standard in function so at the top of our code we will say use standard IO and yeah it's pronounced standard not TD come on guys and then we'll Define a string variable so we can store that name then we'll say IO Doon Colin standard in and then dot read line buff is basically short for buffer and it means hey where do you want to store this string we'll say name and this is going to give us an error which I'll explain right now it's going to complain because we can't change name it says it's expecting a mutable reference to string but but instead it found string so let's talk about what a mutable reference is and how to create one when we get a reference to data it's a new way that we can access that data that's what a reference is the data is going to be owned by the name variable but for this function call that function is going to need access to it so we're going to give it a reference now a mutable reference will allow the function to change that data so in order for the function to change the data we have to one pass it a mutable reference and two the original variable must be mutable so the first step is to label the variable mutable with mut and then pass immutable reference with an sign mut now we can give this person a greeting hello name welcome we will test this out so we'll run it says hey what is your name we'll say Caleb Curry hit enter and it says hello Caleb Curry comma welcome and you'll see that this is on the next line which is a little strange and that's because when you type in your name and hit enter the enter keyword is the new line character and that stays in the string so we actually need to remove that all we need to do is attach another function called to name so I'm going to take name from these curly braces put it outside and say name. trim and you can do trim or trim end it's really just the end here but we'll just use General trim which will do the front and back so running this now what's your name I'll type in Caleb Curry and it says hello Caleb Curry welcome so that's how we get user input and output it back removing the new line character now there is something I wanted to call out and that is this warning here unused result that must be used all this is saying is that this could error out and you're not doing anything to address that we're not going to worry too much about errors right now but a quick fix to this is to say hey let's just expect that they type something in correctly I know that could break but let's just do that and then we'll say expect and then an error message if something goes wrong error reading input and this actually makes sense because basically if they don't put their name in correctly the program is not going to be able to proceed so we'll just end the program and say error reading input this is a very simple way to address this problem but it's not the best way because in theory we could keep looping until they enter a name correctly and so forth but to keep this simple for right now we're just going to say expect which is basically us saying hey we know this be an issue but we're just going to end the program if it is an issue now we're going to update our code to take a number instead of the user's name I just wanted to show that as an example but if we're going to be building out a guessing game we need to retrieve a number now we're still going to start by retrieving it as a string there is technically a difference between a string and a number but this is the easiest way to get started then we'll learn how to convert from strings to numbers and this is exactly what the book is doing so basically we're going to ask for a number create a string for it and then read that value and print it back this is almost exactly what we're doing we just did the name. trim because we had text after so it was showing up on the next line which is a little weird so let's start by asking the user for a number so we'll say hey guess a number and then we'll just change the variable name just so it makes sense we'll say it's num that's what we'll read into and then we'll just say hey you guessed this numb you guess passing in numb and I guess I'll just keep it on the outside with trim so this should work pretty much exactly the same way but instead of a name it's now a number I guess a number we'll say six you guess six next up we're going to take a look at crates now crates is usually the word to describe other software that you can pull into your software and use you may also hear packages so packages crates often used interchangeably although technically they're slightly different as a package can contain multiple crates but you'll often just hear these used interchangeably either way we're going to download some external packages these packages are going to be retrieved using the cargo tool and it will come from a website crates.io so you can find a bunch of different software packages from crates.io for pretty much probably anything you need in your entire life crates.io is pretty much the same thing as the npm registry if you're coming from JavaScript or piie if you're coming from python basically just a way to take other rust code that people make available for use one of these that we're going to take a look at is called Rand so you can find it on this website if you want although you don't technically have to go to the web page all we have to do is say cargo add Rand and it'll add it to our project so we will open our terminal and say cargo add Rand and this will allow us to Generate random numbers for the user to guess and it's going to do a bunch of junk you can look through and see what other dependencies it might have but the main thing you need to know is that this will be added to your cargo. TL file under the dependency section so that's where you display all your project dependencies now if you do it the other way around and you take this value and then add that to your dependencies how do you then go and download that well it'll actually be done automatically when you say cargo run and you'll see it's also compiling all these other packages that we downloaded and then our program runs this will also modify the cargo. loock file which will have the exact versions for these packages so scrolling through here you'll see the dependencies for the r ROM package so these were things that we didn't explicitly install but are required in order to use random if you scroll through here long enough you'll find Rand and you can see that this is the exact version and where that came from and the dependencies generally you will want to include the lock file in your repository even though technically it could be regenerated so if I were to delete this and run our code you can see it creates a new cargo. lock if you're sharing this code across Ross multiple computers or across multiple developers it'll just help ensure that everybody is on exactly the same versions that way we don't have any weird issues when we retrieve dependencies somebody might get a different version than you and then the code doesn't work or compile as expected so now I want to talk about how we actually generate a random number obviously make sure you have the Rand dependency installed and we'll go over to main. RS and we will need to have a new use in this list so you can find usage throughout the book or you can actually take a look at the crate as often they will have usage examples as you can see there's a very simple usage here with a link for more examples on how to use this the rust Rand book so let's go to getting started and you can get more details on how to get started so sometimes you have to hop around or look at the source code repo usually there might be a read me but there's a very simple example in the Rust book so we're going to go off of that basically we'll create a variable secret number and this will come from Rand and then thread random number generator gen range one up to 100 so that's pretty much what we're going to use let's see if we can write that out though we'll say use Rand and let me close out of this just to get a little bit more screen space here Rand colon colon RNG there we go so that should be imported in our code now and then we still need the variable for reading from the user but we can get the correct answer somewhere in here as well with creating a new variable we will now say let correct and this will come from Rand colon colon thread random number generator RNG dot then gen range then we can pass in a Range which in Rust looks like one number dot dot and then another number such as 10 and you have the option to put an equal sign if you don't put the equal sign it'll be up to 10 but not including if you do put the equal sign it'll include 10 so this could be one all the way up to an including 10 which which seems like a good place to start and then for development sake just so we can actually check this we're going to print this value so we can guess the correct answer without having to try tons and tons of times so we will create another print line in here and we will just pass in correct and we'll just say correct colon so let's test this out make sure it works and we get a random number you can see that the correct is one so then when we are guessing we might specify one to 10 that way the user actually knows what to guess let's test it out we run and okay we got correct one again which is a little concerning let me just check this again okay we're good correct is eight guess a number 1 to 10 and then they could guess and let's just say we guess really good and we guess eight then we win so we need to figure out how to check that value and tell them that they win or lose so we built the code to generate a random number and the code to read a number as a guess from the user now what we can do is compare these values to see if they are the same there's a few different approaches to doing this we'll start with what you might be familiar with if you came from another programming language which would be an if statement within rust they are called an if expression but it's a very similar idea then we'll show an example using match this is going to be slightly different than an if expression it's a different approach to checking against certain values so after we get the number from the user we will say if and a difference between rust and other programming languages you will not use parentheses here so you'll say something like correct being equal to to the num that they guess that would actually probably be a better name I'm going to change this to guess just so it's a little clear what we are referring to and then inside of curly braces this is what happens if this evaluates to true so if they are the same value whatever's in these curly braces will happen so we'll say print line you guess the correct number and then you can say else and anything in here will happen if it's false so we'll just print line you guessed wrong get out of here so let's try this we'll say cargo run and it's complaining that there's no implementation for integer comparison with a string so this comparison you have to compare the same type so after we get the value from the user you might think to come down here and say guess. trim. parse and thenex and then we'll give an error message error with parse and this is on the right track but this is not just going to modify guess this is going to give us a new value so we'll need to reassign this back to guess but the problem is guess is defined to be a string so if we hover over guess we'll see that it's defined as a string rust is statically typed and the types for variables will not change throughout the execution however it is possible to create a new variable with the same name as this variable up here within the same scope and this will just Shadow over the other value so we'll just say let guess which will be of type u32 and then all of this stuff so now when we say correct being equal to guess it's going to refer to just this guess variable not this guess up here so these are two separate guesses they just happen to have the same name and if that's confusing to you you can of course use a different variable name no problem with that at all but now we should be able to run this and check to see what happens when we get a correct answer one change we will need to make is this here is using trim which is for Strings and now we're working with a number so we don't really even need that line since you can see what you've entered in really easily so we'll just say cargo run and the correct answer that was generated is seven so that's exactly what we're going to guess and it says you guess the correct number if we try again and guess the wrong number it's going to say you guessed wrong get out of here so you can see that this if statement is working the way we had expect but now I want to build on this and say what happens if we guess too high or too low so for that we can use use an else if which will look pretty similar to this but we'll just add in another condition here so let's say correct is less than guess and then else if correct is greater than guess and then the final section could be the else which is optional to have but it makes sense in this scenario because you could be less than the correct answer greater than the correct answer or equal to the correct answer so we'll just change the print lines here so if correct is less than guess you guessed too high else if correct is greater than guess you guessed too low and then else the only other possibility is if you got it correct so we'll just change this to say you guessed correct and that's pretty much it this should allow us to have every possible option so if we guess too low we get you guess too low if you guess too high we get you guess too high and then if you guess just right you get you guessed correct now you may be curious why it's called an if expression instead of an if statement and it's because we can easily return values from the if expression meaning we can use it as part of a binding or a larger expression so imagine with me for a second instead of print lining these values directly here we actually wanted to assign it to a message variable and then print it later we might create a message variable up here so we could say let mutable message and say string new then you would assign this inside of the condition body so we will remove the print line here and say message is you guess to high and this will need to be string colon colon from passing in this value and then later on you could then print message so say print line passing in message and then you can do the same idea for this section and this section as well and this is a pretty common pattern you might see in other languages but you can actually simplify a lot with rust because you can return values so instead of saying string new here we could just use the equal sign and then use the if expression and then all you will need to do is remove any statements and just have the literal value so it'll look something like this and when you take that semicolon off you're saying hey this is not a statement this is just an expression this is what we essentially want to return it'll be the same idea here so we will remove these parentheses and say string from pass in that value remove the semicolon and same thing down here so string from and remove that semicolon so now this is going to work exactly the same way but it's more rust like using the values of the if expression now when you do this the entire thing needs to be as part of a statement so we will end the entire thing in a semicolon hopefully that is all clear and then we can say cargo run and it should work exactly the same way so let's try three here and we get you guess too low so now that we've got a pretty good understanding of how an if expression Works inside of rust I want to talk about an alternative option called match now this is also an expression meaning you can use it to easily return values match is probably more similar to a switch statement in other languages it's basically where we're going to say what we're looking at the variable and then a bunch of different patterns that we could match against if the value matches any of those patterns that is the section that'll be executed let's take a look at what this looks like because we'll actually be able to replace this entire if section and we'll go off with the docs here which gives us an example using this match and a call to guest.
CMP compare now traditionally when you have a compare function and it's zero it means they are equal if it's less than it means your guess was too small and if it's greater than then your guess was too big so I will apply this example to R code here but I still want to show you this being used as an expression so I'm going to keep this binding however because we are binding directly we don't need to make this mutable and we can just use string literals so this is going to simplifier our code a lot so we can remove all of the concept of the uppercase string and everything should work exactly the same way now we can easily add in the match so we'll replace if Al together and we'll match against guess.
CMP and this will take one argument if you look at the signature you will see that the argument we need to pass in is the address of a u32 you can ignore the and self that's just because this is a method meaning this value is actually guess so we don't actually have to pass that in it's basically provided implicitly because this is a part of guess so we just have to worry about other which is a reference to a u32 so we'll say and sign for creating a reference and we will look at correct now let's remove all the concept of the if expression so now we just have these values and we'll start making the different arms of the match you can think of arms as different cases but I think they're typically called arms and rust and real quick before we start typing in the different match arms I will want to close this curly brace so that we have matching open and close and then we can just create these different arms so the first one will look like ordering colon colon greater and then an arrow and in a comma pretty similar thing for the rest of these so ordering cool in cool in less and then an arrow comma and then ordering equal Arrow you guess correct comma Now ordering will need imported so you can hover over this and click Quick Fix import ordering and then from standard compare and that'll bring it up here to the using section then when you save those errors should go away let's test this out to make sure it works the same way if we type in five it says you guess too high and you know the other ones probably work as well but let's just test them out you guess too low and you guess just right now I want to touch on loops and rust we want this code to execute over and over until they get the correct answer there's various approaches to looping and rust I'm going to show you an interesting one which is just called Loop and it just starts an infinite Loop and then it's your responsibility to break out of this Loop so we can just have the loop going on until the user gets the right answer so this is our entire main function so far we can make this Loop by first deciding what code we want to Loop for example we don't need to generate a correct number every single time we only want to generate a number the first time basically as soon as the program starts we generate a random number and then we start the loop asking the user for a guess of the number until they get it right so to create a loop we will say Loop and open a curly brace and then close the curly brace after we're done this will just go on forever until we invoke break so when would we want to break out of this Loop well if they got the correct answer we would say break so we can do that within this equal section so to do this we can surround it in curly braces which will allow us to have multiple things happen here so the first thing we can do is we could print that they got it right and then we will break so I'll put that break there so I don't forget and I'll say print line passing in this message and then end in a semicolon now because it's a statement so this is essentially how we would change our code to Loop until this section is matched let's try it out see if I'm a little crazy or if I got this right so cargo run correct is one let's try a few numbers you guess too high let's try negative one okay that just broke it don't do that that's because we're working with unsigned integers so we'll talk about dealing with with errors in just a second let's try this again correct is eight so now we can try say five you guess too low nine how is nine an invalid digit so I was tinkering with this and I did figure out what I was doing wrong and that is a little misunderstanding of read line which appends it to the specified buffer not replaces it so I was thinking we just needed to create guess once and that was fine because we would basically just read a new value from the user replacing whatever's in there but turns out it will actually append to it so whatever was previously in there is still there so what that means is we just need to move this line into the loop and then every single time this Loop runs we will have a cleared out guess so now when we run this we can try various numbers 1 3 5 and then eventually two and we get it correct now one other little change I'm going to make because we're doing this equal just slightly different than the greater and less I don't see a lot of value in having the separate message Mage variable of course you can keep it if it works for you but I think I'm just going to print line directly so I'll just print line and then do that here as well and this will allow me to just completely remove the message variable so I don't have to worry about it and think of like those two different scenarios either assigning a value or printing now it's just printing let's take a moment to talk about error handling we have this section here in the book we're going to talk about what this is doing and create a better user experience for the user of our game once we figure this out you have a pretty good understanding of some of the fundamentals of rust now it's a never ending journey of things to learn but this will get you going in the right direction basically when you say parse and I'm going to remove this expect and you can take a look at the signature and you can see that this gives us a result now a result is an enum so an enum will give you one of multiple values so if you go to the definition of result you will see that it has the first first option which is okay and then the next option which is er which is the error so basically when you're given a result back you can then check if it is of the value okay or if it's of the value error this will allow you to give more specific messages back to the user this is in contrast to what we were just doing which was expect and this is basically saying we don't care about that enum this could work it could not work doesn't matter to me the consequence of this is that if you run and expect and something goes wrong it will panic and to panic is an unrecoverable error so when we say expect we're making our code easier to understand and write but we're basically just ignoring any possible errors and just saying hey something went wrong sorry try again later now that we understand a little bit more we can do something more custom so let's again remove expect and then we can remove this result too we just typed that out so we could go to the definition and then you will match against guess and there will need to be two arms in this the first one being okay and then what goes inside of okay will be the actual value pars so we'll create this as a parameter we can call it num and then in this scenario all we will do is return num this return value can be given back to guess so let's just make this mutable and then we'll say guess equals match the other arm we need to worry about is ER for the error and then we can call that error E and in that situation we could give a message back to the user I'll print line and say error with parse try again and then we can invoke continue now continue is a keyword kind of like break but instead of breaking out of the loop entirely it's just going to end that iteration and go to the next iteration of the loop basically skipping anything after for this comparison and going back up to reading a new value now when you do this you're going to have to be a little bit more spe specific on the types now I think we could actually clean up this code a little bit because this is going to still return a result and we're making this a u32 so we could just do this all in a single call so I'm going to cut this and paste it right here then we can remove this and just say let guess it's saying we need a type annotation so this is going to be a u32 and then we end the whole thing in a semicolon a little bit of jumping around there but I think you get the idea one of these is going to get matched so either it's going to be okay or it's going to be an error and then whatever is returned from parse will be given to the parameter here so num will be the value or an error and you can output the error if you want in curly braces like so now that's not something you would generally give to the end user but we'll show that for an example and let's say we put in -1 error with parse try again invalid digit found in string so I guess that's not too bad it's not like you know getting an entire stack trace or something like that and you can see it now asks us again so we could try 10 and the loop continues this will keep going until we get it correct so we'll say five and we got it correct wow so surprising now let's go in and actually remove this line or we could comment it out so that we don't get the correct message displayed in the terminal and now we have to actually try to guess the number so one and now you could go to the higher numbers oh too high maybe somewhere in the middle seven and there we go was seven fastest way to do this would be to start in the middle because then you could effectively cut the list in half each time and that's pretty much it we've gone through all of the code that you get in the chapter 2 of the Rust book but we explained it in a lot of detail and in video form so hopefully we were able to get a better understanding than just reading through so what I'm going to do now is put this in a git repository so that way we can have all this code online for you to access and if I make any future changes you'll be able to see that code as well so it creates a g repository for us by default so we can say get status and see all of our untrack files so we'll just say get add dot get status now we can see there's added get commit Fancy Pants guessing game hire me Google please okay we now need to put a remote destination for this so then we'll come back and then push our code to that destination so let's go up to GitHub from here will say new repository and we will call this rust guessing game create repository and then I will copy this code to push my existing repository so delete that and paste and there we go so now you should be able to access this code at github.com calb Curry SL rust guessing game at this point you have a pretty good understanding of the fundamentals of rust so congratulations but there's still so much to learn so we're going to continue to build on these principles while I don't want this video to go on forever there's just a few more things I wanted to show which is the use of collections specifically a vector a vector is a dynamic collection it will allow us to store multiple elements and we can add elements to it as we need we will also get a bit more experience with loops because we'll be able to Loop through the data inside of this Vector this is a natural next step for our game so what we're going to do is we're going to have the user guess multiple numbers at the beginning we'll have the user say how many numbers they want to guess that's how many numbers we will randomly generate and put inside of the vector and we will Loop through until the user guesses all of them then we'll be able to display all of the correct answers at the end so we'll start with the existing code we already have oh it's a little big so we will start with the existing code we have which of course you can get the latest commit from GitHub so the first thing we're going to do is we're going to ask the user how many numbers they want to guess this is how many they will have to guess correctly before they win the game so we'll say let how many be and we'll say string new because we're going to read this from user input and then we'll do something very similar to this right here so we will C copy and we will paste and we will put this into how many which means this will need to be mutable and we will need to ask the user so they know what to do so we'll say print line how many random numbers do you want to guess then we could parse this to get the integer version so this can be called num guesses and this will come from how many parse and we also want to invoke trim before parse to remove any wh space and then we can just say expect and we'll just keep a general error here error reading input we're not going to worry about matching and everything like we did earlier let's see n guesses I'm assuming we just need to specify the type so let's give this a u8 type which is an unsigned integer of eight bits so that should give you you up to like 255 guesses if you want more than that then you can make it u32 have fun now that we have the number of guesses from the user we can create a vector to do this we will say let mutable correct and this is going to come from VC colon colon new now we will no longer have a single correct so we can remove this here but now we have to figure out how we can do this for every single value in the vector for this many times however many numb guesses is to do this we can create a new Loop and this is going to be a for Loop which we will give a range and this is how many times it will invoke this Loop so for example for I in and then we'll create a range say from0 dot dot up to num guesses then the body of the loop so for each iteration I will refer to whatever number we're currently at in the range starting at zero and then the next duration one two 3 all the way up to numb guesses but not including the number of guesses so that way we're always at size minus one for the index which is really important for collections so we don't go outside of the balance and now what we can do is generate this random number and push it into the vector by saying correct dot push passing in this call so that'll randomly generate a number and push that into the correct Vector then just to take a moment and make sure we're on the right track let's print line and we will print the correct values and we will need to use a debug format to easily print that collection now we're probably not going to be able to run this just from code later on now that we switch to a vector so what I want to do is I just want to comment out everything else for a moment so we can make a multi-line comment starting it here on 19 and then going down all the way to the bottom and ending it here now let's test what we have so far look say cargo run how many numbers do you want to guess let's say we want to guess 10 numbers and it generates a vector of 10 numbers it's pretty cool now the I here is not actually used in this Loop so if you had to use the index for something you could create that variable but if you know you're not going to use it you can just use an underscore this will just make your code more clear so whoever's reading this immediately knows we don't need to use that variable in this Loop so we've talked about a few different Loop structures so far we've talked about Loop which will just go on forever until you break out we talked about four which will allow you to run a loop a certain number of times based on a range and now we're going to create another type of loop which is a while loop and this will continue to run as long as some condition is met so let's take a look at what that's going to look like we're basically going to keep running this Loop until the user gets the correct answers we can do this by just keeping track of how many they've gotten correct and then once that value is equal to the total number to guess then we can end the loop so you could probably structure this just using Loop but I think a while is going to be a little cleaner here so what we will do is we will have them guess the number and let me remove the other side of this comment but I want to actually put this inside of the loop so I'm going to move the loop start up here so that way every time they get a correct answer they know that they're on the next section and before we change this to a y Loop we will create a variable to keep track of how many they've gotten correct so we'll say let mute guesses made and we'll set this to zero then we could say while guesses made is less than the number of guesses so num guesses this will continue to run and then instead of breaking out of the loop we could just increment how many they've gotten correct so we could say guess is made plus equals 1 and now we have another problem here where we're passing correct but we switched correct to a vector so it contains multiple values where compare only wants a single value so we need to access a single value inside of that Vector we do this by passing an index in square brackets so if we wanted to grab the very first thing in the vector we would passes zero and then the next thing one two and so forth so we could basically do this automatically for us by passing in guesses made which will start at Value zero and then every iteration increment by one now this is going to give us another complaint so you'll see when you hover over this it'll say something about you being unable to index by u8 when you want to pass in a variable as an index like this you will want it to be of Type U size this is another integer type you can look up more about that if you wish so you have two options you can go change the variables to type uze and that should work or you could just say as uze here and cast it from a u8 to a uze that should work fine as well so let's try that we'll say guess is made as U size and that should have got rid of all of our problems we just have an unused import so we can remove that don't remember what I was using that for but we don't need it now so let's see if what we got works at all we'll say cargo run how many numbers you want to guess let's say five we'll say s and then 9 and then we'll just get it right so eight and it says you guessed correct and then continues to ask us for a number now I actually want to make one small change and I know I just changed this but I'm going to change it back I want to actually bring this hey guess a number outside of the loop because I find it a little distracting saying it over and over again so what I'm going to do is instead down in this final case check to see if guess is made is less than num gu gues we can give them a different message and say let's now try the next number so outside of the loop and you can track this up to see where the Y Loop starts we could just say thanks for playing and then what I wanted to do is show you one more thing which is how we could use another type of loop to iterate through the elements of a collection so you could say four item in and then we'll say correct and print line and you can pass in the the item here so that's going to be each individual value in the vector and then you can just say the correct answers were and it should it rate through printing each one this is just an alternative to using the debug format which just allows us to have a little bit more control of How It's displayed or what we do with each item so hopefully that improves the experience a little bit you can close out with contrl c and we'll run how many numbers do you want to guess we'll say five let's just get them right so we say seven you guess correct let's now try for the next number four 10 and then it was five and seven so five and then seven scroll up just a little bit and you can see it says you guessed correct but it does not say let's try for the next number then the loop ends and it says thanks for playing the correct answers were and lists out each one on its own line then the last thing you got to do is just remove the printing of all the correct answers at the beginning so that's right here I'll just comment that out and then you could customize this to have the user say what difficulty they want so instead of just having from 0 to 10 it could be you know 0 to 500 but that's on you if you want to keep building on this so I will commit this with a message multiple guesses and push this to GitHub that's my crash course on the basics of rust there was a lot of information here if you were new hopefully it was a very good intro and gave you what you needed to start learning more in Rust and I'm not just going to leave you there I'm actually planning on releasing another rust video there's a whole world that we didn't even Explore there's so much more with Collections and iterables and closures as well as an entire plethora of things to talk about when it comes to ownership references storing things on the stack in the Heap custom structs and how to implement traits there is a never-ending amount of information here which can be overwhelming I know but also very exciting because as you continue to learn more rust will feel more comfortable and it'll just become like second nature so please please if you enjoy this video hit like And subscribe and check out the next rust video that's going to continue from this point and teach you some more of those advanced concepts thank you so much for watching and I will see you in the next one all right bye
Up Next
74:10
Intel x86 Architecture, Assembly, and Applications Part 1 of 2
@OpenSecurityTraining
21.6K views•2012-04-14

11:23
Solving the Heat Equation with DeepXDE and PINNs
@Dr.Mohammad_Samara
8.5K views•2023-07-17

4:55
HTTP Requests Explained: GET, POST, PUT, DELETE
@codecademy
103.1K views•2021-10-07

19:25
Enigma Machine Mechanics: WWII Encryption Explained
@JaredOwen
13.2M views•2021-12-11
Related Study Plans & Knowledge Roadmaps
Structured learning paths in Computer Science
computer-science
Building a Rust Debugger: ptrace, ELF & DWARF
01Systems Programming Foundations & Rust
02Process Control and the Linux Ptrace API
03ELF Layout: Inside Linux Executables
+ 3 more learning modules
38h6 modules
Explore Roadmap
computer-science
Container Runtimes: Namespaces, Cgroups & Go
01Linux Systems & Go Programming Foundations
02The Core of Isolation: Chroot and Filesystems
03Linux Namespaces: Process Isolation
+ 3 more learning modules
32h6 modules
Explore Roadmap
computer-science
Building a CHIP-8 Emulator: Rust & CPU Basics
01Computer Architecture Foundations (Bits & Bytes)
02Rust Programming for Systems Development
03CHIP-8 Virtual Hardware Specifications
+ 2 more learning modules
32h5 modules
Explore Roadmap
computer-science
Building BitTorrent: Go, P2P & Concurrency
01Go Fundamentals & Concurrency
02Networking Foundations & P2P Architecture
03Bencode Parsing & Torrent Metadata
+ 3 more learning modules
26h6 modules
Explore Roadmap