


















Total internal reflection occurs when light travels from a higher refractive index medium to a lower one at angles exceeding the critical angle (θc = arcsin(nT/nI)), causing all light to reflect rather than refract; this principle enables fiber optics for internet communication and creates mirror-like surfaces underwater. Lenses form images by bending light according to Snell's law, with three key ray-tracing rules: parallel rays converge at the focal point, rays through the focal point emerge parallel, and rays through the lens center remain straight. The thin lens equation (1/do + 1/di = 1/f) describes image formation, where positive lenses (converging) form real or virtual images depending on object position, while negative lenses (diverging) only form virtual images. Lens power is measured in diopters (P = 1/f), with applications ranging from reading glasses to camera optics.
Total Internal Reflection & Thin Lens Optics Explained
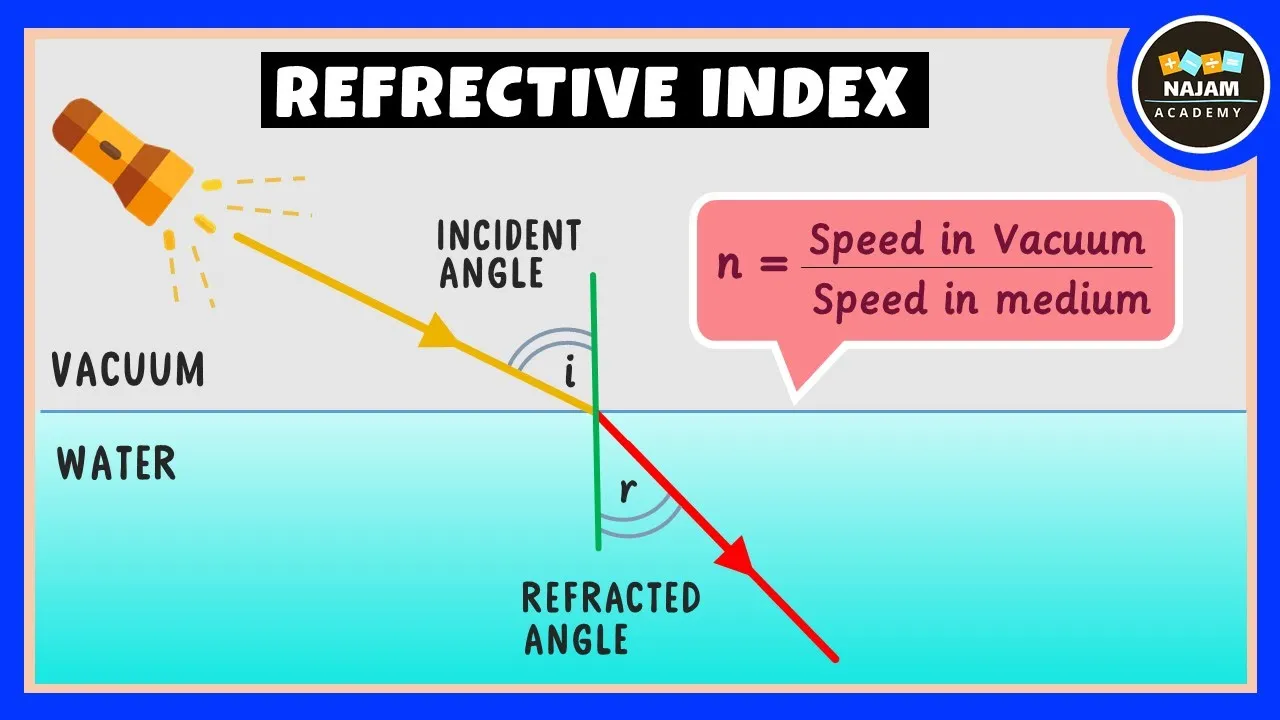
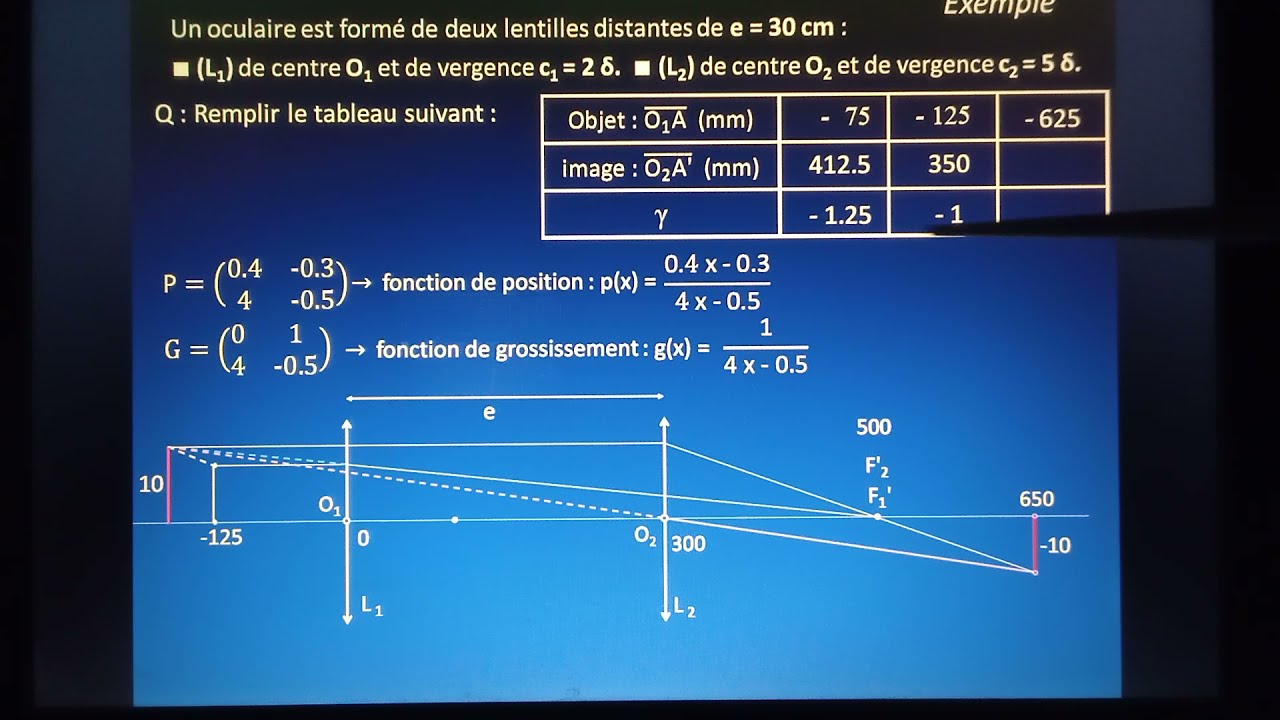
Added:okay let's talk about this idea of going from higher index to lower index and let's talk about something called total internal reflection so in our pool when we had an interface and we took let's say we take a flashlight okay and we take it underwater with us here's our flashlight and we're going to shine it towards the surface we know that that light ray is going to Bend and it will Bend away from the normal so there is the surface normal and if this is water and this is air out here then this thing will Bend away from the normal so it bends like that okay but what happens when I start to increase this angle in other words let's move my flashlight up to this position and now let's shine that ray at the surface and I'll try to do it in a different color where is the light going to go well it again bends away from the normal and eventually it's going to go right along the surface and if I keep going if I keep moving my flashlight up eventually I'm going to get to a position where the light never leaves the water okay I can't bend any further away from the normal and so all the light does that and that is what's called total internal reflection now total total internal reflection only happens when you go from high index to low index and it happens when that transmitted ray equals 90 degrees okay so let's see if we can write this out mathematically we know that Snell's law holds and I sine theta I equals and T sine of theta T an I in this case was water okay theta I is the incident angle but at a very special angle called the critical angle the transmitted ray is at 90 degrees okay what is the sine of 90 degrees is a 0 or is 1 it's 1 so we get n I sine theta C equals and T since we're just multiplying by 1 and now you can identify what this critical angle is theta C is equal to and T over N I and then I better move that over because we got to write the arc sine in there arc sine of NT over N I if this is water and air let's calculate what theta C is and you guys punch it into your calculator so we're going water-to-air theta C is equal to arc sine of NT remember this is what it's transmitted into which is air so that is 1 and I is what it came from which is water 1.33 so what is the arc sine of 1 over 1.33 Sean do you have a number for us forty eight point seven five degrees okay so this orange one which is that the critical angle is forty eight point seven five degrees anything higher than that namely the pink one you don't have the light exiting the water it all stays inside the water and this is a really fun experiment to try but next time you're at you know a swimming pool and you can get the water pre flat and come go underneath the water and look across the pool and what you'll see is if you look straight up you can see the sky as you start to look at an angle further away at that water in Erfurt you got to do this under water of course as you start to look away you can still see the sky still see the sky and then when you get to this magic angle forty nine degrees you can't see the sky anymore okay the water surface becomes a perfect reflector and all you see then is the other side of the pool it becomes a perfect mirror and it's sort of interesting when you do that in fact if you lay on your back underneath the water and you hold your breath so there's no bubbles disturbing the surface and you look straight up you'll see a cone of sky above you and then outside of that cone it will be a mirror you will see the bottom of the pool it's really kind of a fun experiment to try where else do we see total internal reflection one place you see it is in fiber optics ok fiber optics are pieces of glass not water of course but pieces of glass and you want to keep light in the glass how do you do it well you come in at a very shallow angle such that when it hits the edge of the glass it all stays inside the glass okay and it just bounces back and forth all the way down the fiber-optic length and this is of course the backbone of the internet this is how you're seeing me right now a lot of the signals that you're seeing me are coming through fiber-optic cables right now but there's another example of total internal reflection and it's sitting right in front of us okay this piece of glass right here has total internal reflection going on right now around the edge of the glass there are strips of high power white LEDs that LED light is staying inside the glass it's bouncing back and forth on the edges of this class and it's just going back and forth all the time it doesn't come out of the glass because total internal reflection keeps it inside the glass unless you do something to the glass unless you put something on the glass then it will pull the light out so for instance if I take my hand and I put it right here all of a sudden you can see that light get pulled out okay and in fact if you look closely you can probably still see some of my finger prints on the glass or you take a pen and you write on the glass and that ink will pull it out and this is called frustrated total internal reflection you've added something to the surface which pulls that light out of the glass and now you can see it let's talk about lenses now now that we understand Snell's law and this idea of the index of refraction how does this apply to lenses well let's think about the following picture let's say I have a piece of glass and I curve it like so okay what's going to happen to the light that goes through this piece of glass all right we know that a light ray that is normal to the surface doesn't bend it all right if it's normal to the surface theta I is zero theta T is therefore zero so it will continue straight on through and head off in that direction okay actually that's a solid line in there what about a light ray that comes in near the top of the lens well this glass is curved right there and so it's going to bend down just a little bit and then it sees another curve on the other side and so it's going to bend down a little bit more and it takes a path like that a light ray on the bottom side sees a curve it bends a little bit there and then it bends more and it all goes through like so each ray obeys Snell's law if you design this glass just right you can get all those rays to come to the focus F and this of course becomes a thin lens okay so it's kind of cool when you think about it because glass you can make from silica right you take a bunch of sand purify it a little bit melt it down carve it into this shape and also an it does something very special to the light that goes through it and now you can use that glass to help people see better or make a telescope or make a microscope you can make all these really cool elements just by carving this glass appropriately alright this is what a lens looks like there are a bunch of different types of lenses and let's identify a few them so this is curved on the first side curved on the second side and therefore it is called by convex okay if it is curved the other way on the first side and curved the other way on the second side then it is called by concave remember cave is the one that you can crawl into so if you can crawl into this cave its concave by cohn by concave but they don't have to be curved on both sides you can just have it curved on one side and so if I curved it on one side like this this is called Plano convex plain on one side convex on the other and likewise if I do it the other way then it's called Plano concave okay and these are four of the typical lenses there is a table in your book figure 23 31 that talks about a few other kinds of lenses now if it's a thin lens then we are not worried about the thickness of the lens we don't have to really worry about what's happening in the interim it really only depends on what's happening out here at the focal position once you get into advanced optics you start talking about thick lenses where there is a substantial amount of glass in between the two curvatures and then you have to worry about the propagation in between them whenever you're designing an optical element like for a 35-millimeter camera you really have to take into account the curvature and the thickness of the glass itself and if you have a nice 35 millimeter telephoto lens there will be something like 30 40 elements in that lens okay you'll have all these different lenses one after another and the goal is to create a good image and it's not easy to do that with just one lens you need a whole bunch of lenses to get color correction to get rid of spherical aberration all sorts of those problems okay so let's talk a little bit more about the lens and how we might form images with the lens okay we're going to go back to our three rules that we had before and see how to apply those let's start with a simple picture here's our optic axis let's put our thin lens right here and that thin lens has a focal position F on either side and it's symmetric okay if it's a symmetric lens then you have symmetric local positions and this is part of being thin lens all right let's put our object out here somewhere how about right there that's our object and now we want to figure out where the image is okay how do we form that image to do that we go back to our three rules and it's the same three rules that we use for the mirrors except now we're going to use a lens all right rule number one is parallel rays go through the focus same as we had before - like we said is really that one in Reverse raised through focus goes parallel okay and the last one number three is raised through the center do not Bend same rules that we have before we got to identify where the center is right we knew where it was for a curved mirror was the center of that radius of curvature but here for a thin lens the center is in fact right in the center of the lens okay all right so let's see how to do this we've got our object we need to draw some of these rays the first one is parallel ray goes through the focus okay parallel ray comes in it's going to go through the focus it's not going to bounce off this glass and go back to this focus it's going to bend and go through this focus okay so this is Ray number one ray number two is going through the focus it then goes parallel all right going through this focus it then goes parallel this is Ray number two and then finally and we'll draw a little separator right there finally we have rule number three which is Ray's through the center do not bend now we already have an intersection point so you really only have to do two of these three but just for kicks let's draw the third one to make sure it works out Ray's through the center do not Bend that's right number three okay and these are reasonably straight that's where the object generates an image we know that the base of the object is still going to be on the optical axis and so it is inverted in this case it looks like it is d magnifying and that is where the image is located okay so those are the three rules for figuring out where that image is located and it takes a lot of practice and as you move this object in and out it gets a little bit harder and harder to do this is a real image in other words if I put a piece of paper there I can form an image on it or if I put a piece of film there or a CCD array then I can form an image right there okay it is inverted upside down and it is also in this case it is D magnified but it doesn't have to be it depends on where the object is located as we'll see when you move the object in closer it can get magnified now this idea of it being inverted is sort of interesting what that means is when you have a camera and you have a lens and you're looking at a tree the image on the film or the CCD array is upside down okay but guess what this is exactly how you view the real world your eye is a lens when you look at a tree the image on your retina is upside down the whole world that you're seeing around you is upside down your brain has figured out how to not really worry about that and correct for it but on the retina the back of your eyeball everything is upside down it was if you block half of a lens what happens to the image so this is kind of a tricky concept but let's think about the problem we have a lens here we'll put our object right here and now we're going to form some image over here just like we drew last time now when you follow the lens rules for determining where the image is we just drew three rays but of course there are rays coming off of this object in every single direction okay there was essentially an infinite number of rays coming off the object so a few of those are going to come to the lens I drew for rays here that are coming to the lens all four of those rays came from the tip of the object which means they all go back to the tip of the image okay our lens rules just applied to one of those okay then maybe when it goes through the focus that's our second one if it goes through the center that's our third one but there's really an infinite number there so if I have four rays that are going to form my image that means that the CCD array or the piece of film is going to pick up that much light but if I block half of the lens all right if I take an aperture and I just cut those out then these last two are gone nothing changes with the image except its brightness there's less light going to form the tip of the image and so it is less bright but it's still located exactly in the same spot still roughly with the same Christmas it's just less intense all right good question so here is our optic axis here is our thin lens okay this is called a converging lens it tends to converge the Rays to a particular focal point it's also called a positive lens all right so by convex converging positive those are all essentially synonymous so let's draw the focal point F for this lens and now let's do the following let's take our object and let's put it inside the focal length so we brought the object all the way through the focus and now sitting right there okay this is not hard to do right if you take an object and hold it right up next to your eyeball that's essentially the same idea how is this going to form an image and where is that image let's follow our rules it says that rays that are parallel are going to go through the focus that's number one it says that rays through the focus are going to go parallel well that one's going to be a little hard to draw because if I come from this focus it's going to miss the lens entirely okay that would be our Ray number two but we're not going to worry about that remember there's only two of the three rules that you need the last rule I'm going to erase that one just for clarity the last rule was raised through the center do not bend all right we can draw that one rays through the center do not bend that's number three so where's the image well it's where those two rays meet that looks like a problem right it looks like they are separating they're not getting closer together but that means somewhere back over here it looks like they were coming from the same point and so all we have to do is extend this dashed line back take this one and extend this dash line back and they meet right there this is the object this is the image member - lines mean virtual rays it's not real light over here it's just where you perceive it coming from so if you're sitting over here looking at this you see these rays 1 & 3 coming from this point over here so is this a real object a real image or a virtual image it's obviously virtual in other words I can't take my piece of film or a piece of paper and form an image on it there that doesn't make any sense it's upright okay not inverted because it's also pointing up above the optic axis and it is magnified so this is a way to see objects very magnified is to put the object very close to the lens and this is what you do with a magnifying glass ultimately we see it works with a microscope okay that's what the image looks like in this case alright so where do you get positive lenses well you go to the drugstore and you buy a pair of these these are my reading glasses and these have a particular power associated with them and the power of a lens is given by P and it is one over the focal length okay this is one over meters and this is a very special unit called a diopter so if you have glasses your prescription will say something like plus three what does that mean it means plus three diopters so if your prescription says plus one that's the power what does that mean in terms of the focal length that means it has a focal length of one meter in other words these have a focal length of a little bit less centimeter it's a round plus one I think it's one and a half okay what it means if you have a focal length of one meter if you go outside and you image the Sun onto the ground that image will be one meter away and if you go up or down with your glasses then the thing will go out of focus so where it's the smallest spot where it's a crisp sharp image of the Sun is one meter away okay likewise you can use these for magnifying glasses right I use them for reading put them on like that but if I start to pull them away from my eyes you should see my eyes getting bigger and bigger and bigger okay can you see that right about there they're pretty bit looking pretty funny how's that looking Sean okay you can use these as magnifying glasses obviously if you have reading glasses and they are positive prescription then they are converging lenses you can use these to start a fire but if it's a negative lens it's a diverging lens you cannot use those to start a fire there's another thing that's really cool to do with reading glasses when you go to you know Walmart or you know CVS any place that sells reading glasses the reading glasses are really very spherical okay the lenses are spherical if you cover them up with tin full tin foil and poke a small hole in that tin foil it's just like we talked about with cutting out some of the Rays the image will still be there but it will be less bright and so I have used these before to view partial solar eclipses so when the moon goes in front of the Sun and blocks it partially right you still can't look up straight at the Sun but you can image it onto a piece of paper and if it's too bright on the piece of paper then you just put some tinfoil on your glasses to cut out part of the glass and that will make it dim so you can try that buy a pair of plus-one reading glasses put tinfoil on and poke a hole in the tinfoil and then image it onto a piece of paper one meter away you'll see an image of the Sun and you can see a sharp cut out where the moon is it's kind of a fun little experiment okay that's the power of a lens let's talk about negative lenses and image formation negative lenses or diverging lenses we drew a few pictures of those but how do those form images so here's our optic axis a negative lens looks like this okay it is a biconcave lenss and now let's see if we can figure out where this object will form an image and now the reason that you call it a negative lens is because the focal length is in fact negative it means you still have two focal points but they're flipped all right so rule number one still applies light coming in parallel is going to go through the focus but it doesn't go through this focus it goes through that focus okay but it doesn't bounce off this thing it's not a mirror it refracts and it refracts out at an angle that looks like it was coming from the focus okay and this is why you call it a diverging lens because it diverges those rays away from the optic axis that is Ray number one I'm not going to draw ray number two but ray number two would go through this focus it gets a little complicated to see it all just going to go straight to rain number three because rate number three always applies rays through the center do not bend all right here comes my array through the center that is array number three where those two rays meet is where the image is located and it looks like they meet right here and this is our image now it's made up of one real ray but one virtual ray which means it's a virtual image it is clearly pointing upwards so it is upright and it is clearly smaller than the object so it is d magnified here's the special rule about negative lenses diverging lenses they only form virtual images you can never form a real image with a negative lens and so if you're stuck on a desert island and you have a companion that has glasses you had better hope that those glasses are positive lenses because you can use those to start a fire not negative lenses if they're negative lenses on their eyeglasses they're not going to help you start a fire at all and the thin lens equation is exactly the same as the mirror equation it's the following one over D o plus 1 over di equals 1 over F there's only one difference which is the sign of these items so the way they're measured is the following this is our focal length F we've drawn a positive focal length F because it's a positive lens when we put our object out here that distance from the centre of the lens is do and this is a positive number okay when do is to the left it's a positive number we know that it's going to form an image over here somewhere okay we can use our ray tracing techniques to figure out where that is that distance from the lens to the image is di and in the case of a mirror member it was positive to the left and negative to the right but for a lens this is also positive okay so all the numbers in this picture are positive 1 over DL plus 1 over di equals 1 over F all right let's see how that applies for a real example let's say you want to take a picture of a tree and we're going to say that the distance from your camera lens to the tree is 2 meters and let's say that the focal length of your camera is pretty short maybe it's about like that so that's 10 centimeters okay what is di equal to all right how do we do that well here's our lens equation we can just take that equation and rewrite it and then we can solve for D I so we have 1 over D o plus 1 over D I equals 1 over F all right so 1 over D I equals 1 over F minus 1 over DL and I can rewrite this slightly if I multiply up by DL multiply up by F divided by the common denominator and now I can flip it so what does di it's equal to F do divided by do minus F and now we have all those numbers 10 centimeters is of course not SI units so we need to make that SI units what do we get we get zero point one times do which we said was 2 we're going to divide by 2 minus 0.1 and so we get zero point two divided by one point nine and so di is very close to zero point one but it's a little bit bigger than that Sean can you punch in those numbers I'm going to say it is 0.11 that's my guess let's see what it turns out to be zero point two divided by one point nine 10.10 five all right so we'll clear that up point one zero five very close to the focal length of that lens okay and that was with a tree there was only two meters away anything further away the image distance gets closer and closer to the focal length of the lens and this is why point-and-shoot cameras or your smart phone camera can basically have things in focus very far distances out because it's all at an image distance that's nearly the same as the focal length of that little lens okay all right and the thin lens equation is exactly the same as the mirror equation it's the following 1 over D o plus 1 over D I equals 1 over F there's only one difference which is the sign of these items so the way they're measured is the following this is our focal length F we've drawn a positive focal length F because it's a positive lens when we put our object out here that distance from the center of the lens is do and this is a positive number okay when do is to the left it's a positive number we know that it's going to form an image over here somewhere okay we can use our ray tracing techniques to figure out where that is that distance from the lens to the image is di and in the case of a mirror member it was positive to the left and negative to the right but for a lens this is also positive okay so all the numbers in this picture are positive 1 over D L plus 1 over D I equals 1 over F all right let's see how that applies for a real example let's say you want to take a picture of a tree and we're going to say that the distance from your camera lens to the tree is 2 meters and let's say that the focal length of your camera is pretty short maybe it's about like that so that's 10 centimeters okay what is di equal to all right how do we do that well here's our lens equation we can just take that equation and rewrite it and then we can solve for di so we have 1 over D o plus 1 over di equals 1 over F all right so 1 over di equals 1 over F minus 1 over DL and I can rewrite this slightly if I multiply up by do multiply up by F divided by the common denominator and now I can flip it so what is di it's equal to F do divided by do minus F and now we have all those numbers 10 centimeters is of course not SI units so we need to make that SI units what do we get we get 0.1 times do which we said was 2 we're going to divide by 2 minus 0.1 and so we get zero point two divided by one point nine and so di is very close to zero point one but it's a little bit bigger than that Sean can you punch in those numbers I'm going to say it is zero point one one that's my guess let's see what it turns out to be zero point two divided by one point nine 0.10 five all right so we'll clear that up point one zero five very close to the focal length of that lens okay and that was with a tree there was only two meters away anything further away the image distance gets closer and closer to the focal length of the lens and this is why point-and-shoot cameras or your smart phone camera can basically have things in focus very far distances out because it's all at an image distance that's nearly the same as the focal length of that little lens okay all right kind of cool right
Up Next

Derivation of Lensmaker's Equation | Optics Tutorial
@AKLECTURES
41.4K views•2014-01-22

21cm Hyperfine Transition in Neutral Hydrogen: Radio Astronomy Basics
@AaronRobertParsons
12.4K views•2011-10-13
Understanding Electromagnetic Waves: EM Spectrum, Energy & Momentum
@yoprofmatt
4.5M views•2014-08-06

Entropy and the Second Law of Thermodynamics Explained
@veritasium
27.5M views•2023-07-01
Related Study Plans & Knowledge Roadmaps
Structured learning paths in Physics