


















Accurate pH measurement requires understanding that pH is a logarithmic scale where each unit represents a tenfold change in hydrogen ion concentration, and proper electrode care including regular calibration with appropriate buffers, correct storage in suitable solutions, and appropriate cleaning methods are essential for reliable measurements across diverse water applications.
Mastering pH Measurement: Accuracy, Calibration & Electrode Care
Added:The fundamental chemical definition of pH, including the logarithmic scale and the concentration of hydrogen ions (H+) in a solution.
Basic principles of acid-base chemistry, including the definition of acids, bases, and how chemical buffer solutions resist pH changes.
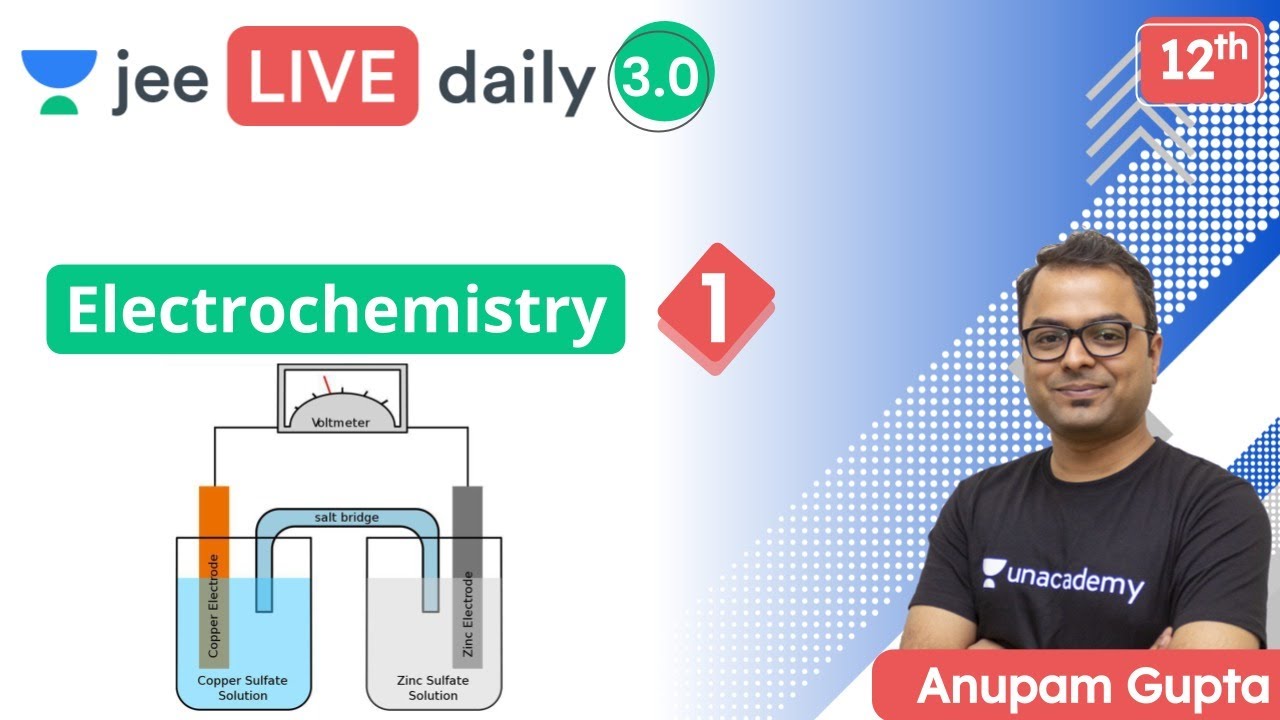
Introductory concepts of electrochemistry, specifically how potential difference (voltage) is generated between reference and measuring electrodes.
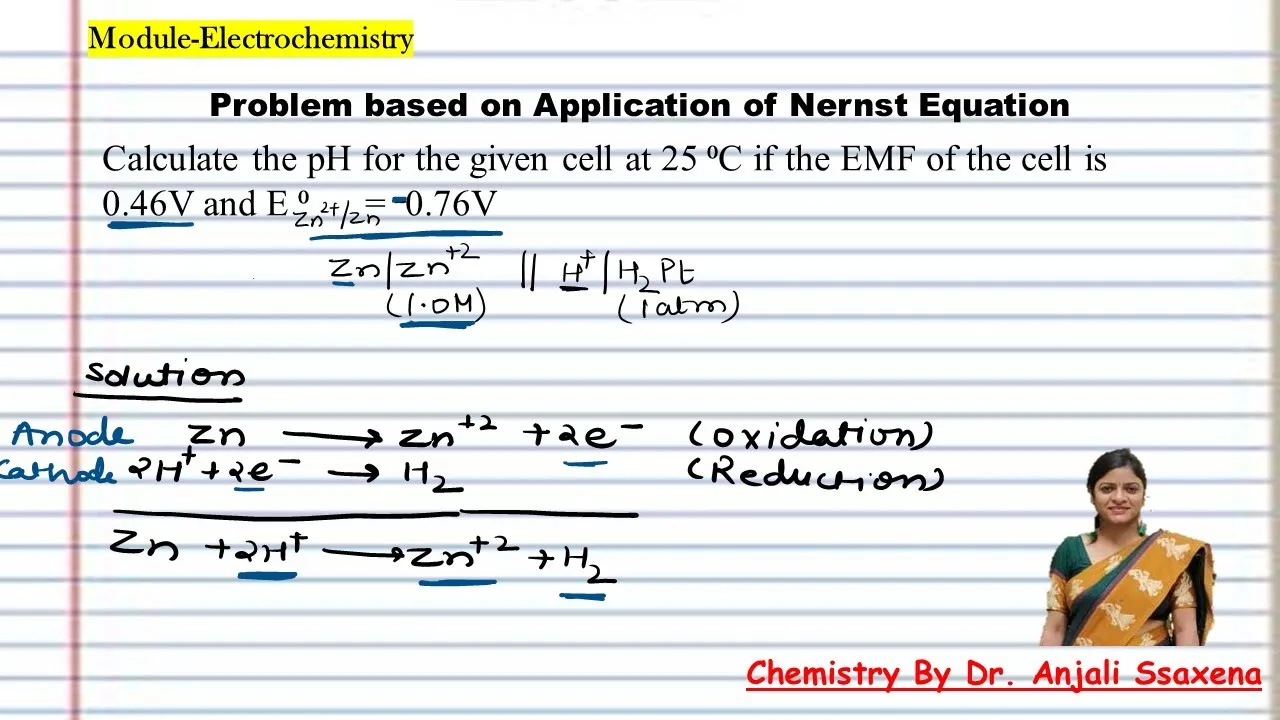
Mathematical application of the Nernst equation to understand how temperature variations affect pH electrode slope and calibration.
Advanced troubleshooting and diagnostics of electrode degradation, including calculating slope percentage and resolving reference junction clogging.
Implementation of pH monitoring data in real-world environmental science, such as assessing ocean acidification or monitoring municipal wastewater treatment processes.
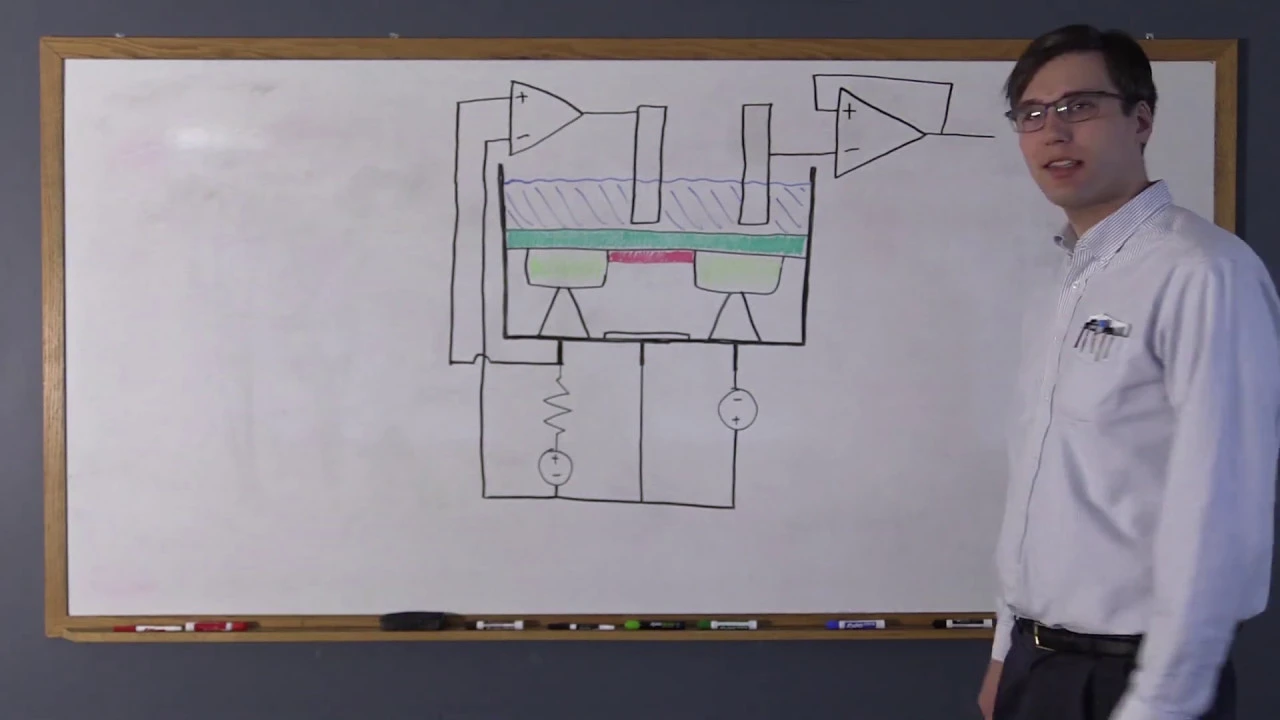
Exploration of specialized pH measurement technologies, including Ion-Sensitive Field-Effect Transistor (ISFET) sensors and non-aqueous pH testing.
1.6K views12likes1:14:57Original Release: 2025-06-25
Management is a delicate balance for water municipalities. Essential for maximizing operational efficiency, protecting infrastructure, safeguarding aquatic ecosystems, and ensuring safe drinking water. The consequences of mismanagement are severe. Systemic process breakdowns, costly repairs, and irreparable damage to our communities.
So, how can we assure our approach reflects cutting edge best practices?
Today we'll hear from Jim Huntley, global project man product manager with Hawk, along with two sales development managers, Jim Burke and Mike Feldman.
Three specialists with a combined 80 years experience in process pH management. Together, they'll explore key strategies for optimizing pH technology, share techniques vital to maximizing the accuracy and stability of electrodes, evaluate the benefits and drawbacks common to mounting styles, and outline best practices for cleaning, calibrating, and storing electrodes. I'm your host, James Crosspane with Water Online. I'd like to thank you, the audience, for attending today's event.
This is live, so we do encourage your participation. I'll be holding a Q&A with Jim H, Jim B, and Mike following their presentation. So, please share your questions with us using the Q&A box on your screen. Even if we can't address them all, I'll pass along any we miss for followup after the event. This question box can also connect you with me if you run into any trouble, but please try refreshing your browser first as it will fix most common issues.
Finally, today's event will be available on demand. You'll receive an email with a sharable link shortly after we conclude. Now without further ado, let's begin today's presentation. Welcome Jim Huntley.
Everyone for joining us here today from around the globe. We have jammed as many tips into this webinar as possible. We want to thank you uh for being here and want you to be s we really want you to be successful with your pH measurements.
We've been innovating in water analysis for over 90 years. And more specifically for this audience, we've been in pH manufacturing through Hawk and Great Lakes Instruments for over five decades.
We can help you with your industrial and municipal customer bases here. And for both process control improvements and your EPA methods, we do have a global reach here both in manufacturing and engineering. But we also then also have a direct sales service distribution network for you to use. So if you need help here online versus you need help in your location, we're here for you and we can assist you. Headquarters are in Lovelin, Colorado.
There's a lot to cover today, so we're really going to just jump into it uh with really four or five big ideas here.
One, looking at the methodology of pH, some best practices for calibration, handling, and cleaning, typical problems to be mindful of, and application challenges around temp, pressure, and then sensor and mounting considerations.
With that, I'm going to turn this over to Jim Burke to kick it off.
Thank you, Jim, and good morning everyone and thank you for spending part of your day with us today. So, why do we measure pH? Well, there's many reasons, but the number one reason is because we have to. The pH of any water-based solution has a significant impact on its overall quality and characteristics. For example, in the paper making industry, the quality and color of the final product is dependent on the pH of the water used in the process. In the automotive industry, pH of the paint uh dictates how well it adheres and its durability over time. In the food industry, uh for example, canning fruit, fruit canners, uh the pH of the water that's used in the rinse has an impact on how easily the skin comes off the the fruit. drinking water distribution and boilers, the pipes uh there p the corrosion uh is a big uh impacted by the pH of the water flowing through those pipes. Uh and in wastewater uh the living organisms in the receiving waters are highly impacted by the varying pH levels of the waste water being discharged.
And of course in the human body uh our bodies regulate the pH of our blood to a very tight window of a tenth of a pH as that would have drastic impacts on a lot of different things going on in our body. So pH is one of the most commonly measured analytical parameters there is.
But there are many unique challenges to achieving an accurate and reliable measurement. We're going to spend the majority of our time today talking about these challenges. But first, I'd like to spend just a few moments reviewing pH theory and how pH is measured to set the stage for the rest of our discussion.
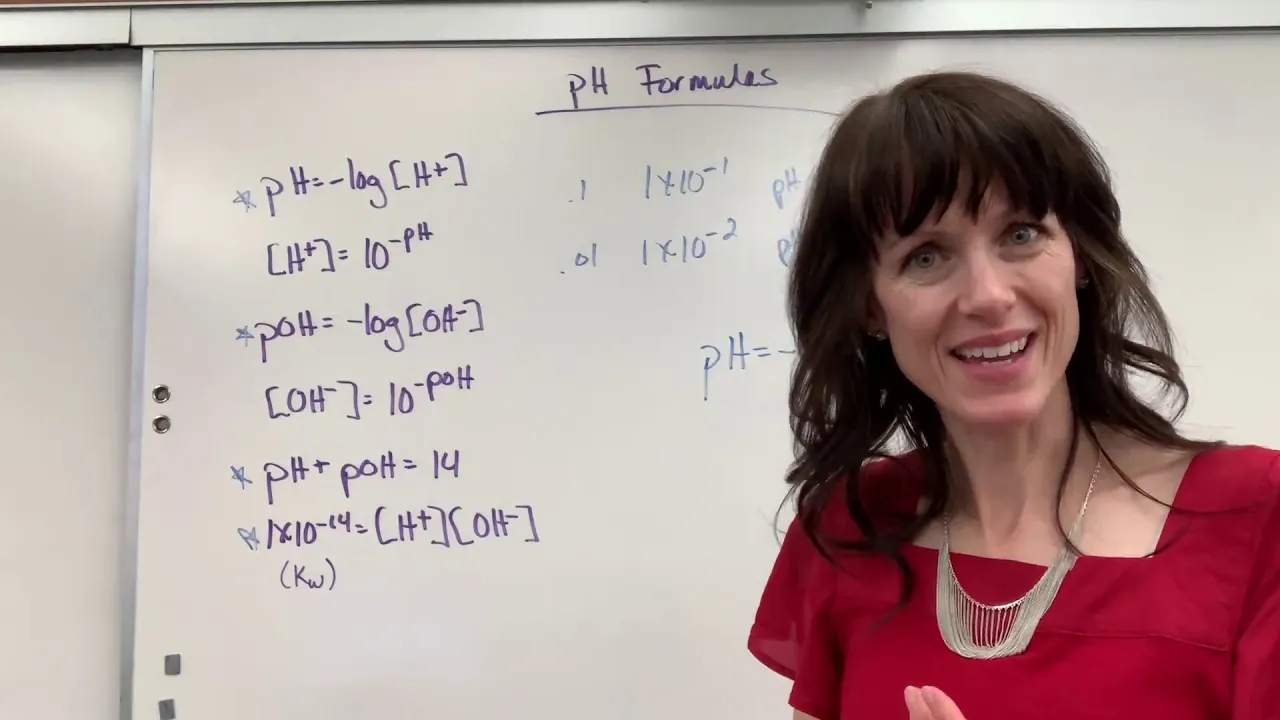
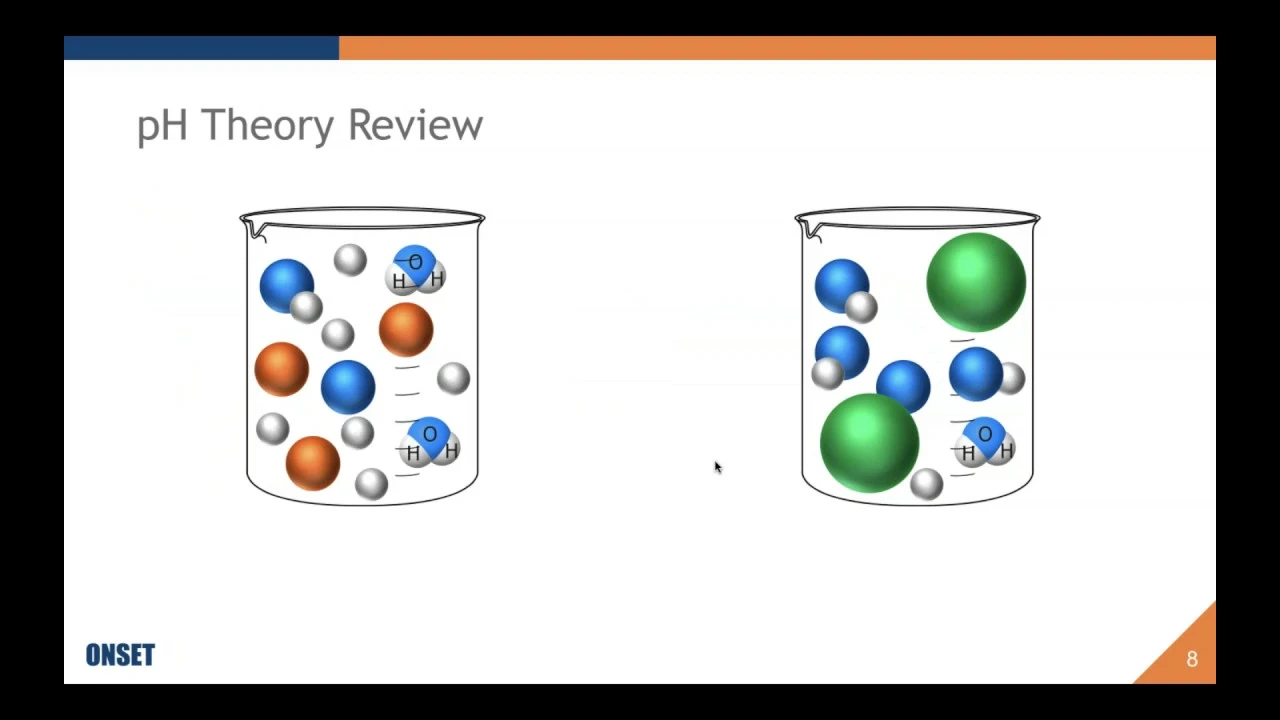
So, pH is the negative log of the hydrogen ion concentration and water dissociates into hydrogen ions and hydroxil ions. And the addition of those two concentrations of the hydrogen hydroxil ions always adds to adds up to 10 to the -14 power.
So it's important to remember that pH is a logarithmic scale and that means that one pH different on on the scale of pH1 difference is a t-fold difference in the ion concentration that's there. So in other words 3/10en of a pH change equates to doubling roughly the amount of ions that are present. So on a meter you could see a tenth of a pH change, but just remember that that's logarithmic and it's a lot bigger difference than it appears on a on a regular scale.
So here are some commonly uh exposed things that that people are exposed to.
Uh and you'll notice that things lower on the pH scale tend to be more friendly to the human body. things that are higher on the pH scale uh tend to be a bit more uh detrimental to us. And below you can see uh for receiving waters uh fish are very um exposed I guess to different changing pH values and you can see small changes in pH result in detrimental effects to to those things.
So that's why everybody has uh pH on their discharge permits if you're sending water to uh natural receiving waters out there.
So the way that you measure pH uh really is evolved through the nurse equation and as you can see highlighted in red hydrogen ion concentration and temperature. Uh those two variables with some uh some constants will relate to a voltage. Uh and that gives us uh 59 molts per pH unit due to the the nurse equation.
So over a little over 100 years ago uh it was discovered that a special formulation of glass was sensitive to developing a potential across across the glass that was equivalent to pH and that that 59 millles per pH unit from the nurse equation was how was the ratio of the hydrogen ions. So that's what's used today. Uh that's the most commonly uh used measurement technique to measure pH. There's a few others out there, but they don't have the ability to cover the broad conditions and things that it's exposed to and still measure accurately.
So, even though there's a lot to keeping a glass electrode uh in good working shape, which we're going to talk about here as a big part of our discussion today, uh it it is sensitive and uh it is the most common way to to go about measuring pH. Basically, pH sensitive glass is a fine layer of glass that has that have holes in it that are the same size as hydrogen ions. So, when you put that in a solution uh that's water-based, those hydrogen ions will migrate to the to those holes and fill those holes at a rate of that's proportional to the hydrogen ion concentration in the water. And pH sensitive glass is made up of dozens of fine layers of this glass with water and aquous solution in between. And basically it transfers that voltage by the same forces repelling uh to go all the way to the internal solution. And then we put a silver silver chloride wire on the inside and a potassium chloride solution. And then we just pick up that voltage and transfer that back to uh an analyzer to to get pH measurement.
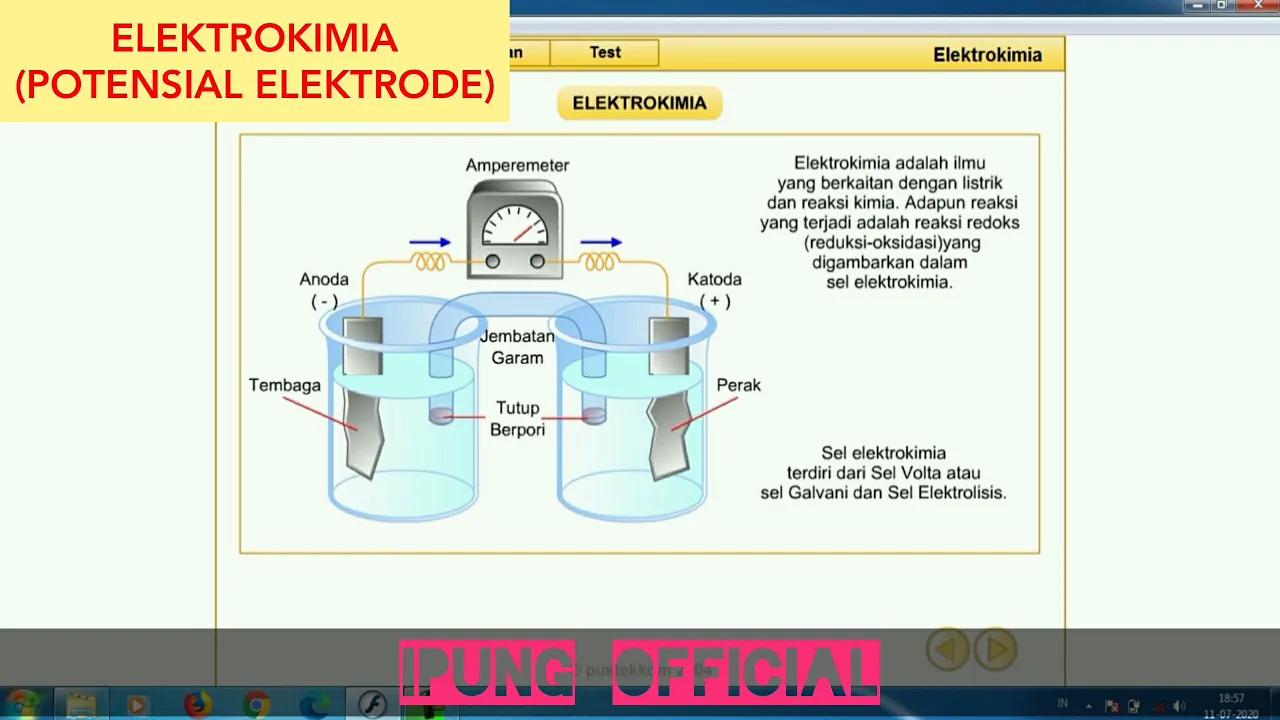
So for for knowing about electricity, you can't just hook up a a meter to a wire and then measure its voltage. you have to create a circuit that has current flow. So in every pH sensor you need to have a reference electrode that the goal of that reference electrode is to uh complete the path uh for the current to flow but stay the same voltage so that when an analyzer is measuring the voltage change and comparing it the changes are only due to the hydrogen ion concentration changing not the reference electrode. So this is a typical reference electrode. It's very similar to the glass electrode with the silver silver chloride wire on the inside and the potassium chloride solution, but the instead of a glass electrode as the filter, it has a porous diaphragm on the end. We call that porous plug generally and that allows the current flow but keeping contaminants out so the the voltage may stay the same.
So you usually don't see two different electrodes put into a process to complete that circuit usually. Uh but this is what what it would look like if it did. But typically you have them combined into one body that gets inserted into the process. But you can see it still has the two different electrodes uh in in the center. You see E1 with the pH electrode and then surrounding it is the reference electrode to complete the the circuit.
So let's go to some uh lesserk known facts and best practices around pH measurement. one is that that glass is sensitive to temperature changes. So the rate which uh the the relationship in the nurse equation uh relates the the millolts per ph as temperature increases hydrogen ion activity increases so the slope increases so we need to adjust for that uh and compensate for that in a controller and this is a pretty common knowledge that uh that that pH is a temperature compensated measurement but what's a little bit lesser known is the fact that there's also temperature compensation associated with the solution you're measuring. And every solution is different based upon the chemical makeup of that solution. But here are just some examples of some typical solutions. And I used pH buffers as an example. You can see that pH buffers at different temperatures, they have a different pH value. And the reason that's important to know in making a pH measurement is that if you take a sample at a particular temperature and you measure it, say at 25° C, you see a pH7 buffer is seven.
but it maybe you're in a hot room and it increases up to 30°, you'll notice that it has a different pH value at that point. So, temperature compensation plays an important role uh especially solution temperature to making sure that you get good accurate calibrations and when you're comparing to the lab uh that those are as consistent and uh accurate as possible.
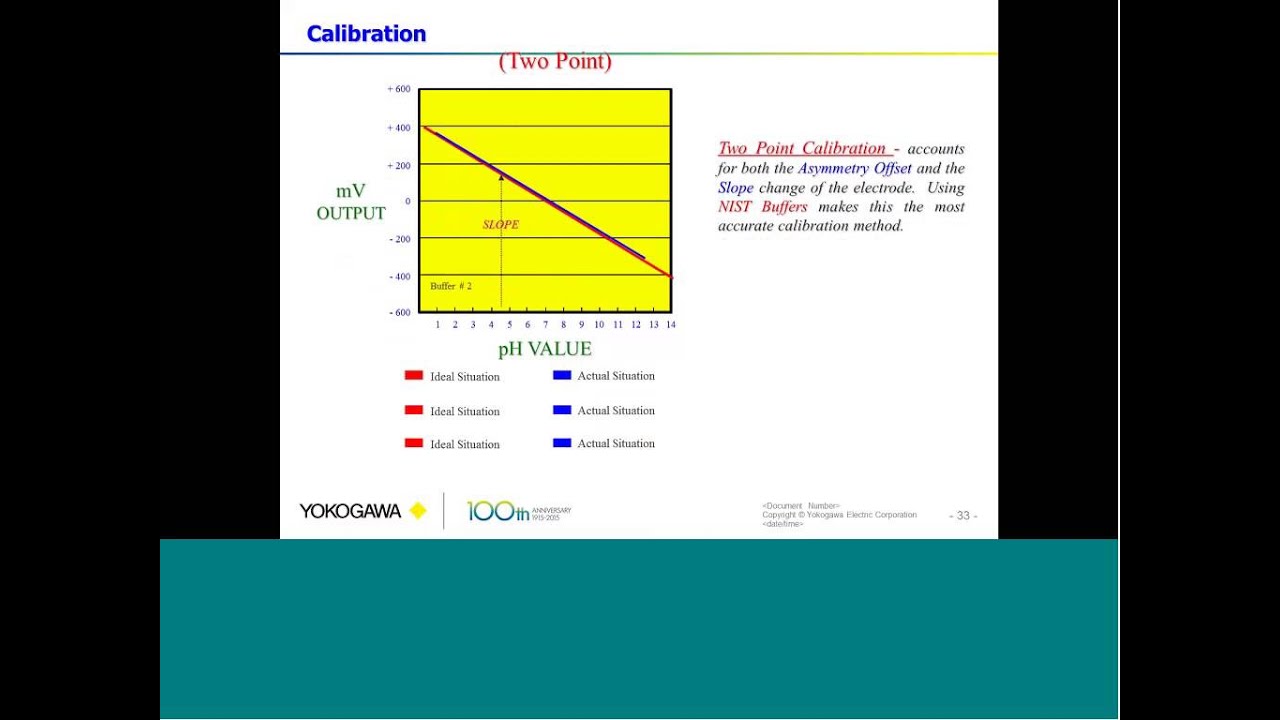
Thanks, Jim. So, as we shepher this very sensitive glass bulb into the real world we all live in, the real crazy world we live in, uh, one of the first steps to keeping it happy and and getting a good measurement as as it gets exposed to the elements is the calibration process. So, as we talk about the calibration process, you can see here that offset and that moving line. It's really important to start with a seven buffer.
The seven buffer is considered the isop potential point. This is where everything is in a happy state of equilibrium where the hydrogen and the hydroxal ions are all in the same space and and happy. And so that's really critical to understanding that offset.
That offset could represent a poisoning in your reference solution. It could be a little bit of change that happens in the buffer over time. And so it's really important to incorporate that when normalizing your probe and getting it to be able to measure throughout the full span of its measurement. Then we also look at the slope. So as Jim had described, you got these porous uh glass layers with the gel in there. Everything is designed to create this this good millolt potential uh between these two points. And so as we do that, we things change with that glass probe. And so we've got to then use a a buffer to calibrate it. So we either use a four or a 10. And then therefore between the four and the 10 we can create the angle and the slope which slightly changes over time. And then we also have uh our offset. Now there are extremes. I've been to sites where customers have had me help help out and they're doing onepoint calibrations where it's only adjusting the offset and it could be 200 millolts of um offset and that's like three decades. That's a thousandfold difference, right? As Jim had talked about. So that could be very detrimental to good quality measurements across the span. Same with slope. If if if you should be around 55 to 61, if you're outside of that slope, you're kind of pushing the envelope of that probe's abil ability to measure accurately across those numbers as that changes. So please keep that in mind. It's a first sign to a healthy probe or maybe a probe that needs just a little love to get it back where it was when when we started.
So, one of the first questions that we get quite often is what is the difference about the pH10 than seven and four? Sometimes I I really cringe on this one. Now, remember 10 buffer uh everything wants to be in equilibrium and so 10 actually rapidly pulls CO2 out of the air which then lowers that uh buffer. So, even though we're packing a lot of ions and things to keep it as stable as possible, we really want uh we want to get a good quality measurement and bad buffers can be one of the first things that causes those problems. As you see here, there's a lot of different package sizes and ways that that that you can get a buffer. We have powder pillows that you can add DI water to that you can use as needed at the time or if you're carrying them around in hot temperatures and things and baking it in. But the biggest thing to keep in mind is that the date on these buffers is relative to an unopened package. As soon as you open that package, you should write that date down and start that ticking clock. Uh 10 buffer has a lot less time than the fours and sevens.
So in some cases, maybe you want singlet packets like you see here in the left here and where my pointer went. Uh sometimes you can go with the 500 mil.
You got the four liters and the 20 gallons. Just keep in mind how fast you're circulating and what those buffers are. I tend to be a lot more sensitive on the 10ens and go with the smaller solutions on those to be sure.
So then the next following question that's follows this one obviously is well how long should I leave it in the sensor before calibrating and obviously the best answer everyone loves to get is depends it both on the pH and temperature values need to be stable right and so that's the most important thing is that your your temperature and your pH look stable when you do it but but how does that change why is that different in some cases and so the things you need to be wary of are usually the environmental uh concerns concerns that come from the uh probe and where it's been living. So, as we talk about uh did you do an acidbased clean?
Did you need to do a more aggressive clean uh where maybe putting in a seven buffer for a good 20 minutes is is pertinent. Is it a brand new probe where you know things should be fairly fresh?
Uh temperature is a huge thing. If you're pulling a process in the middle of the winter and your drinking water is just above freezing, but your buffer is at room temperature, you need to make sure that these systems are are in equilibrium. So you either chill your buffer down to the same temperature which it can be pretty difficult or the more typical thing is to let everything come to room temperature. And when we say everything that means the internal solution, the gels where those thermerers are inside the probe, everything needs to be in equilibrium.
So that could take again another 20 30 minutes for everything to get happy. Uh so and then the other thing to keep in mind is with acids and bases is that inside that solution we have hydrogen and hydroxal ions all floating around and and we really want these to be homogeneous and kind of in a happy state. If you have an acid then all of the hydroxils are going to be at the bottom of that bulb. So again the more aggressive the solution is out there the more time you should give for everything to kind of come come into equilibrium and separate itself out and and get in a happy state.
How often should I calibrate is also another very common question. And of course that one also as depends. Uh really you got to understand your process. How much drift is coming across that electrode. If you have a very if you're in an acid bath or you're doing acid uh addition for pH control things like that you might find that there's a bigger drift. Uh if you're in very clean water right if you're in 60 microine water you might see a little uh heavier drift. And then also the process. how tight does your process need to be? If you're doing jar tests and you know you have a small window of where your coagulant works really well, then then use that to guide you. Uh quite often uh it's all set on your tolerance and the time and how things go or on the regulatory requirements. Right? In the lab, you're required to calibrate every every day, every hour shift. In the in the processes, it's typically probably more like a month. Sometimes I've seen it quarterly. Uh and then in some cases where it's difficult solutions, low low ionic strength, high purity water, you might actually go every two weeks. So really the the important thing there is figure out what your pH value was as found after you calibrate. See what it's understand what that drift is and that change in the millolts are and and be able to guide you in in what best practices are for your calibration frequency.
So then pH probes being stored, that's when you get it from us in the factory, when you get it in the field, uh if you're pulling it out of your process as maybe you're clearing a a mixed liquor tank and now it's going to be exposed.
What are the dos and don'ts of this? So how should a pH be stored? Typically, you want to have it in ambient temperature. You don't want to be freezing or in hot temperatures, those extremes. Keep your protective caps. If you get a lab probe or a processed pH probe, they always come with a cap. Keep that. Make sure that those stay wet when not using it if you're storing it so that it's ready and fresh to go. So, best practices, follow what the re uh manufacturer recommends first and foremost, but typically what good looks like is a 3.5 molar KCl solution, which is either indicative of the fill solution or the saltbridge solution that's in there. Uh, seven buffer is very good, too. and differential probes as Jim had talked about. We have the equference solution which is a concentrated seven buffer and where that internal electrode is uh so we we wouldn't be poisoning that at all. And then tap water certainly in a pinch will work uh certainly better than the alternatives in the bad environment. So bad would be DI water. There's really nothing in there. It wants anything it can to pull out. So it's gonna water down your your your salt bridge solution. It's going to pull ions out of your glass. It's very aggressive uh to keep that stored in there. It's good for a rinse, but but no, nothing more. I see a lot of customers storing it in PH4 buffer. It's a nice light acidic cleaner uh that works very well if you want to just do a light clean, but I've also seen a lot of probes in the field where the internal probe is of the probe is like pink because it's poisoned with it, right? And this is a buffer. It's meant to handle the outside influences that are there. So having a buffer in there could affect your water, especially if it's a lower ionic strength water. Uh certainly don't keep it in an acid or a base.
Those things are going to etch and and and cause problems in those pores and then what we get to is the worst part of the whole scenario, and that's nothing.
Don't leave it dry. One of the carnal sins of of a pH probe is letting it dry.
like we have in this little picture of the desert here. It's going to get dried out. The gel is going to get crusty. The pores are going to get clogged and and could cause a lot of issues. So, what what does that look like though? Uh typically, if it is dried out, it's going to cause slow response. You're going to have bad slopes. Uh you have higher than normal impedance, which will be detrimental to its resolution and and proper operation. If you do find a probe that's been sitting in there and it's uh just a very light uh moisture environment and or it's just slightly dehydrated, it hasn't been dry for too long, um you can rejuvenate those by storing them in storage solution or or doing a mild acid clean. Again, you really will be able to tell by the slope and the offset how things are affected, how fast that probe responds in those buffers. But significantly dihydrated electrodes are just going to not going to be able to be rejuvenated. you can't resurrect them. Um, so keep the shipping and storing material as we talked about and then even check the probes if you're if you've got one in backup maybe once a month or um certainly every two weeks even if you wanted to just inspect it.
Make sure it's perfectly sealed and that things are moist in there so that when you need it that probe is happy and ready to be put in a process.
As we talk about storage and handling, look at the transportation as well as we go through. Like in the winter, there might be a rush shipment to ensure that it's not sitting out in in a dock for too long or in a truck in in the winter.
This is a glass bulb. If it freezes, it's going to crack and fracture.
Certainly, a lot of heat or even electrostatic um or even uh hammering and things like that and vibrations can cause issues. They're very soft glass, right? Very permeable soft glass. So, we just want to make sure to protect it so that you get the performance that we would expect right out of the factory.
So, okay, Mike, you know, I don't live in a perfect world. I need I need to be able to keep this probe happy. How do I do that? Well, when we talk about cleaning, really the biggest thing to do is do as little as possible and then work your way up as needed. So if you find your slope and your offset or response time isn't working good, then then keep escalating to more aggressive measures until you get there or maybe you find out that your your probe is kaput. So when we talk about dues, mild cleaners are great. Uh Alenox, a diluted Alenox Liquinox is a nice detergent that cleans it out. Pepsin, if you're in presence of proteins, is is a wonderful cleaner for proteins almost some would say required in those environments. a non-lenoline soap. So again, no no no glycerin, none of that um that could clog those pores, but a nice light soap uh will work or tap water or even a 4 pH buffer. Right? Those are all really good non-aggressive ways to calibrate your system or or clean your system.
As we move up the scale, we go to a more aggressive cleaner. So your less than 5% hydrochloric acid or less than one normal can work. You can swirl it around for about two to five minutes depending on the process. Clean out those pores, clean off the glass, make sure it's nice and and clean like it it showed up. Uh sodium hydroxide as well works great, especially in the presence of oils.
Really understanding what is contaminating your probe will help you understand what might be a more aggressive way. I had a service tech I worked with for years. They would use CLR on their online pH probe. So, if if your probe is covered in manganesees or or lime or calcium residual salts, don't be afraid. Uh CLR could work really good. You do a quick little clean on that with some dilute CLR and then and rinse it off and and you'll be good to go. Uh DI water again, it'll strip some things out, but it's also a good cleaner. It's a good way to to clean things out. Physically, you don't really want to touch these probes any more than you need to. Again, very soft glass. So, a soft bristle toothbrush is what we typically use. Don't use the very hard or even medium. Those could be too aggressive and cause problems. Uh, with a wash bottle, again, you're getting a good squirt. You're getting some pressure behind it, but you're not being too aggressive. There are online systems like air and water blast cleaning systems to keep probes, excuse me, clean uh as they're in nasty processes like mixed liquor. And then I always carry a magnifying glass. Doesn't matter how much you clean or what you do to that probe. If it's damaged, if it's scratched and broken, it's gonna it's never going to rebound and you're always going to have issues if there's craters in it. Um, so having a good visual of these can be very helpful.
So, when we talk about pH probes, this is a good example. This is kind of a close-up shot of a probe that has uh some scratches or cracks in it, and that's compromised the results. We weren't able to recover that one.
So, what are the big don'ts?
GL glycerin or lenol lenoline based cleaners. Dish soap not very good. They do great job in keeping your plates nice and shiny and you can see a reflection in it. Um, you can keep your hands like palm oil nice and soft when you're when you're doing your cleans, but it's not very good for a pH bulb. Muriatic acid is super concentrated hydrochloric acid.
Even a 4:1 dilution is pretty aggressive. Make sure it's at least 6 to1 or 10 to one.
really work your way up. Don't don't use those nasty things. Uh physical abrasive items. So hard wire, hard bristled toothbrushes we talked about. I went to one site customer and said, "I don't understand why my pH probe isn't working." And we went through his process and he had a green scrubby like the ones that you would use in a dish pan to get the nasty things you can't get off with just a sponge. And um and just etching the heck out of it and damaging that probe. And then even shop towels, those blue shop towels, they have lotions on them, things like that.
Never never really do it. Don't sit there and work the probe because again, you're going to damage it physically. If you're going to take a Kim wipe or a towel, dab it, and to to get anything off, don't don't rub it. Don't scrub it in any way. Not not great stuff to do.
Thanks, Mike. Uh great stuff there. So uh that covers how you take care of the sensor uh outside of the process right cleaning it in between uh taking and storage those types of things. So next we're going to talk about problems that we typically see with the electrode uh from being in the process. Uh the first thing is the glass electrode itself. So a key thing about the glass electrode is you need to keep it clean. You need to keep it from being scratched or broken like Mike showed a little bit earlier.
Uh it needs to be clean because those that outer layer of glass needs to be exposed to the hydrogen ions that are in the water so they can go into the outer holes in those in that outer layer. So keeping it clean uh and visually inspecting it. It should be nice and shiny. It shouldn't be cloudy. It shouldn't have those scratches like Mike showed. Uh and keep it in good condition. Remember this is glass and it's fragile. So you need to handle it with care. Uh it needs to be taken care of. Uh if it's taken care of properly, the glass electrode itself can last to 10 15 years uh in the application. But again, it's very fragile. It's very susceptible to scratches uh because of glass temperature changes. So if it sees a large temperature change, we'll see it go into what we call a shock. like it'll lock in on the value that it was and it won't be responsive until it equivalates to the process and becomes stable again.
So, uh so just change your expectations if you do have large swings that happen fast in your process uh that your probe will maybe take a little time before it gets back to the right value again.
So, those are the typical issues with the the glass electrode, the reference electrode. Uh again, there's problems associated with that because it's designed to stay stable in an environment where it wants to become unstable. So there's ions you in the process that are not typically inside the reference electrode. So what ions like to do is balance out their concentration across membranes. So the ions that are in the process are going to want to try to get through that junction and get to the inside and balance out their concentration. So there's two things that can happen. One is that those ions are large and they get stuck on the outer layer of the porous plug. And I'll just show you exactly like right here on that outer sensor of that and over time it could block the electrical pathway between the reference and the active and then you'll get a an error in the measurement. If they're small enough to pass through that porous plug, they will go inside and they will change the voltage of that uh fill solution because all ions have either a small positive or negative voltage associated with them. So they're going to change that voltage of that reference electrode and that'll result in error in the measurement and that's what we call drift. So those ions are coming in, they're changing the voltage slowly moving away from where it started at uh as drift. So that and that's the point of doing a calibration every so often is to say whatever voltage is coming from that reference electrode just pretend that that's zero and reset again. So that's the point of doing calibrations. One of the points of doing the calibrations. Uh so poisoning the internal element. So sometimes there's ions in the process that will react with the silver silver chloride wire that's doing the the voltage measurement in the reference electrode. Cyanide will do that and sulfides will do that. that they'll react with that wire and they'll render it in a bit in uh not able to measure the voltage anymore and then obviously you have a problem with the measurement. The opposite could also happen whereas the ions that are inside potassium chlorine a few other things will want to get out of that reference electrode and balance the concentration with the process. So what we call and that could happen uh over a if it's a large gradient it'll happen faster. So we call that electrolyte depletion. And lastly, one other thing is a ground loop could occur which I will talk about a in a little bit more detail in the next couple of slides. But the typical most of the time when people are having problems with their measurement and pH in a process uh it's usually due to the reference electrode and the inability of that to be remaining stable and giving a good measurement and doing its job so that any changes with the active electrode are being uh picked up and accurately measured by the analyzers.
So it's important to remember uh for this ground loop uh situation that this is a high impedance measurement across that glass membrane. Glass is not a conductor. It's an insulator. So it has a high impedance associated with it. So when you're putting it in a process and there's a potential uh that that solution is at that's at a different voltage than the the grounding of the analyzer, you're going to have current flow happen. And there's two choices for that current flow to flow from the process to the or ground of the analyzer. And then one is through the process electrode or uh the second is the the reference electrode. And since the reference electrode is a much lower impedance uh resistance than the active electrode, it's going to flow through the reference electrode and that's going to cause error in the measurement. So, we see this happen a lot and the indicator of that is the lab measurement is different than the process measurement and we don't understand why.
And it's because when you're doing a lab measurement, you're in a a bucket or a container that doesn't have a potential associated with it. So, there's no current flow that's going to happen.
When you stick it in the process, you do have potential for current flow. So the way to verify that you have a ground loop problem is to take a sample of the process and put it in a insulated plastic bucket or glass uh beaker and then measure the pH there and compare that. So if you get different values between that bucket test that we call it versus when it's installed in line, that means you have a ground loop.
So as I mentioned earlier, pH is predominantly measured with this glass electrode. Been around for over 100 years. There's a few other ways to to measure pH. Really is not practical to do that in most applications, but there are a few different twists and and different techniques in a pH measurement, pH sensors that do utilize the glass electrode for the measurement.
Like I said, the reference electrode is a big problem. A lot of the issues are associated with that. So there's a sensor on the market that has a different type of reference electrode that has some advantages uh compared to that one that I described earlier that's voltage based. So we call it the differential electrode and the reference electrode in this one is not a wire measuring voltage of a of a potassium chloride solution. We take another pH electrode and we put it inside a chamber and fill that with a highly concentrated pH7 buffer solution. So the reference electrode here is measuring pH uh whereas we're not measuring voltage. So the difference there is that you can buffer a solution against changing its pH value where you can't buffer a solution against changing its voltage.
So the benefit of that is that we can take a lot of ions into that pH reference buffer solution and it will change its voltage but it won't change its pH value. So it stays stable much longer. And if you remember that's the goal of the reference electrode is to stay stable as long as possible. uh and not have that drift associated with it.
So that's really the advantage of of this particular sensor. You'll notice there's a third electrode, a solution ground rod that was also introduced to this measurement. Uh that's because both the process and reference electrodes are high impedance measurements taking place here. And to help resolve that ground loop potential problem, uh the third electrode was introduced because that would be the path of least resistance for the ground loops. And as you notice in the equation on the right side, that voltage is canceled out when you subtract one from the other. So that whatever the voltage potential is, if there's current flow happening, that will not be a factor in the measurement with this sensor. So two key advantages, references stay stable much longer and we're talking to a magnitude of three to four times longer than what a typical conventional sensor would do. And then any ground loop potentials would be canceled out in this scenario.
This is the wet end view of a a differential electrode sensor. You can see right here is the active electrode uh with the pH sensitive glass. You can see this is in great condition, nice and shiny, smooth, no scratches, anything on there. This is the what we call salt bridge with the porous plug that's exposed to the process. You'll see here it's nice and clean, clear color. Uh it's filled with a saturated salt solution to pre present a physical barrier to the ions uh before they would get inside. And then on the back end, there's another porous plug before it gets to the reference solution. And then this one right here is the ground rod uh with a temp temperature compensation device that's u built right into that.
Thanks, Jim. It was interesting. We were just working in an industrial site in a highly conductive solution where that ground rod was turned into a cathode and had been half eaten away. So again, even though the the pH was was working and and the ground was doing its job, it it was kind of drifting as it was being eaten away, but the customer didn't even realize that. I've also been in in a drinking water plant where a ground well had a ground charge and they had to ground it and we could see that delta in the in the um in the bucket test when we measured it in the tank versus in in its own little location. So really good stuff there. really critical to to making sure you're getting good accurate phes. So, as we look at other things that help qualify a probe uh and what what are the right probe for the job, right? There's a lot of different flavors. We got vanilla, chocolate, strawberry, all these different flavors here to choose from. Which one is is good for us? Um, one of the biggest first considerations is temperature. If if you're standard ambient temperature, not a big deal. We have analog and digital probes. We are measuring a small millolt. So, as you're running millolts across a large line, uh, uh, electrical wire, you know, big pumps in the area, you can get a lot of interferences. We tend to like to have a digital probe that's just sending ones and zeros from the electrode. But in some cases, the temperature of the digital components can't handle it. And so, you you kind of need to go to the analog above the 70° C range. Uh but a good kind of opening thought on on different considerations with different probes and also relative to the fill solutions and other things out there. Pressure of the probe. If it's in a in a pipe, is that glass bulb going to be handled be able to handle that pressure? There's a little air bubble usually in there to allow for a little bit of flexibility and temperature and pressure as those things can uh expand and contract. Uh but it's really important. We always put these on the positive pressure side of a pump. We don't really recommend on a vacuum side having these in vacuum can be kind of detrimental and and really cause damage potentially the ionic strength of the water. Again, do how many ions are in the water to even detect?
Um the purer the water, the more difficult the measurement and there's a lot of other things that I'll go over in a moment or two that that are important.
I have a lot of customers that uh in drinking water that that would be at like 60 microsemens and even though they don't need like the super low ionic strength pH probe, they did need a little bit better design to get less drift and have more reliability and longer life. Uh process makeup. So, uh a good example would be like in the coal industry uh when they're burning coal, they create ash and that ashes in the water. That's carbon fines or upflow anorobic digesttors. Um they have a lot of carbon fines. These things can physically damage a probe. So, MBBR, the plastic pellets in there. So, you really need to be able to understand what we need to protect that probe. Uh what chemicals are present? You know, are we do we have the chemical compatibility of all the components? So, these things are all really important to understanding what probe is the right one for you. And then lastly, I can't tell you how many times I've gone to like a new design and build project where we go through and there's some challenges and everybody's like, "Mike, this pH probe is awful."
But it really comes down to the mounting hardware. Mounting can make a huge difference in a quality consistent measurement, the quality of life of measurement, especially in intermittent flow. Is it probe staying wet? Some of these considerations are really important on on what what mounting hardware to choose from. So one of the more difficult things to measure is low ionic strength water. So for applications we define as less than 100 microsemens. You need some sort of low ionic strength uh pH probe and and there are ones like the one that's shown here that's really for like less than 25 or 50 microsemens really aggressively low and then there's some of the in between and versus your standard ones. What it has is low impedance glass electrodes.
We're packing a lot more ions in there to be able to be more sensitive to the ions that are in the water. We also are having to earth ground the measurement chamber because the water is nonconductive. As you get cleaner water, it becomes less conductive. You get static buildup just like, you know, on a balloon when you're shocking your friends. Similar things can build up in these systems and cause a ground loop or or grounding issues uh and cause that background charge. So really important to have a good earth ground to be able to pull that out of there. Uh temperature control, we're very sensitive to temperature. You also want to be airtight. High purity water wants CO2 out of the air and and bringing it in to help it bring in to a comfortable state of equilibrium. So, a lot of these things go into uh good consistent measurement, good flow, uh no air bubbles, these type of things are critical to good measurements.
As we go through for more considerations on a pH probe, some of the things that you should consider are the different components. So, I've kind of alluded to this in in in some of this uh earlier discussion, but there are different types of bulbs. So, we have flat glass.
So if you have uh abrasive material uh that could impact it or crater it like the moon and cause issues with that pH probe, flat glass works good. We have S-class and high impedance glass for very acidic or very costic solutions. Uh antimony is used with HF acid because HF eats glass very rapidly. So that works really good within a limited range uh of pH. We have HF resistant glass that's more thick uh that that'll take a little bit more abuse, have more layers in there to to help. And then again, we mentioned the low ionic strength glass as well. Uh or or somewhere in between where we we pack a little bit more ions.
Um so there are a lot of different options when it comes to to the material of the bulb and the sensing material. We also have the body of the material. So uh is it peak? Is it right time? what's going to work in your process and hold up. The O-rings that are protecting uh the internal solutions could be a consideration or even the saltbridge material. Do you have kindly tight protects the internal solution but can plug easy or or the ceramics that that have a little more porousness to it?
Still protect the inside but but but don't but create that healthy circuit.
Uh low ionic strength typically have open junctions or high pressurized electrolyte. We need to create that circuit. we need to create create conductance across that face of the bulb in the water and if it's low ionic strength you can't really do that there's a lot of resistivity there so really critical uh to operation and then certainly the fill solution even as well liquid versus gel is it throwaway is it rebuildable is it a high temperature where the liquid would boil and we need a gel to ensure that that that you're getting good good numbers with that reference reference electrode or or silver chloride uh junction. And then of course your warranty. Not all probes are created equal. So we have probes that are typically 30-day warranty out there that are kind of throwaway probes at best last a year, maybe even 90 days.
And then as Jim had referenced before, uh rebuildable probes, ones that can change out the salt bridge, uh change out the reference solution. If you're in a very acidic environment, that internal solution gets killed much more before the glass bulb or the salt bridge goes bad. something that you can replace and and get the the measurements and alignment within the healthy range of your um reference millolt uh value can all be very important.
So then as we go through here and we talk about mounting here are some examples of of different mounting options as we go from from left to right here. Number one is a union mount. So this is a compression fitting right here uh on a kind of a T.
The probe sits in. The electrodes are all there. You saw the picture of the tip before. Uh, but when we need to pull this probe out for calibrations, it's just unscrewing the cap and pulling it out. No twisting of the cable. We want to protect the integrity of the shielding and and the wires. The second one is probably my most favorite. This is where you got flow coming in to the left, flow going out to the right. You can tilt this system so that even if there's air bubbles, it doesn't get caught underneath the electrode. that can cause um a lot of erratic measurements and jumping around so you can um really get good temperature compensation. Everything is really encapsulated and you can see through it so you can see exactly what's going on.
Is your pH dirty? What's going on there?
We have insertion hardware where you can insert into a tank with a ball valve here on number three. If you're in ambient temperature, this flow block is really nice. You got flow in from the bottom and out to the side.
Again, not the best temperature compensation, not for really high pressure, but for a low pressure system, pretty good. You've got protection caps here. On number five, so we talked about like an MBR, plastic pellets. This is going to protect your pH probe from being damaged physically uh for those big particles. For the small ones, not going to be that that helpful. That's where flat glass might be more appropriate. Here's another earlier version of our uh fully encapsulated um pH uh sideream setup. I like. And then our seven and eight uh seven and nine are our insertion hardware. We have stainless versions of PVC that can be related to the temperature or pressure.
We also have the ability to put outside pressure to slowly move the probe back into the process and repull out the probe. This also has ball valves so you can pull the probe out while the process is still running without flooding out your house there. And then of course eight is the traditional union mount.
So, I like these a lot because it gives room for air. If there's air, it doesn't get caught under the electrode. It kind of has places to migrate up. It also encapsulates the probe completely for temperature compensation. Uh, I try to tell people avoid the TE's at all cost.
They they they make me lose sleep at night, honestly. Um, and then of course, if your process is changing in levels, uh, ball floats work really good. They help you keep the probe in a consistent location up and down. The handrail kits are good. They also can move around.
Make sure it's in a representative sample, not on the side of the wall either. That's also a big deal. Uh because you're probably not very well mixed and you don't have good flow there and it's not going to represent what you're trying to control or process. And lastly on the right is our air blast or water blast system. Another example of where here at the nozzle, you would you would uh spray the system and you could hold the outputs during those events and even delay the output from from going live uh as it goes through that cleaning process to avoid you having to touch it as often.
And lastly here, this is one of the things I really love to talk about are are the things you definitely shouldn't be doing and some pretty good examples here on the left on number one. You can see uh there's a lot of electrical components and things below these pH probes and other systems that when you open them up, they're going to leak and fall. Be cons considerate about the environment and what you're doing when you have to go in and deal with those.
Number two, uh this isn't a lime slurry.
Uh you need to access it. You need to be able to clean it. Uh this was kind of wire tied up and it's hanging by the wire. So again, these are kind of really small wires. We're small measuring small millolts. there very small shielding protecting it from outside signals.
Definitely don't recommend hanging your probe by the cable itself. Put a collar on it or or there's other ways to do it.
Number three, I laugh about a lot. How are you going to calibrate that pH probe? I don't even know how they got it out. I imagine they have to twist it every time, but be very considerate when you're designing on how often you have to pull it out. It's also in the T-mount. Not good temperature control.
This is like one of the worst installations ever in my opinion. Uh again, you can see a lot of wires and cables coming from below as well, but uh be be wary of these things. These can be um very detrimental. Number four, these probes are upside down. They're not designed to work upside down. The little air bubble, if you move a pH probe around, again, you're going to see that air bubble and the glass bulb. It's important that water is in there and that those ions, the hydroxils and the hydrogen are floating around and able to create that potential accurately. Number five is another one, too, where it's it's horizontally mounted. No pH probe should be horizontally mounted. You really need to be at a 15 degree. Not to say I haven't seen them give decent results, but really it's not good practice and really something not to recommend and you're not going to get the performance and life out of the probe that you should. So all these are really critical. The last three are kind of the finale here. This is a again one of my favorite mounting hardware but not used right. The customer had mounted this to the collar on the top. Only the very tip of the probe is is touching uh barely. It's barely getting a result.
you're not getting good temperature compensation. Not not very good. Number two, you know, this one here, it could be a dead body. We don't even know. It could be a duck. Uh really any kind of slime or formation or any kind of growth around a probe, you're going to get, you know, if it's nitrifying bacter bacteria, you're going to get a reduction of pH. It's not giving you representative samples as the flow goes by. Be wary of that. And then lastly, the T-mount. If you look here, this is what happens when you have a tea for a long amount of time. You can see again where the water leaks are there. There's not anywhere for the air to escape. If any air is getting in the line, air goes to the top of the pipe. And then the worst thing here, look at this cable.
Look at how many times it's twisted.
This is compromising the quality of the measurement. It's it's it you could get cross junctions, could affect your thermostatrmister. A lot of things going on here that could could cause it. So, be aware of of the mounting. Make sure you're in a good protected system.
All right. Well, thank you for joining us. Please put your comments into the chat so that we can expand any of these topics as we need to for you. Before we open it up to live Q&A, we want to let you know we're here for you. You can reach out to us at hawk.com for a lot more information on pH monitoring, what sensors, meters, and controllers we have for both online pH and lab monitoring.
We have the largest selection of of anyone on the market for these type of sensors and lots of experts like Jim Burke and Mike Feldman to assist. We have a tech support team who can also come in and help troubleshoot any issues you might be experiencing.
Note, we will be sending out a follow-up email to everyone who's attended with the link to the on demand webinar, the PH cleaning poster to download and print, and a form to fill out if you'd like to be contacted by sales tech support or an expert, as well as our new process PHP and conductivity selector tool.
You gentlemen, for such an amazing presentation. The level of detail was immaculate and the audience is telling us they agree. We have so many fantastic questions coming in. I want to thank you all for that. Before we start the Q&A, please continue submitting those questions via the Q&A box. And if you'd like to connect directly with Jim H, Jim B, and Mike, their information is located on the side of your screen.
Our first question is on ground loops.
Um, Khaled would like to know, is it necessary to adjust the temperature of samples to a specific temperature while measuring pH?
So, I'll take that one. Uh, no, it's not important to adjust to a specific temperature, but it's important to understand that your process could have a different pH value at a different temperature. So if you're comparing it to another measurement, either keep it at the same temperature or understand that if it is a different temperature, it could be a different pH value. And every process is different. Uh every every unique makeup of a solution has its own unique curve with regards to how the temperature changes with regards to the the pH for the temperature change.
So you can establish your own curve. you can uh you know do your own uh you know analysis and then you can compare against that. But the real key important thing is to know that your process will probably change its pH value at different temperatures and to know that there is one caveat. So like in low ionic strength water uh there are different temperature curves. So again we're really sensitive in low ionic strength water like in the power industry they use ammonia to adjust the pH. So if you're adding ammonia that does affect the temperature curve uh where it's equal is about 78 degrees but then there's certain systems like in our low ionic strength one that we showed there where you can actually use an ammonia or a phosphatebased curve and it'll make those adjustments so it doesn't matter what temperature you're at where normally if you didn't have those built-in curves and on a normal curve you'd have to be at 78 degrees.
Excellent. Now we have a few questions on uh high purity. Our first comes from Madison who would like to know, "Do you recommend calibrating pH bench meters with low ionic buffers that resemble high pressure steam applications? And if not, why?"
Um, so I'll I'll take that one. So in life there's always opportunity costs, right? And so the benefit of a low ionic strength buffer is that it will acclimate to your process quicker after calibration.
The opportunity cost though is it's a low ionic strength buffer. Buffers are supposed to be high in ionic strength so that they don't change over time. So, so the stability of a low ionic strength 10 buffer is going to be worse than even a standard buffer. Uh same with the 4N7.
So for me, I would rather have a more reliable buffer that I can trust that I know is more stable. Uh but everybody has to make that decision for their own.
And just know that you have to recondition that probe. If you're calibrating a standard uh low ionic strength pH probe in a standard buffer, a four and a seven, let's say, or a seven and a 10, then it could take a couple hours even for it to fully acclimate back in the system or just soak it in a little DI water. These are the one probes. I will say the low ionic strength, they're designed to be kind of in in very low ionic strength water. DI is actually lower though than the 0.055 you would see in normal really super clean demineralization uh environments.
So, uh again, there's an opportunity cost. Everybody has their own personal belief, but my my mentor and and myself, I I would rather have a normal buffer and deal with a little more breakin time and know that I've got a good calibration and offset.
Good question. Yeah, thank you, Mike.
Uh, our next question is from Shana, who would like to know, for high purity samples like condensate or demineralized water, how quickly should you take your pH reading?
As quickly as possible. I would be bringing those probes out into your process. Have a portable unit if you can. Uh you also what you do is you put like a little straw off the nozzle and let it overfill. Don't airrate it and stick your probe in there and kind of let it go and measure continuously until you see a stability uh at a consistent flow rate. Low ionic strength probes like lab probes have big open junctions and those ions and they're there to measure as quickly as possible.
Traditional systems, even using standard probes, would have cups that were completely sealed or airtight to ensure to try to reduce the CO2 impact. Uh, but it is critical. I think there was another question about stir bars. Don't put a stir bar and create a vortex where you're pulling air into your water. That could cause even more rapid issues there. Uh, if you're going to stir, stir really slow and low. Um, but great, another great question. It's critical.
air air is going to impact it as soon as it hits it, which is why the inline systems are so important and great and when you're doing comparisons that you're really measuring and not air rating as you measure.
Great stuff. Thank you for knocking out two questions. Our next one comes from Michael uh related to ionic strength wanting to know if low ionic strength sensitivity is different based on the ions present. giving an example. Low conductivity natural water versus low conductivity second pass RO feed that may be heavy in sodium.
You want to jump on that, Jim? I've been answering much. Yeah. No, you can take this last high purity question since uh since I'm on a roll. So again, you know, low ionic strength is low ionic strength. Uh certainly not as severe. So for instance, we have a rebuildable differential that works pretty good at at the 30 to 100 microsemen. I I live in Eastern New York and I used to work with a a plant that had really low conductivity res uh water and we had put a throwaway combo probe. We put our standard probes in there and there was a lot of rapid drift and and need for constant calibration and so we put a differential probe that has a larger open junction and also has uh more ions in the glass and it really held up good.
So, um, you know, high salt concentrations can be like in brine environments. Those can affect the results as well. Uh, it doesn't really deplete the salt bridge as much and and there's more ions really in those those those high sodium um solutions. Um, but uh again, it's usually a bigger issue when there's low conductivity. The higher conductivity uh it is the least challenges or less resistivity. I don't know Jim if you want to add anything to that too on that end.
Oh, that's great. We can we can move along. Yeah, great stuff Mike. Uh we now have some questions on calibration.
We'll shift gears to that. Uh the first comes from Billy Jean who would like to know what is a typical offset value when calibrating?
Yeah, so great question. So ideally probes when they're brand new, they're going to be right at zero at a seven buffer. That's the isop potential point.
That's where you're doing the adjustment of the whole curve up and down uh around zero. And then the span is that 59 millolts per pH unit. So you typically calibrate, you must calibrate with a seven to do that offset and then you must calibrate at another point along that line to do the span. So those are the two things and then you get the the whole curve. So ideally you're going to be right on those numbers out of the box, but you can take uh a little bit of deviation, right? So that's that's really the question. And it's all it's all relative. So, pH sensors don't work and then not work. Usually, they kind of drift away from working and then they get gradually worse as you age. Kind of like your eyes as as you get older. Uh, you know, they're going to kind of go go bad slowly over time. So, realistically, you know, within 10 millolts usually is is pretty good on the on the offset out of the box. and and uh you know same thing with the span of around plus 5 or 10 per decade of pH unit but um it should be pretty close in the field I think online we we t traditionally say plus or minus 30 molts is the extreme of where we wouldn't feel comfortable using the probe after and really go to more aggressive cleans to try to get that number down or change out the internal reference solution or or have to just change out the probe um was kind of the rule of thumb, you know, plus or minus three, so 55 to 61 on the on the slope and then u plus or minus 30 millolts on the seven buffer is typically there. And that also gives some breathing room too for the buffers.
Great. Our next question comes from Matt who's found the standard calibration process for rugged probes are stabilizing too quickly um in his process. Is there a way to change the sensitivity so the calibration process waits longer before accepting the buffer solution pH?
Yeah, I think that's might be an indication that there's something else going on. Uh because really the goal of the calibration is it's going to take place once both the pH is stable. The glass electrode measuring the hydrogen ions is not jumping around. It's going to be stable for a period of time and it's going to lock in on that. Same with temperature. So those two things, as soon as they're stable, most meters will say, "Yep, this is good. Grab it at this point." In in uh theory, there's no problem of it happening too fast. I mean, once it's stable, it's stable and that's good. So that's probably something we would need to like dive into a little bit further to see what problem is actually happening. Um thinking that that might be the symptom, but there might be another symptom that's that's like uh happening in that particular situation.
I would I would also add too, you know, it's better to be safe than sorry. So when you pull it out of your process, nothing's going to happen or hurt it by leaving it in the seven buffer for 15 or 30 minutes. Walk away and let it sit, right? That then you know it's going to be in a nice state of equilibrium with the internal solution. I think also with the probes, making sure that air bubbles in a good spot and you know sometimes you got to flick it like a pen. Um really making sure that that system's set up for success, that the temperatures, everything are as stable as possible when you hit the button. uh just avoids any kind of complications or issues in whatever uh you know algorithm is being used to to lock in that stability.
Thank you both. Um we're coming up on time, but I'm going to let things keep running. We have so many fantastic audience questions coming in. Thank you guys again. I'm just going to remind you when we do wrap things up that we're going to pass all these questions to the presenters to follow up offline. So don't worry, please keep submitting your questions. We thank you so much. Um, our next question is from Freda who's asking about drift. After the meter uh says the pH is stable, especially during alkalinity titrations, the drift will be at the second decimal place like 6.12 will become 6.15. Um, she's asking if you wait long enough, can you ignore the drift with if for example samples chemically uh define fresh water for algae growth?
Yeah, it's a great question. And so it sounds like Freda's calibrating without that automatic uh stability check by the analyzer. She's doing it manually. And really that boils down to how what's the accuracy required for your application.
So if you're down to the hundths of a pH unit and you feel that that's within the tolerance level of what you're looking to get out of measuring hotline, that's perfectly fine. So it's it's whatever your tolerance is. I would say usually you're looking at probably 5 to 10,000 of a pH unit until an actual meter would say that it's it's pretty stable over a 1 second period of time. So that sounds reasonable to me. Mike, what do you think? I would throw one other thing out there. You know, laboratorily speaking, we talk about different things that can affect everything, right? So making sure you don't have a vortex that you're mixing your solution, but you're not creating a vortex and and pulling in air and other things like that. The other thing is, like we talked about, there's, you know, several flavors of pH probes out there. And so when you're dealing with a pH probe, there might be an open junction versus a porous pin versus an annular ring. Um, so not every probe is great for titrations. The annular rings are typically the the best of the best when it comes to titrations because you're getting a a quicker response and that might also affect the stability or again you know if that junction's getting plugged at all if it's a ceramic pin that could be um more problematic.
It's protecting your internal solution but at the same time um you might not be getting the best results. So different processes like what you're talking about with an alkalinity titration might might be better served with a different type of a salt bridge junction.
Thank you. I think we have a question to end the topic of calibration on here.
We've talked about a lot of really specific applications. Uh Mark would like to know, are there any tips on how to choose which calibration method to use? For example, single point, twopoint, and process buffer calibration.
Yeah, great question. So, the standard is the two-point calibration. As we talked earlier, you need to do the offset and you need to do the span. and then you've got two points on the line and then that's done. So that's the typical way to go about it. Um a lot of times uh the process calibration comes into play when you're not sure that it's really measuring properly compared to the calibration in the lab. So we would caution you against doing that calibration. Maybe investigating a lot of things that Mike talked about earlier. Uh especially cleaning the glass electrode as the reference stable.
But really that twopoint calibration would be the one that's that's recommended in most situations.
I I would add too one of the other sins other than letting your probe go dry that I see is that people validate with what they calibrate. So when you put a four and a seven buffer in and you calibrate that pH probe, you're telling this is four and this is seven. So by putting it at seven again, you're just saying, "Hey, did you hear what I was saying?" You know, can you repeat what I was saying? Really the best way to validate a probe is to pick a buffer somewhere in between the two calibration points. You can certainly extrapolate as well, but best practice is if you're doing a four and a seven is get like a five or a six buffer and then be able to validate there or a seven and 10, get a eight or a nine buffer and validate there to ensure that your your pH probe is is reading accurately after that calibration.
So I I think that is is super critical.
Um, and and remember if you if you do a onepoint calibration, all you're doing is changing the offset. If you do a seven, it's just going to change the offset, right? It's not going to change your slope. And your your bulb is changing all the time every, you know, millolt, you know, 69 millolts per decade. And so it, you know, doing a one point or even falsifying it and doing a grab sample and telling that pH probe what it should be reading is just creating an offset. And that's where I've seen some processes where where a customer has like a minus 200 millolt offset and then that's like three decades. That's a thousandfold difference that you're fudging this probe to fit your you know your happy space. That's not really going to give you a good quality measurement.
Great. Uh you were alluding a bit in there to buffers. We're going to shift gears. So that is a topic now. Uh, Nicholas would like to know, "What is the time frame for a pH buffer after it opens, specifically for the liquid size bottles?"
Mike, you want to go first? I I was going to give you or Jim the other the chance on that one.
Yeah, bumpers are generally pretty stable. You obviously want to keep them close to the environment. They really don't absorb too much, but there's expiration dates on there. But once once you open them up, you really don't want to go too long uh with them. Um but four and seven are stable compared to 10, as Mike was talking about earlier during the presentation, that it grabs carbon dioxide relatively aggressively from from air. So you you once you open a 10 buffer, it's uh it's it's going to be drifting in in a matter of uh hours uh really and and after a couple days, it really depends on how much head space is in there and how much carbon dioxide that it can pull from the air, but 10 is is highly volatile compared to to four and seven.
Yeah, there's definitely formal recommendations if it's low strength or not. It's all use case, right? What is the temperature? Is it nice air conditioned? Are you in a hot place that's 80 or 90°? Are you taking some of that 500 mil jug and you're pouring it into a smaller cup for the day use and you're kind of sloshing it around a bunch or is it tightly sealed? I mean, there's a lot of factors in there. I think, you know, the low the older it is, the more sensitive you should be and be looking at the raw millolt signals to see how how those results pan out and or shift, right? You can even see it when you first open a bottle. What was the four and the 10 buffer and the zero, you know, at the seven and I think it's minus plus or minus 170 or uh 140 for the other buffers. And so at that point, you can kind of look and see what that is. So the important thing is write the number down. I really like I cringe with the four liter jugs. The bladder boxes don't mix as much, but but again just be sensitive so much. I think you guys covered a big majority of the question we had on buffers there. Thank you for that depth.
Uh let's shift gears to cleaning. So Tracy would like to know, "What is your opinion on using Q-tips for cleaning?"
Yeah, Q-tip would fall in the category of being a nice soft thing that's not going to scratch the glass. Uh, so that would that would be a relatively acceptable thing to use, especially if it's clean, especially if you're using it along with those mild cleaners that Mike recommended earlier. Uh, you want to not touch the glass as much as possible. Uh, as as he alluded to earlier, but a Q-tip would be um something that would be within the realm of reasonable to use for cleaning the glass electrode.
But, you know, if it's muddy water, you don't want to be grinding that either.
So, pre-clean it. Make sure you're using that as a final thing. and more dabbing than than wiping or being aggressive, right? You can you can stab a break a glass electrode with a with a Q-tip if on a on a bad day, I think.
Yeah. You know, one thing we didn't talk about too much just because we're limited on time is the fact that if you get a hard coating on there, you want to try to use something that's opposite.
Like if it's a acidic coating that's hard on there or or a basic one that's like calcium carbonate or lime that that like gets hard on there, you want to try to something opposite. So, an a mild acid will dissolve that off. And a good way to apply that would be dabbing it on there with a with a Q-tip. Uh so, so there are some situations where you could do that, but again, being careful.
It is sensitive. You don't want to scratch it. You don't want to break it.
It's like some of the softest glass in the world, right, with all these pores.
And the more you mess with it, the more the issue. I mean, I've said some sites where, oh, we've been doing this for 20 years, and I wonder how sensitive that pH probe was. What? they were manhandling it all the time. So, it's it's just something to be wary of with with these probes. I mean, it's it's um it's, you know, it's a tight walk to get good, accurate, repeatable measurements.
Thank you for covering a few different methods of what you could clean with as well. That answered a few of the next questions I had planned to ask. Um, now talking less about specifically what you use, but more so, uh, Khalid would like to know, is it necessary to adjust the temperature of a buffer solution to 25 degrees Celsius before performing a calibration?
Right. So, earlier in the presentation, I showed that chart that showed the different pH values at different temperatures. So, that's on every buffer bottle that that we provide and that pretty much any other would supply. So, it's key to know where you're at in order to know the right value. So it doesn't you don't necessarily need to be there, but you just need to know that there's a different pH value. So if your solution's at 35, you need to know that that's a different pH value, but and we're compensating for the glass comp of that, but we're not compensating for the solution difference in the pH value.
So yeah, theoretically, yes, it should be at 25 degrees C for seven a seven buffer to calibrate at seven. Most pH probes lab and process are temperature compensated, but but not all. So there are pH probes even that we sell that don't have thermostatrmers in them. So you know to keep that in mind as well.
If it isn't, then then that's when it becomes more critical, right? But the thermister is calibrating for the glass's response to that buffer solution at that temperature. But if that buffer is at 35 degrees C, that is a different calibration. That is seven. I can't remember what the number is off the top of my head, but you put in, you don't put in seven. You put in whatever it says on that chart to calibrate that.
It's it's actually even a bigger issue with ion selective electrodes, which are very similar to pH. If you're using ISC, it's important that whatever you calibrate the temperature is what you measure it at. it's not as critical on pH, but for ISCs, it doesn't matter what that temperature is, but you got to be consistent. So, that that is something that's somewhat related, but not directly.
Thank you for that. Um, thank you to the audience as well for giving us an extra bit of your time today. We're going to ask one more question and then we're going to wrap things up. Uh, Michael would like to know, what is the most common way to solve a ground loop problem?
Yeah, great question. And so if you remember ground loops were the processed uh voltage potential is at a different potential than the earth ground and we get current flow through the reference electrode causing error in our measurement. So the way that you solve that problem is tying those two voltage potentials together uh so that they're at the same potential. And the easiest way to do that is to run a wire from the earth ground of the analyzer to your process. And if your process is in a metal pipe or a metal tank, all you need to do is get that wire to the tank or the the pipe that you're in. So basically just allowing contact the electron flow to balance out so there's no current flow. And you do that physically by attaching some kind of a conductive device between the earth ground or the analyzer and your process.
You can also do that with tanks. So sometimes there's just so much ground loop in the tank. You know, like I said, at this water plant, there was just so much in the well that, you know, you just got to have a good earth grounded rod and then tie it to a cable to that tank and be able to ground ground it to that that solution in that process.
All right, thank you guys for answering all those questions and uh that is going to be all the time we have left for today. Don't worry if we didn't get to your question. I'm going to pass them along to our presenters to follow up with you offline. I'd like to thank Jim H, Jim B, and Mike for their stellar presentation and you, the audience. We appreciate you being with us today and we hope to see you again soon. Have a wonderful rest of your day. Thank you.
Thank you. Thank you.
Get your time.
Up Next

7:54
Synthesis of Iron Oxide Nanoparticles via Precipitation Method
@engineeringchemistrylab5793
16.1K views•2021-12-17
24:04
The Jablonski Diagram: Radiative and Non-Radiative Transitions | Photochemistry
@benedictugi8420
262 views•2025-07-15
10:06
1H NMR: Determining Number of Peaks from Structure
@MSJChem
59.2K views•2017-04-06
17:31
Edible Water Bottles: A DIY Guide to Sodium Alginate Spherification
@ryan
10.5M views•2019-06-21
Related Study Plans & Knowledge Roadmaps
Structured learning paths in Chemistry
chemistry
Photochemistry: Excited States & Reactions
01Foundations of Light-Matter Interactions
02Molecular Orbitals and Electronic States
03Photophysical Processes and Jablonski Diagrams
+ 2 more learning modules
18h5 modules
Explore Roadmap
chemistry
Coordination Chemistry: Bonding & Properties
01Introduction to Transition Metals and Ligands
02Crystal Field Theory (CFT) and Geometry
03Magnetic Behavior and Spin States
+ 2 more learning modules
14h5 modules
Explore Roadmap
chemistry
Polymer Chemistry: Synthesis & Properties
01Introduction to Macromolecules & Monomers
02Polymerization Synthesis Mechanisms
03Polymer Characterization Techniques
+ 2 more learning modules
12h5 modules
Explore Roadmap
chemistry
Separation Science: GC, HPLC & Mass Spec
01Foundations of Separation Science
02Gas Chromatography (GC) Principles & Systems
03High-Performance Liquid Chromatography (HPLC)
+ 2 more learning modules
24h5 modules
Explore Roadmap