

![DINÂMICA: AS LEIS DE NEWTON [AULA 1]](https://i.ytimg.com/vi/cPH39PABeqQ/maxresdefault.jpg)


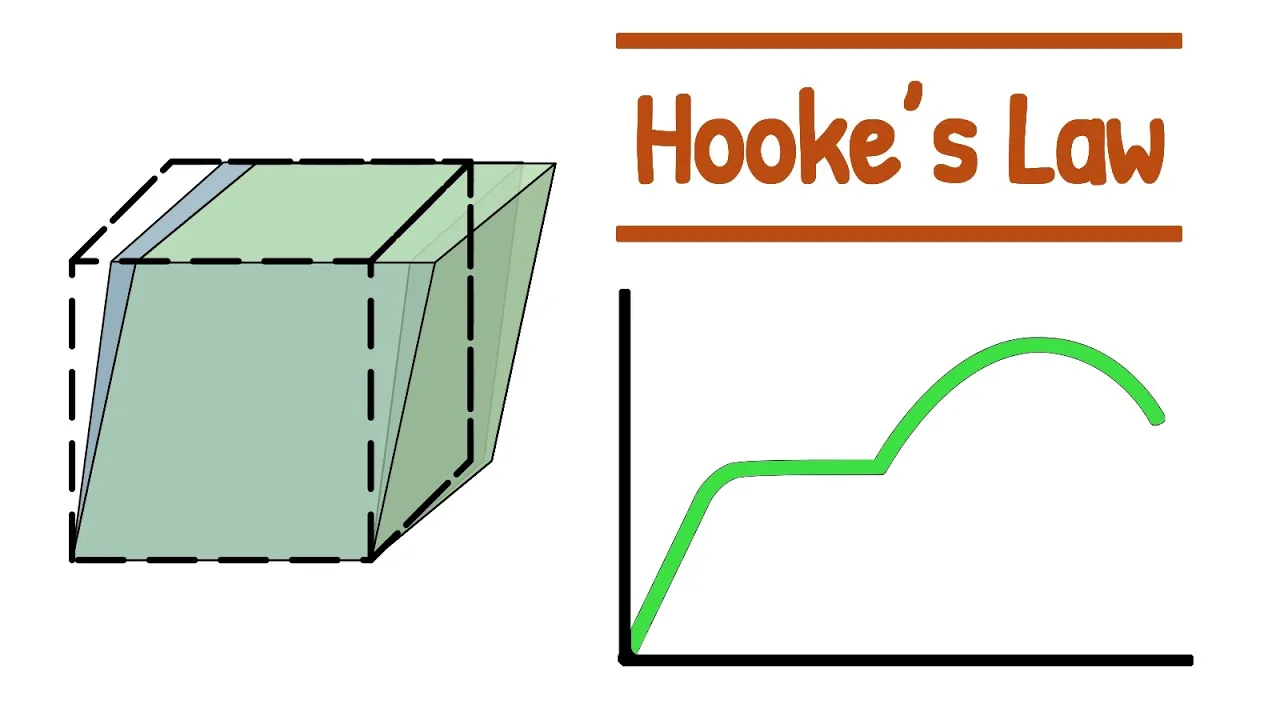













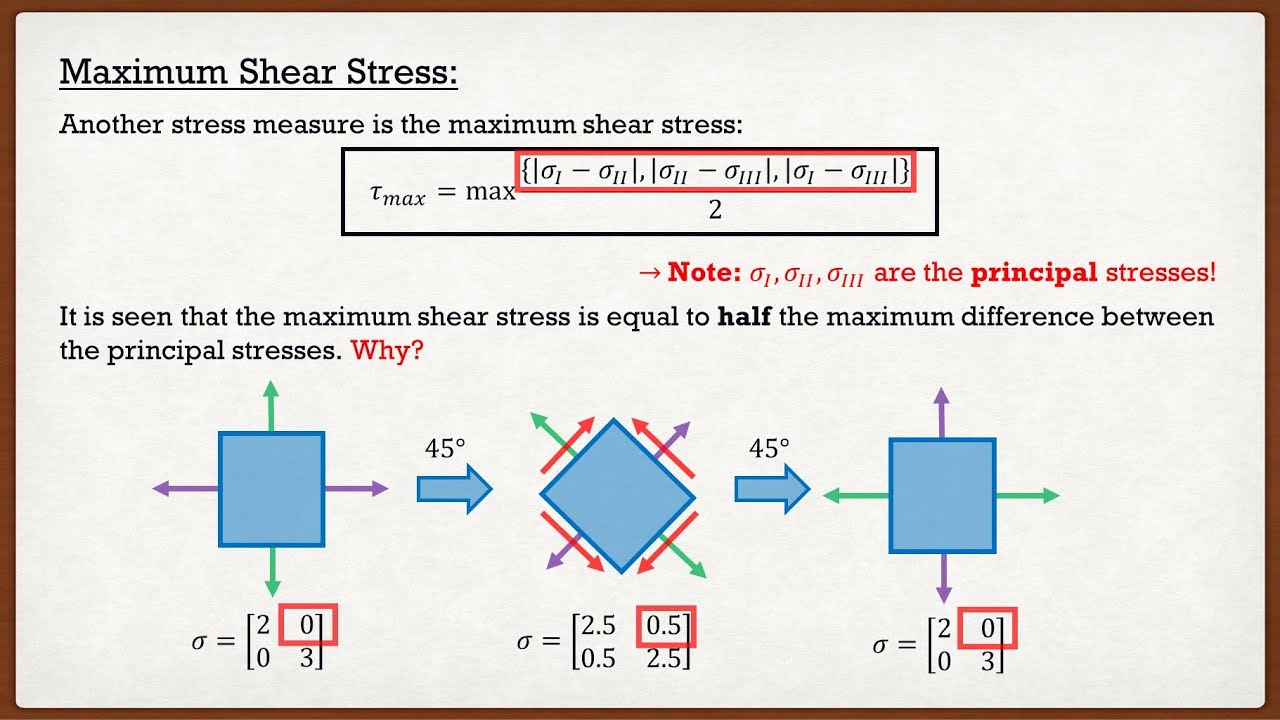





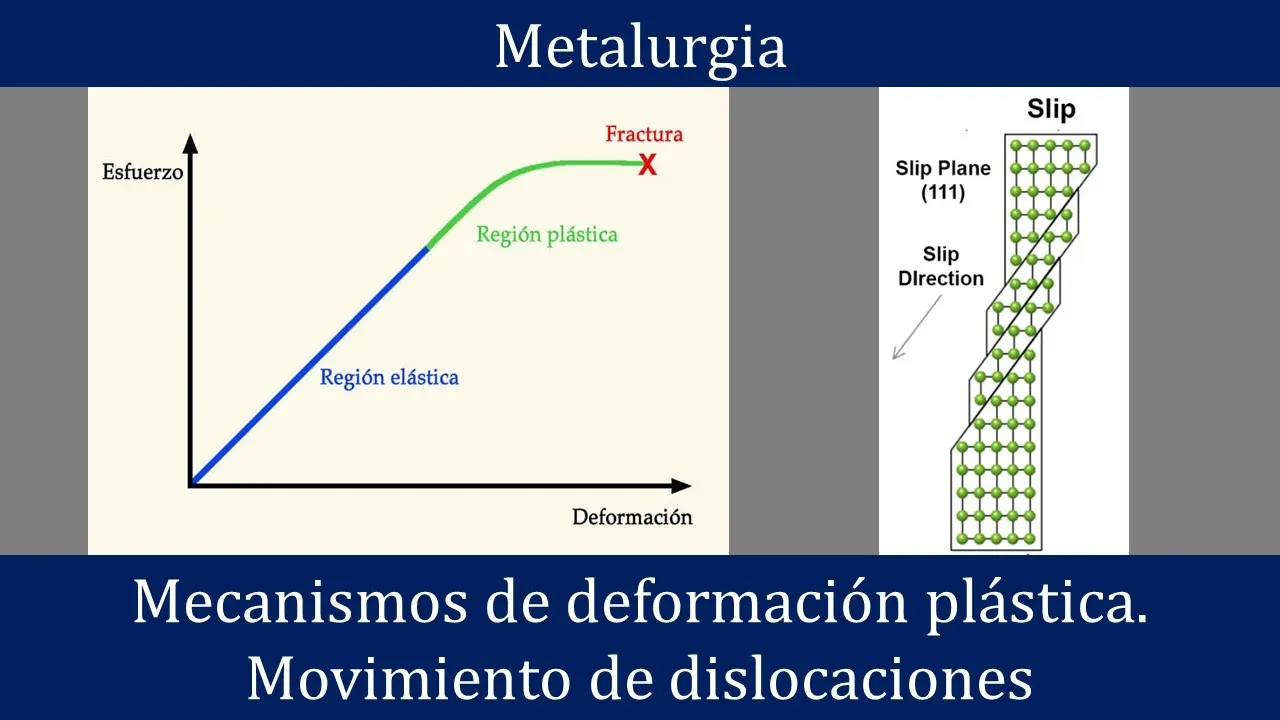
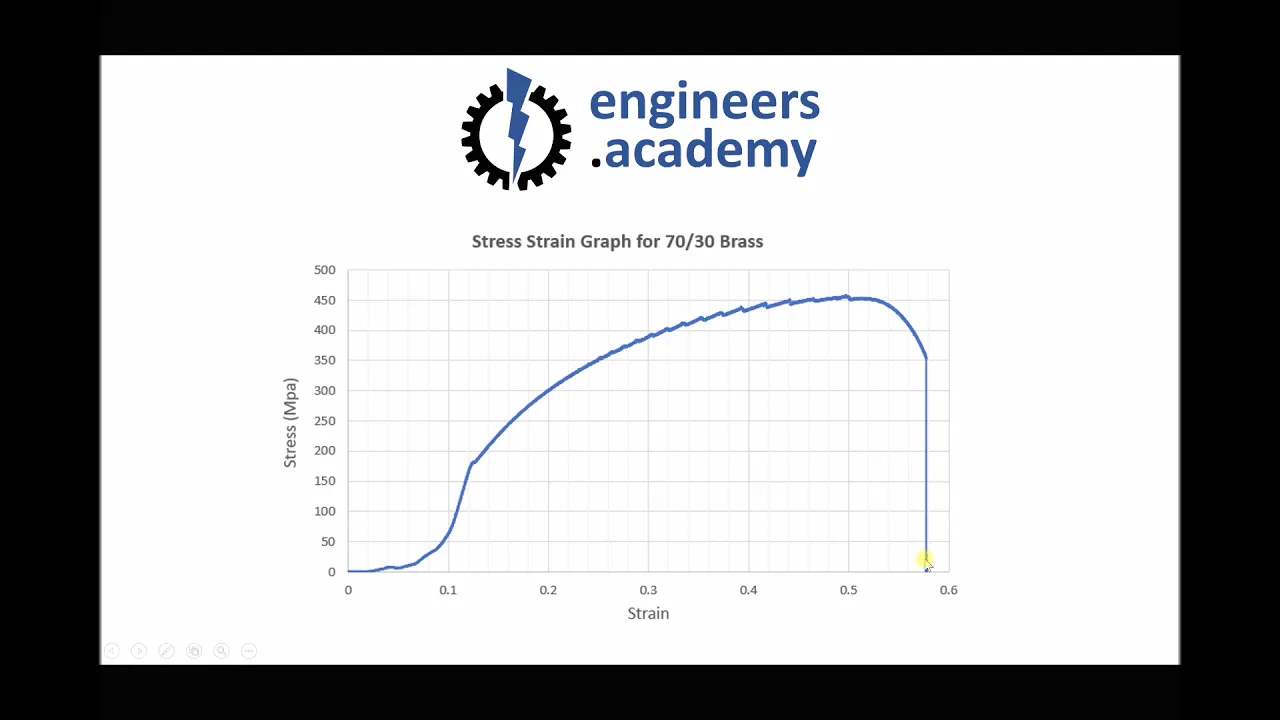









This lecture covers the fundamental concepts of stress and strain in materials, including normal strain (change in length/original length, ε = ΔL/L) and shearing strain (change in position/height, γ = Δs/L), and explains how these parameters relate to material behavior through tensile testing. The instructor demonstrates how stress-strain curves reveal key material properties: elastic modulus (slope of linear region, representing stiffness), yield strength (stress at 0.2% offset for permanent deformation), ultimate strength (maximum stress before fracture), and ductility (percent elongation at fracture). The lecture emphasizes that engineers use factors of safety (FS = failure stress/working stress) to account for uncertainties in material properties, manufacturing variations, and unexpected loading conditions, ensuring designs are safe and reliable.
Stress-Strain Relations: Tensile Testing & Material Strength
Added:so today we are going to learn a little bit more about stress and also another factor that's really important with respect to understanding how materials carry load and what they do while they carry load and that other parameter we're gonna learn about today is called strain okay and so by way of introduction of the idea of strain what I'm gonna do is go back to our unrealistic material model right unrealistic but very simple and yet you know it does at least for our purposes here it does accurately reflect what real materials do on average even though the bonding you know kind of scheme inside of a real material is more complicated than the way I'm showing it up here okay the idea still holds so over there on the Left what you see there is an example of one unstretched bond alright so this is again about the smallest piece of material that we can think about just two particles with one bond in between them okay and think about what happens if you take this you know this little piece of material right here and you begin to load it okay so there it is it was unloaded now we're gonna put a force on it okay so when we put the force on it like this of F what happens it stretches okay so stretch it out to about like that right now what we've talked to about up till now is the idea of how much does it take to break a bond you know between a piece of material today we're talking about before we break it it's gonna stretch some right we're gonna talk about in that zone before it actually breaks how does it stretch and can we characterize how it stretches okay so for this example now where this thing was you know on the page there it looks like it's about it was about four little squares long now it looks like it's about five little square long because we have applied this force of f2 that little bond okay well my next question is this what if I now apply the same force to this little chain of the same kind of material so we imagine that these bonds are going to more or less be the same type of bonds as the first case right we don't expect there to be any difference between how these bonds behave and now I apply a force of f2 this chain okay with me so far what's it gonna do okay so what we're gonna do is now stretch this to the point where the you know I'll try to make it about right but to wear one of the bonds now is about five squares long right why do you think I do that like I've looked at one of these little bonds and I'm gonna stretch it out to where now it's five squares long instead of four right any one bond is gonna stretch about the same amount so if we apply a force of f2 this chain each bond we now expect would stretch about the same as what the last one stretched right and yet what happens with the overall length of the chain okay it gets longer based on how many bonds there are is the suggestion here and it gets proportionally longer if it started out longer right that makes sense right if it started out being longer then you apply a force to it it's going to stretch more any one bond hasn't stretched more but the fact that you've got a larger number of them chained together means that the overall thing will stretch more okay what we would like to do is come up with a parameter kind of like we did for stress where we came up with a parameter you know stress is a parameter that essentially describes on average how much force is any one bond carrying right and that way we know whether or not we're close to breaking it because anyone bond can hold some amount of force and so you know if we have a parameter that tells us about how much force any one bond is carrying then that helps us to know if we're close to breaking the material well this time what we want to do is figure out another parameter that tells us how much is any one bond stretching okay and what we're seeing here is that that's going to be a function of how many of them we have chained together so what we'd like to do is eliminate that factor right and get back to what how much does any one bond stretch and so what I would suggest here is that you know let's say that you know this little guy stretched by one this was the the difference in length now of this piece was one little square right what would you expect the difference in length to be for this guy three squares because each bond is giving you a square right and so if I wanted to come up with a consistent way of describing how much any one bond stretched and I wanted to do that on more of a macro scale instead of a micro scale what would be a good way of doing that let's say I apply a force to this this little block of material here and under that force that we apply to the little block of material it then stretches by some amount right so now it has a new length coming out to about here under that force that I apply to that when let's give that a name okay or a variable at least we typically call this deformation and we give it a variable this is a change in length is what we're talking about there okay so it started out one length and it changed the variable we usually give it is a lowercase Greek Delta okay so now my question is this if I want to come up with a parameter now that describes on average how much did any one of the bonds stretch what would I do in terms of my macro dimensions that I have on this body what would be a way to eliminate the factor that we just identified that said the longer this piece started out the more it will stretch even if it's not under any more load okay we could divide by something I wouldn't say cross section because that the cross section kind of describes how does it divide up the force that it's feeling right it has to divide that across a certain number of bonds well this time let's say we have you know a uniform we're making that uniform the same amount of force per bond we're trying to figure out how much now does it stretch right and and we want to have a value for on average how much does one bond stretch well to normalize this just like we had up here if I if I say we stretched by one but the original length was four I could basically take 1/4 right and that would be how much we stretched per bond right you know it started out being four units long and it and we stretched by one little unit down here how many units did we start out long four times three right so we started out four times three long all right and we stretched by three so if I take four times three which is 12 and I stretched by three I'm stretching by three dividing by 12 what is that fraction one over four which is the same as the one before it what I'm trying to motivate here is that if we take the amount that we stretch and we divide by the original length then we'll have a parameter that will track with with however much one bond is stretching in the material it will scale proportionally to however much one bond and the material is stretching that makes sense okay so if I go ahead and identify that this thing started out being you know L long and now it stretches by Delta then if I take L over excuse me Delta over L okay then that should be a good parameter for us to discuss how much any one bond might be stretching in the material okay and that is exactly how we define something that we call normal strain okay normal strain which we give the little Greek epsilon as a letter to talk about this it's just going to be the change in length over the original length and just so I'm complete with this there are actually some interesting other definitions of strain that I don't want to get too far in the weeds but if you begin to stretch this thing then you could make an argument that that would say you probably should keep up with how much you already stretched it to figure out what the original length should be at any given position of how much you stretch it more that's that idea if you apply an idea like that you can come up with something that's called true strain all right we're not gonna deal with that because we're close enough by just saying original or how much the change in length divided by the original length and just call it good this type of strain is known as engineering strain right so we just say that's good enough to talk about what was the original length and how much did it change and we'll define strain like that okay so that's normal strain I want to point out here that in normal strain the the direction that the part is extending so in other words the you know the axis along which this this thing is moving right is parallel with the direction of the applied force right but also the direction of the original length of the part is also along that same direction right so the the L that we're talking about here was already measured parallel with the direction we're applying the force and it's also parallel with the direction that it's extending okay well you might get the idea that I'm setting something up that maybe not all of them are like that like maybe there are other kinds of strain besides normal strain would you get that kind of feeling okay and you would be correct to think that there's something else coming so let's actually slide down here a little bit let's talk about shearing strain okay so with shearing strain you imagine taking a little piece of material and applying a force kind of in the same direction as we did when we talked about shearing stress right and under a force like this how does this little block deform would you say I think we talked about this briefly last time too okay it's going to actually turn into a bit of a parallelogram and by the way how much real materials really do this is usually pretty small all right I'm exaggerating it like crazy so that we can see it on the diagram but they do this right they do actually skew a little bit in shape under this applied force as I'm showing here okay so let's say that this is the new shape of the material under this applied force okay well how much deformation is there here where's it where's a reasonable place to measure the deformation okay we could say this point over here I'm just picking a point but let's say you pick a point you say where did that point move to right so that point moved to there so the amount of of change that happened is right here okay and so let me actually name that I'm going to call that Delta but with a sub s on it to kind of mean that's my you know my change in position in a kind of a shearing orientation all right so now my next question is this what if I had another block that I did something similar with and I applied the same amount of shearing stress to another block but it had a different cross section to it sort of this way right the different size of cross section to it that I'm showing in green right what if it had a different size that way but I still applied the same stress would you expect the same strain if I had the other dimensions being the same okay so the green let's say the green size increases in size but we would increase force proportionally so that we kept the same stress and then I also kept the same height should I have the same amount of deformation less more what do you think no idea it's okay if you don't have any idea I would pretty I would submit to you that we should probably have about the same amount of strain okay because any one bond is going to be experiencing some level of skew right and we're applying the same stress in both cases so any one bond is experiencing the same amount of sort of deformation there and so what really matters with respect to this is not necessarily the size of the base but more the size of the height all right so let's now take another example what if I took a block that was otherwise the same size and applied the same kind of stress to it but change this dimension to where it now it's taller like this okay and I apply the same stress to this block and I want to figure out what does it do what do you say okay same direction right that someone just said it's going to deform the same way but more okay and I I like that thought didn't draw that super well but call it good right there my my guess is that this Delta value that I have right here will increase as a result of changing the height of that block okay so I know it's kind of taking a second to really describe this but the way that you would normalize how much you would expect any one bond to have skewed is based on taking that change in length under the applied stress and instead of dividing by a length in the direction of that change in position right we're now going to divide it by a length that goes this way right because if you go taller and taller and taller you would expect to have more and more skew under this applied stress okay so hopefully that that kind of makes sense to you and I'll say the letter that we often use for shearing strain is gamma and how do we define it you think okay me okay this is shearing strain is gamma and you're saying Delta s right and you know I really probably should have drawn this L over here because that's where I also have my Delta s I want to kind of explain it for the same piece of material okay Delta s over L okay same definition what's the one thing that changed okay now the change in position which is Delta s is perpendicular to the length that we care about okay that height all right so that's our definition of shearing strain and I have to go off in the weeds just a little bit here now all right and talk about something that's a little bit interesting have you guys ever heard of something called the small angle approximation okay this is something that people who like kind of the mathematician way of thinking about things they don't like this very much people who operate more in the engineering side of the of the house we love this because it makes things easier and it works well enough okay so small-angle approximations okay so let's let's start with this is for trig function so let's start with the sine function let's say I've got you know set of axes here where this is y and this is X and I want to plot the function y is equal to the sine of X what does that function look like okay it's a sinusoidal curve right that's going to be centered so that it passes through 0 0 they're close enough right ok next question is what if I take the derivative of that curve and set the place where I want to evaluate that derivative equal to 0 the x location of where I want to evaluate the derivative equal to 0 ok so first of all what's the derivative okay cosine okay and now I want to do that at X equal to zero okay so Y prime at x equals 0 is 1 right what does that tell me geometrically okay what it tells me is that if I take a tangent line to this curve that passes through zero right there what's the slope of that line okay and a line with slope of 1 that passes through zero has what equation okay which means if I take a very small range on either side of that curve right then it is close enough for me to say that the sine of X is approximately equal to X as long as I'm in a tight little range to either side of that point right how far can you go believe it or not it's farther than you might think before you start getting large amounts of error all right okay good with me so far I'm not gonna give you an actual value of how far you can go cuz you can figure it out yourself exactly how much error you have the further you go away from zero but as long as you stay pretty close in there this that's that's a relationship that holds pretty well there is one other thing I should say about it how do you have to measure your angles in order for that to actually work you got to use radians to be measuring your angles in order for that to actually work okay good shall we do this for another example what about the cosine make it a little bit smaller here so we can fit what's the cosine function look like okay y equal cosine X what's our cosine function look like okay sign function but now shifted to where there's a peak at zero right something like this okay where this is X and this is y okay well now my question is this what is y prime for this function okay well what is y Prime at X equal zero now we we did that I kind of formally with calculus there right but we could have done that without the calculus probably what would we have seen I'm asking what is the slope at zero right it's a horizontal line so now my next question is if we stay really tight in on this one you know say a little range right around zero how could we approximate cosine of X okay so there really the question there is you know what's this value and I would say that for any of these you know for this trig function either sine or cosine the peaks happen at what height one okay and it doesn't vary because the slope is zero right so this height is one and so I would say the cosine of X as long as the angle X is small is approximately equal to one all right now at this point you're kind of saying we are really on a tangent now right glad you mentioned that right because that's what we need a tangent what is the tangent function what's the what is one of the identities for the tangent sine of X over the cosine of X okay if X is small what is this going to be approximately equal to X right if sine of X is approximately equal to X and cosine of X is approximately equal to one as long as we have small angles right then the tangent of X is approximately equal to X okay and so now you might really be thinking this is this is bizarre why would I need any of that okay well let me show you why you might want that let's go back up to this triangle that we made right here okay and I'm going to draw that triangle separately right down here that triangle has a height of L and it has a length up here on the top of Delta s and it's a right triangle okay let me define an angle right here and I'll just give it some name what is the tangent of fee for that triangle Delta s okay over L okay well that's exactly what we had up here Delta s over L okay and so what I'm trying to motivate here is this even though we we started out with a definition that wasn't any different than normal strain right it was a change in position divided by some length and that gave us this shearing strain we can prove easily enough as long as the angles aren't too big that that's pretty much just the same thing as the angle that is formed when it begins to deform okay and you got to see a little bit of small-angle approximations along the way so that's fun so all I would say here is that usually what we do is say that the shearing strain is just this angle that is formed once the the body begins to deform but I wanted to motivate that it's really not a different definition other than the fact that the length that you're chanting you're measuring to normalize how much you have deformed right is perpendicular to the direction that it's deforming right all right that takes a little bit to show you that but small-angle approximations are are very important in a lot of areas of engineering and so I figured this is a good chance as any to get you introduced to the idea of them alright that's good stuff what I want to do now is I want us to think about should there be relationships between stress and strain okay so let's actually go back up here again and you might have wondered why I didn't do anything with these other blocks right here let's get back to them and start looking at them so for the unstretched block up there on the top now I've got four bonds right so what would how much force would it take to apply to that entire face right how much force would it take to apply to that and apply to this right in order to have each bond carrying the same amount of force as the cases on the left side for F okay and what I'm trying to motivate here is this idea that the amount of stretch that we have per bond should be related to the amount of force per bond but what we really have for those numbers are stress and strain right the amount of force per bond is stretch stress and the amount of stretch per bond is strain right and so we could have for F there and once we put for F on there any one of the chain of chains of bonds is going to stretch the same way as we had over on the left side right so I didn't label this earlier but what I should put on here is that this is happening under some amount of stress right and under that amount of stress I should exceed see the thing exhibit a relatively constant amount of strain as long as we aren't failing the material okay and in fact that is what we see the same thing happens here where you know we might need to put on for F here and for F here to account for all of the different bonds that we have so we're going to stretch that with that value and it should stretch the same as the case over there on the left side all right so hopefully this motivates it just a little bit that there should be a relationship between stress and strain and in fact there is and we as engineers I don't know if you've ever heard kind of the idea that engineers get to break things how many of you started you know started engineering with this idea that I want to be an engineer because I hear engineers get to break things okay I see a couple hands there's usually a few all right yes we get to break things here's the thing though breaking things tends to be expensive right but you kind of need to you'd need to break things in order to know what does it take to break things right my son is five years old and he is experimenting with this almost constantly right he loves breaking things why because every time he does he learned something right that's how much it could take before it broke right and then he looks at it and whatever his toy was that just broke he has this you know short period of joy for having broken it and then he realizes now his toy is broken right so this happens a good bit my point with this is that yes as engineers we get to break things but also as engineers we are trying to do this so that we maximize how much we learn from it and we minimize how much it costs does that make sense so we want to make sure we learn as much as we can from as low a cost of a you know experiment where we break things as possible so in other words we don't want to build a part that costs you know ten thousand dollars and then try it out and try to break it first we want to learn something about whether or not we think it might break before we break that thing if we could break a five dollar item and learn something so that something that we could then may be applied to the ten thousand dollar item that would be a good deal right and that is exactly what we do in engineering we do material testing and we do it on relatively simple specimens right one of the most common shape of specimen looks like this is often called a dog bone right and it's built to where it has a round circular cross-section to it and what we do with a specimen in order to learn something about the material it's made out of first of all when we make the specimen we try to make it in a way that we have fully specified the exact manufacturing process it took to make that material right so we if it was heat treated we try to be very careful about how it's heat treated so that it's exactly the kind of material that's gonna be like the thing we make our ultimate part out of right or if it's gonna be you know is another process it's called cold working which involves intentionally you know deforming something permanently right we try to figure out exactly how it was cold worked so that we can make the specimen into such a material that's exactly the kind of material that we want to build our part out of ultimately okay so we start there and say you know get reasonably confident that we've applied those same types of manufacturing process to the specimen but then we put it into a machine and the machine will apply a force to it like this and that's called tensile test tensile testing or tensile testing is usually kind of slur that together a little bit but we put a tensile force into the specimen but we don't just put a tensile sport force into the specimen and and pull it until it breaks we want to learn as much as we can from it while it's breaking okay so what do you think we do okay one thing we do is before we stretch it or anything actually in the process of building the specimen we want to make sure we know exactly what this diameter is to as close as we can measure it why okay I think we we're pretty sure that's it's gonna break somewhere in that little neck right there right why do we want to know that diameter and hopefully as accurately as possible okay we're gonna be able to measure with our tensile testing machine we're gonna be able to measure how much force we put on this thing right it's for us to know how much stress happens on that on that little spot right there we need to know the diameter so we can calculate the area right so we measure that and we say this little right this little you know area right there we compute what's called a gauge area okay so that's one of the things we try to measure carefully what else do you think we might want to measure carefully the length and actually what you do is you you pick a couple of points you know maybe one up here and one down here and you accurately measure what was that length right what do you think you might call that maybe a gauge length right so you've you've tried to accurately measure the area of the part that's carrying the stress and then we measure a little gauge length right there and what we'll do is you know usually at that point the the equipment that does the tensile testing has another attachment that it attaches to it and basically it like clamps on right here and clamps on right here and then some super accurate instrumentation is able to track that length right there live as we begin to stretch it okay so we start stretching it and what we care about there is not so much the actual length itself what we care about is how much did it change in length right so out of this right here we can derive a change in length and we will be able to relate that change in length to how much force is being applied because both of those things will be measured by the tensile testing machine as it breaks the piece of material okay and you know I'm gonna at some point I'm gonna show you on one of these machines back here we have the you know these types of things set up on one of those machines and I'll be able to show it to you by the way the little piece of instrumentation that measures that Delta that's called an extant saw meter if you want a fancy word for that it measures how much did it change in length all right did I see a hand over here no just stretch it all right so this is what we do with a with a specimen like this and so the next question is what do you think we're likely to see if we take our force of F right and we plot it against what do you think Delta all right those are the two things we're trying to simultaneously measure and so let's say we end up with a set of axes here where we're plotting F relative to Delta okay so f there and Delta down here okay so there's gonna be some phases of this piece of materials behavior right we just finished talking about a range of this materials behavior where all your bonds are stretching all right they're not breaking yet they're just stretching all right so if we plot this or if we if we look at this curve there is going to be a region of this curve where there's almost an exact straight line okay so that as we apply more and more force there's a you know change in length that starts to increase proportionally to that change in force okay all right well then at some point inside the material there is a point of stress where the first bond in the material says I've had too much and that first bond breaks okay now I'm gonna add another little thing on this and that you probably have in mind that this is some kind of metal maybe you do maybe you don't it doesn't have to be metal but let's say that this is some kind of metal you know the variety that we're probably used to metals have an interesting characteristic to them and that they are they have a property that's called ductility ductility basically means that they can change shape without losing strength they can like permanently deform without losing strength the reason why that is on an internal like particle by particle basis is that when the bonds inside of that material begin to break they are basically open to rebonding with other material that's nearby so let's say two bonds that were near each other both broke well those two bonds are now available and they hook up again right so this is basically the you know as the bonds are breaking they don't mind looking around to try to see if there's something else to hook up to and it doesn't lose its strength right and it begins to deform so what happens with this curve as those bonds begin to break and reform this curve starts to become very nonlinear and it might take on a shape that looks something like this as a matter of fact that's what most of them do if you test them all the way to failure the curve will be very linear at first and then after a while the material begins to permanently deform and the curve goes to where it's very nonlinear and I put an X doubt out there at that point what do you think that might mean yeah that's where it actually comes apart actually goes into two different pieces okay now there's something about this curve that you know causes a lot of people you know to go huh like why does it do that and it's this why does the curve curve back down okay the bonds break down at some point it starts to take less force even though you you keep on increasing that deformation at a you know at a particular rate that takes less and less force at some point to do that okay very good so one of the things that happens with these specimens is that at some point there's a behavior they start to exhibit and we're never exactly sure where it will occur where it will occur in that gauge portion of the specimen but it will start doing something that's called necking and what that is is that some relatively local location the cross-sectional area begins to change rapidly okay and that's called necking well basically where this thing starts to drop lower what that what's happening there is that the material has begun to neck and so even though you know we we would imagine this was a decrease in the amount of stress it isn't really because what's happening is you are decreasing the amount of area so just because the force is decreasing it doesn't mean the actual stress it's experiencing in that neck is decreasing what's happening is the area is decreasing right all right so that's about what this thing does okay I want to change this chart just a little bit because right now what we've done is one specimen okay we've tested one specimen and let's say we did that and this is the data that comes out that data is not nearly as widely applicable as it could be yet because we arbitrarily chose the size of the specimen in other words we chose what that gauge area was going to be and we chose chose what the gauge length was going to be and so what comes out of here could be different if someone else chose a different size of specimen right I made one let's say where the gauge length is one inch and the diameter is a quarter-inch okay and I do this test I'm going to get one set of values for F and Delta let's say my buddy makes one that has a 2-inch long gauge length and a 1/2 inch gauge area or a gauge diameter right so his results as far as the size of this curve are going to be different than mine because he chose a different size of specimen is there a way that he and I could wind up with about the same answer okay I think I hear a few of you saying what if we take the force and we divide it by the gauge area and instead of plotting force we plot that value force / gauge area okay also what if we take the deformation Delta and instead of plotting it directly we plot it divided by what you think gauge length okay what do I have as far as that fraction on the left that's now a value that's in stress that is how much stress the gauge portion of the of the material is carrying and what about the Delta over L that strain and so my point with this is that for both of those all I'm doing is dividing by a constant value right so it won't change the shape of the curve the func you know the fundamental shape of the curve it just scales the curve right it's gonna scale differently because I I'm dividing each of these values by a constant okay and so what I'll basically say is that instead of this being F and Delta now this curve can be expressed in terms of stress and strain okay and what I'm showing there is called a stress-strain curve for this material and now it is independent of the specific dimensions that I chose for my specimen I could choose one set of dimensions and a buddy of mine could choose totally different dimensions we should come up with roughly the same curve because the curve is now describing something that is purely a material you know a function of just the material not a function of the size of the specimen right so and what we're coming up with is how does the nature of how the bond stretch relate with how the bonds carry force okay now let's actually look at a few other things on this curve okay what's one thing that you feel like might matter that we might want to sort of once we've done this for a type of material we might want to publish our results like if someone's trying to design a machine and they want to use this kind of material to design their machine what are some nature what are some of the pieces of this curve that you think they might find interesting okay it's a lot of times one of the first ones people think of is the slope of this linear portion because that's an indicator of how stiff this material is yeah okay the point at which it goes into plastic deformation that's another thing that might matter so you're looking up here you're saying there is a limit where at some point it's no longer linear and now it's gone up into this part where it's nonlinear and that's you know he used the term plastic deformation that's exactly what we call that over here to the left side that is you know anything over here to the left this is considered to be elastic and anything over here to the right is called plastic deformation okay so that's another interesting thing can you think of anything else that's interesting okay now when people say breaking point usually what people say to think of is they think of where is this X over here and this is a little counterintuitive but I'm gonna tell you that where exactly that X is located that actually doesn't matter very much okay here's the reason why when we're testing these pieces of material when it gets to the end of this curve it's not very constant exactly what happens and the reason why is that this necking has begun to occur and so that's a little bit of a chaotic I don't know the behavior of it a little bit chaotic right how exactly it next isn't necessarily the same every single for every single specimen every single time so sometimes this curve might end right where we showed it sometimes it might actually fall off and end up with a kind of a downward line like this and it's not very constant or consistent where exactly that breakage occurs okay so he says what about the necking point and I would even say yes what I'm what I'm curious about is just how high did that curve get right that is another factor that would be important to us okay as a matter of fact you guys were very good at picking out in concept the three things that matter most to us about this curve right so let's talk about them and actually give them some names right you guys mentioned the slope first so this slope over here is you could measure it in terms of you know stress and strain right how much stress do I have for a particular amount of strain and that slope is called the elastic modulus okay so the elastic modulus we use the capital letter e okay and that's going to be equal to stress over strain okay and say with the parentheses next to it in the elastic region okay so II there again that is our modulus of elasticity or another word that we use for it sometimes is Young's modulus okay and like I said earlier that is a measure of how stiff the material is interesting thing here your modulus of elasticity stays relatively constant within a material family so if you're talking about Steel's then it doesn't make very much difference how you process the steel it keeps roughly the same modulus of elasticity even if it's processed differently than another type of steel okay now it might end up a little bit different than stainless steel because stainless steel is only called stainless steel because it does have some iron in it right but it is a very different kind of a material so but anyway the point is if you're in a particular material family the the elastic modulus doesn't actually change very much within that family okay that's good elastic modulus that was one of our items that we needed to look at okay what's the next one you want to look at okay someone says yielding strength and that's going to take us a little bit of a focus to try to think about our yielding strength and here's why technically your plastic deformation begins as soon as the first bond breaks in the material now this is where my material model that I had that I've been working with really breaks down okay it breaks down because the way real materials work the bonds are not all just straight in a row they're very chaotic as to what direction they all go on average they start averaging to behaving as if they were just these things that are kind of straight in a row for many many factors that we might care about but this is one where that that starts to have an effect on the behavior of the material because it makes it very difficult for us to know where exactly did the first bond break right that curve doesn't tend to all of a sudden change right it's kind of a smooth transition into this part into this non you're part the non-linearity is an indicator that there are bonds breaking and that there will be permanent deformation right but it's hard to tell exactly where it began occurring okay so what how do how would we go about trying to come up with a consistent technique to where me and my buddy who wants to also do material testing can come up with the same answer as far as where does this plastic deformation begin what do you think you got any ideas okay here I'll give you one what if we go back to this idea that there what we're trying to know is whether or not there was permanent deformation okay there's it is kind of like where does the slope change but that so that's another suggestions like well it's got to be where the slope begins to change the problem with that is that when you do this testing it isn't a continuous curve it is a set of points and once you break it down to where it's not a continuous curve and it's a set of points there's enough error between any two points that it's hard to say when exactly the slope begins to change even though conceptually you're right it's the function of doing it functionally like doing the actual work of trying to figure out where that slope changed isn't easy it might not even be possible okay so there's another good idea but what I was gonna get to just a second ago is what we're trying to know is whether or not the material has begin to begun to permanently deform right so let's actually define some finite amount of permanent deformation where we officially say we will say permanent deformation has occurred when this amount of permanent deformation has occurred something we can measure right and let's pick a value but let's all agree on the same value and say when this amount has occurred that's when we'll say that we're into the plastic region okay and I don't know all the history as to why they picked this but the value that is has typically been chosen for this purpose is this little value to where you you more or less show some amount of deformation right here that is 0.2% or a strain value of point zero zero zero two I get that no point zero zero two excuse me so people sometimes refer to this as 0.2% what they mean by that is that the definition of strain is itself kind of a percent right it's how much did you change in length divided by the original length so you can think of that as being a percent and if you have 0.2% of deformation then people say okay I think that that permanent deformation has occurred okay what you do is you offset on this axis by 0.2 percent and then you draw a line that's parallel with the linear portion of the curve over here and where this line intersects with this curve right here that's what we will define as being yield strength okay by the way I had to I had to put some space in between those so that you could see that there was some right so that we could talk about it but this is a fairly small amount right so it may not actually be as pronounced as what I'm showing up there right but anyway that that point right there is actually just a little bit beyond where the plastic deformation really began but it's where we're gonna define this idea of yielding strength okay and this value right here sometimes we'll call it Sigma sub Y to indicate that that's a yielding strength all right that's how much stress the material can hold before deforming permanently okay and usually at this point someone has another comment right I mean let me actually put this and write this down this is yielding strength usually at this point someone has a comment and says well is there a name for that point right because we're saying the point where it really started to go nonlinear is a little bit before where we're defining yield strength okay and the answer is yes this is known as a proportional limit okay but it's not used as much because it's harder to figure out where exactly it is we can talk about it in theoretical terms but in terms of practical terms it's hard for us to know exactly where that proportional limit is whereas it's easier for us to define a consistent place where the yielding strength occurs okay all right so those are two of the items that's yielding strength and we had modulus of elasticity before what else okay someone says tensile strength and that is a term that is used for this this particular textbook we're using typically refers to this as ultimate strength okay so this thing right here is the ultimate strength okay and that stress value at that point that's the most it can reach is that ultimate strength all right so those are some interesting things to think about on here let's go back again and you know someone mentioned that where this thing actually begins to break might be interesting it's not totally uninteresting right there is something interesting about that point but it's not what you might think what that represents is just how much this material was able to deform before losing all of its ability to carry any sort of load right and that's the piece of this that's interesting is how much strain occurred from the very beginning out to where that thing let go okay and what this is often referred to as percent elongation at fracture okay and that's important because that is a measure of the ductility of the material okay so I'm gonna put that down below this measures the ductility not only that but I will say I'll give you an idea so that you know whether or not you it's appropriate to call a material ductile right if your material can stretch at least five percent before breaking then it's usually considered to be ductile right so if it can stretch you know strain at fracture if this is greater than or equal to about five percent then that means you are ductile okay and that's this value right here is the strain at fracture all right so this brings up another question if a material is not ductile what is it okay you guys already know this kind of the other end of the ductility spectrum is typically called brittle right so let me show you a stress-strain curve for a brittle material kind of a typical brittle material okay and I'm gonna do it a little bit smaller because it's less interesting so think of something like glass or ceramic or something like that that's usually a brittle type of material we've got stress here just give me stress there and strain on the horizontal what do you think the stress-strain curve might look like okay it still it still begins linear at some point the first bond and the material breaks but the material it's made out of is not one that rebonds with itself once there's a breakage right it's a different it's differently it's different at a at a particle level or at a molecular or atomic level it's different and it doesn't want to rebonds the first one breaks well once the first one breaks then that's one less bond that's carrying the load what happens to all the other bonds it increases the amount they have to carry because one broke so they were already close to breaking because everything was close to carrying the amount that would break them before that happened so once the first one breaks the next one breaks and the next one breaks and this thing breaks it's a lot less interesting right so this is a brittle material here okay few things about brittle materials very often they have sometimes they have steeper elastic modulus values there are a lot of times stiffer so in your mind maybe you're thinking of glass or ceramic or that kind of thing those are often stiffer than materials that are ductile so they might have a steeper curve in this portion right here what do you think in terms of do engineers like to work with brittle materials if okay we do sometimes work with brittle materials because sometimes we don't have a choice right sometimes in order to get other properties like heat resistance or you know a number of other things that you might need or you know being able to withstand abrasion or you know there's a whole bunch of things that you might care about and sometimes the only material that can do what you want to do there is brittle right but if we can help it we would rather choose a ductile material in most cases why do you think that is okay there's a little bit of a margin of error not be able to fix it the big thing is a lot of times you will know you'll notice something changed before there's a catastrophic failure right a lot of times for a part that is ductile you'll see that some something changed in shape you know there's a dent that shows up or the hole elongates or something along those lines and you say oh there's something that changed there and I think it's a problem before there's a catastrophic ethic problem right so it's a it's a common thing for us to prefer to work with ductile materials over brittle materials and there's a lot of other reasons too but that's you know one of the reasons why a lot of the materials that we work with are ductile we prefer to work with them all right let me show you one of the thing here on the material testing just so we don't leave it we could also do similar kind of tests but instead of testing a specimen in a normal orientation we could do it in a shearing orientation and what do you think we would find okay let's say we did it all kind of similar and now what we're gonna do is plot shearing stress on the vertical axis and shearing strain on the horizontal axis what shape you think we might see now it turns out they typically aren't much different right something like this but let's actually give some names to the different aspects of this curve so that we can talk about them right because they aren't the same numbers as we had for the normal orientation so we should probably have different names for the parameters for instance what if we take the slope of the linear portion which now is going to be tau over gamma that that slope okay that's called the modulus of rigidity we give it the letter G and it's just the slope of that curve in the elastic portion okay what else might matter to us okay the same stuff right it's there's this part where it stops - it stops being elastic right and that stress value at that point and so this would be the yielding stress and shear okay maybe I'll put it just over here yielding stress in shear what else matters okay ultimate stress and shear all right question okay his question is what kind of a shape would you use to test shear and the best answer for that is that they will often have a round rod that they will twist okay and we'll get into that that's actually much later in the course where we look at the stresses that are induced in a shaft or something that's like a round member that is subjected to a twisting action but it turns out and this is a preview of coming attractions when you do that they experience basically pure shear on the outer surface of the shaft and so that's one of the ways that they go about doing the testing for this okay all right any other questions before we move into our next little excursion into knowledge all right well then we'll get going factors of safety okay and I'll let you have a little preview of the problem that we're about to do in just a second let me define for you what a factor of safety is okay a lot of times we will abbreviate this with just F like FS like this some books use a letter lowercase n to talk about factor of safety I don't usually do that in this class because that's not what it has in the book but say so a factor of safety here's how we define it okay what we put in the numerator it's basically a fraction and what we put in the numerator is a stress that causes failure and what we put in the denominator is sometimes known as a working stress what do you think these might like what's a working stress right it's like how much are you planning on putting on this piece in practice like when you're having it do what it needs to do this whatever the part is that you're designing when it's doing what it needs to do and it has a particular stress on it okay that's the working stress and then based on material testing we might have an idea as to the stress that would cause something to fail so we put that up in the numerator now that actually needs to be thought of a little bit more carefully to what do we mean by failure okay so there's at least two things we've already talked about failure can mean permanent deformation okay where does permanent deformation begin like you get up to you get up to your yielding strength right you get up to your yielding strength if you keep on putting more stress on past the yielding strength you can expect that you will likely cause permanent deformation on the material okay so that's one way and what's another way okay this is the one we often think of okay I'm just gonna call it fracture that's where you actually make the two pieces come apart you cause a crack and the you know two parts actually separate okay and what strength value do you think we would usually use to figure out when something might fracture ultimate strength okay so what kind of goes along with our permanent deformation the strength that we care about for that is usually our yielding strength and the strength that we usually care about for fracture is usually our ultimate strength okay and this is how we define a factor of safety and factors of safety are sort of almost a scoring when you're figuring out whether or not you're dizzy if you're designing something we'll be figuring out whether or not your design is adequate what if you end up with a factor of safety that's lower than one that means you're working stress in the denominator is higher than the stress that causes failure and that makes you feel bad right that makes you not want to design it that way well there's another question though do you want to design all your stuff to wear the factor of safety is exactly one like you say I'm planning on putting a hundred pounds on this part that theoretically can hold exactly a hundred pounds right unless you like to live dangerously you don't want to do that okay and here's why the behavior of materials tends to be more stochastic in nature that's a nice big fancy word what does it mean okay what it means is that the behavior of materials tends to be pretty predictable on average right but any one specimen that we get might be a little different right so we can kind of predict how they behave but not in a window that is perfectly deterministic right deterministic is the is sort of the other end of the spectrum from stochastic right terminus tic means we just know it out to 47 decimal places whereas stochastic means yeah we're pretty sure within this little range right so there's a little bit of uncertainty as what I'm saying with respect to exactly how much material strength we might have for instance okay what are some other factors that might cause you uncertainty about how much or how close you are to failing a piece if the load might have to be static versus is someone gonna put some sort of a dynamic load on the thing at the same time so if you're gonna you know think about that broadly you might say you might have uncertainty about exactly how much load it really needs to carry okay might be some repetition of the force so the force might be applied and then released and then applied and then released right it'll be awhile before most of you get to this point but you'll you'll learn about that whenever you get into one of the more advanced courses there's a property that's called fatigue or a phenomenon called fatigue it's where if you apply a load and take it off and apply it again and take it off and you do that for a lot of cycles your material may get close to failure even though you're not loading it up to the point where hypothetically you should have caused failure based on the stress-strain curve okay so that's a good another good example you know a lot of times this is you know when you're designing something and you're you're a designer you have to design against a reasonable level of misuse right when you're whenever you're driving along the road and you're about to go across say a small bridge out in the middle of the country right do you ever come to up to one of those and there's a sign there and it gives you the weights of the trucks that are supposed to be allowed to go across the bridge okay how many of you are a hundred percent confident that no truck heavier than those guidelines on those signs ever went across that bridge okay so what do you think the designers of that bridge probably did now they probably applied a little bit of a factor of safety so that they could account for a reasonable amount of misuse right because they don't even if someone drives too heavy a truck across that bridge they don't want the bridge to fall down right so there's this is the type of thing that we think about and we try to think of what is a reasonable amount of misuse that we should be able to withstand with our designs impurity the material right that would feed into how sure are we of the material properties that we're counting on yeah these are all good suggestions all right so let's actually get into this this problem here real quick we have two cables that are attached to this little block of structural steel okay we would like to for this piece of structural steel to end up with a factor of safety of two and a half against fracture so we're trying to find is what's the minimum width of that piece W so that we end up with a factor of safety of two and a half okay once we have that I want us to go further and figure out how much strain we might have right at the middle of the plate so if I was to do a cross section through the middle of the plate what's the amount of strain the material is experiencing at that location okay so I've thrown a little bit of a curveball at you here how so okay though you do need to figure out so someone suggest we do need to figure out where it's going to fracture or like where do we feel like you know would be our most likely place that this thing might break given what we so what do you okay at the whole someone says right so it's probably not just gonna break somewhere here in the middle right because there's more area that helps carry the load there so someone says no it's probably more likely to break here at the holes right and the parameter W controls how much area there is to help carry this load right okay so so I actually asked this question with some very intentional language here there might be other factors we would have to control on this body as well right like in order for its to get up to the stress that would fail that particular plane right there it means everything else would have had to hold up to the point where it got to that load right so someone suggested well that's only if the little chunk of material doesn't tear out the front first right and I agree that might be a separate problem all right figure out how much length do we need to be on the end of the thing so that it doesn't tear out okay but we're gonna focus on this particular one say how wide does it need to be so that it doesn't break at that location all right so what do you want to do okay let's remind ourselves what is a factor of safety okay yeah the stress that causes failure divided by working stress in our case we may not know the working stress but we can probably set up an expression that gives us working stress in terms of the things that we know and the things that we don't the particularly the one thing we don't being W right so that part's not that big a deal how do I know what stress causes failure for this material do I need to go find some structural steel and put it in my machine and do some some material testing and figure this out well it's going to be two and a half I need to make it to where the stress that it's experiencing is two and a half times less lower right then the amount that will cause failure but I do need to know what amount will cause failure for this material right and that's a material property so you get someone set it there second ago maybe there's some information like that in charts like maybe other people have done material testing and figured out the factors that matter to us do you think maybe that happened do you think that may even be a table that's in the back of your textbook like maybe even table a seventeen a table that may have even been photocopied and made available to you on Moodle okay this is a table you're gonna get familiar with this is the the us units version of it there's actually right next to it there's another one that's for SI units okay but we were dealing with a a problem in u.s. unit so I'll stick with this okay now what do I need to know off of this table okay someone says ultimate strength right for what okay so I have structural steel right here so I'm gonna read across and I see this number right here right 66 ksi what's that okay Killah pounds per square inch okay so thousand pounds per square inch is what is what ksi stands for okay and so when we are dealing with our factor of safety equation where we say two point five this is you know remember up here we're shooting for a factor of safety of a certain amount I'm going to plug in that value two point five the stress that causes failure is 66 ksi okay and if I want to convert that into something like PSI instead of ksi what what should I do okay there are a thousand psi in a ksi okay so I would multiply this by a thousand psi per ksi okay now what do I put in the denominator okay I need to put in my formulation of what stress is it actually holding right so what is that stress 6,000 pounds divided by cross sectional area of the part that might fail right which would be the thickness 0.4 inch times what W minus half an inch okay now that's a single variable equation so what can we do with it it solve it all right well that's nice that we're going to be able to solve this while I'm punching this in here so I'm gonna start showing you here that once you get something into a single variable equation there's no reason you have to manipulate it algebraically if you have one of these calculators you can just start typing 2.5 equals a fraction 66 times a thousand right while I'm doing this though I'm gonna make a comment and that is that I did ignore something here that I don't want to you know give someone who's trying to go and actually design one of these things in the real world I don't want them to use this exactly like I'm doing it the reason why is that I'm ignoring something that I haven't really talked to you about yet very much and it's something called stress concentrations okay we will get to that so one of the last things we do in this course suffice it to say that what I've just done this based on is what's called a nominal stress okay and it's not bad calculations this is still useful even after you learn about stress concentrations but it's not really the complete story just yet so but we'll still do it alright I think I've got it all in there is that right so what I do now now that I've got the equation put in you might see above the couch key it says solve so I'm gonna get that by hitting shift and then the couch key I already had a value stored into X and if I don't change this value this is going to be its first guess in its iterative solution internally that it does to try to find X okay so usually that's okay just to leave it alone for most of the problems that you guys mostly the time do if you have an equation that's nonlinear sometimes it's important that you get a better guess right this is a linear equation that I'm about to solve so the exact value that's in X didn't really matter okay and so when I hit equals it has now solved for X and what is it telling me there okay the width that I need there is one point zero six eight inches okay and that's W that's how wide I should make this piece so that I hit my goal of two and a half factor of safety against fracture again remembering that I'm ignoring stress concentrations with this particular method yeah say that a little louder ah so his his point is shouldn't we technically round this answer up why would he say that yeah so you know I I definitely appreciate the sentiment I'm not sure if we have any tools that will measure a ten thousandth of an inch right but if we did and we were that ten thousandth of an inch shy right then that might matter right we might be a factor of safety of two point four nine nine nine nine if we made it just a little bit shy of the actual number but I'm being a little bit silly here the the basic idea is right you know you want to make sure you don't go less than whatever this minimum threshold is right so I'll encourage you with that that's like yes you're thinking is right whether or not it practically would matter probably not because we probably don't even have tools that will know whether or not we were a ten thousandth of an inch short right yeah this question is if you try to solve this in your calculator and get something totally off what does that mean for this particular problem that probably means something wasn't entered quite right because there's not that much that can go wrong as far as the internal solution process for this particular set of information so when we get finished here I'll take a look and I'll see if I can find what what may have gone wrong let's go ahead and do the last piece of this problem what's that last piece ok strain of the cross section how would I know that okay do I know the length of this body that's not one of the Givens so I can't do like Delta L over L and find it by definition how might I go about finding it let me ask you this do I know the stress at the location it's asking about okay so I know the stress at the location they're asking about and let me ask another question do I think that this thing is in its elastic region okay how would I know whether or not this piece was in its elastic region go back to the chart right so let's look at the chart here real quick and say I you know the stress that I that I said I couldn't exceed was 66 ksi right at the you know at those critical locations right but I'm actually two and a half times less than that so how much stress do I actually have at my critical locations 66 divided by two-and-a-half is what will actually be occurring at those critical locations okay that's 26 point for you say okay even at the critical locations then do you feel like I will be yielding the material how do you know that okay says the elastic strength is 36 ksi and you're saying that 66 divided by two and a half is more like 26 okay so based on the fact that we use this factor safety yeah that's not we're not up in that range where we're plastically deforming the material we're in the elastic region the material most likely okay further if you look at the actual problem I'm not even asking you for the strain at the whole where am I asking you for the strain in the middle right kind of right in here will the stress be more or less they're less rights gonna be even less than the 26 number that he just sided for me right so I'm definitely in a zone where I'm probably still it last so now let's figure out how would I determine the strain if I can figure out the stress okay modulus of elasticity go back into the table again where's the modulus of elasticity okay it's over here for structural steel this says 29 but look up here thousand ksi that's kind of tricky okay this is 29,000 ksi right because of the heading of the table it says thousand ksi okay so what I'll do here is for this for this problem we're saying that 29,000 ksi that's our elastic modulus this is going to be equal to the stress that it's experiencing at the middle of the part over the strain that I'm trying to find how do I determine the stress at the middle of the part okay six thousand pounds divided by what cross sectional area which is just going to be equal to 0.4 inches times 1.06 eight inches that we just found so I'm saying all of that over the strain that I'm looking to find should be equal to 29,000 ksi okay do I have a unit's issue at this point okay I mean technically I don't because I labeled all of them right but the fact that I labeled all of them lets me see that if I just punch it straight in a calculator it will end up giving me something that's off unless I have put a factor in somewhere right where should I put the factor in okay there's a thousand psi in a ksi okay so now I can go ahead and enter this we can say twenty nine thousand times a thousand is equal to 6,000 ever point four times one point oh six eight okay all of this divided by the strain which I'll just put in as X and I'll have it solved okay and what's that value four point eight four three times ten to the negative four okay and that's not that doesn't worry us because these strain values typically are pretty small right that doesn't usually stretch very much you know relative to its original length so you know we're okay with this all right who's got questions or comments yes sir the fraction that I just wrote up there with the 29,000 okay so this first equation that I got right here came from my definition of a factor of safety I just populated that equation right in the numerator I put my stress that causes failure in the denominator I put my working stress okay my second equation there this one right here I got from the relationship for Youngs modulus based on this chart up here right elastic modulus is equal to stress over strain okay I happen to know for the material that was identified what the elastic modulus is and I also could figure out how much stress the material was carrying so I can then solve for strain because I know that the material is operating in the elastic region good questions anything else
Up Next
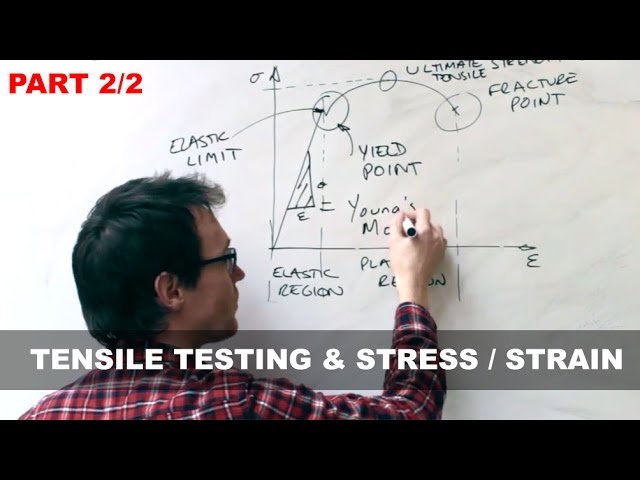
Stress-Strain Curve Explained: Young's Modulus & Tensile Testing Guide
@FuturefabOrgUk
153.2K views•2017-02-27

Ultrasonic Transducers: Resonant Frequency Measurement and Horn Design
@imajeenyus42
229.9K views•2017-02-22
Gear Torque and Speed Relationships | Motor Winch Geartrain Problem
@TheBomPE
96.1K views•2018-03-31

How a Student's Question Saved a NYC Skyscraper from Collapse
@veritasium
22.8M views•2025-04-26
Related Study Plans & Knowledge Roadmaps
Structured learning paths in Engineering