To verify a Stripe account, users must log into their Stripe dashboard, address any verification alerts shown in the red banner, complete personal identity verification using a valid government-issued photo ID (passport, driver's license, or national ID card) that is in color and fully visible, and provide proof of address (utility bill, bank statement, or lease agreement) dated within the last 6 months; business accounts additionally require legal entity documents (certificate of incorporation or partnership agreement), proof of business address matching the registered location, and bank account verification, while beneficial owners holding 25% or more ownership must also provide their ID documentation.
Stripe Account Verification: A Step-by-Step Guide
Added:Deep Dive
Basic understanding of payment gateways, merchant accounts, and how online transaction processing works.
The difference between a merchant account, payment gateway and processor.
50.3K
In e-commerce payment processing, a merchant account is the financial infrastructure that facilitates money movement, functioning like a bank account where funds from customer transactions are deposited and transferred to the business's bank account, with merchants paying a percentage-based discount rate per transaction; a payment gateway is the technical service that enables websites to communicate with payment systems, sending transaction requests to card networks and receiving approval responses within milliseconds, typically charging a flat fee per transaction; and a payment processor is the backend switch that routes transactions to appropriate card brands (Visa, MasterCard), with different processors offering varying capabilities like multi-currency support and dynamic descriptors, though the term is often used interchangeably with merchant account provider in business discussions.
Click to watch →
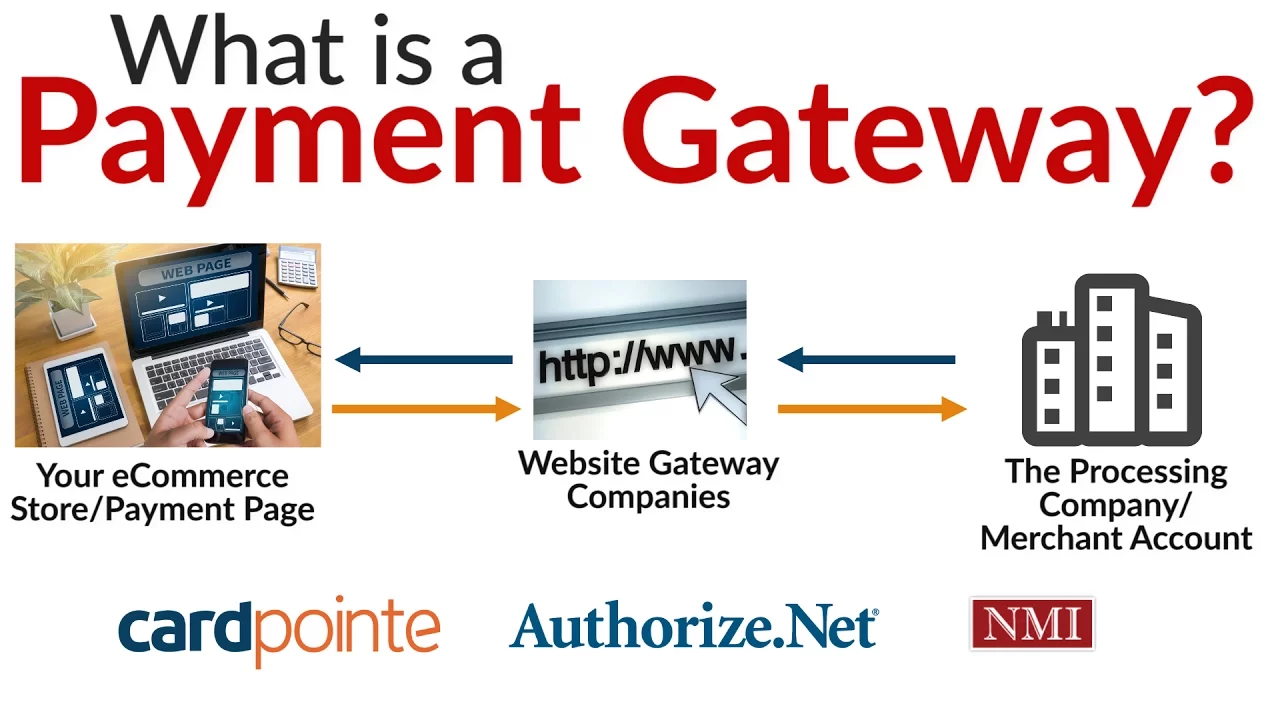
What is a Payment Gateway - 3 Ways To Use a Merchant Account Gateway
214.5K
A payment gateway is an online software tool that securely transmits encrypted credit card data between a business's point-of-sale system or website and the merchant account, facilitating online transactions; it differs from the merchant account (a dedicated bank account for receiving payments) and virtual terminal (staff-facing portal for manual payment entry), and can be integrated with various platforms including e-commerce websites like WooCommerce, standalone form builders, or virtual terminals for call center operations.
Click to watch →

Merchant Account vs Payment Gateway vs Payment Processor (Which One Do You ACTUALLY Need?)
3K
A merchant account is a bank account that holds funds temporarily before depositing them into a business's main account; a payment gateway is the technology that securely transmits encrypted payment information between customers, merchants, and processors; and a payment processor acts as the intermediary that authorizes transactions, transfers funds between banks, and facilitates settlement. These three components work together: the gateway collects and encrypts payment data, the processor validates transactions with issuing banks and transfers funds to the acquiring bank, and the merchant account holds funds until settlement. Businesses need all three to accept electronic payments, though some all-in-one platforms like PayPal or Stripe may bundle these services together.
Click to watch →
Free Payment Gateway | Accept Online Payments | Accept Online Payments on Website
204.6K
A payment gateway is a third-party company that facilitates transactions between a customer's bank account and a merchant's bank account. When a customer fills in their credit card, debit card, or other payment details on a website, this information first goes to the payment gateway. The gateway verifies all the details and then transfers the money directly to the merchant's bank account. Customers never transfer money directly to the merchant's bank account; instead, the payment gateway acts as an intermediary to ensure secure and verified transactions.
Click to watch →

Architecture Of PaymentGateWay
291
A payment gateway is a technology enabling e-commerce websites and applications to accept customer payments through debit cards, credit cards, net banking, and UPI. The transaction process involves: (1) Customer places an order generating an order ID passed to checkout; (2) Bank authenticates the payment; (3) Payment gateway captures the payment; (4) Merchant's account gets credited. The authorization flow works as follows: merchant sends payment request to gateway, gateway forwards to card network, card network sends to issuer bank for verification (checking card validity and fund availability), bank responds to card network, which relays to gateway, and finally to merchant as success confirmation.
Click to watch →
Deep Dive
Familiarity with standard business entity structures (such as Sole Proprietorship, LLC, or Corporation) and tax identification numbers.

PLLC, LLC, S CORP, or Sole Proprietorship? Which do I form?
201
PLLC and LLC can have single-member or multi-member ownership (you and other licensed professionals). S Corporations also support single or multi-member ownership. Sole Proprietorship is exclusively single-owner using your personal name and Social Security number as tax ID. After forming PLLC, LLC, or S Corporation, you must obtain an Employer Identification Number (EIN) from the IRS online for tax filing purposes. Each business type has distinct ownership flexibility and identification requirements that affect how you structure and operate your private practice.
Click to watch →

42: Taxes and Business Formation 101 w/ Shaquanna (Ms. Business) Brooks
309
A sole proprietorship has no distinction between owner and business, meaning personal assets are not protected from business lawsuits. LLCs separate business from personal assets and liabilities, with single-member LLCs taxed like sole proprietorships. Corporations are completely separate entities that pay taxes at the business level with a 21% rate. An S-Corp is not an entity type but a tax election that LLCs and corporations can choose. Pass-through entities (LLCs and S-Corps) file informational returns where income passes to personal taxes, while corporations pay taxes at the business level with no pass-through.
Click to watch →
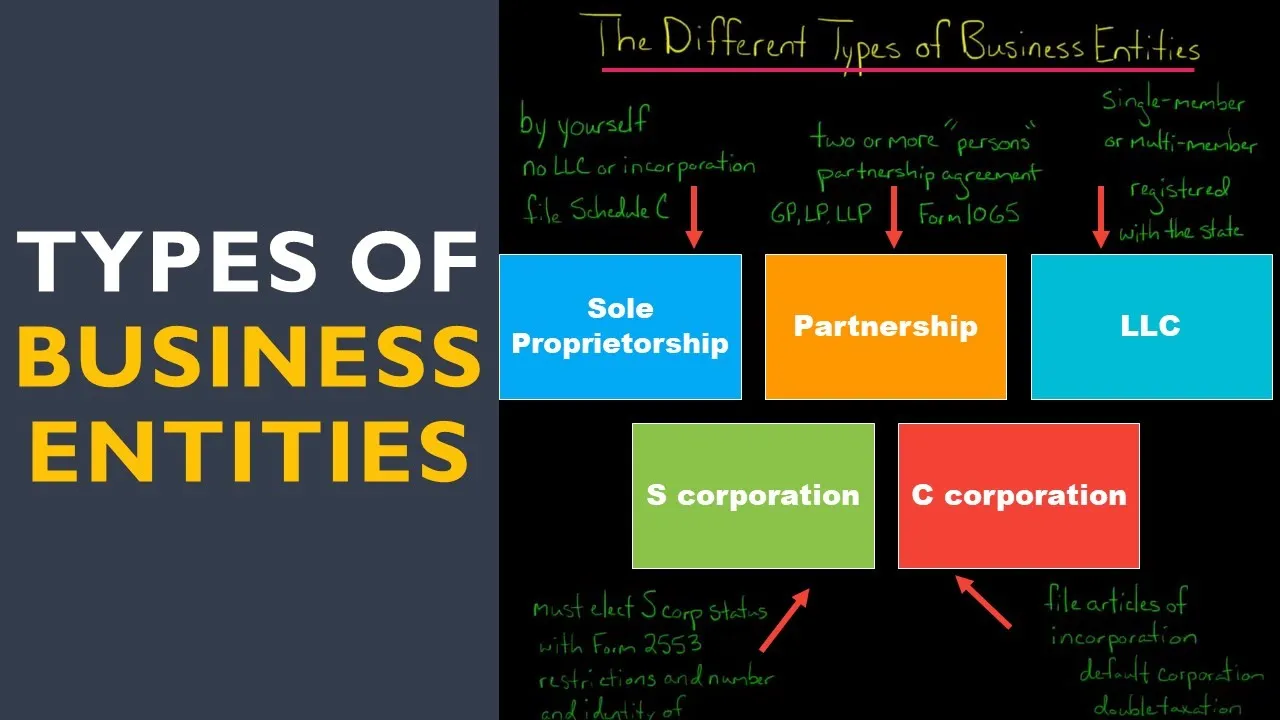
The Different Types of Business Entities in the U.S.
135.9K
In the United States, business owners can choose from five main entity types: (1) Sole proprietorship - for single owners who haven't filed any paperwork, where the IRS treats the owner and business as one entity, requiring Schedule C filing with personal tax returns; (2) Partnership - for two or more persons entering business together, which can be general, limited, or limited liability partnerships, requiring Form 1065 and with profits flowing to partners' personal returns; (3) C corporation - the default corporate type created by filing articles of incorporation, which faces double taxation (corporation taxed on profits, shareholders taxed on dividends) and files Form 1120; (4) S corporation - elected status for corporations using Form 2553, avoiding double taxation through flow-through taxation but limited to 100 shareholders and certain eligibility requirements; (5) LLC - a flexible entity providing limited liability protection (shielding personal assets from business debts) that can be taxed as a sole proprietorship (single member) or partnership (multi-member), requiring state registration but no specific federal tax form.
Click to watch →

How to Choose the Right Business Structure: LLC vs Corporation vs Sole Proprietorship
347.4K
When choosing a business structure, informal structures like sole proprietorships and partnerships are simple and suitable for testing ideas with familiar clients but offer no asset protection; formal structures like LLCs and corporations provide personal asset protection and business credibility, with LLCs being simpler and offering pass-through taxation while corporations allow for easier fundraising and tax year money carryover, and LLCs can choose between default pass-through taxation, S-Corp status for potential tax savings, or C-Corp taxation depending on business needs and profit levels.
Click to watch →
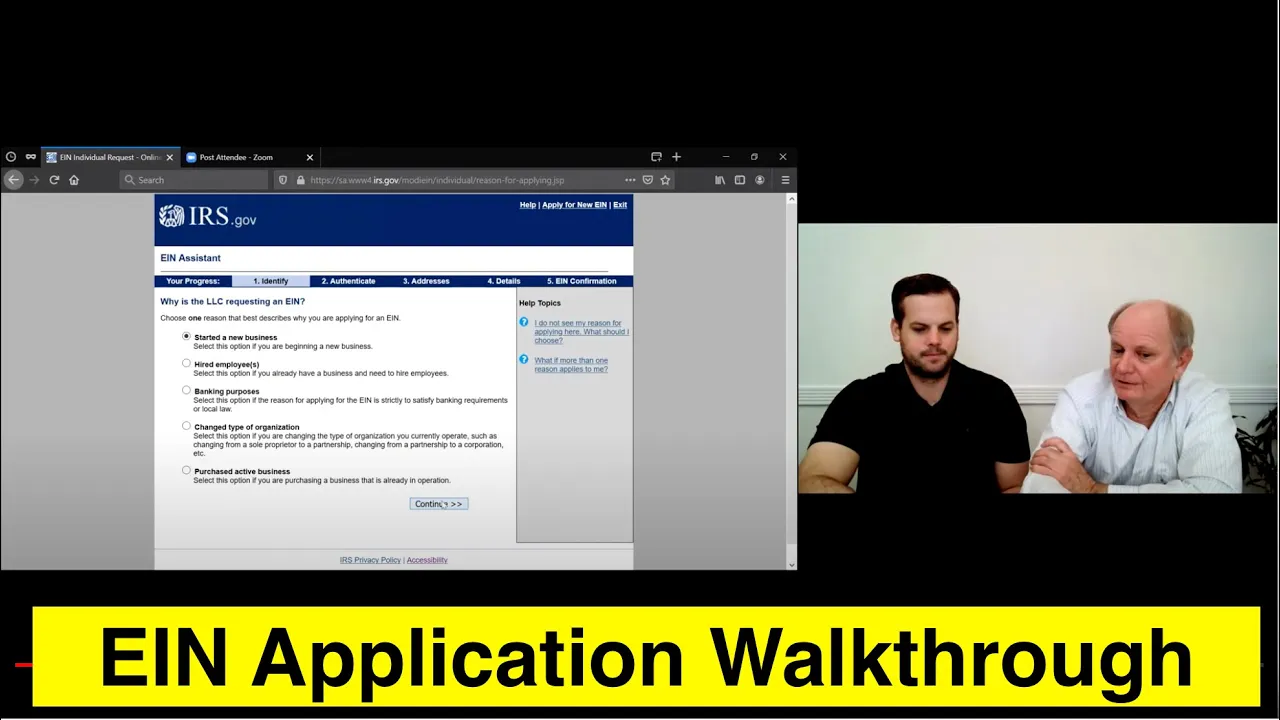
EIN Application Step By Step
101.9K
When applying for an Employer Identification Number (EIN) through the IRS online system, business owners must select their legal entity type (such as LLC, corporation, partnership, or sole proprietorship) and answer questions about business activities, employee status, and tax classification; the IRS will then assign an EIN which serves as the business's tax identification number, and it is crucial to save the confirmation letter as it outlines required tax filings and helps avoid penalties for inactive businesses.
Click to watch →
Deep Dive
Awareness of Know Your Customer (KYC) and Anti-Money Laundering (AML) regulatory compliance requirements in financial services.

KYC/AML| IIBF 2022 | REMOTE PROCTORED EXAMS| IIBF| CERTIFICATE EXAMS
7.2K
This section covers the foundational regulatory framework for KYC (Know Your Customer) and AML (Anti-Money Laundering) compliance in Indian banking. The Reserve Bank of India imposes monetary penalties for non-compliance under Section 47A1C read with Section 4641 of the Banking Regulation Act 1949. RBI issues KYC, AML, and CFT guidelines under Section 35A of the same Act. FATCA (Foreign Account Tax Compliance Act) is mandatory for all account types including savings accounts. VCIP (Virtual Customer Identity Process) enables remote customer identification through audio-visual interactions. E-documents are electronic equivalents of documents with valid digital signatures. Digital KYC involves capturing live customer photos with OVD and location coordinates. Risk perception for vulnerable customers like blind individuals and women wearing purdah is classified as medium risk.
Click to watch →

💯IIBF AML KYC Ultimate Memory-Based MCQ Marathon |100+ Most Expected Questions for Sure Shot Success
720
This video provides a comprehensive overview of AML (Anti-Money Laundering) and KYC (Know Your Customer) compliance requirements for banking examinations, covering key regulatory frameworks including PMLA (Prevention of Money Laundering Act), RBI guidelines, and international standards. The content explains critical concepts such as at par check issuance rules (walk-in customers up to 50,000 rupees, KYC-compliant account holders for 50,000+), pool account requirements for regulated entities, monetary penalty ranges under PMLA Section 13 (10,000 to 1 lakh rupees), and the distinction between CTR (Cash Transaction Report, monthly by 15th) and STR (Suspicious Transaction Report, within 7 days). The video also covers money laundering techniques like smurfing (structuring deposits below reporting thresholds), back-to-back loans, and the roles of key regulatory bodies including FIU-IND (established 2004, reports to Economic Intelligence Council), FATF (39 members as of 2025), and Wolfsberg Group (13 global banks).
Click to watch →

IIBF AML KYC Expected Questions Best 100 | Most Important MCQs for Certification Exam | By Ajay Sir
14K
The Prevention of Money Laundering Act (PMLA) 2002 establishes comprehensive anti-money laundering and counter-terrorist financing regulations, requiring financial institutions to implement Know Your Customer (KYC) procedures, maintain transaction records for 5 years, report suspicious transactions exceeding thresholds (₹10 lakh monthly aggregate, ₹50 lakh real estate, ₹7 lakh cross-border transfers), and conduct due diligence based on customer risk levels (high-risk every 2 years, medium-risk every 4 years, low-risk every 8 years). The Financial Action Task Force (FATF) categorizes countries into black-listed (high-risk) and grey-listed (increased monitoring) jurisdictions, with updates occurring quarterly in February, June, and October. Banks must maintain records of all transactions, including attempted transactions, and report to the Financial Intelligence Unit (FIU) through the FinGate portal. The Act takes precedence over other laws including the Indian Penal Code, and penalties for non-compliance range from ₹10,000 to ₹1 lakh.
Click to watch →

AML & KYC Guidelines in Bank | Anti-Money Laundering for JAIIB Exam | Bank Promotion & Bank PO Exam
20.3K
Anti-Money Laundering (AML) and Know Your Customer (KYC) are essential banking compliance frameworks under the Prevention of Money Laundering Act (PMLA) 2002, which came into effect on July 1, 2005. Banks must implement KYC procedures including customer acceptance policies, risk management, identification procedures, and transaction monitoring to prevent money laundering and terrorist financing. Banks are required to maintain transaction records for 5 years, classify customers into low, medium, and high-risk categories, and report suspicious transactions to the Financial Intelligence Unit (FIU-IND). Key obligations include obtaining valid identification documents (Aadhaar, PAN, or other government-issued IDs), conducting periodic customer identification updates, and reporting cash transactions exceeding 10 lakh rupees or cross-border transfers above 5 lakh rupees.
Click to watch →

KYC & Anti-money Laundering | important topic #cseb #juniorclerkexam #cooperativebankexam #bankexam
414
This comprehensive section covers the complete RBI KYC and AML regulatory framework. Customer Due Diligence (CDD) is required during account opening, large transactions, and when money laundering suspicion exists. KYC updates are risk-based: high-risk customers need more frequent updates, low-risk need less. Suspicious Transaction Reports (STR) are submitted to FIU-IND. AML objectives focus on preventing money laundering and detecting suspicious transactions, not profitability. KYC includes customer identification, identity verification, address verification, and biometric verification, introduced under PMLA 2002. All account types require KYC compliance. The framework encompasses customer identification, risk management, and transaction monitoring to prevent financial crimes.
Click to watch →
Deep Dive
Knowledge of standard banking information required for electronic fund transfers, such as routing and account numbers.

EFT ফরম পূরণের নিয়ম...
4.1K
Bank account information is the most critical part of the EFT form. Required fields include: (1) Bank Name - the name of the bank where the account is held; (2) Routing Number - can be obtained by visiting the bank account or searching online with the account details; (3) Account Name - must match the name on the NID and the bank account, written in capital letters; (4) Bank Account Number - the online account number, which can be 10 or 13 digits. The form requires the teacher's signature and the institution head's signature for submission.
Click to watch →

How to Take A Policy Loan Online with One America
1.2K
For electronic funds transfer, applicants must confirm they are bank account owners and provide bank information including the financial institution name, routing number, and account number. Routing and account numbers can be found at the bottom of paper checks, or through online banking or mobile banking platforms.
Click to watch →

Electronic Payments
236
To perform an electronic fund transfer, you need specific beneficiary information including the beneficiary's name, address, and country; the beneficiary's account type; the beneficiary's account number; the beneficiary bank name; and the beneficiary bank's EFT routing number. These details ensure accurate fund delivery.
Click to watch →

THE ULT UPDATE on EFT, A4V and Defense of self, Promise u will learn something
391
The video explains that Electronic Funds Transfer (EFT) is exactly what it sounds like - transferring information electronically. The video explains that money orders were designed to send information to banks, which would type the routing number and account number into their computer systems to process payments. The video notes that people have been ordering banks to do EFTs without telling them directly, because they knew the banks' policies.
Click to watch →

№332: TransferGo для поповнення lnteractive brokers
11.7K
ABA (American Bankers Association) numbers are routing numbers assigned to American banks, used for ACH transfers. ABA and routing numbers are essentially the same thing. To set up Interactive Brokers as a recipient, users need: company name (Interactive Brokers), address, city, postal code, state, routing number, and account number. These details are obtained from the IB payment instructions. The presenter demonstrates copying these details from IB's payment section and entering them into TransferGo's recipient form.
Click to watch →
Prerequisite Knowledge
- Concept 01Basic understanding of payment gateways, merchant accounts, and how online transaction processing works.
- Concept 02Familiarity with standard business entity structures (such as Sole Proprietorship, LLC, or Corporation) and tax identification numbers.
- Concept 03Awareness of Know Your Customer (KYC) and Anti-Money Laundering (AML) regulatory compliance requirements in financial services.
- Concept 04Knowledge of standard banking information required for electronic fund transfers, such as routing and account numbers.
Subsequent Learning
- Step 01How to securely integrate Stripe API keys into your web or mobile application for live transaction processing.
- Step 02Configuring webhooks to receive real-time notifications about payment events, successful charges, and payout updates.
- Step 03Managing Stripe Radar for fraud prevention, setting up custom rules, and handling customer chargebacks and disputes.
- Step 04Setting up Stripe Billing for recurring subscriptions, customer invoicing, and metered billing models.
- Step 05Analyzing Stripe financial reports, understanding payout schedules, and integrating transactional data with accounting software.
ID Verification
Business Docs
ID Verification
0:00Playing Section
- 1
Log into dashboard and review alerts for pending requirements.
- 2
Upload a valid, colored government-issued photo ID.
- 3
Provide recent address proof if auto-verification fails.
The Pitfalls of Centralized KYC and the Case for Permissionless Payments
While Stripe's verification process is designed to ensure regulatory compliance and security, critics argue that relying on centralized payment processors introduces significant systemic risks. Opponents from the decentralized finance (DeFi) and privacy sectors point out that centralized gatekeepers can unilaterally freeze merchant accounts, withhold funds, or de-platform businesses based on automated, opaque risk algorithms. Furthermore, the extensive personal and business data required for Know Your Customer (KYC) compliance creates highly vulnerable targets for data breaches. This counter-perspective advocates for permissionless, decentralized payment protocols (such as Bitcoin and self-custodial tools like BTCPay Server) that enable censorship-resistant, peer-to-peer transactions. Proponents argue that true financial security and inclusivity are achieved by eliminating intermediaries and geographic barriers rather than relying on rigid, centralized identity verification systems.
Deep Dive
How to securely integrate Stripe API keys into your web or mobile application for live transaction processing.

A Forma Mais RÁPIDA de Criar SITES e Aceitar PAGAMENTOS com IA
14.4K
Stripe requires two API keys: a secret key (SK_test or SK_live) that must be kept private, and a public key (PK_test or PK_live) that can be safely exposed. The secret key should never be shared or posted publicly. For testing, use test keys; for production, use live keys. To access API keys, log into the Stripe dashboard, navigate to Developers in the sidebar, then click on API Keys. The dashboard displays both keys, with the public key usable in code and the secret key requiring secure storage. Stripe accounts can operate in test mode without full business verification, allowing developers to test payment flows before going live.
Click to watch →

Accepting Online Payments With Stripe
4.4K
Stripe provides two API key types: publishable keys (PK_test/PK_live) for client-side JavaScript calls and secret keys (SK_test/SK_live) for server-side authenticated API calls. Test mode keys begin with 'test' and live mode keys begin with 'live'. To integrate Stripe into .NET applications, install the Stripe.net SDK via NuGet and configure the secret key globally in application services. The SDK wraps all Stripe APIs for seamless .NET integration.
Click to watch →
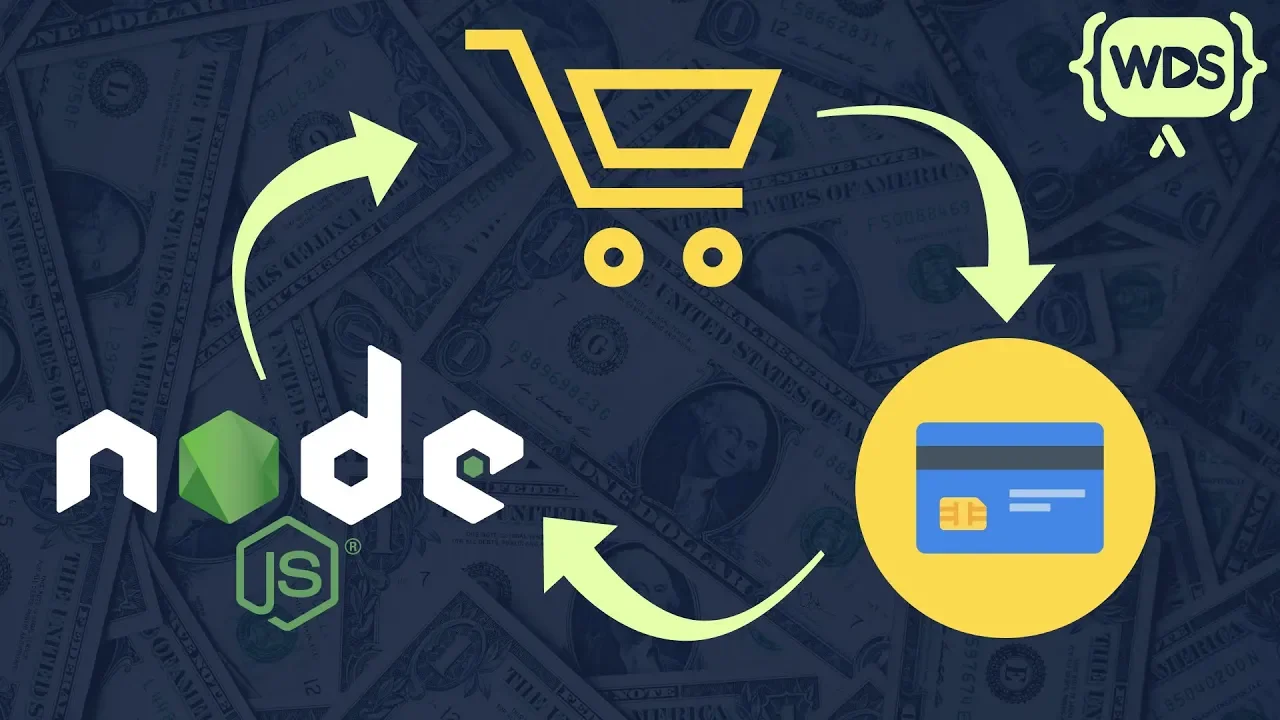
How To Setup Payments With Node.js And Stripe
305.5K
Stripe provides two types of API keys: a publishable key and a secret key. The publishable key can be safely shared with clients and can be committed to GitHub. The secret key must be kept secret and should never be shared or committed to public repositories, as anyone with access could charge customer credit cards. Both keys are found in the Stripe dashboard under Developer > API Keys.
Click to watch →

Implement Stripe on your Webflow site | Stripe to Webflow part 1
11.6K
Stripe uses two types of API keys: Publishable Keys for client-side use and Secret Keys for server-side operations. The Publishable Key can be safely exposed in your website's code, while the Secret Key should never be exposed to clients. Stripe offers Test Mode for development, allowing unlimited test payments without real money, and Live Mode for actual production payments. For development, you should use Test Mode with test keys. You can inject different keys based on your environment using build-time configuration, declaring variables and using conditional logic to specify different keys for development and production environments.
Click to watch →

I Fixed Stripe
101.7K
Stripe integration requires managing a 'split brain' problem where payment data exists in both Stripe's API and your database; the recommended solution is to use Stripe webhooks as triggers to update a key-value store (like Redis or Cloudflare KV) with the latest subscription data, rather than relying on Stripe's API for real-time checks, which is slow (3-10 seconds per request) and rate-limited (100 requests/second). Critical best practices include: always creating a Stripe customer before checkout, using a dedicated KV for subscription state, handling double-subscription edge cases, and disabling Cash App Pay due to security vulnerabilities.
Click to watch →
Deep Dive
Configuring webhooks to receive real-time notifications about payment events, successful charges, and payout updates.
Notificaciones de Pago (Webhooks) de Mercado Pago | PHP
7K
Webhooks are server-to-server notifications sent by Mercado Pago API when payments occur. They solve the problem of users closing browser tabs or encountering errors that prevent confirmation pages from loading. Configuration requires a public HTTPS URL in your Mercado Pago integration preferences. You must have hosting with a domain name since Mercado Pago cannot send to localhost. The notification_url preference receives all payment events including successful payments, errors, and pending transactions.
Click to watch →

Tutorial de Integração API Asaas e Bubble - Pagamentos e Banco Digital
44.5K
Webhooks are server-to-server callbacks enabling external services to notify applications about specific events. Developers configure webhooks by providing URL endpoints that payment providers call when events occur (new invoice creation, payment completion). When configured, the provider sends HTTP POST requests with event data, enabling automatic reactions without polling. Applications can process webhook data to create database records, update user statuses, or trigger workflows. This event-driven approach enables real-time payment processing and user activation based on payment confirmation.
Click to watch →

Bolt + Stripe Basics: Payments, Subscriptions, and More
1.5K
Stripe processes different payment types at varying speeds: credit cards in milliseconds, bank transfers in minutes to days. Webhooks are the primary mechanism for receiving real-time event notifications about account changes. When Stripe integrations are added, webhook handlers are created to listen for events like payment successes, failures, and charge updates. Applications should wait for webhook confirmation before acting on payments due to potential fraud detection or insufficient funds. Stripe Workbench allows monitoring events sent to webhook endpoints.
Click to watch →

Webhooks - Notificaciones de pago
19.5K
Webhooks are one-way HTTP POST requests that payment platforms like Mercado Pago send to configured notification URLs to notify applications about payment events, such as payment creation (payment_created) or status updates (payment_updated); these notifications contain JSON payloads with action and data fields, and successful delivery requires responding with HTTP status 200 or 201, with the platform implementing retry policies for failed deliveries.
Click to watch →
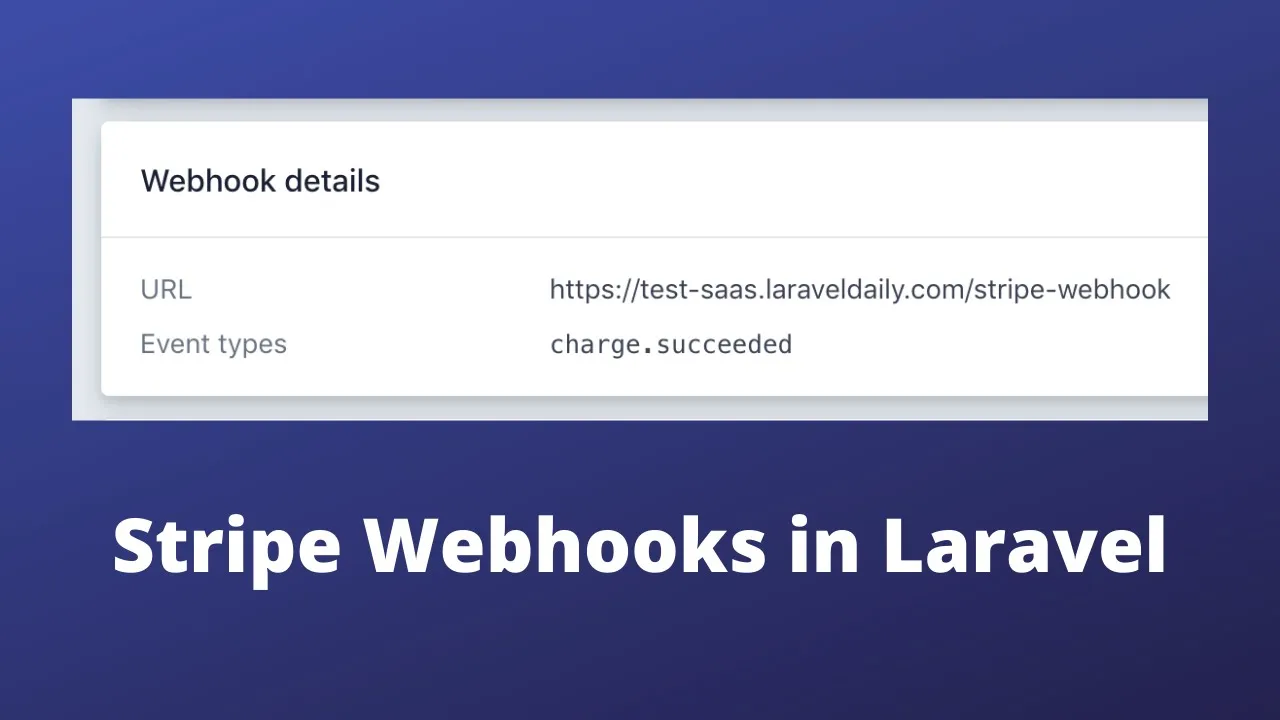
Laravel SaaS: Stripe Webhooks to Register Successful Charge
30.1K
Stripe webhooks are events sent from Stripe to your application when payment-related actions occur, such as successful charges; to implement this in Laravel, you configure a webhook endpoint URL in the Stripe Dashboard, create a public route to receive these events, and use a package like 'stripe-webhooks' to automatically process events like 'charge.succeeded' by creating corresponding payment records in your local database for revenue tracking and reporting.
Click to watch →
Deep Dive
Managing Stripe Radar for fraud prevention, setting up custom rules, and handling customer chargebacks and disputes.

Using Stripe Radar to Stop Credit Card Fraud - Business & E Commerce
3.4K
Stripe Radar is a machine learning-based fraud prevention platform integrated into Stripe's payment system that helps businesses detect and block fraudulent transactions while minimizing legitimate transaction blocks; effective custom rule implementation involves creating rules in the following order: first request 3D Secure authentication for high-risk scenarios like country mismatches or elevated risk levels, then allow verified transactions, followed by blocking rules for failed verifications, suspicious patterns (disposable emails, anonymous IPs, excessive attempts), and finally review rules for elevated-risk or high-value transactions to balance fraud prevention with customer experience.
Click to watch →
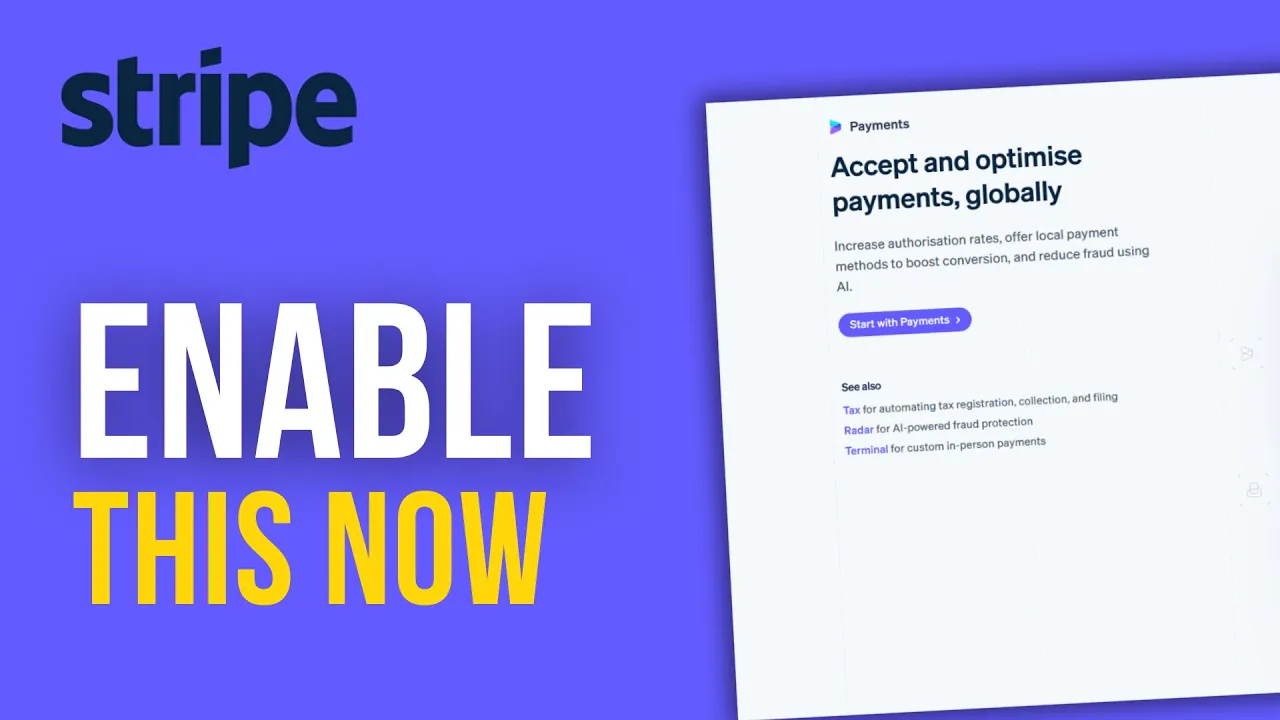
How to Enable Radar in Stripe & Automatically Block Fraudulent Payments - Tutorial for 2026
126
Stripe Radar is a real-time fraud detection system that analyzes payment signals like card behavior, IP reputation, and velocity patterns to automatically block high-risk transactions before they become disputes or chargebacks; to enable it effectively, navigate to the Payments section in your Stripe dashboard, access the Rules area, enable block rules through the hidden three-dot menu, and allow Radar to learn your business patterns over time to reduce chargebacks and maintain account health.
Click to watch →
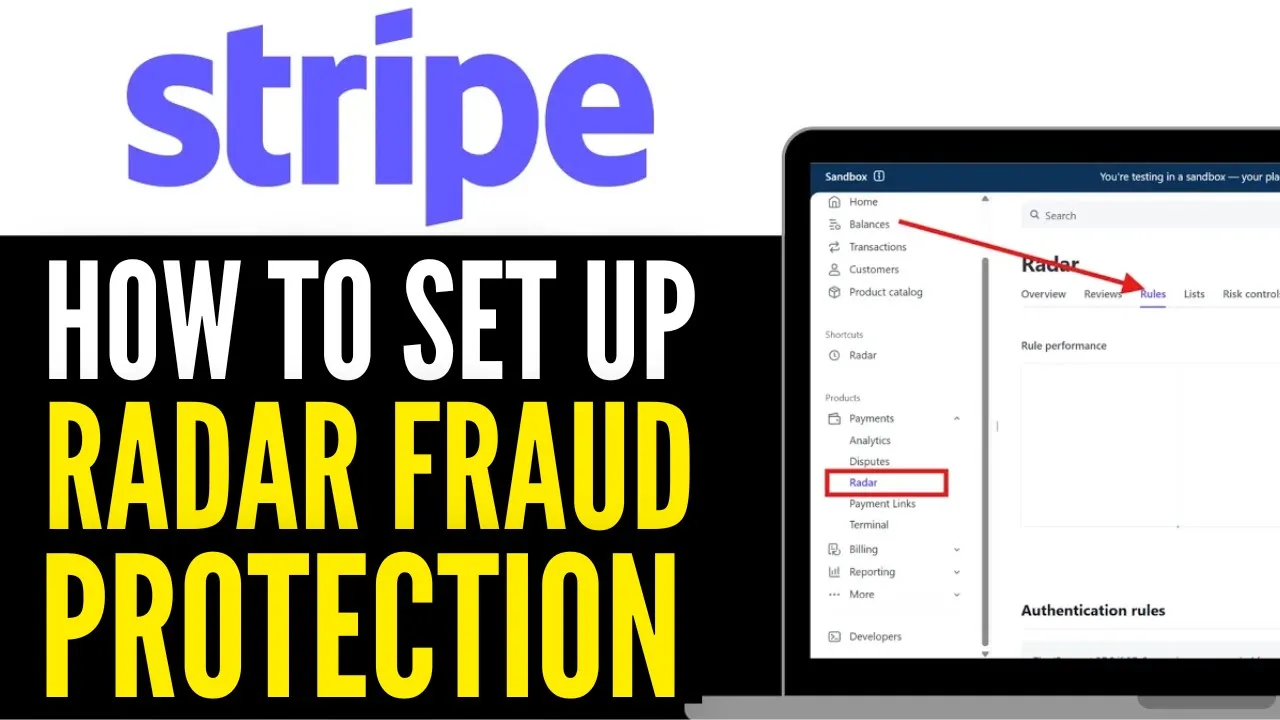
How to Set Up Radar Fraud Protection With Stripe Payments 2025 (RIGHT WAY)
301
To set up Stripe Radar fraud protection, log into your Stripe account, navigate to the payment section, select Radar, and customize fraud detection rules such as country-based blocking, card metadata checks, and velocity checks in the condition section to prevent unauthorized transactions.
Click to watch →

🚨How To Set Up Radar Fraud Protection With Stripe Payments • PayPal Limited & More
6.6K
Stripe Radar is a fraud protection system that helps online businesses prevent fraudulent payments by implementing customizable rules (such as CVC verification and postal code checks) and enabling 3D Secure authentication, offering 100% transaction protection for a small 2-cent fee per transaction, making it more secure than PayPal for digital product sales.
Click to watch →
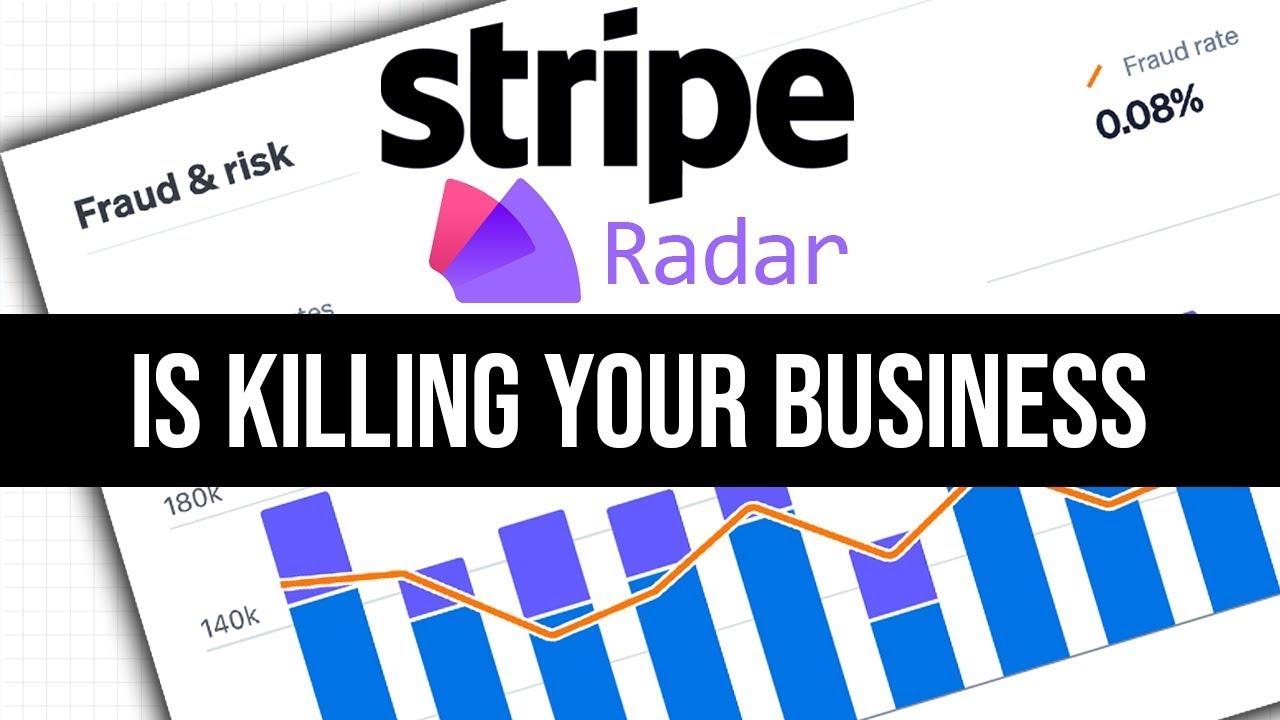
Stripe Radar tweaks to SAVE your business
1.7K
Stripe Radar uses machine learning to detect fraud by scoring transactions, but businesses can lose significant sales when the system misinterprets legitimate activities like sudden sales surges, international traffic, VPN usage, or multiple transactions as fraudulent; to prevent this, businesses should configure Stripe Radar by adjusting score thresholds, whitelisting trusted customers and countries, setting up manual review rules for suspicious transactions, and regularly analyzing decline patterns to ensure the system aligns with their specific business model.
Click to watch →
Deep Dive
Setting up Stripe Billing for recurring subscriptions, customer invoicing, and metered billing models.
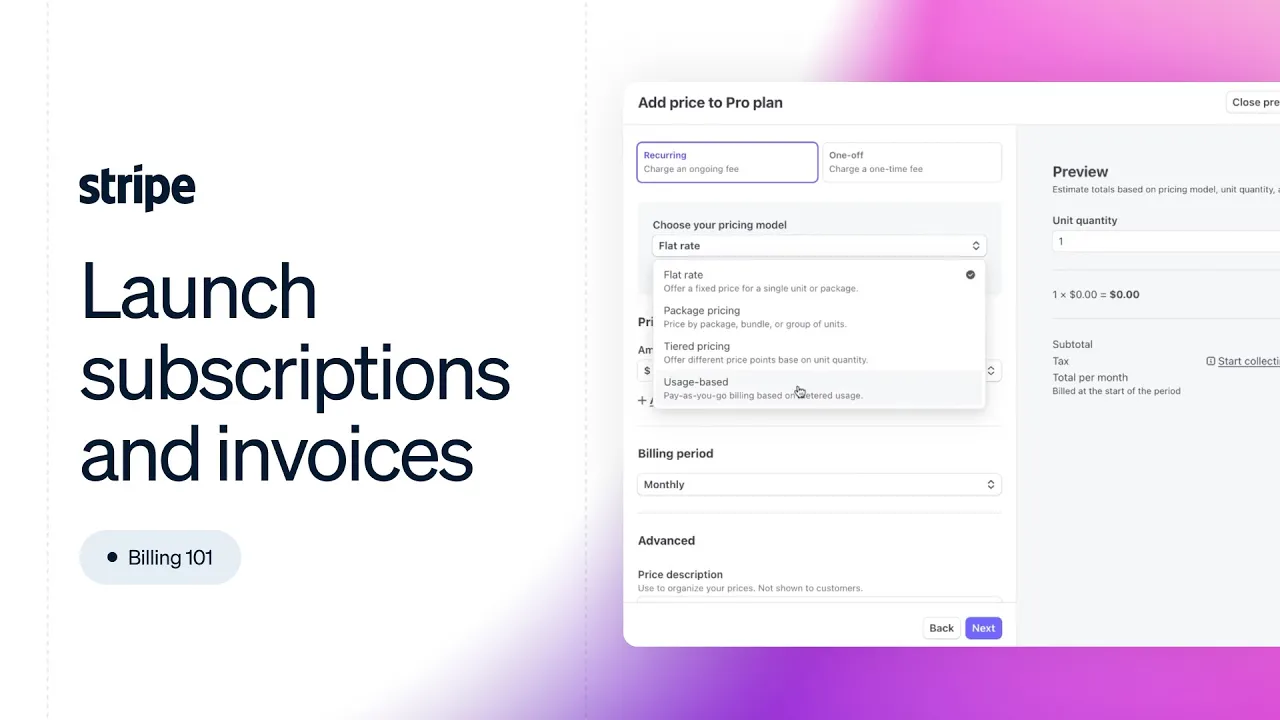
Billing 101: Launch subscriptions and invoices
2.3K
Stripe Billing is a comprehensive platform that enables businesses to launch various revenue models including subscriptions, usage-based billing, and invoicing; it requires creating products and prices as foundational elements, supports flexible pricing models from simple flat-rate subscriptions to complex metered billing, and includes tools for managing customer trials, coupons, and revenue recovery through automated payment retries and failed payment handling.
Click to watch →

How to Setup Stripe + Collect Online Payments
9.7K
Stripe enables businesses to send invoices directly from the platform, though using a third-party checkout cart is recommended. Key invoice creation steps include configuring brand settings first, adding customer information, specifying products/services and amounts, and reviewing details before sending. Critical rule: invoices cannot be edited after sending. For subscriptions, businesses can create recurring products with pricing models (standard, graduated, packaged), billing periods (daily, weekly, monthly, custom), optional usage metering, and trial periods. Payment methods include email invoice for manual payment or automatic charging.
Click to watch →

Automating Recurring Client Payments for Marketing Services
42.4K
To set up recurring payments on Stripe, first create a Stripe account with email and password. Create a customer by entering their email address and calling them appropriately. Add the customer's card details by inputting their card number during the setup process. Create a product for your service, then create a pricing plan with the monthly amount and billing interval. Add the subscription to the customer account by selecting the product and pricing plan, then submitting to start the subscription. Stripe will automatically charge the customer's card monthly.
Click to watch →
Setup Monthly Recurring Revenue (subscriptions) using Stripe
2.6K
To set up monthly recurring revenue subscriptions in Stripe, navigate to the Subscriptions section, create a product with recurring billing set to monthly, specify the price and currency, then create a subscription for each customer with automatic payment processing or email invoicing options.
Click to watch →
How To Set Up Metered Billing Using Stripe in Moesif
1.4K
To set up metered billing with Stripe in Moesif, first configure Stripe as the billing provider by adding a webhook endpoint and API keys, then create billing meters by selecting a Stripe product and defining usage criteria such as specific API endpoints and response status codes to trigger billing events.
Click to watch →
Deep Dive
Analyzing Stripe financial reports, understanding payout schedules, and integrating transactional data with accounting software.

Connecting STRIPE to your Accounting Software
487
When integrating Stripe with Xero, businesses can either use Stripe as an app for payment links on invoices or as a bank account for direct payments; crucially, Stripe transactions should always be reconciled first before the main bank account because Stripe payments represent net figures after fees are deducted, not gross sales amounts.
Click to watch →

Stripe Sessions 2019 | Keynote
35.4K
Stripe extends its infrastructure benefits to internal teams beyond developers, focusing on finance, operations, and revenue functions. Financial reporting tools help accounting teams produce information needed for book closing in record time, eliminating manual data munging and reconciliation. The Sigma analytics tool allows building custom reports, performing SQL queries directly from the dashboard without ETL processes, and scheduling delivery to email distribution lists. ERP integrations with NetSuite and QuickBooks enable automatic synchronization of Stripe data. Revenue recognition product beta addresses the operational burden of managing creative pricing experiments and plan adjustments, with billing now providing tax rate support for invoices and subscriptions. Operations teams gain a customizable dashboard allowing them to choose exactly which information to see and organize layouts to suit workflows, with search improved 50% faster. Connect platforms can now execute admin tasks without developer code—creating accounts, checking verification status, and sending payouts directly through the dashboard. Stripe's cross-border payment ecosystem enables real-time visualization of payouts occurring globally, with webhook events triggering notifications to stakeholders. A homeowner in Singapore can receive payouts in SGD nearly instantly after USD transactions, with Stripe handling currency conversion and cross-border transfers automatically.
Click to watch →
Stripe - NetSuite Payout Reconciliation Connector Integration
1K
This integration automatically reconciles Stripe payout transactions to NetSuite by creating summary payout records and bank deposit records, matching payments to existing customer transactions, recording Stripe fees to specified GL accounts, and posting unmatched transactions to a suspense account for investigation.
Click to watch →
How To Connect Stripe With QuickBooks ! (Full Tutorial)
7.5K
This tutorial demonstrates how to integrate Stripe (a payment processing platform) with QuickBooks (accounting software) by first creating and activating a Stripe account through completing five setup steps (verifying business details, adding bank information, securing the account, and accepting terms), then setting up a QuickBooks account, installing the Stripe integration app from the QuickBooks app marketplace, connecting the Stripe account through authorization, and finally enabling test mode to verify the integration before switching to live mode for seamless financial synchronization.
Click to watch →
Wave Accounting Workshop - Wave and Stripe
440
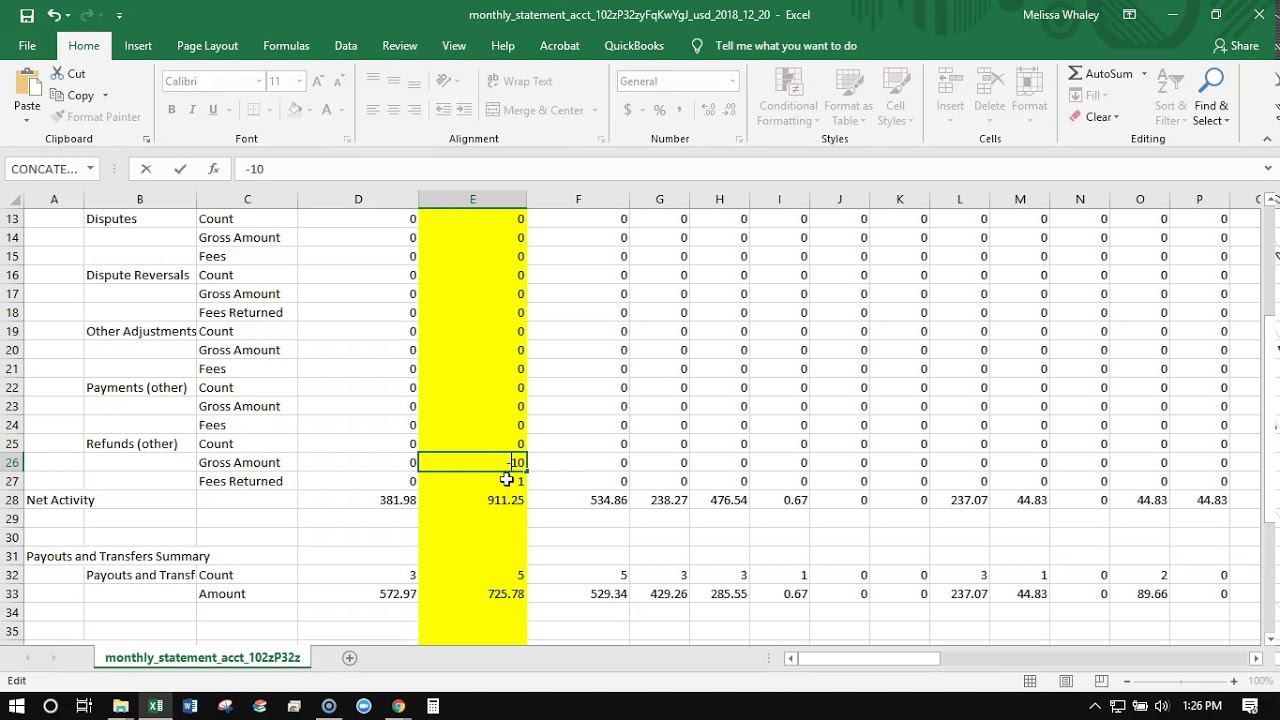
The manual Stripe integration process involves accessing Stripe's monthly report from Business Settings > Data, which provides an Excel spreadsheet of all transactions. You must read the statement columns to identify total sales (gross amount before fees), processing fees, and any refunds. In Wave, record income on the last day of the month using the gross sales amount, create a separate expense account for Stripe fees, and handle refunds by entering negative amounts categorized as 'refund for sales' or 'refund for stripe fees'. The ending balance on Stripe statements helps reconcile your account in Wave.
Click to watch →
ID Verification
Business Docs
ID Verification
0:00- 1
Log into dashboard and review alerts for pending requirements.
- 2
Upload a valid, colored government-issued photo ID.
- 3
Provide recent address proof if auto-verification fails.
The Pitfalls of Centralized KYC and the Case for Permissionless Payments
While Stripe's verification process is designed to ensure regulatory compliance and security, critics argue that relying on centralized payment processors introduces significant systemic risks. Opponents from the decentralized finance (DeFi) and privacy sectors point out that centralized gatekeepers can unilaterally freeze merchant accounts, withhold funds, or de-platform businesses based on automated, opaque risk algorithms. Furthermore, the extensive personal and business data required for Know Your Customer (KYC) compliance creates highly vulnerable targets for data breaches. This counter-perspective advocates for permissionless, decentralized payment protocols (such as Bitcoin and self-custodial tools like BTCPay Server) that enable censorship-resistant, peer-to-peer transactions. Proponents argue that true financial security and inclusivity are achieved by eliminating intermediaries and geographic barriers rather than relying on rigid, centralized identity verification systems.
Basic understanding of payment gateways, merchant accounts, and how online transaction processing works.
Familiarity with standard business entity structures (such as Sole Proprietorship, LLC, or Corporation) and tax identification numbers.
Awareness of Know Your Customer (KYC) and Anti-Money Laundering (AML) regulatory compliance requirements in financial services.
Knowledge of standard banking information required for electronic fund transfers, such as routing and account numbers.
How to securely integrate Stripe API keys into your web or mobile application for live transaction processing.
Configuring webhooks to receive real-time notifications about payment events, successful charges, and payout updates.
Managing Stripe Radar for fraud prevention, setting up custom rules, and handling customer chargebacks and disputes.
Setting up Stripe Billing for recurring subscriptions, customer invoicing, and metered billing models.
Analyzing Stripe financial reports, understanding payout schedules, and integrating transactional data with accounting software.
894 views5likes3:04@BehindToolsChannelOriginal Release: 2025-09-10
In today's video, I'm going to teach you how to verify your Stripe account. This is an essential step to enable you to process payments and receive payouts efficiently and securely. To get started, we'll be using the Stripe dashboard, which is your central hub for managing all things Stripe. So, let's dive right into the process. First things first, log into your Stripe dashboard. Once you're in, you should keep an eye out for a red banner or alert at the top part of the screen.
This banner is Stripe's way of telling you there are some requirements you need to address. Click on review details to have a closer look at what exactly is needed for your verification. It's a straightforward start. Stripe really wants to ensure that everything is transparent and easy for you to follow.
Next, you'll move on to personal identity verification.
Here, what you'll need is a governmentissued photo ID. Some common options include a passport, a driver's license, or a national ID card. It's crucial that the ID you upload is in color and fully visible. If there are both front and back sides, make sure you capture both. The ID must also be legible and importantly still valid. An expired ID won't do the trick, so double check that before you hit upload. Now, depending on your country, you might need to provide additional proof of address. This is particularly the case if your identity information wasn't autoverified.
Documents like a utility bill, a bank statement, or a lease agreement are generally acceptable. The key point here is they need to clearly show your full name and address. Also, make sure these documents are dated within the last 6 months. Accepted formats for uploads are PNG, JPG, and PDF. So, keep this in mind when preparing your documents. If you're setting up a business account, there's a bit more to do. Stripe might request documents related to your legal entity.
Think along the lines of a certificate of incorporation or a partnership agreement. You'll also need to provide proof of business address, and it has to match the registered location of your entity. Additionally, for bank account verification, Stripe will want confirmation that payouts are going to a legitimate account under the same name as your business.
These steps help ensure a smooth transaction process going forward.
Finally, if your company is set up in a way where any individual owns 25% or more, Stripe will need details and verification for each beneficial owner.
This includes uploading their ID documentation and personal information.
You can use the dashboard or API if you prefer to declare these ownership roles and associated documents as needed. And there you have it, a comprehensive guide on verifying your Stripe account. By following these steps, you're setting up a solid foundation for secure and efficient payment processing. Thanks for watching and until next time, take
Up Next

62:19
Google Analytics 4: Complete Beginner Tutorial Guide
@LovesData
120.6K views•2022-04-11

12:54
Triumph of Orthodoxy Icon: Byzantine Art & History Explained
@BenCallan
2.1K views•2024-08-06

9:49
FastAPI vs Flask vs Django: Choosing the Right Python Web Framework
@TechWithTim
302.5K views•2024-05-26

1:42
Game of Thrones Opening Credits: A Cinematic Analysis
@gameofthrones
46.3M views•2011-04-18
Related Study Plans & Knowledge Roadmaps
Structured learning paths in General & Interdisciplinary Studies
general-studies
Elevator Engineering: History, Physics & Cities
01From Hoists to Safety Brakes: The Dawn of Vertical Lift
02Hydraulic vs. Traction: The Engineering Physics of Elevators
03Modern Speed, Safety, and Algorithms
+ 2 more learning modules
12h5 modules
Explore Roadmap
general-studies
Rubber: Material Science, History & Geopolitics
01Origins of Natural Rubber & Mesoamerican History
02The Chemistry of Natural Rubber & Vulcanization
03The Geopolitics of the Rubber Boom & Colonization
+ 2 more learning modules
12h5 modules
Explore Roadmap
general-studies
Containerization: Evolution, Logistics & Trade
01Ancient Trade & Bulk Cargo: Amphorae to Barrels
02The Industrial Revolution & Cardboard Packaging
03The Containerization Revolution: Malcom McLean
+ 2 more learning modules
12h5 modules
Explore Roadmap
general-studies
Textile Tech: Evolution, Labor & Global Impact
01Pre-Industrial Textiles: Handloom & Cottage Industry
02Mechanization: The Spinning Jenny to the Power Loom
03The Factory System & Global Labor Transformation
+ 2 more learning modules
10h5 modules
Explore Roadmap