For babies under one year old who are choking (unable to cry, cough, or breathe), perform five back blows between the shoulder blades followed by five chest thrusts using two fingers at the center of the chest; repeat this cycle until the object is dislodged or emergency help arrives, and if the baby becomes unresponsive, begin CPR.
Baby Choking First Aid: What to Do & Emergency Steps
Added:Deep Dive
Understanding basic infant anatomy, specifically how an infant's airway differs in size and flexibility compared to an adult's airway.

Pediatric vs Adult Anatomical & Physiological Differences | Anesthesia PG Class
5.8K
Pediatric airway anatomy differs significantly from adults: newborns have large heads with prominent occiputs requiring shoulder roll for alignment, large tongues relative to oral cavities, floppy omega-shaped epiglottises, and larynx positioned at C3-C4 levels (vs C5-C6 in adults). The narrowest airway portion is the cricoid cartilage. Trachea is narrower (4mm vs 8mm in adults) with 75% cross-sectional area reduction from minimal edema. Respiratory system has immature characteristics including compliant chest walls, immature intercostal muscles, and decreased lung compliance. Pulmonary surfactant production begins at 20 weeks but peaks at 36 weeks, explaining why preterm infants are prone to respiratory distress syndrome.
Click to watch →
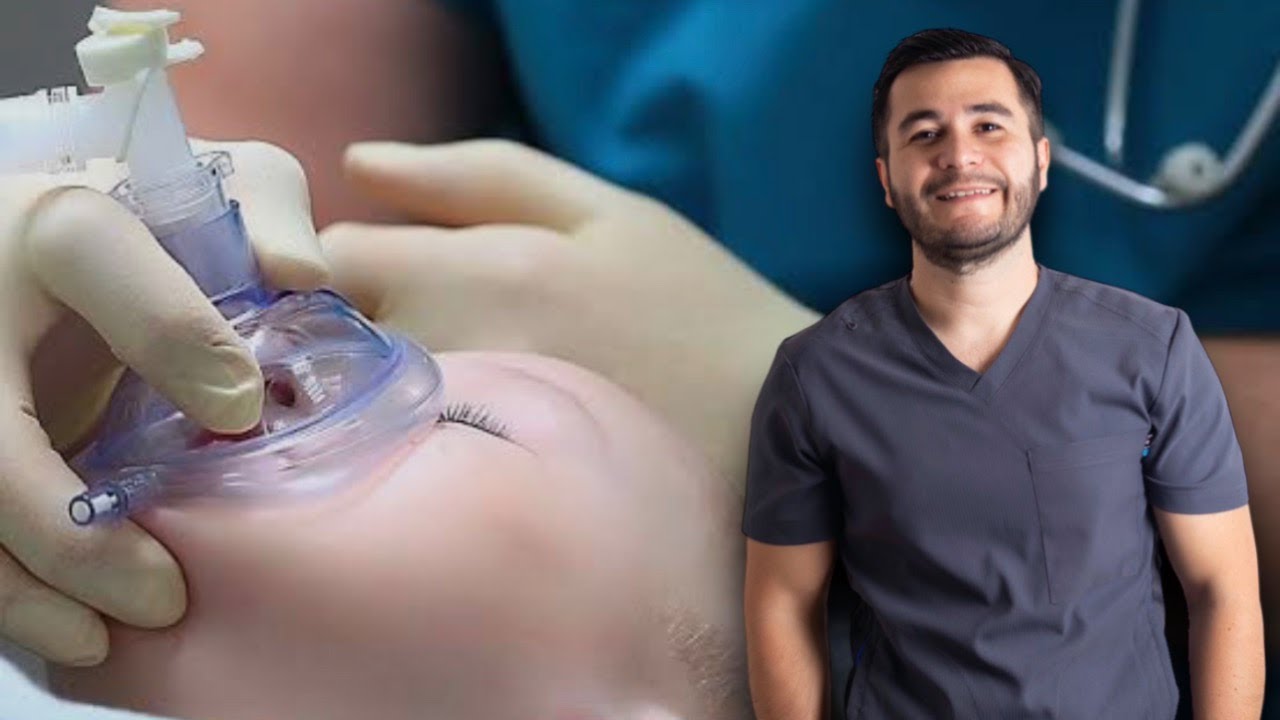
VÍA AÉREA EN PEDIATRÍA 👦🏻🧒🏻 | Tips de Manejo avanzado
12.6K
Children are not small adults, requiring specialized airway management. Key anatomical differences include: small nasal passages (obligate nasal breathers under 6 months), prominent occiput causing head folding in supine position, relatively larger tongue, omega-shaped flexible epiglottis, higher glottic position at C3-C4, and shorter neck with anterior vocal cords. The cricoid ring is the narrowest, least manipulable part. Intubation is more difficult than in adults, with multiple attempts often needed. A 1mm edema decreases pediatric airway area by 75% (vs 44% in adults) and increases resistance 16-fold (vs 3-fold). Pediatric patients have higher metabolic rates, smaller functional residual capacity, fewer alveoli (20-50 million at birth vs 200-500 million in adults), making them more prone to hypoxia. The immature nervous system causes rapid bradycardia with hypoxia. Laryngospasm accounts for 27% of perioperative cardiac events in pediatrics. Premature infants have increased apnea risk. Pediatric patients have only ~2 minutes of apnea time (vs 4-5 minutes in adults), requiring pre-oxygenation and rapid intervention.
Click to watch →
Differences in Pediatric and adult airway-Pediatrician’s perspective MD/DNB/DCH Pediatrics Exam prep
7.3K
Pediatric airways differ significantly from adult airways in terms of size, anatomy, and vulnerability to obstruction, requiring specialized clinical approaches for assessment and management in pediatric patients.
Click to watch →
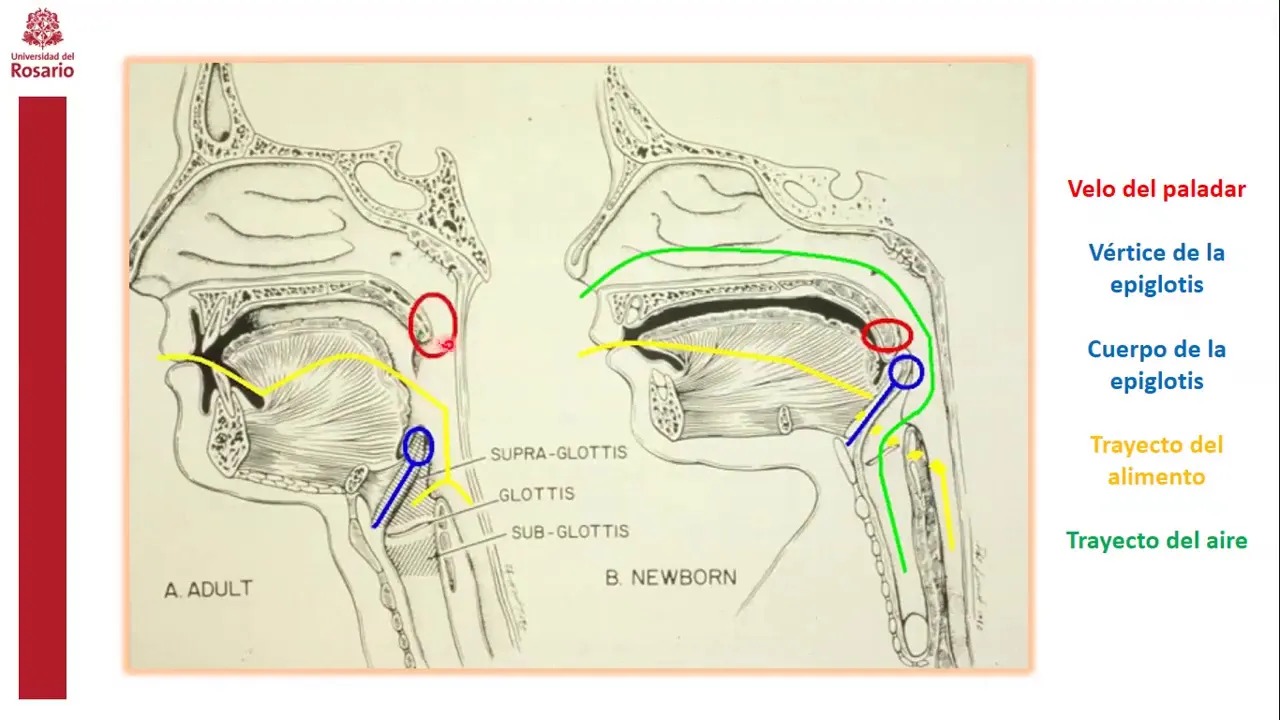
EL PASO A PASO DE LA SECUENCIA DE INTUBACIÓN RÁPIDA
7.8K
Pediatric airway differences from adults include: smaller nasal orifices (45% resistance), larger tongue relative to mandible causing rapid oral obstruction, more prominent occiput making axis alignment difficult, more cephalic laryngeal position (C2-C4 vs C4-C5), longer V-shaped epiglottis forming 45° with pharyngeal wall, and funnel-shaped airway with cricoid cartilage as narrowest site. Pediatric airway size is determined by weight and height, not gender, with younger children more susceptible to obstruction. The pediatric trachea is positioned caudally and posteriorly, making cricoid pressure more effective. Physiological differences include lower oxygen reserve, reduced hypoxia tolerance, higher laryngospasm incidence, immature elastic airway with collapse tendency, less developed respiratory muscles, and higher risk of bradycardia. Closing capacity and functional residual capacity occur at the same level in children, unlike adults where tidal volume exceeds closing capacity. Rapid Sequence Intubation (RSI) is a coordinated process of preparation, sedation, and paralysis to secure endotracheal intubation in emergency situations with full stomach, limiting complications like hypoxemia, aspiration, and death. A 2015 multicenter study demonstrated RSI's first-attempt success rate of 83% versus 55% with sedation alone.
Click to watch →

Composite Airway Access Segments - 3D Medical Animation
52.3K
Children and infants have distinct anatomic and physiologic airway characteristics compared to adults, including a larger occiput causing neck flexion, a tongue occupying greater proportion of the oral cavity, a higher and more anterior larynx with a large floppy epiglottis, and functional narrowing at the cricoid cartilage; these differences make pediatric patients more susceptible to airway obstruction, respiratory muscle fatigue, and hypoxemia, requiring specialized airway management techniques such as using the sniffing position, selecting appropriately sized airway adjuncts, and recognizing that the pediatric airway reaches adult-like proportions by age eight.
Click to watch →
Deep Dive
Distinguishing between gagging (a normal, noisy developmental reflex) and actual choking (a silent, life-threatening airway obstruction).

Introduction to Solid Foods
2.4K
Parents must distinguish between gagging and choking: gagging is loud, red face, spluttering - a natural reflex as babies learn to move food around their mouth. Parents should let babies sort this out. Choking is silent, blue lips, no noise - an emergency requiring immediate help (call 999). Babies' gag reflex is further forward in their mouth than adults. If parents have first aid skills, they can help; otherwise, call emergency services. Parents can take first aid courses through family centers.
Click to watch →

БОЮСЬ ДАВАТИ ШМАТОЧКИ В ПРИКОРМ
121
Parents must learn to distinguish between gagging (normal) and choking (dangerous). Gagging involves coughing, the baby remains active, and they can breathe. Choking involves the airway being blocked, the baby becomes inactive, and breathing stops. The gag reflex does not disappear during solids introduction; it simply shifts position on the tongue. This reflex is protective and should not be suppressed.
Click to watch →

Lalo | Webinars | Starting Solids 101 | June 2025
118
Choking involves blocking the breathing tube and is rare (less than 1% of babies experience severe choking). Non-food items pose greater choking risk than food. Actual choking signs include inability to breathe, inability to cough, wheezing, pulling backward, and color changes. Gagging is a protective reflex to unfamiliar textures, not choking—it involves closing the breathing tube and squeezing the esophagus upward to push things forward. Gagging looks dramatic but is normal learning; babies often gag something out and put it back in their mouths.
Click to watch →

PEDIATRICIAN EXPLAINS: How to Start Solids For Baby | Dr. Amna Husain
144.6K
Choking and gagging are different conditions: (1) Choking is a medical emergency where the baby's airway is obstructed and they cannot breathe. Signs include inability to cry, high-pitched sounds, and color change to blue or purple. If choking is suspected, immediately call 9-1-1 and start CPR. (2) Gagging is a protective reflex that prevents choking. When babies gag, they should be coached to spit out the food rather than having fingers inserted into their mouth, which could dislodge food into the airway. Baby-led weaning experts recommend demonstrating how to spit out food by sticking out your own tongue.
Click to watch →

Atorados en las papillas. EL bebé no quiere comer sólidos o alimentos con textura | Cachitos de mama
15.5K
Parents must learn to distinguish between gagging (a normal reflex) and actual choking (a dangerous situation). Gagging is a protective reflex that babies use to prevent choking and is a normal part of learning to eat textured foods. Choking involves the airway being blocked and requires immediate intervention. When babies gag, they are learning to move food around in their mouth and will eventually overcome this reflex.
Click to watch →
Deep Dive
Awareness of common household choking hazards for infants, including specific food textures, small toys, and loose objects.

5º Encontro Curso de Extensão Formação para Profissionais de apoio
681
Common choking hazards include party balloons, small toys, coins, pen caps, paper clips, and food items. For infants, common hazards include food pieces, liquids, and small objects. For children, hazards include foods that are difficult to chew, such as nuts, seeds, and whole grapes. The size and shape of the object relative to the child's airway determines the risk.
Click to watch →
![[지식실험] 아이 주변에 이 물건은 조심하세요. 영유아 질식사의 위험과 예방 [위기탈출 넘버원] | KBS 20060211 방송](https://i.ytimg.com/vi_webp/wOp2MF75Ub4/maxresdefault.webp)
[지식실험] 아이 주변에 이 물건은 조심하세요. 영유아 질식사의 위험과 예방 [위기탈출 넘버원] | KBS 20060211 방송
13.2K
Infants under 3 years are particularly vulnerable to choking hazards because they explore their environment primarily through their mouths, making small objects dangerous. Common choking hazards include stuffed animals with detachable plastic or button eyes, small toy parts, and other objects that can be easily swallowed. To prevent choking accidents, parents should always check age recommendations on toys, avoid products with detachable small parts (smaller than 3cm in length or 5cm in total dimension), regularly inspect toys for damage, and keep small objects away from infants. If an infant accidentally swallows a foreign object and experiences airway obstruction, immediate medical attention is required, and for conscious infants, the Heimlich maneuver can be performed by placing the infant face-down on the caregiver's knee, striking the back 5 times, then turning the infant face-up and pressing 2-3cm into the chest with two fingers.
Click to watch →

Clase abierta - #Asfixia y atragantamiento pediátrico
1.1K
Common objects that can cause choking in infants include coins, milk, small toys, Lego pieces, and food items. During breastfeeding, infants may aspirate milk. Water can also cause aspiration. Solid foods are particularly dangerous. If a baby chokes on food, do not insert your finger into their mouth as this can worsen the obstruction. Instead, place the baby face down and perform back slaps.
Click to watch →
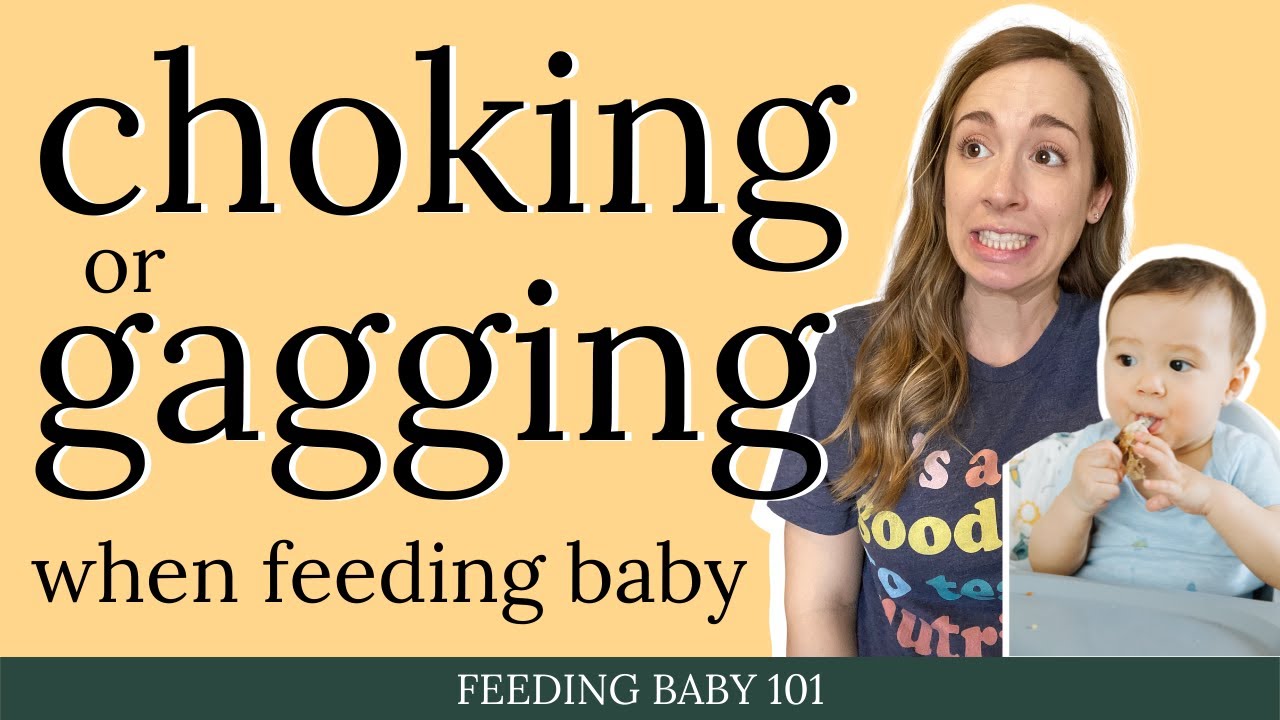
Why gagging is a good thing and purees don't prevent babies from choking
2.6K
Common choking hazards for infants include coin-shaped foods (hot dogs, sausages), raw carrots, raw apples, chips, popcorn, candy, nuts, seeds, untoasted bread, sticky foods like peanut butter, and hard cheeses. Raw apple is identified as the most common choking hazard, with large apple slices or whole apples being hazards until age four. Most hazards can be modified: slice hot dogs into coins and quarter them, use tools like the OXO grape cutter for grapes and cherry tomatoes, cook vegetables and fruits until soft, and shred hard foods. A practical test is the finger squish test - if you can squeeze food between your fingers, it's likely soft enough for your baby.
Click to watch →

askTBG - Drowning and Choking
253
Choking hazards include small objects (like toys) and certain foods. Children are particularly vulnerable because their airways are very small. As soon as children develop motor skills, they tend to put everything in their mouth, which is how they often get sick (not because of teething itself, but because they put germs in their mouths while teething). Parents need to be aware of choking hazards in both toys and food, and CPR certification includes training on how to respond to choking emergencies.
Click to watch →
Deep Dive
Basic knowledge of emergency response protocols, such as how to quickly contact emergency services and provide location details.

Basic First Aid Training UK (Updated 2023)
289.4K
When contacting emergency services, provide your full workplace address (including landmarks if GPS fails), number of casualties, type of incident, and extent of injuries. Repeat location information when asked. Prioritize treatment using the order: breathing over bleeding over bones/burns over other medical conditions.
Click to watch →
Erste Hilfe – Basic Life Support (BLS) – AED, Notruf, stabile Seitenlage, Leitlinie von 2021
101.5K
When calling emergency services, provide three essential pieces of information: the exact location of the incident (remembering that emergency responders typically take about 10 minutes to arrive), allow the call operator to guide you through the conversation, and request specific instructions for first aid procedures. Using speakerphone mode on your phone is recommended for clearer communication.
Click to watch →

19 Curso de Primeros Auxilios - Cap 1, 2, 3 y 4 - Accionar general, Hemorragias, Osteoarticulares
113.7K
When calling emergency services, provide: what is happening (describe exactly what you see), the exact location (coordinates), when the incident occurred, how it occurred, the number of victims, your name, and the phone number you are calling from. After calling, remain at the scene until help arrives. When emergency services arrive, introduce yourself as the person who called and provide the same information. This ensures continuity of care and helps emergency personnel understand the situation.
Click to watch →

CLASE 01 - SOPORTE VITAL BÁSICO
333
When reporting an emergency, the caller should: (1) identify themselves (name, relationship to victim), (2) describe what happened, (3) provide the victim's condition, (4) give the exact location with reference points (landmarks, streets, buildings). The caller becomes responsible for the situation and will be contacted by emergency services. If the caller leaves, they may not be able to provide information when help arrives. In Peru, fire departments are volunteers and may not have GPS systems, so accurate location description is critical.
Click to watch →

#17. GOŚĆ - Tomasz Grądzki: O Pracy w Policji, Straży Pożarnej i o Bezpieczeństwie
1.6K
When calling emergency services: (1) Dial 112 (universal emergency number connecting to police, fire, and ambulance), (2) Provide clear location information first (address, landmarks, road numbers), (3) Describe the situation and number of people involved, (4) Provide your own contact information, and (5) Remain calm and follow dispatcher instructions. Location information is critical as it may be the only chance to reach the scene. When reporting emergencies: use landmarks, road numbers, and directional information; if on highways, identify the road number and direction of travel; if lost in wilderness, describe last known location and distinctive features. Emergency dispatchers can often locate callers using GPS technology, but providing additional details helps.
Click to watch →
Prerequisite Knowledge
- Concept 01Understanding basic infant anatomy, specifically how an infant's airway differs in size and flexibility compared to an adult's airway.
- Concept 02Distinguishing between gagging (a normal, noisy developmental reflex) and actual choking (a silent, life-threatening airway obstruction).
- Concept 03Awareness of common household choking hazards for infants, including specific food textures, small toys, and loose objects.
- Concept 04Basic knowledge of emergency response protocols, such as how to quickly contact emergency services and provide location details.
Subsequent Learning
- Step 01Mastering Infant Cardiopulmonary Resuscitation (CPR), which is the necessary next step if a choking infant becomes unresponsive.
- Step 02Learning choking rescue protocols for older children and adults, highlighting the anatomical differences and the transition to the Heimlich maneuver.
- Step 03Studying pediatric basic first aid for other urgent situations, such as managing burns, allergic reactions, seizures, or poisoning.
- Step 04Implementing comprehensive child-proofing strategies and safe-feeding practices (like baby-led weaning safety guidelines) to prevent choking incidents entirely.
Choking Signs
Back Blows
Chest Thrusts
Emergency Response
CPR Transition
Key Recall
Choking Signs
0:00Playing Section
- 1
Weaning introduces choking risks from food or small objects.
- 2
A choking baby under one year cannot cry, cough, or breathe.
- 3
Immediate recognition of symptoms is critical for intervention.
Debate on Portable Anti-Choking Suction Devices
Standard first aid protocols taught by organizations like St John Ambulance rely strictly on manual physical maneuvers (back blows and chest thrusts) to clear an infant's airway. However, an alternative perspective has gained traction with the introduction of portable, suction-based airway clearance devices (such as LifeVac or Dechoker). Advocates argue these devices provide a life-saving alternative, especially when manual protocols fail or cannot be performed due to physical limitations. Conversely, major medical bodies and resuscitation councils currently advise against their primary use, citing a lack of robust clinical trials, potential risks of tissue damage to an infant’s delicate airway, and the danger of delaying proven manual techniques. This debate represents a critical tension between relying on immediately available manual skills versus adopting unstandardized mechanical interventions.
Deep Dive
Mastering Infant Cardiopulmonary Resuscitation (CPR), which is the necessary next step if a choking infant becomes unresponsive.
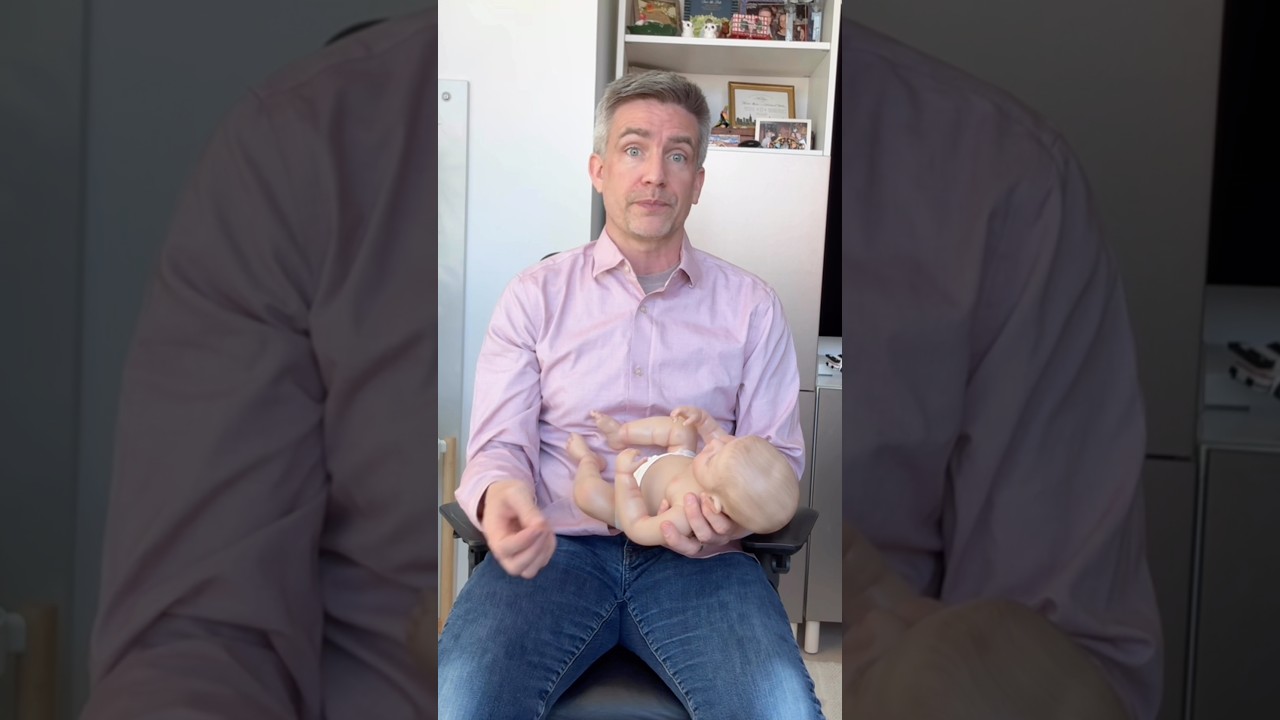
Baby Choking
75.4K
If the choking infant becomes unresponsive during the emergency response, immediately begin CPR (Cardiopulmonary Resuscitation) to maintain circulation and oxygenation until professional help arrives.
Click to watch →
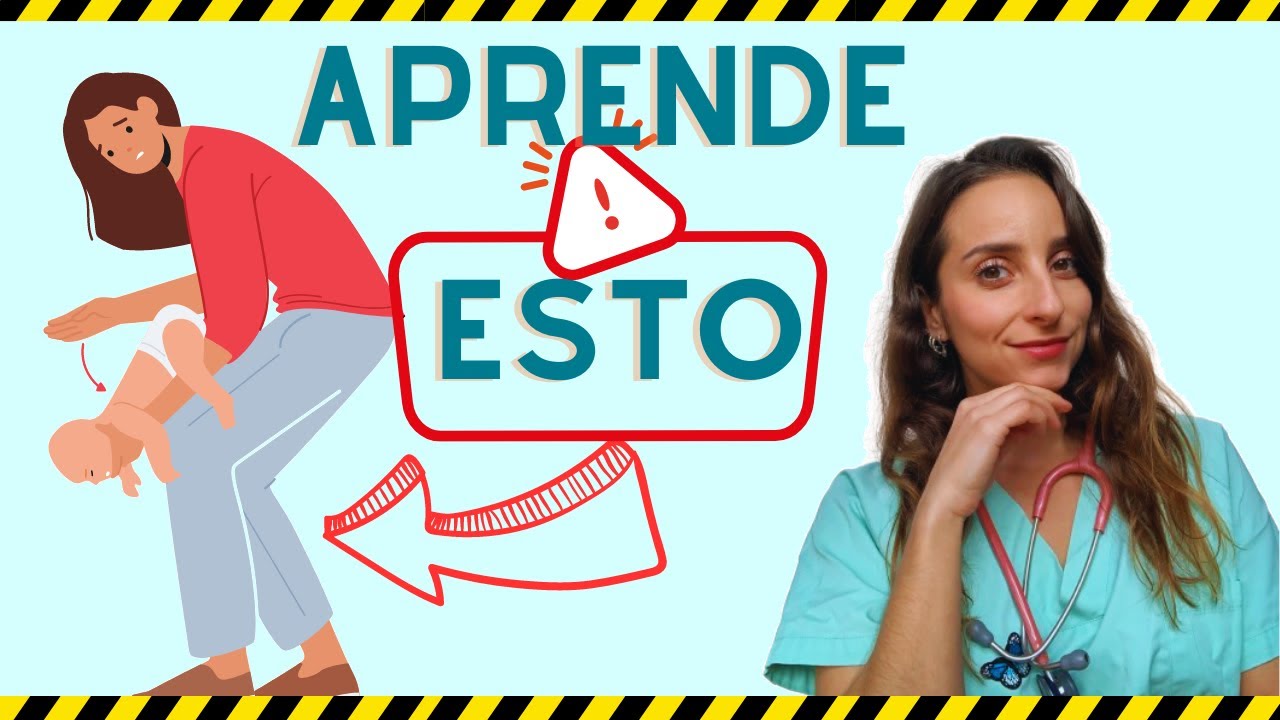
DESATRAGANTAR a un BEBÉ menor de 1 año PASO a PASO ¡¡ Salva vidas !!
249
If the child becomes unresponsive, stops breathing, or shows no signs of life after choking interventions, begin CPR immediately. Open the airway by tilting the head back and lifting the chin to prevent tongue obstruction. Deliver five rescue breaths using mouth-to-mouth-and-nose technique for infants. Check for a pulse by placing fingers in the armpit or groin area. If a pulse is present, continue ventilations only. If no pulse is detected, perform full CPR with compressions and ventilations.
Click to watch →

🔴 RCP Y PRIMEROS AUXILIOS: QUÉ HAY QUE SABER
380
If a choking infant becomes unconscious, place them on a hard surface and begin CPR. Perform 30 chest compressions (between the nipples, compressing 4 cm) followed by 2 rescue breaths. For infants, cover both mouth and nose with your mouth. Continue the cycle until the baby wakes up, the object is expelled, or emergency services arrive.
Click to watch →
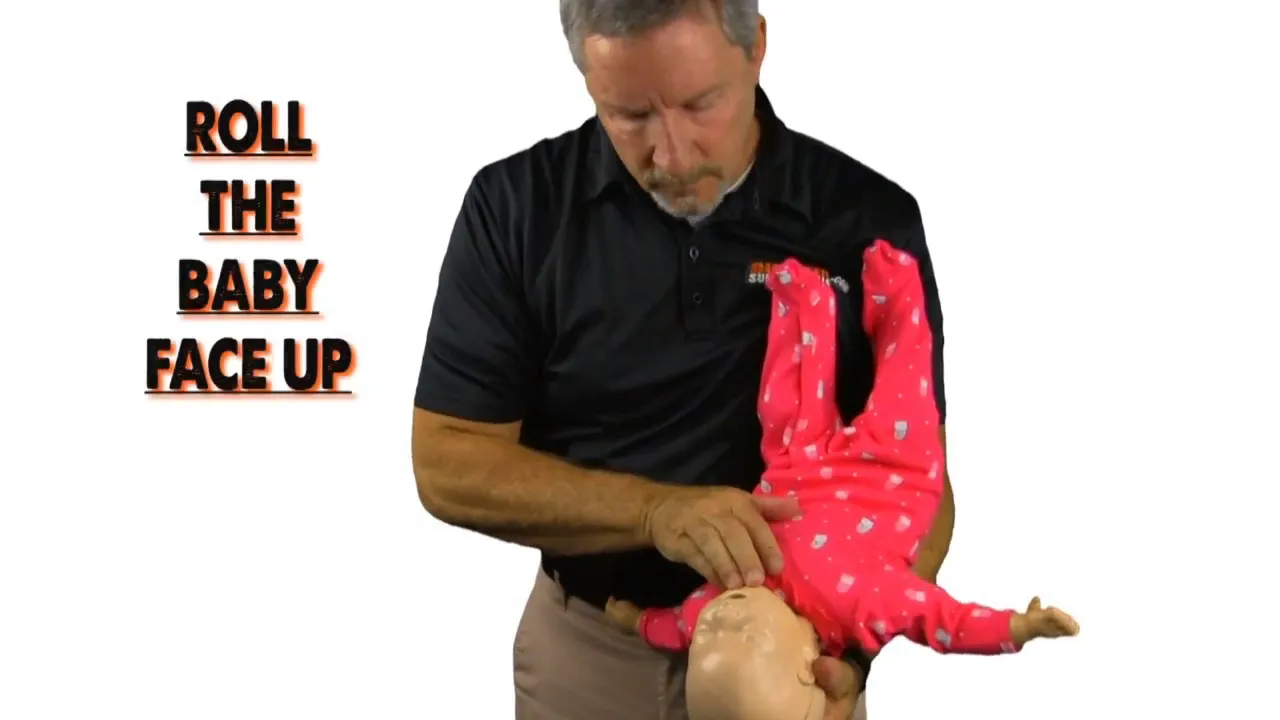
How to Save a Choking Baby
1.6K
If the choking infant becomes unresponsive during the choking response, immediately begin infant CPR. This is the critical transition point when the choking response is no longer effective.
Click to watch →
CPR Certification Practice Test 2025 | 25+ MCQs for Healthcare Workers & Students
2.8K
If an infant (especially below one year old) is choking and becomes unresponsive, you should immediately start CPR. During CPR, each time you open the airway to give breath, you should look for the object and remove it if visible. This helps circulate blood and oxygen while attempting to relieve the obstruction. If the infant is still responsive, you continue back rubs and chest thrusts. Abdominal thrusts should not be done on infants as they can cause internal damage. Calling emergency services is important but CPR should start immediately.
Click to watch →
Deep Dive
Learning choking rescue protocols for older children and adults, highlighting the anatomical differences and the transition to the Heimlich maneuver.

RCP y Primeros Auxilios (niños y adultos) -Curso Completo-
2.1M
For choking adults, the Heimlich maneuver involves placing two hands in a fist below the sternum and thrusting upward and backward. After 2-3 attempts, if the object is not expelled, the maneuver should not be repeated more than 5 times. For choking infants, providers can support under the armpits or position face-down on their thigh for back blows. The provider must first determine if the person is in cardiac arrest. If coughing, the cough is effective and should not be interrupted. If not coughing or in cardiac arrest, activate emergency services and perform abdominal thrusts.
Click to watch →

EMERSON CEARÁ - OPERAÇÃO NO BUTECO DA MAGIA / @felipemosk.
886.9K
The Heimlich maneuver is a first aid technique used to dislodge objects from a choking person's airway. For adults, the rescuer stands behind the person, wraps arms around their waist, and makes a fist just above the navel. The rescuer then performs quick upward thrusts to create pressure that dislodges the object. For children, the technique is adapted for smaller body size. For infants, the rescuer places the infant face down on their forearm and delivers five back slaps between the shoulder blades. The maneuver is considered successful when the choking person begins to cough or breathe normally.
Click to watch →
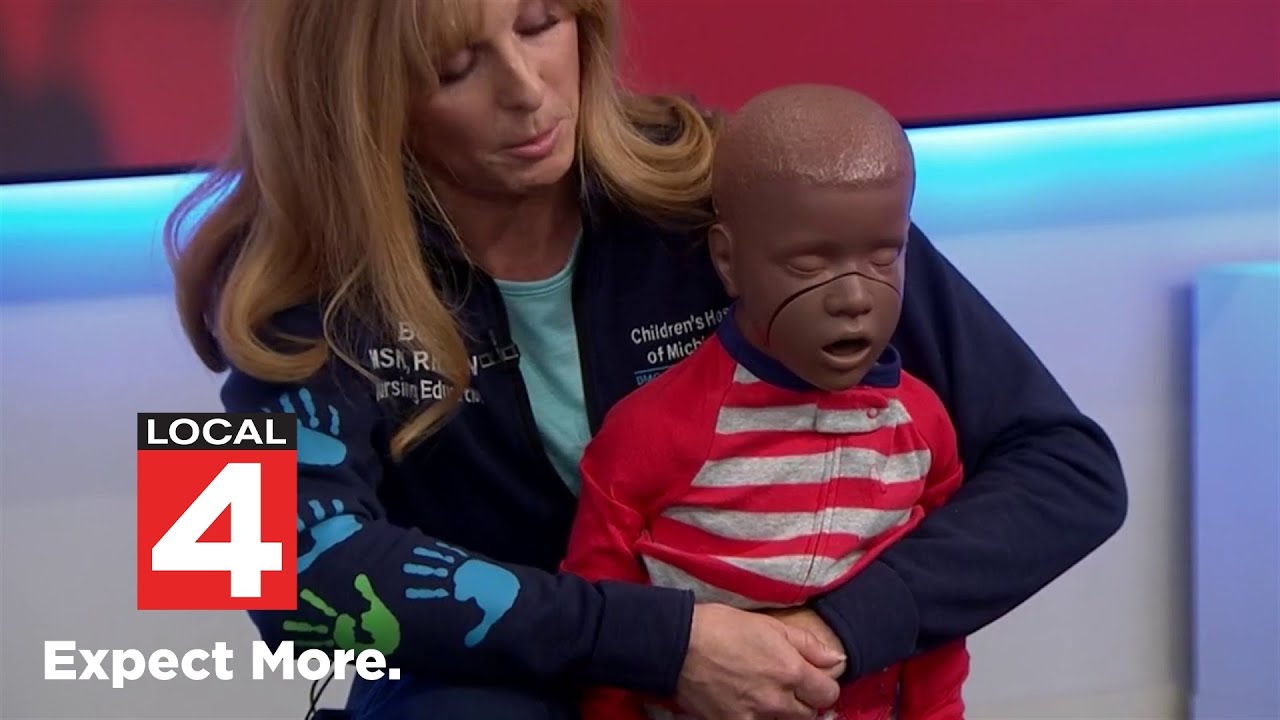
What to do if your child is choking
959.3K
For older children who can stand or walk, the Heimlich maneuver involves getting down to the child's level, wrapping arms around their waist with thumbs positioned inside the ribcage, making a fist, and performing inward and upward abdominal thrusts. This technique should be continued until the object is expelled from the airway. Parents should continue these thrusts until the child coughs up the object or it comes out, which will typically cause the child to cry and be upset, indicating successful relief.
Click to watch →

위기탈출 넘버원 - Crisis Escape No1 20070811 #008
400.6K
The Heimlich maneuver for adults and older children involves standing behind the person and wrapping your arms around their waist. Place one fist with the thumb side against the abdomen, just above the navel, and grasp it with your other hand. Perform a quick inward and upward thrust, then release. Repeat this action until the foreign object is expelled. In the demonstrated case, this technique successfully removed a candy from a 7-year-old child's throat. After the object is expelled, it is important to check for any internal injuries caused by the abdominal pressure. Additionally, when feeding children, jelly-like foods should be given with caution and apples should be cut into small pieces to prevent choking hazards.
Click to watch →

Personas Mayores: Qué Hacer en Caso de Atragantamiento Solo Durante los Primeros 23 Segundos
209.3K
Adults over 60 are at significantly higher risk of fatal choking due to weakened swallowing muscles, thinner saliva, and medication side effects; however, survival is possible through seven sequential self-rescue techniques that must be executed within the critical first 23 seconds: (1) Stop and maintain absolute calm to prevent the object from embedding deeper, (2) Call emergency services immediately even if you cannot speak, (3) Stand up and lean forward at a 45-degree angle to use gravity to help dislodge the object, (4) Perform deliberate diaphragmatic coughing with maximum force, (5) Strike your abdomen against a sturdy chair backrest repeatedly, (6) Deliver forceful backward impacts against a wall or door frame to create shock waves that vibrate the object loose, and (7) As a final resort, drop to your knees and perform the floor-based Heimlich maneuver by thrusting your torso downward onto your fists, which generates the highest pressure for clearing complete airway obstructions.
Click to watch →
Deep Dive
Studying pediatric basic first aid for other urgent situations, such as managing burns, allergic reactions, seizures, or poisoning.

TREINAMENTO BEBÊ A SALVO — Primeiros Socorros para Pais.
6.7K
Beyond choking and burns, other pediatric emergencies include seizures (which can occur without warning), severe allergic reactions, hemorrhages, and injuries from animals (both domestic and venomous). Each situation requires specific first aid knowledge and cannot be handled with the same approach.
Click to watch →

First AID | Basic First Aid Skills | AIIMS & CHO Exam Preparation
628.8K
For minor burns: place under cool running water for 15 minutes, apply aloe vera cream, and cover with antibiotic ointment if blisters form. For severe burns, call emergency services. For unconscious victims, perform CPR: ensure scene safety, place person supine on firm surface, place hands in center of chest, compress at 100-120 per minute, and provide rescue breathing. For bee stings or insect bites: call emergency services if signs of severe allergic reaction appear, remove stinger with flat object, wash area, apply cold compress for 10 minutes, and use antihistamine cream for itching.
Click to watch →

Hanımlar Rehberi | İlk Yardımın Temel Uygulamaları
764
For burns: calm person and stop running, cover with wet cloth, have person roll on ground, assess ABC status, remove clothing but not stuck items, run cool water for 20 minutes for small burns, do not use water for large burns to prevent hypothermia, remove jewelry before swelling, do not pop blisters. For epilepsy seizures: stay calm and ensure safety, place something soft under head, remove dangerous objects, do not try to hold person down or open mouth, do not put anything in mouth, do not give anything to smell (garlic, onions), time the seizure (most last 2-3 minutes), if seizure lasts longer than 5 minutes call emergency services. After seizure: stay until fully conscious, help to safe position, check for injuries, turn to side if vomiting, comfort person, allow to leave alone if able, seek medical attention for severe cases. First aid education is crucial: training from Red Cross or certified first aiders, certified individuals can teach others creating knowledge chain, parents should learn first aid as children frequently have foreign objects in airways, many preventable child deaths occur because parents don't know basic first aid, schools should provide age-appropriate education, community awareness programs can expand knowledge throughout society.
Click to watch →

Primeros auxilios en niños. CUN Healthy Forum. Clínica Universidad de Navarra
1.1K
This comprehensive guide covers essential pediatric first aid and emergency response. Prevention is key: infant sleep safety (back sleeping, firm mattress), kitchen/bathroom/toy safety, pool safety with fences and continuous supervision. First aid is evidence-based interventions that never delay emergency activation. For cardiac arrest: ensure safety, call the child, shout for help, open airway with head-tilt chin-lift, give 5 rescue breaths, then 30 chest compressions (lower sternum, two fingers for infants). Continue for at least one minute. For respiratory difficulties, position semi-upright, keep calm, provide cool environment. For febrile seizures, prevent injury, place on side, do not insert objects in mouth. For choking, allow coughing, recognize ineffective cough, call 112, perform 5 back blows and 5 abdominal thrusts (modified for infants). For hemorrhages, apply direct pressure, clean wounds with water and soap, apply chlorhexidine, cover with sterile dressing. For burns, cool with water, cover with sterile gauze, leave blisters intact. For environmental emergencies, remove from cold/water, apply cold, disconnect power for electrical burns. For poisoning, call National Toxicology Institute, do not induce vomiting. For travel, pack medications, antipyretics, oral rehydration solution, gauze, dressings, chlorhexidine.
Click to watch →

Tableta de sănătate - ABC-ul urgențelor pediatrice
147
Febrile seizures require immediate emergency evaluation, with management including rectal antipyretics, safe positioning (lateral decubitus), and avoiding dangerous interventions like tongue holding. Fever thresholds for emergency evaluation vary by age: infants under 3 months require evaluation for any fever above 38°C; infants 1-2 months require evaluation for fever above 38.5°C. Antibiotics are ineffective for viral infections (90% of pediatric cases) and contribute to resistance. Anaphylaxis requires immediate epinephrine administration, with severe cases requiring emergency department evaluation. Burns require immediate cooling with running water, avoiding home remedies like butter or ointments.
Click to watch →
Deep Dive
Implementing comprehensive child-proofing strategies and safe-feeding practices (like baby-led weaning safety guidelines) to prevent choking incidents entirely.
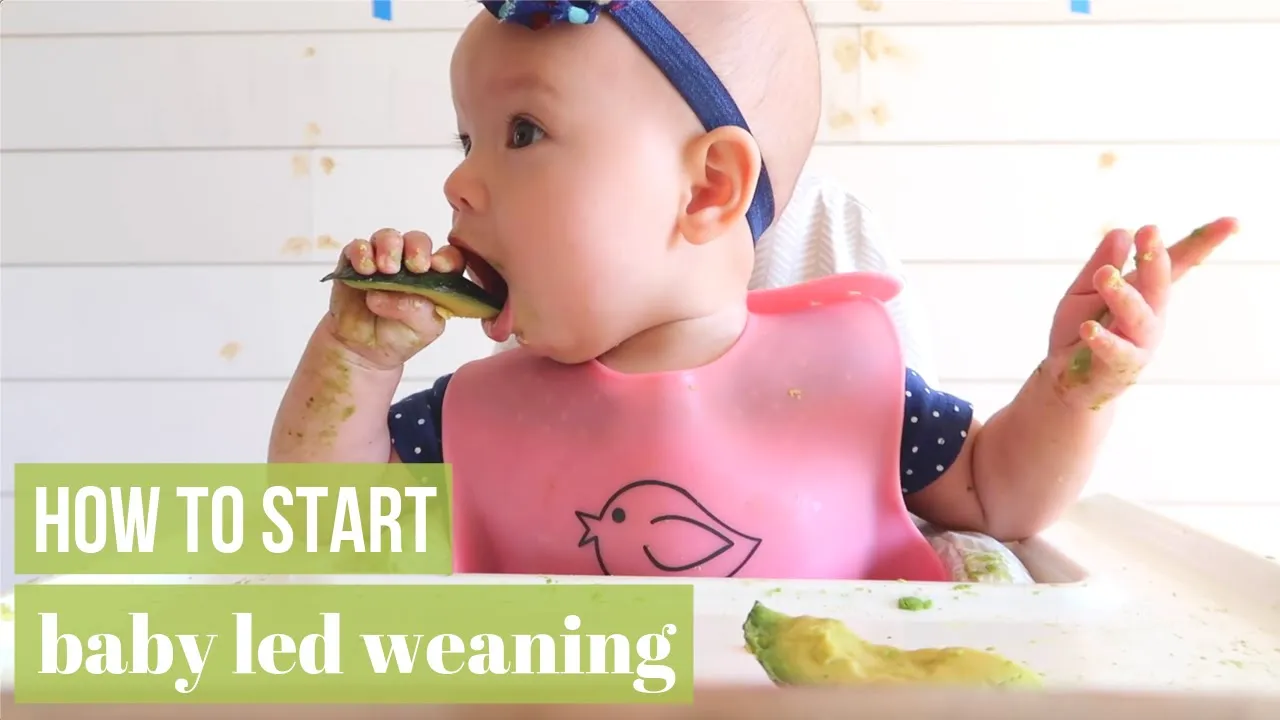
BABY LED WEANING: HOW TO START (& DO IT RIGHT!)
1.1M
Baby Led Weaning skips purees entirely, offering babies solid finger foods from day one. The term 'weaning' here means starting solids, not reducing milk intake—parents should maintain existing breastfeeding or formula schedules. Food before one year is primarily for exploration and fun. Safety concerns about choking are valid but research shows babies aren't more likely to choke on solids than purees. Gagging is a normal reflex that helps babies expel food and is not dangerous. True choking is an emergency requiring immediate action. Parents should take infant CPR classes and understand the difference between gagging (sounds, facial expressions, baby continues eating) and choking (no air, terror, no sounds). Babies don't need teeth—strong gums and jaws handle solid foods. Essential tools include silicone pocket bibs, sleeved bibs for messy meals, crinkle cutters for slippery foods, and glass baby cups with ridged edges. Babies can eat anything the family consumes, provided it's soft enough to squish between two fingers. Avoid honey (botulism risk under one year) and cow's milk (inadequate nutrition).
Click to watch →

BABY LED WEANING UPDATE + Q&A - 8 months old
50.5K
Babies have gag reflexes located further back in their mouth than adults. Gagging is often due to texture, smell, or taste rather than actual choking. True choking is characterized by the absence of noise. Parents should stay calm when babies gag, as anxiety can cause babies to feed off that fear. Parents should not reach in to pull food out, as this may push it further back. Always supervise babies closely, especially with new foods or larger pieces. Start with big strips of food and cut into smaller pieces as babies become skilled. Take CPR training to know what to do if a baby starts choking.
Click to watch →

COMO FAZER O BEBÊ COMER - 10 DICAS DE INTRODUÇÃO ALIMENTAR - 6 MESES? | Naiumi Goldoni
41.3K
For BLW, cut foods into appropriate shapes to prevent choking (grapes lengthwise, not round). The gag reflex is protective, not choking. Parents should learn the Heimlich maneuver for emergencies. BLW requires patience and persistence - babies don't start eating immediately. Some babies need help eating initially. Parents may need to help babies eat after playing to consume adequate amounts.
Click to watch →

Dante Mealtime : MY FIRST MEAL TIME!!
270.1K
When implementing Baby-Led Weaning (BLW), parents must ensure child safety by never leaving the child unattended during meals, providing appropriately sized food pieces (larger pieces for younger infants to prevent choking), and maintaining control over feeding to measure intake; parents should also educate themselves about which foods are safe and which are dangerous for their child's age.
Click to watch →

Clase 2: Mitos en la Crianza - Semana de la Maternidad de Lucía, mi pediatra.
58.9K
This segment covers Baby-Led Weaning (BLW), a feeding approach where babies are given whole foods in various textures rather than pureed foods. The speaker explains that research shows that when families have proper information about safe foods, the risk of choking is comparable to babies who eat pureed foods. The key is knowing which foods are safe and which are dangerous. For babies between 6 months and 2 years, foods should be soft enough to be crushed between the tongue and palate. Safe foods include cooked vegetables, soft fruits, and well-cooked meats. Foods that are not safe include raw apples, whole grapes, nuts, and hard candies. The speaker specifically warns about sliced hot dogs (Frankfurt sausages), which are a leading cause of choking deaths in children in the United States due to their gummy texture that allows them to lodge in the trachea.
Click to watch →
Choking Signs
Back Blows
Chest Thrusts
Emergency Response
CPR Transition
Key Recall
Choking Signs
0:00- 1
Weaning introduces choking risks from food or small objects.
- 2
A choking baby under one year cannot cry, cough, or breathe.
- 3
Immediate recognition of symptoms is critical for intervention.
Debate on Portable Anti-Choking Suction Devices
Standard first aid protocols taught by organizations like St John Ambulance rely strictly on manual physical maneuvers (back blows and chest thrusts) to clear an infant's airway. However, an alternative perspective has gained traction with the introduction of portable, suction-based airway clearance devices (such as LifeVac or Dechoker). Advocates argue these devices provide a life-saving alternative, especially when manual protocols fail or cannot be performed due to physical limitations. Conversely, major medical bodies and resuscitation councils currently advise against their primary use, citing a lack of robust clinical trials, potential risks of tissue damage to an infant’s delicate airway, and the danger of delaying proven manual techniques. This debate represents a critical tension between relying on immediately available manual skills versus adopting unstandardized mechanical interventions.
Understanding basic infant anatomy, specifically how an infant's airway differs in size and flexibility compared to an adult's airway.
Distinguishing between gagging (a normal, noisy developmental reflex) and actual choking (a silent, life-threatening airway obstruction).
Awareness of common household choking hazards for infants, including specific food textures, small toys, and loose objects.
Basic knowledge of emergency response protocols, such as how to quickly contact emergency services and provide location details.
Mastering Infant Cardiopulmonary Resuscitation (CPR), which is the necessary next step if a choking infant becomes unresponsive.
Learning choking rescue protocols for older children and adults, highlighting the anatomical differences and the transition to the Heimlich maneuver.
Studying pediatric basic first aid for other urgent situations, such as managing burns, allergic reactions, seizures, or poisoning.
Implementing comprehensive child-proofing strategies and safe-feeding practices (like baby-led weaning safety guidelines) to prevent choking incidents entirely.
1.3M views7.8Klikes1:47@stjohnambulanceorgOriginal Release: 2016-09-07
As you start weaning your baby small items of food may get lodged in their throat and they may choke. They can also choke on small toys or household items.
If a baby under one year old is choking, you'll notice that they'll be unable to cry, cough or breathe.
What we're going to do now is administer some back blows. So first of all you need to lay your baby face down along your thigh, making sure you support their head and their neck.
Next we're going to administer those directly between the shoulder blades using the heel of your hand. Give up to five sharp back blows making sure after each one whatever it is hasn't come out. If the back blows don't work we need to move on to giving some chest thrusts. So we need to turn them over so they're lying face up, again making sure that their head and their neck are supported. Put two fingers in line with the arm pit in the center of the chest pushing down sharply administer up to five chests thrusts. If this doesn't work call 999 or 112 for emergency help repeat five back blows and five chest thrusts until help arrives.
If they become unresponsive you will need to start CPR.
So remember if your baby is choking, check the mouth slap it out squeeze it out and that's how we treat a choking baby. Thanks for watching. Help support St John Ambulance, donate today.
Up Next

16:00
Bioarchaeology Explained: Skeletal Analysis & Richard III
@shortvideosonarchaeology7387
1.5K views•2020-09-25

12:54
Triumph of Orthodoxy Icon: Byzantine Art & History Explained
@BenCallan
2.1K views•2024-08-06

9:49
FastAPI vs Flask vs Django: Choosing the Right Python Web Framework
@TechWithTim
302.5K views•2024-05-26

1:42
Game of Thrones Opening Credits: A Cinematic Analysis
@gameofthrones
46.3M views•2011-04-18
Related Study Plans & Knowledge Roadmaps
Structured learning paths in General & Interdisciplinary Studies
general-studies
Elevator Engineering: History, Physics & Cities
01From Hoists to Safety Brakes: The Dawn of Vertical Lift
02Hydraulic vs. Traction: The Engineering Physics of Elevators
03Modern Speed, Safety, and Algorithms
+ 2 more learning modules
12h5 modules
Explore Roadmap
general-studies
Rubber: Material Science, History & Geopolitics
01Origins of Natural Rubber & Mesoamerican History
02The Chemistry of Natural Rubber & Vulcanization
03The Geopolitics of the Rubber Boom & Colonization
+ 2 more learning modules
12h5 modules
Explore Roadmap
general-studies
Containerization: Evolution, Logistics & Trade
01Ancient Trade & Bulk Cargo: Amphorae to Barrels
02The Industrial Revolution & Cardboard Packaging
03The Containerization Revolution: Malcom McLean
+ 2 more learning modules
12h5 modules
Explore Roadmap
general-studies
Textile Tech: Evolution, Labor & Global Impact
01Pre-Industrial Textiles: Handloom & Cottage Industry
02Mechanization: The Spinning Jenny to the Power Loom
03The Factory System & Global Labor Transformation
+ 2 more learning modules
10h5 modules
Explore Roadmap