
![OpenCV의 소개 및 기본 사용법 [ Python 데이터 분석과 이미지 처리 ]](https://i.ytimg.com/vi_webp/F2FRpmh9sQo/maxresdefault.webp)

![[Free Python Course] - S9 - Thực hành xử lý ảnh với OpenCV và Python - Mì AI](https://i.ytimg.com/vi/aSaWSiR2GbQ/maxresdefault.jpg)





![OpenCV Computer Vision Application Programming [Video Course]](https://i.ytimg.com/vi_webp/DB5bJ5LkN0U/maxresdefault.webp)
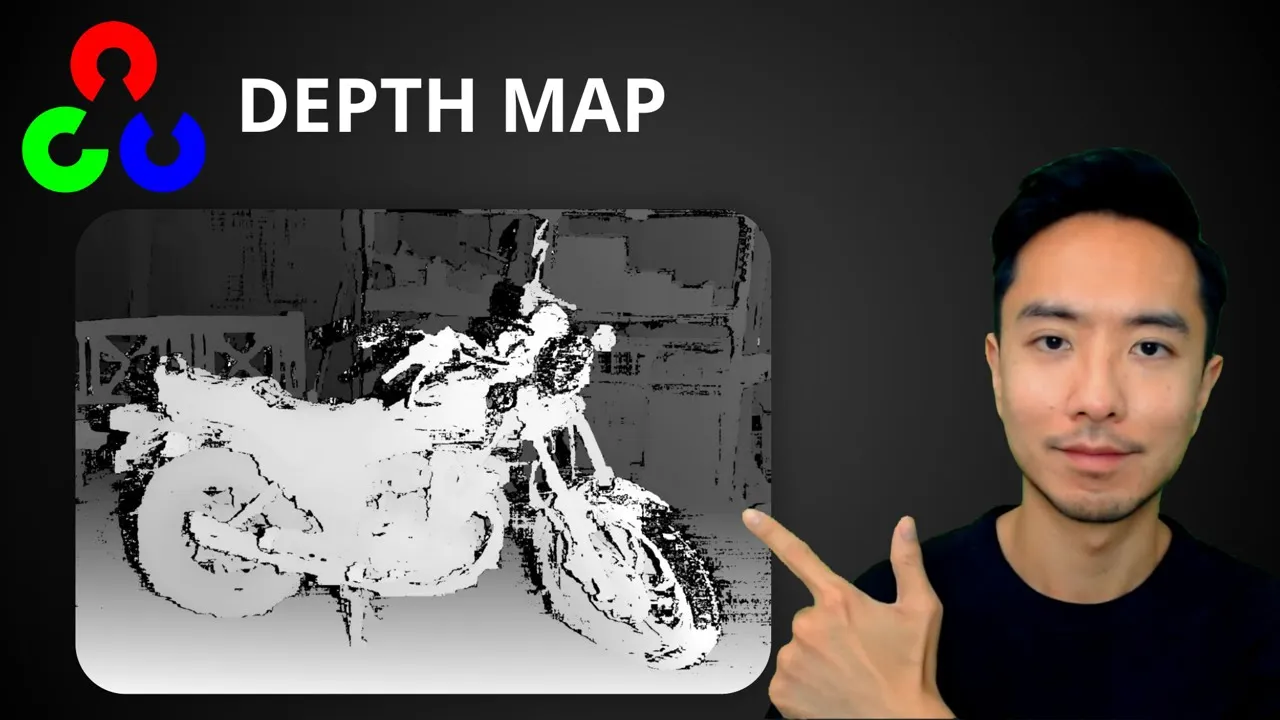








This video demonstrates how to implement depth estimation using stereo vision in Python with OpenCV. The technique involves tracking a colored object (such as red) across two synchronized cameras, calculating the disparity between corresponding points in the left and right image frames, and using the geometric relationship between baseline distance, focal length, and disparity to compute the depth (distance) of the tracked object from the camera. The implementation includes color segmentation using HSV color space, morphological operations for noise reduction, contour detection to find the object's center, and triangulation to calculate depth based on the disparity values.
Depth Estimation with Stereo Vision in Python and OpenCV
Added:Basic Python programming and fundamental image processing concepts in OpenCV, such as handling multi-channel arrays, image filtering, and coordinate systems.
The Pinhole Camera Model, including an understanding of focal length, principal points, and how 3D world coordinates project onto a 2D image plane.
Epipolar Geometry, specifically the concepts of epipoles, epipolar lines, and the fundamental/essential matrices that govern relationships between two views.
Camera Calibration and Image Rectification, which are critical for correcting lens distortion and aligning dual-camera images horizontally so that search matching is reduced to a 1D problem.
Advanced Disparity Algorithms, moving from basic Block Matching (BM) to Semi-Global Block Matching (SGBM) and deep-learning-based stereo matching models.
3D Point Cloud Generation and Visualization, converting disparity maps into 3D coordinates (XYZ) and processing them using tools like Open3D or the Point Cloud Library (PCL).
Visual SLAM (Simultaneous Localization and Mapping), applying stereo vision depth maps to track a robot's ego-motion and map unknown environments.
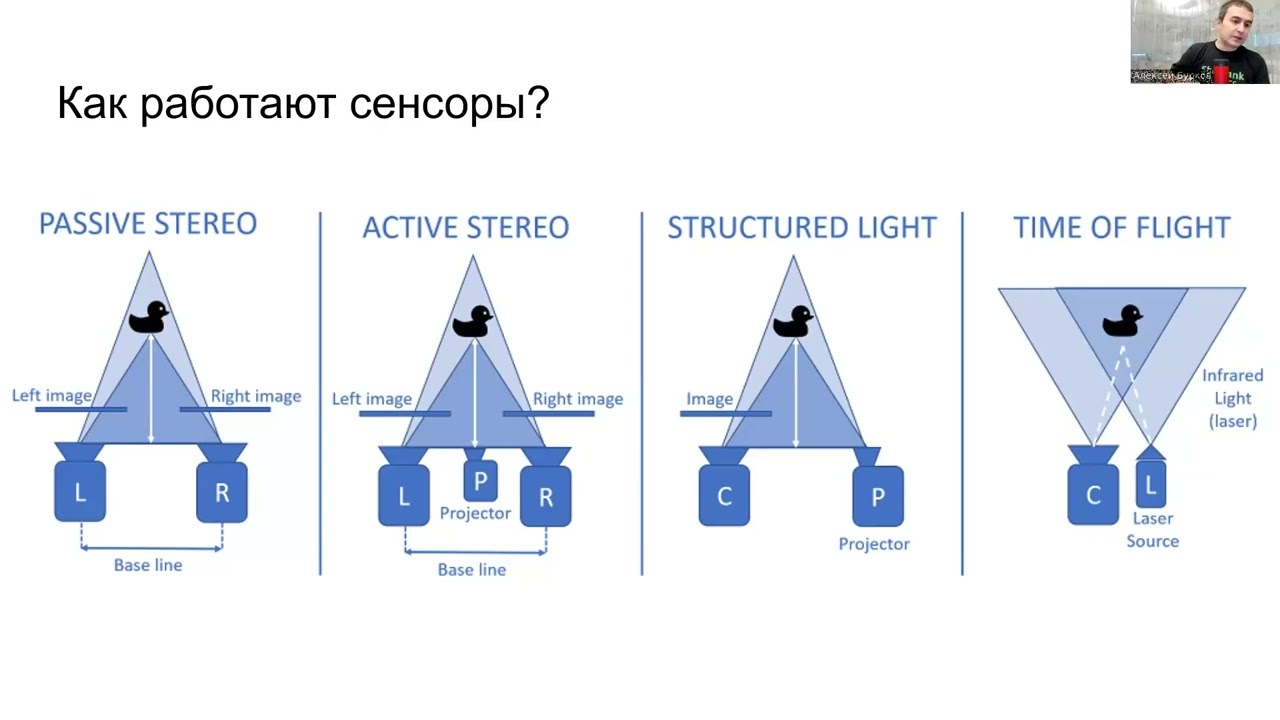
Sensor Fusion and Alternative Depth Technologies, comparing and integrating passive stereo vision with active sensors like LiDAR, structured light, and Time-of-Flight (ToF) cameras.
45.2K views814likes27:30Original Release: 2021-02-04
hey guys i'm logan's a new within this computer vision tutorial in this video here we're going to talk about the starvation depth estimation project uh that we've already did in one of the previous videos with cbs plus but in this video here we're going to focus on like how we can implement it in python and how we can do uh depth estimation where we're tracking an object in an image and then doing that designation with stereo vision in python here but first of all i've linked this course server down in description so make sure to join that um and join the community where you can talk with other people about computer vision artificial intelligence deep learning and a lot of different kind of stuff and also if you have some problems in your projects or just want some inspiration for for new processes and stuff like that make sure you join that discord server and join the community so let's not jump into the first slide here where we're going to talk about the multiview gamma 3 that we're going to use for our servation setup and to calculate the disparity which we're going to use to calculate and estimate depth of a point in the image so we already went over this in the previous tutorials in the cpus project example so in this video here we're just going to give you uh give you a quick overview over what it is and how it can be used to actually like uh use it for this application here and if you want a more detailed uh detail explanation of all of these different kind of parameters and how to find them and what we can use them for and also if you want to go over it step by step make sure to check that video out before we dive into the code because it's just the same details and the same kind of methods that we're using but in the previous tutorials at the end we're going to receive passcode and in this way here we're going to do it in python so first of all here we have these two these two cameras here so we have the stereo vision setup so we have a left camera and the right camera and they are lined at the same axis and then we have uh then the right camera here is placed um at a distance away from the the left camera here and this is called the baseline so the distance between these two cameras here is the baseline and this is what we're going to use to actually like calculate the depth and the disparity of the images or like the points in the images and we're doing the our project and then we also have this xl and xr here with the disparity of a point here in the left image frame and the disparity over here for the point here in the right image frame so we're going to calculate these disparities or like these um these like disparities from the left optical axis here out to the point in the left image frame and the same thing over here to the right so and then we can calculate the overall this is the disparity um for this point that we're tracking in the image and and in this example here we're actually like going to track an object that is moving around in the image so we're going to track a red item or a red object and then we're going to calculate the depth to that item that we're tracking in the image so to calculate the disparity over here we just subtract this um this distance here or like this difference here uh from the point to the optical center of the left here and then we subtract it um with this x r value here so we went all of these we went all of these formulas up here and what these different kind of like parameters and values are um in the previous video where we went over the project so make sure to check that video out if you want to know like how we can get these different kind of formulas and what this c distance is and also the f f distance and x distance here and stuff like that so we already did this code example here in c dot plus um with the depth estimation where we are refining the depth and we're using these formulas i just showed you on the previous slide and then over here to the right we have this masking material so we're going to to do such a segmentating of uh of a color so in this case here we're segmenting out the red colors over first of all we're going to convert it to hsv hsv color space and then we can actually like um fill it out the red color that we're going to track in the image so we have this object here that we're going to track and then we're going to find the contours find the center of mass and then we're going to track that item around in in in the image with our stereo vision setup and when we're tracking the same item with our stereo vision setup we can actually like calculate uh from the center of the of the object that we're that we're like tracking in the image then again we can actually like calculate the disparity for that and then from with this disparity we can calculate um the depth or like the distance to that object that we're tracking around in the frame um as and as we see here like this is the result that we get um from the code example in cbs plus so in this video here we're going to do it in python number and it will be the exact exact same method and exact same formulas and like um approach that we're going to take so this will just be in python instead of c plus if you prefer if you prefer python or receipt plus or if you just want to use or if you have a python application where you just want to implement this here and you it won't do it from yourself from cpus plus then i'm going to give it to you here in python as well so first i just wanted to show you like this uh this drawing here that i did for like the multiview geometry here so this is the actual like kind of like approach or method that we're going to use for actually like getting the information about the depth in the image from our derivation setup so as we have here we have this red point here that we can remove around here in the in the world coordinates and then we can see that it will make a protection down here on the left image frame and also the right image frame here um on the in the cameras so we can see that if we're moving this a circle here around like this object here around in the world coordinates then we can see that that our point on the image frames uh or like image plane is actually like moving and we can see that if our object is close here uh to the image frame or like to our camera lens then we can see that the change in disparity is is greater so we can so that we can know that and we can use that information to actually like calculate uh the depth and know like how far away is that object from um from the camera so if we move further away here we can see like the changes here in the disparity is is not that great like we don't we don't have like a great value um when we're changing um changing the the point here when we're moving far further away and if we're aligned point here with one of the left optical axis for example we can see that if we move closer here that we can see like we don't really get like we get really um we can really large disparities here and then when we're moving closer like it just gets smaller and smaller and the disparity and if you go like too close to to the left image frame here or like the camera lens we won't be able to see it in the right camera so we can use this information here from the second camera so if you only have one camera we don't have any information about depth here for example in the left camera frame here we don't have any information about the depth but we can see that the point here is actually like moving in the right camera here um when we're going up and down here on the left optical axis and this is the information that we can use to actually like calculate the depth from these disparities here in the image frames so we're not going this is the blind text here and i'm going to show you the actual code that we're going to do for this project here and then at the end of the video we're going to run the project and see how it works uh with the stereo camera setup so first of all here we're going to import the different kind of modules that we need so we need like for example numpy opencv 2 sometime umtils matplotlib and some other stuff like that and then we're going to create our own functions in these different kind of uh and these different kind of files here where we have the hsb filler that we're going to do and then we're going to do some shape recognition of the object that we're going to track and then we're going to do the triangulation here in this file we're actually like going to calculate the depth from the disparity in the images so first of all here we're going to open up both the cameras here so we have a a capture for a ride for a right camera and also a capture for the left camera and then we're going to set the different kind of parameters here that we have for for our cameras so first of all here we're going to set the frame rate to the maximum frame rate at 120 fps and we have a baseline which is that the distance between the two cameras that we have in our starvation setup in this case here uh they are nine centimeters away from each other and the confocal length from from the camera which is the distance from the camera lens to the to the image plane is six millimeters and then we also have like a field of view here uh which is our alpha value then we're going to run our while loop here so this is just like this this program here will just keep running until we terminate terminated or hit the cue button at the end here so first of all here we're going to first read in the return frame right here or return left and see like if we cannot open the frames these will return false and then we and then restore it in this frame right here and frame left here so we have to like what we're capturing with our left and right cameras will be stored in these uh frames here which which is the right one and and the left one and then we're going to have the camera calibration here so ideally we'll first have to do a camera calibration but we won't go over it in this video here i created another video um previous in this tutorial here where we went over camera calibration and how we can calibrate a camera and why we should calibrate a camera in in in opencv and just in like in computer vision programs or applications in general because if we have a really distorted image and we're going to do and calculate these disparities here uh there would be distortion and and our our like estimation of that will not be exact so we need to calibrate our camera first uh before we do this if we have a lot of distortion on our images but we won't be doing it um in this video here um so make sure to check that video out if you're interested in camera calibration and how we can calibrate a camera for your application um or your project that you're doing so first of all here we again we're going to to to see like if we kind of catch any frames from either of the two images or like the two cameras that we're going to uh to capture then we just break up this while up here and it will just terminate the program or else we will run the different kind of methods here that we're going to go over in the different kind of files here so first of all here we have this mask right here and the mask left so we want to get the mask off the item or like um the the color that we're segmenting out so first of all we're going to call this hsb here which is the from the file up here that i'm going to show you and then we're going to add this hsv filter here uh to the right frame here on the right camera so if you're going to the hsv filter file here we can see that we have this function here add hsb filler and it takes a parameter it takes in the frame and it takes in what type of camera so if it's the right or the left camera so we're going to use this because i don't have two identical cameras for this application here where we're going to set this stereo vision setup up so i have some different kind of colors for the asb hsb color color space so i have to to fill that out to different colors but if you have the exact same cameras you can only you can just only pass this frame here and you can just use the exact same values for the lower limit and the upper limit for segmenting out a color in the image so first of all here we're going to to blur the flame to blur the frame here to reduce some of the noise from our from our camera so first of all you're just going to call this dot gaussian noise and then we have this frame here where we apply this five by five fill the kernel here that we're going to to blur out the the frame with and then after we've blurred out the frame we're going to convert it from rgb to hsb so we have this hsb color frame um color frame uh color space here that we can actually like so i only have the hue saturation and value so we can actually like just fill that out at a h value so it's a hue value so we can just fill out exact range between those uh hue values and then we're going to create an an upper a lower limit for um the right image and a lower and upper for um for the left image as well so first of all here these are just the the hsb values that we're going to fill the house in this case here this is for filling out the red ball or like segmentating the red ball in the image or like the the red item or object that we're going to track so if you have some other different kind of colors you want to track in the image then you need to go in and change these values here like to the hue value um that you want to segmentate out in the image frame so after we've done that we go down here and we're actually like going to apply this filter mask here where we're going to segment it out from the from the image and like the object that we're tracking and we'll then create this mask here which will be returned that we can do some other operations on so first of all here we check if it's the right camera that we're operating in right now then we're going to do to have this in range function here where we where we filled it out or like segmentate out um these curls here that were specified in the lower and upper um upper boundary up here for our red camera and then we're going to store it in this mask here and we do the same thing if it's in in the left camera uh if it's the left camera that we're using but then we're just using the other different kind of lower limits and upper limits that we've set up up here so when we've done that we're actually like created our our our mask here for um for our camera frames and we have segmented out the color that we want to track in our image and then after that to do some other different kind of uh image processing and reduce more of the noise in an image then we can actually like use the morphology operations we've already been over in in one of the previous videos in this computer vision tutorial here so the mask here is equal to this cv2.erode where we're going to erode the image first so we have these um these parameters here which is just default parameters that we passed to this road function here and then after we have eroded the mask here we're going to dilate it so when we're doing this combination of erosion and dilation then we actually call it opening so we're doing uh the mythology operation opening on our image to reduce some of some of the noise and like open up some of the different kind of like noise inside of the segmentation that we're doing off the object in our image frame and then we when we have done that uh we're returning this mask here which is the mask that i showed you in the slides as well where we have this um white object that we're tracking around and which is the actual mask that we have for our image so if we go back here to our main function then we can see that we actually like apply this fill hdmi field here both for the mask of the right image and a mask for the left image here um and then when we have this mask here we can actually like calculate or like uh take the resulting flame frames after applying the hsv filter mask here so we have this resulting right frame here and the resulting left frame here somewhere we're going to do this here we're going to bit wise and um the right right image frame and the right image frame here and then we're going to end it with this mask here that we just got from this applying this hsv filter up here so we're actually like segmentating out um segmentating out the optic um in our original frame by using this mask over here to write a lever calculator with this asb filter so that then the resulting frame here would actually like store the resolving frame with the object that we're tracking and we do this but both for the right image and the left image here so when we have done this here we can actually like apply some shape recognition where we're going to to find the circles or like find the object that we're tracking in the image by using this find circles um function here so if we're into the shape recognition file here we can actually see we have this fine circle function here and we pass in the frame and also the mask that we're going to use to define these circles here or like find the biggest circle or like the biggest object that we're going to track in the image so first of all here we're going to find contours in the image that we're going to track so we just use this function here um with the default parameters in opencv and we're going to use these functions here which is just like how it finds contours in the image and then it will be and it will restore it in this in this variable here all the contours that it finds will be stored in this variable here and then contours here we're using this humid uh imutils where we're grabbing the contours contours in contours here so we will grab and we will first sort sort the contours here with this function and then we're going to grab the biggest contours in the image and then first of all here we set the sender here to none and then we're down here we're actually like going to to proceed if at least one contour was found and if one contour was not found we'll just right return the center here uh which is non so we know that we haven't found any objects or circles in our image but if we find some contours in our image we're going down here and then we find the large contour in the mask and then we use it to compute the minimum and closing circle and the centroid of that of that circle so we actually like know the middle point that we're going to calculate the disparity for um of the object ever dragging in the image so first of all here we're going to take this c here which is the max of the contours and then we take like we use this cv2 contour area so we're going to to take the contour with the greatest area in in like inside of the contour and this will be stored in this c variable here so they will this will be the biggest contour that we have and then we have this x and y here and the radius so this is the actual like circle that we're going to draw around our object and we use this by using it by we get that by using this min enclosing circle here which will turn the x y which is the center of the circle that we're that we're tracking and then we'll also get the radius of the circle here around our object that we're tracking so to find the actual like center point here for our image or like for the object that we're tracking then we use this moments function here um where we can get this c value here which is the maximum contour that we found and we will store it in this m value here and then to actually like get them get the center values for this moment here we have to use some of these functions here uh which can be found and like some of these different parameters and for the moments which can be find in uh find the found in the ohmsv documentation and then it will be stored in this center variable here so now we actually like have the sender of the like off the contour that we are tracking and we also have the x x and y value so then we can go down here and only proceed if the radius is greater than a minimum value because we can find some different kind of contours that is not as as big as we want to or like some false positive that we don't want to track in our image so we can go down here and see that if the radius is greater than 10 then we will draw a circle and the centroid off on the like the frame and so we can actually like show the result of the of the circle that we're tracking in the image and then we can update the list off the track points so to exactly like draw the circle and the centroid on the frame we just use this circle um circles function here from opencv and then we're going to draw the circle on the frame here and we're going to draw it at the center of the circle that we have calculated up here and then we also use the ranges here so we're going to to have this radius here so we're actually like going to draw a circle around um the object that we're tracking and we also draw like the center of that circle here with this center variable here that we calculated up here from the moments and then when we're done with that we just return this send the value here and it can either be none or it can be uh this value up here so we can actually like use this center here to actually like do some other different kind of operations um with when we're going to calculate the disparity of the two i like off the point in the two images so to go back here to the main function uh we can see that we will we will store um the circles here in this circles right and the circle's left variable here and we do that by just calling this find circles here where we pass the frame the frame we want to find the circles in and also the mask that we just calculated up here by applying this hsb filter so now the circuits that we're tracking in in the two images will be stored in this circles right and circles left here and then we can use these two different kind of like these variables here to actually like do the triangulation and calculate the disparity and the depth of that item or like object that we're tracking in the image so instead of using finding contours and stuff like that we can also use some half transform which we also went over in this tutorial here as well to do the optic detection which will also return like the sender of the object that we're tracking or we can use some neural networks to do object detection so a lot of other different kind of object object detection algorithms and stuff like that can be used together with this here and then to find the third dimension and the depth in the image of that object that we're tracking then we can actually use this openc like this derivation setup and approach here that we're going to take to actually calculate the disparity and the depth of the image and then we have this uh 3d understanding or 3d information of the objects that we're tracking in the image so to actually calculate the ball lip here we go down here and see like if no ball can be caught in one camera we just show the text on the image and that whatever you're outputting or like sharing that the tracking is lost and we do this by just using this put text here we're just going to put this texture track lost and then we have some colors and where we want to place that text on the image or else if we can actually like catch an item or like we're tracking an object in our image frame then we'll go down here and we're going to calculate the actual like depth by using this find that from the triangulation file and for to find to find the depth here we're going to pass the circles in the right image frame and the circle in the left image frame and then we're going to pass the two image frames as well and we also need information about um the baseline so the distance between the two cameras in the stereo vision setup and the focal length and also the alpha value here which is the field of view so let's go into the triangulation file here and see like how we can actually like find the depth by using these foam layers that i showed you in the slides so first of all here we're going to we need to convert the focal length from millimeters to pixels to actually like be able to do these uh calculations uh with pixel values from the images so first of all here again you're going to get the height from the right image frame and the width and also the depth and we get this by using this frame uh like we're calling this shape uh shape uh shape function here on the right image frame and we do the same here for the left and then we can check that if the width of the right image frame and the width of the left image frame is equal to each other then we're actually like going to calculate the focal length in pixels because when we're doing stereo vision we need the width of both cameras to be the same or else we can really use this approach to calculate the disparity and find the depth of the information from that if we don't have the the same with of the two cameras or like the pixel width for the two cameras so to actually calculate um the focal length here in pixels we just use this formula here which is just a standard formula for converting from millimeters to pixels with this focal length here and if if those two um width here is not the same then we just print out that the left and right camera frames do not have the same pixel we use or else we go down here and find the disparity for the right circle um right circle and the left circle and then we'll store it in this x right here and x left here uh which is the which is the values that we also saw in the slides and then to calculate the disparity here we just subtract these two values here um from each other so the values in the and and the x and the left which is the distance from the point in the image frame to the obstacle center in the image so when we have our disparity here we actually like have the displacement between the left and the right frames and then we use this this disparity here to actually like calculate the depth of the item that we're tracking in the image so to calculate here we have to see that value here which is the actual like depth of that point that we that we're now calculating and then we need this a baseline information here which we pass in as a parameter up here in the function and then we multiply that by the focal length in pixels and when we have that value we actually like um divided by the disparity that we just calculated up here and when we're done this here we can actually like return absolute value of the dip value here and then we actually like have information about how far away is the object um that we're tracking in the image and like how far away is it from the camera so then we're going to return this value here and then we have actually like found the depth of the circles that we're tracking in the image so if you go back here to the main file again we can see that we will now store the information about the depth in this variable here and then we can just output some text on the image frame again that we are now dragging tracking the object and we also output and display the distance to that object here on the image frame both the right if right image frame and the left image frame and then we will print out to the terminal the depth of the image as well which which which is the same as that we're going to show on the actual like frames then down here we can show the actual frames so we're going to show the left frame and the right frame here and then we're also going to show the mask that we're that we're getting from applying this hsv filter here so we can see like what information do we get and what information are we actually like tracking and then down here we have this hit q to close the window and when we hit q in this wallet here it will just terminate our program we will release the capture for the right and the left image and we and then we also destroy all the windows so we can actually like open up the camera later on again and close them when we're done using so this is the actual code here for doing this stereo vision and depth estimation using stereo vision in python so now i've just set up the distribution setup here so we need to like see how we can use this when we run the program so let's run the program here and see how this application and project here works so i'm not running the pro project here by hitting ctrl b and uh in sublime text here and we can see that now i'm coming off on this on the image frame here and we can see that we're we've lost the dragon here in the image and we can see that we're not segmenting anything out here on the on the right and also the left image frames here we can see that i don't have two identical cameras here so the color is not exactly the same and that was why we needed the two different kind of upper and lower uh lower ranges in our hsv filter but we can see that the the image frames like the width of the image frames here is the same one so we can still use this for our stereo business setup so if we check this object up here we can see that we have i have this kind of like shoe here that we're now tracking in the image and we can see that the mask down here um is returning like it's pretty good it's pretty good segmentating out this red color here from the image and we can also see that our morphology operations with the opening that we did is reducing a lot of the noise inside of the of the actual object here that we're tracking and we can also see like now we can see that it is dragging up here so so we can see that it is now tracking the object up here um at the top here and it says tracking and then it also displays the distance that it's calculating from the disparity to this object here that we're tracking so if you move this object here closer to the stair machine setup here we can see that that this distance up here um uh gets gets less and less the the closer we come to the camera and then we can also see like every move for the way like right now i'm around one meter away from the camera and this is actually like a really exact calculations off of the depth here and we're like the distance to this object here because i'm actually like right now uh one meter away from the camera um so if you move closer again we can see that now we're at half half a meter towards the camera so it's a pretty good estimation of the depth in the image here by just using this symbol application or like the sample code here that we did in python and so it tracks it pretty good around we can see that it keeps track of the circle we're segmenting out the color uh really good here on the mask and we're actually like calculating the distance really really really nice um approximation or depth estimation so this is a really cool a nice project project that you can do in your own application and you can use this code here as well if you have some stereo vision projects that you that you're doing so thank you guys for watching this video and remember to describe button and bellification under here on the video and also like this video here if you like the content and you want more in the future because it just really helps me and the youtube channel out in a massive way and it really motivates me to to do a lot of other different kind of cool projects like this here that can be used in a lot of different kind of modern computer vision and opencv applications and projects so i'm currently also doing um a deep learning and neil network tutorial so if you're interested in that tutorial i'll link to it up here and we're actually like going to combine it with opencv and computer vision later on so thank you guys for watching and see you next one bye for now [Music] [Music]
Up Next

3:13
Depth Map to Point Cloud Conversion Using Open3D and Python
@pycp5998
389 views•2024-08-18

57:07
BitTorrent Protocol Explained: Piece Selection & Peer Choking
@StevenGordonAU
481 views•2013-02-22
23:05
Stereo Vision and Depth Estimation Using OpenCV (C++ & Python)
@NicolaiAI
86.1K views•2020-11-03

19:25
Enigma Machine Mechanics: WWII Encryption Explained
@JaredOwen
13.2M views•2021-12-11
Related Study Plans & Knowledge Roadmaps
Structured learning paths in Computer Science
computer-science
Building BitTorrent: Go, P2P & Concurrency
01Go Fundamentals & Concurrency
02Networking Foundations & P2P Architecture
03Bencode Parsing & Torrent Metadata
+ 3 more learning modules
26h6 modules
Explore Roadmap
computer-science
Actor Models (C++ Concurrency & Lock-Free)
01C++ Multi-Threading Foundations
02Thread Pools and Task Scheduling
03Atomics and Lock-Free Queue Design
+ 3 more learning modules
45h6 modules
Explore Roadmap
computer-science
Coding HM Type Inference: Algorithm W & OCaml
01Introduction to Functional Programming & OCaml
02Abstract Syntax Trees & Language Interpreters
03Type Systems & Lambda Calculus
+ 2 more learning modules
28h5 modules
Explore Roadmap
computer-science
Building OAuth 2.0: Node.js OIDC Server
01Web & Security Foundations
02Authentication vs. Authorization & JWTs
03The OAuth 2.0 Protocol & Grant Types
+ 3 more learning modules
25h6 modules
Explore Roadmap