











![ROS2 Tutorial - ROS2 Humble 2H50 [Crash Course]](https://i.ytimg.com/vi_webp/Gg25GfA456o/maxresdefault.webp)



![[소프트웨어 공학] SE 6 5 1 디자인 패턴 (design patterns)](https://i.ytimg.com/vi_webp/I49IK3UDCVE/maxresdefault.webp)





Object-oriented programming (OOP) in Python enables efficient code organization by grouping related data (properties) and functions (methods) into reusable classes, with inheritance allowing new classes to derive functionality from existing ones, while properties and self-referencing enable encapsulation and controlled access to internal state.
Mastering Object-Oriented Python for Robotics
Added:Basic Python programming proficiency, including familiarity with functions, data structures, and control flow.
An introductory understanding of basic Object-Oriented Programming (OOP) concepts such as classes, instances, and methods.
Fundamental concepts in robotics, such as sensors, actuators, and the basic feedback control loop.
Experience running Python scripts from a command-line interface or terminal environment.
Applying Python OOP design patterns to construct Robot Operating System (ROS/ROS2) nodes and packages.
Developing Hardware Abstraction Layers (HAL) to interface Python software with physical robotic hardware and microcontrollers.
Implementing advanced Software Design Patterns (such as State, Factory, and Observer patterns) specifically tailored for complex robot behavior.
Transitioning Python OOP concepts to C++ to meet real-time execution and performance demands in commercial robotics.
12.2K views264likes1:12:59Original Release: 2022-06-13
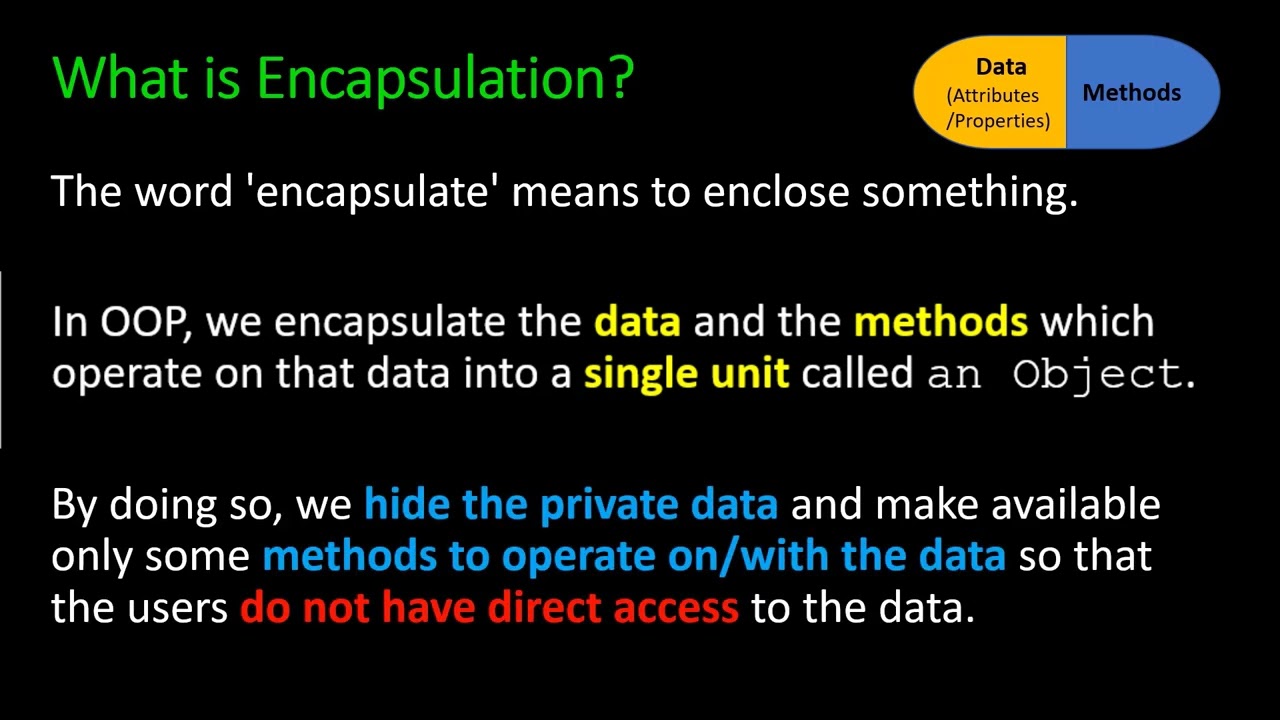
hey robot makers hope you're having a good day so far so do you want to go beyond the basics of python micropython circuit python and learn about object-oriented programming concepts like classes then this is the show for you so let's dive straight in my name's kevin come with me as we build robots bring them to life with code and have a whole load of fun along the way okay let's get over to our keynotes so yes i've been on holiday i'm back now a lot of cool ideas and it's going to be such a cool month uh i cannot wait to show you some of the things that are up and coming but let's get into today's session so this is all about python and you might have done quite a bit of python programming yourself putting a few scripts together and so on and this is really aimed at people who want to go beyond that and start working with some quite advanced concepts in python object-oriented programming and we'll we'll go through quite a few of those things today so many cool things to show you as well so we're going to go over classes and objects and the concepts behind them why we would use classes anatomy of a classmate we'll get into some code it's gonna be quite um quite a lot of code today um we're gonna be looking at inheritance uh we're going to be and that's not to do with money that's to do with uh how things get uh inherited by classes we're going to be looking at class structure we're going to be looking at uh properties and something called self which sounds very psychological i'm going to have more demos on that we're going to have a demo about animal inheritance and how we can model that in our code and also the explorer which is the little robot i have just behind me over here with one that's on screen there cool so let me know if the audio is coming in a bit strong there i can see it's peeking a little bit yellow to make sure it sounds good for you okay so let's go over to my next slide so yes classes and objects so we're going to go through what these are all about so a class is a bit like a template a class contains variables they're called properties when we're working with object-oriented concepts and functions which we've created before and they're called methods when it comes to object-oriented programming so an object is a class that's used by our code and has real live variables of its own so an object is a class that's being used it's being executed and the methods for each of the um objects are actually shared between all the objects of the same type which saves on memory so it's really efficient on memory you don't have to have like two lots of it if you've got two lots of uh code using the same thing it manages all that for you it's pretty clever and why would we want to use classes it seems quite a complicated thing when you first see it and you think that maybe i'll just carry on doing things i've always done them it's not really complicated it's just new concept if you've not used it before and it really helps with code reuse so you'll see this and it hopefully will the penny will drop and it will click why you want to start doing this yourself so classes help you organize code together so it can reduce the amount of duplication replication in your code and it can help you model real world things this is one of the reasons object-oriented programming came about people wanted to really model objects physical things or think concepts that make much more sense um together rather than apart so you can keep your code together it can make your code a lot easier to read as well and uncluttered and one of the concepts of object-oriented programming is called encapsulation so this is all about bringing together related functions and variables in one place so if we want to model for example a motor anything to do with the motor speed the direction all the functions for making it go forward and backward and stopping they can be all together in one object one one class so we're gonna have a first demo about classes we're gonna have a look at what it looks like without classes so we can start from a base point so i'm just gonna get over to my um my uh visual studio and i've got here without classes i've got a bit of a template we can start from so we're going to model cars in this particular one um so what we're going to do is we're going to create a couple of variables so the first one let's get my microphone just about there hopefully that's still all good just need to get my hands underneath my microphone so it's uh just a bit of a juggle going on that right so we're going to create a variable that's called car01 and this is going to be the color of the car so i'm going to make this my car my car is white we're gonna have another car which is going to be gray and this is going to be jenny's car and then i'm going to have cairo 3 which is going to be alex's car so yours is duck egg blue isn't it mint i'm going with duck egg blue because it looks nicer right so three variables we put three values in we're now going to create who is the owner of these car so car 01 and then owner and yep it's guessed that right i've got a co-pilot on here i don't know if you've used this before yourself which is from github and it helps you create code uh in a really smart way so you can do a lot less typing so this is new to me literally today so car three is going to be alex and then next the car model so let's create another load of variables so caro one model and this is going to be a zoe mine is a renault zoin electric car the next one is going to be jenny's car which is uh a class merc and then we have alex's car which is fiat 500 we'll just go for 500 there next up the fuel types so let's go for car01 this is going to be fuel type and this mine is going to be electric like i would guess the fuel type that it said petrol which is pretty clever uh cairo 2 is going to be petrol absolutely it is and carol 3 is also going to be fuel type um it's getting diesel it's not diesel but we'll go with that just because it's different that's that's cool then engine sizes right so i'm going to create another load of variables kind of see what i'm getting at here for each of these different things which is like a car 1 car 2 or car 3 we have to create separate variables for each of them so engine size so mine isn't um in liters it's measured in kilowatts which is small k big w so i have an 80 kilowatt um motor in mine caro 2 is actually i think it's a 1.6 liter and then alex's cat 03 engine size is actually a one liter there we go okay so we've created a whole bunch of variables there so there's one two three four five variables for each car that we're going to do so 25 variables that we created there they've all got a similar kind of naming convention so hopefully we can sort of keep hold of what's going on there so the next thing we want to do is we want to create a function so this one is going to called show details and this is going to take the color i'm using the british spelling there because i'm british we're going to take the model and the fuel type and the engine size it's guessed it right there so so this let's let's do this slightly differently so one of the more advanced features we could do print when we want to print something out in um in python and you can sort of break things up by having these pluses in between them but that's actually not an advanced way so let's start by having one of the more advanced ways of handling strings in python and that's used an f string so we can instead instead of having to this plus thing and breaking up our um our little string there we can actually use these curly braces and put the variable within that so i can say v so let's say v and then color select the blue car the red car whatever and let's get rid of all this stuff first of all like so so the white car is a and then let's put the fuel type in there um powered and then let's put the model and then let's say and oops and he's owned by and is owned by and then let's put the owner in the brackets okay so what's going to happen there is it's going to interpret this and basically replace these variables with the the value that's in them within our string and print out so let's get rid of that there very impressed with co-pilot oh it's uh creating a lot of our code for us so that's the first one it's not going to return anything it's literally just going to print it out the next one is beep the horn so let's do beep horn and this is just going to take the car and then we're going to say print i'm going to use that f string again and we'll just say car beeps it's horn there we go okay now one of the things that's a really good idea to do when you're creating functions is to create a doc string so the way that we do that is just underneath the the definition of our function we do three speech marks and then another three speech marks and then in between that we can put some kind of text about what this does so it shows the car details and then similarly under this one that we've just done for beat the horn we can just do that again um but that's fine beeps the horn would be good so beeps the horn and what that means is when we come down here and we want to actually use sort of a beep horn if i hover over that that little piece of text there that appears is what the doc string is underneath it and you can put all kinds of things in that dock string and it can run over many lines as well so you can actually break this out doesn't return anything like that for example so if i come down here now and hover over that we can see that beeps horn doesn't return anything and i think if we break that up into single lines like that does it respect that there we go it respects that so you can really make them dock strings a lot more intelligible right so we're gonna have another couple of functions on here so we're gonna have lights on and this one is gonna take nothing it's just going to oops so let me just back up that lights on i think we do need to have the car that it's putting the lights on for but let me see i'm just going to say lights on it's not going to have any variables it's just going to be empty and it's just going to return true and similar with lights off so let's just make that lights on that's going to return false so there we go and then we're going to have another one which is just what the status of the lights is so let's say def lights status and then car lights that we're going to pass in as a variable and what it's going to do is it's going to say if car lights the lights are this is cool this uh else print the lights are off i'm really liking the copilot it's basically just writing the code for me here yep that's good do that so you just press tab to auto complete that so what i'm going to do is just put another dock string in that particular one and that's going to say um it shows the current status of the lights just shows current state of light there we go okay so what i'm going to do now is i'm going to actually start using this code so let's come down to the bottom here and then let's say show car details so this is a very kind of functional procedural type program so we're going to take car one the color owner model fuel type engine size and we are basically going to run that and have it display so let's just click run and see what happens there oops sorry that's up in there let's try that again yeah so we can see in the little terminal down here let's just make this a bit bigger it says and let's just turn off that for a second the white car is electric powered with a spelling mistake there zoe and his own by kevin so let's just change that powered by to correct that typo okay so what we can do now is we can do the same for all three so do show details car two show details car three i'm loving the way it's auto filling this out i'm so not familiar with this um it's new to me too there we go tabbed complete return and then we're gonna beat the horn for car one so let's do that so beep horn and then in brackets car 01 we're just passing in text and then we're going to say car one lights which is a new variable equals false we're going to make that false to begin with and then we're going to say light status like so and then pass in car on lights okay and then we're going to do lights on so car one lights equal lights on and then we'll do the status once again okay so we should see three details and we should see the car lights off and on and also the beep so the white car is electric powered zoe and is owned by kevin the grey car is a petrol-powered a-class and is owned by jen duck egg blue car is diesel-powered 500 is owned by alex carr caro one beeps it's horn the lights are off the lights are on so that's how we do things if we don't use classes so it's quite a lot of repetition there we're having to repeat variable names multiple times um we're then having to and this the functions are completely disconnected from the variables themselves there's no concept of this all being together we've got lights on and lights off we've got a status thing and then we're just doing some settings some showing some variables and again these are not connected to the variables they're just standalone functions so that's what it looks like without so let's get back over to our keynote and let's continue our journey so so properties and functions uh properties and variables methods are functions we've talked about that a second ago this is all about the anatomy of the class the composition and inheritance we're going to have a look at inheritance in a minute so when we talk about classes or and objects uh they can be composed of things so they're made up of things or and or they can also be inherited from things so what we say is an object contains other objects so it has a another object or if it's derived from another object another class we say it is a so hazard is how it's composed of so if we're making a robot the robot class might be derived from a base class of robots and this one might be specific with wheels instead of legs for example um so and then it has uh it might have a motors for turning wheels they might have a range rangefinder for sensing things um distances and so on and that'll become a lot more clear in a minute when we get into some of the uh the modeling of inheritance sorry nice stomach rumbling there data abstraction so when we were looked creating our cars then we were creating all the different statuses of various different things um all that data is completely public anyone who's writing who's sharing our code can see exactly how that works and they can also fiddle with them they could also change the value of this and unless we got really robust error checking it could actually break our code sometimes we don't want that to happen extra error checking within our functions and then hide them away so that the user doesn't know that's happening they just if they pass bad values it'll just return an error so that kind of abstraction is is a key part of object oriented programming and we call this public versus private so the very simplest level we have public variables which we expose in our class and we say you know you can change these and we give them an api an application programming interface to do that or we have private data inside our class that only we know about and that's just how we internally represent it and that means that we can change how we do things internally and as long as we don't change those public facing variables those properties and methods then um everything will carry on working so we can really change and make our code more efficient without the user ever actually knowing about that encapsulation is where we group together functions and data together to make a package which makes sense so if we want to model a car you can probably start to see what kind of things we were put into the class from a property's point of view and also from a methods point of view and then there's this really unusual word in object oriented programming called polymorphism and it sounds really complicated um and you can get your kind of knickers in a twist with this one if um you've not come across this before but simply what it does is it simplifies complex hierarchies of code for the user so for example we could have a shape class and the we could have a circle class and a square class and they both inherit the common shape class so a shape might have an area for example whereas a circle might have very specific formula for working out what the area of a circle is and any points for people who guess what that is in the uh the chat and also you know an area of a square or rectangle or triangle or whatever that would be very specific to that type of shape so we can have a common class and then we can we can have other classes which inherit that and their subclasses of that sort of superclass so they can all have their own implementations for drawing for example but they all have that common ancestor which is the shape class it just means we can create code once and then the things that inherit it can just automatically pick that up okay so inheritance let's get into this a bit deeper shall we so inheritance this is from wikipedia inheritance is the mechanism of basing an object or class upon another objects or class and retaining similar implementation also defining as derived from new classes existing ones such as a superclass or a base class and then forming them into a hierarchy of classes it is indeed by r squared richard well done so we can see here i've got a hierarchy of classes i have animal which is our master superclass we then have mammal which is a type of animal i was second guessing myself then we have reptile which is another type of animal and we have insect and then we have dog which is a type of mammal and cat which is a type of mammal snake which is type reptile and fly which is a type of insect i hope i got that right and we're going to have a deep dive into this in some code in a minute so we're going to have a real good play with that too so class structure how we define classes so in python it's declared using the class keyword followed by the class name and the com the convention there is that you have an uppercase character which we don't normally do in python but we have an uppercase character with class names to differentiate them from everything else so just the first letter is capitalize in the class that's what we need to do just say class explorer for example which will define our explorer class and then we can start creating some variables under that we indent them as we would with a regular code and we can also have some methods some functions so variables and functions so we're gonna have a look at that uh in a moment or two so the properties they can be public or private and this is one of the more advanced things i remember somebody saying a while back that they got really confused with why we had underscores and double underscores and some of our variable names within a class and it's to do with how we make things public or we make them private so in python we define variables by assigning a name to a value so speed equals 100 for example and in a python class we can decide whether that variable is that property or should say can be outside it's public or whether it's within the class it's private and the way that we do that is by using the double underscore or not the double underscore this is really useful when you're coding and using things like autocomplete or copilot and we can make our properties private using that single audible underscore in front of the property name so the single underscore is a way just to give some kind of weak protection and it's to do with namespaces is to do with when you're writing your code and how python puts them in a dictionary and so on and put in the underscore puts into a different place uh within its in the sort of structures within python the double underscore really does hide them away from users so it's it's not a massively secure way of hiding your implementation but this is the the way that we do it so private properties are protected from misuse by the end user and we'll have an example of that in a minute with the speed function we'll have we'll put some extra code in there public properties expose data to the end user so that's something we definitely want to share we want them to let users do whatever they like with that we're making that nice and public so properties getters and setters this is a very common pattern in python programming so if we want to create a a property a property is a function that behaves like a variable and we can do some clever logic within the function you can't normally do when you just have a variable so for example i could just have in my class a variable a property called speed and it's just a regular variable and if somebody's using that class they could see that speed variable and just assign it whatever they like they could assign it characters numbers whatever they like if we want to restrict what they do we can use the property function and we use that decorator the at symbol above the the function name and then that means to python that this is a special kind of function and it will use that decorator to make the the code have extra functionality so we'll get into that it's easier to demonstrate and show you what i mean by that so in this example here we've got the speed property we can check if the value is minus 100 or between -100 and plus 100 before we set it otherwise we can just say not within that range and we can throw an error message so you can just see some of the code peeping out there so we've got two things we have the the getter and the setter so by saying it's a property we're saying that this function here is just going to return a value and it's going to return the under double underscore speed variable don't worry about what self means we're going to come to that in a minute so it's going to return the speed now when we set the value we can use this other decorator and we use the function name which is the same if you look at both of them normally that wouldn't be a valid wave you couldn't have two functions oops with the same name so i've just gone up a bit too far that let's just back up back up and just go back to that one there okay so yeah normally we have two functions of the same name but when we have that decorator it actually changes the the name and it becomes a different thing so a property is something where it just returns a value and a setter means that we can set the value so get and set so by having that variable the function name dot setter with the decorator in front that means this is going to be a special function for setting values and what the difference is when you normally have a function you have the brackets at the end by putting that decorator there it removes the brackets and it treats it as if it's a variable so it's really quite clever so speed we pass in self which is something we're going to look at in a minute and then we pass in a value and i'm saying i'm using this colon here to say the value that i expect to be passed here is an integer so we can give it a little type hint to say that this is an integer and if somebody types something that isn't an integer it will actually throw an error in the code so it's a way of protecting our our code to make sure that it's actually the right type being passed through and what we see and we could actually include that on the end of this speed one for example so if this speed is going to be an integer i could do a dash and then a right arrow bracket to say that this is an integer i'll show you that in a minute so then we then do have a little code that just says if the um if minus 100 is less than value is less than 100 that's a very similar way of saying if value is less than 100 and is greater sorry if value is greater than minus 100 and less than 100 then continue that's what that is a way of saying that's another bit of advanced python for you there and then we say um self. underscore speed equals value so whatever is in that value if it's within between those two values within those values then it's going to be okay to set the internal value which is underscore speed otherwise print a message that just says the speed must be between minus 100 and plus 100.
so that's what that's about and you'll also notice it says there the function names have set and getters are the same so speed and speed but they have properties they have decorators property which is first getting variables and the setter which is for um setting them cool so let's have a look at how we would do the same thing we did before with the cars but using classes this time now we've learned a little bit about classes so let me get back over to here and we can now go over to demo two and i've got my uh skeleton code ready to go so the first thing we're going to do is um well actually um what i can show you there's a slightly different way of of doing what we did before but instead of using individual variables we can just use things like dictionaries and lists um just to make it a bit more efficient i'll show you a bit of that but essentially the other code is exactly the same so if we say caro 1 equals and then we use this is going to be a dictionary so it's got the squiggly brackets we can then say color and then equals white we can then say look at that it's guessing what i'm going to type there which is pretty clever yep it's insane the owner is kevin the model is zoe the fuel is electric the engine size is 80 kilowatt that is clever that's remembered that from the previous piece of code and what that means is we can keep all of those different variable values together in one variable so it's a bit more efficient and we have got the the name of the the variable if you like in there there's like a key value pair so that's a slightly more efficient way of doing what we did on the previous one but it still doesn't bring together it doesn't encapsulate or protect these variables anyone could come along and say color equals blue or speed equals 200 for example and break all our code so that's just another way that we could actually do that without um um without classes so i'm not going to type all that coding because i think we pretty much cover that off on the previous one but we are going to look at with a simple class i'm going to do not cars this time but an animal so let's create a new class and this is going to be a cat so now interestingly co-pilot is going to type out some extra stuff for me here and we pretty much want this so i'm going to press tab there so this is a simple class it's done that underneath the um the class name so if we come down to the very bottom of our code and let's just type um i don't know trixie which is the name of one of our cats equals cat and let's just give it a name which is expecting that an age and it can do this with positions or you can actually say what the variable name is that you want it to be equal to so you can say name we call that and age equals that and that also means if you're not using positional as in the first thing it's expecting is the name the second is the age if you actually call out the um the variable the parameter that you're actually changing you put them in a different order you could have age first and then so we could do that we could say age equals i think tricks is how old is she 16 or something let's get rid of that bit there so we can have them in the kind of wrong order and that's fine that's valid because we're using the name okay so that's the first thing we can do we're gonna and we're gonna develop this a bit further so what is this double underscore init thing so when we create a class we say that a class is constructed so the very first time we create a class we're going to use it such as here so trixie is a cat the very first thing it will do is run this initialization block we call that the constructor you can also have a destructor at the very end when you get rid of it but in python we don't tend to get rid of our objects we can just use them and then forget about them but you can have something that if you don't need it anymore it goes out of scope for example where you're not using anymore it can run like a d initialization but for now we just need to know this is a new thing it's got the double underscore that means it's kind of a special internal python function name and it knows to run that the very first time the cat class is being used okay so what we're going to do now is have another one which is and notice how these are slightly indent indented from our class name and we're going to have um info i'm impressed it's doing meow there i'm just gonna have the word self we'll get on to what self means in a minute and then we're gonna print something which says i'm gonna use our f strings once again so i am a cat i am a cat my name is self.name and look at that it's even even typing what i wanted to type there so i just hide out the way a second you can see that i am so many years old right and then the last thing we're going to have is make sound and print meow there we go perfect perfect okay so we've got five cats in our household so we have trixie who's the oldest then we have cookie so cookie how old is cookie do we think about eight so age equals eight and the name is cookie we have who's next oops let's do a lowercase just naming conventions she's a cat h2 pepper it's almost as if it hurt you then that's creepy then we have bella that's a cat how old is bella that's creepy it knows about this one and then we have i forget my own cat's name now yeah tigger of course tigger our latest cat and he's eight nine months it's nine months old so let's do 0.6 of a year old okay um actually what i'll do just to be consistent i'm going to make all these floating point numbers so if you put a point after it it knows it's then a floating point number otherwise it'll treat it as an integer i want them all to be the same right so if i now say cat trick c dot info and i then do cookie info let's just run that code so i'm a cat my name is trixie and i'm 16 years old i'm a cat my name is cookie and i'm eight years old so you can see there we've defined our classes our class is simply just this small piece of code here it's got two variables two properties and it's got two methods two functions if you like within it now this self variable which we saw being used throughout here means whatever this particular instance is so you can see trixie is the first instance that we've got the the value of the name which is going to be trixie is going to be different from the second instance of this class so so that python understands which cat we're referring to which class we're referring to we have this thing called self and it means the one that you are so that's what that self means it means refer to yourself and whatever is stored within those variables so that's that oh and can also make make um take us our noisy cat so let's make sound like so so if we do that and press return you can see it says meow so the other thing we could also make the name actually we could say um let's do an f string again let's put in there self.name says meow like that saves me i'll not see me out there we go trick the ticker says meow there we go so you can see there we he meow so you can see that um we can use these nice f strings to embed it reads a lot more like english and the other way to do this is by having sort of um percentage variables and then after that at the end of the thing you have to say what those variables was it's just horrible this is a much more understandable way it's just those brackets the first time you see anything what's that what does that actually mean so this is a real class we have we've defined our class we've defined an initialization a constructor we've set some internal properties and then we've got some functions and then down here when we've actually started playing with this so let's have a look at another thing if i go to tricksy.name i want to show you if we do if i type n for that you can see there it's got this little symbol here and it says name and it's any any is because we haven't actually defined what that is we haven't it doesn't know what if that should be a string an integer a floating point number um it doesn't know what it will be it can be anything because we haven't defined up here what that is if i actually come to the very top of the class here before the constructor and i say name equals and then do that and then i do age oops and i do equals not point naught for example i've given them some default values and if i come down here now and i'd go back to name i start typing it in again now you can see now it now knows that that should be a string because we've defined further up that that's going to be a string type but you can actually still pass it any value so um we can put whatever we like there but you could put like a number and if we run that let's see what actually happens it's gonna it's gonna run fine it doesn't care that you've assigned that number it's not treating that in any way because we haven't got any protection around that we've just simply set it as being trixie.name so there we go i think that's everything i need to cover off on that particular one yes because we're going to get into uh some more in a second so let's get back to our keynote and let's carry on so self we looked at that a minute ago so in the previous example we noticed this word self which is a it's provided in the function parameter now in our method parameter self refers to that specific instance that is being used at the time so trixie or bella or cookie pepper or the other one tigger so remember classes can be in instantiated many many times we have many many copies of the class being used in objects and each one has its own set of data and the self enables that class to identify which piece of data is being referred to so in their self means whichever particular one you're you're currently using and the double underscore is a way of protecting it by making it private so we're going to create that in a second and i'm going to show you how to create some clever protection around your your properties we saw just a second ago i could create name but i could assign that number we don't want to be able to do that in every single case sometimes we want to protect what people can change so we're going to have a look at that in a second and using classes with robots so think about what you've just learned so far composition you can say each part of our robot can have its own class so we can have a motor class we can have a rangefinder class we can have a legs class in fact when i created my uh open cap my pico cats i modeled each section of the leg because it was essentially just a servo motor but i had like upper leg foot um i had like shoulder that kind of thing and then i would like left leg and that would be composed of the foot and the leg um so i could have i could have hierarchies of classes within my robot and it makes constructing the robot code a lot easier to understand and a lot easier to debug when you've got problems and the abstraction it hides the implementation making the code a lot more portable and easier to use on other robots so i could write some code here in python and i can actually lift that and put that into micropython as long as the actual end uh piece of code that does the you know the turning of the motor is just tweaked for that particular implementation but everything else all the other logic will work just fine so if you like what i do and you want to see more of this give the a like on this particular video let me know that you're enjoying this drop me a comment as well tell me if you've used this before if this is um something that's new to you whether you're going to use this in micro python circuit python or regular python and also subscribe to the channel if you've not done that already that really helps the channel grow and become more popular and we did breach the 7000 um bracket of follow-up subscribers and most recently on twitter as well we've got over a thousand followers on twitter and i think we've got almost a thousand and a half there so that's pretty cool i do go live every single sunday at seven o'clock gmt um so if you wanna join live and join in the conversation after the demonstrations then you can do that too right let's go over to our animal classes this is pretty cool so let me get back over to uh visual studio and let me find the next piece which is should we go for the car one off the animals one i think we'll go for the and go for the car one first right he said i'm all good for car first right so what we want to do is we want to create a new class which is car and we're going to create some variables which are for properties i can't type so we're going to create color let's do owner first let's do double underscore owner i'm going to say no one to begin with because uh no one actually owns a car to begin with the color is going to be uh yeah black's fine then we're going to have model unknown we're going to have fuel type diesel's fine to begin with what else do we have engine size and we also had the light status remember we created an extra variable after we've done all that for the lights status lights status set that's false begin with the lights are off and we've got model there as well right so then the first thing we need to do is create that initialization thing and what i'm also going to do on this one um i'm not going to do on this one i'll do it slightly later on right so we're going to do self first of all because we need to make this initialize the current one now i could just do this and just say owner color fuel type model and engine size and what that means is when you create a new class a new object of this class you have to provide all of those things now sometimes you might not want to be you might want you might not want to have to create all these things um or have them ready when you create the class you might want to provide them slightly afterwards so what we can do is make them optional the way that we do that is we say equals none and we can do that after each of these just say each of these can be optional so model equals none then engine size equals none okay and then what we can then do is we can then just have a create a new car docstring and let's say if owner so if this variable here owner if that's none uh we want to basically create a default value for that but if it does have a value so if owner is passed in so say kev is passed in there and we'd have to say is owner equal is true we could write that but you can also just do something a bit more advanced you can just say if owner so that is it assumes it's true so if owner and then we can say our double underscore owner which we have to refer to using the self thing so self.
double unscore owner equals whatever we pass in there and then otherwise we can say um it's no one for example we could do that i'm not doing that because i've already actually set those up here so that's fine so we don't need to have um an else statement each of these so we can basically just do this for all of these so if you'll type i'm just waiting a lot to guess everything for me model model if uh engine size and it's the one more any size model fuel type color oh no that's all good right now we're going to do something new now we're going to we're going to create a property using that decorator function so we say at property and then we say the name of the thing that we want to be the property so in this case we want it to be um owner we need self in there because anything that's inside um a class needs to have self as the first variable so that it has that link back to which particular it's actually a memory address that's what it's actually providing there and it does this kind of behind the scenes and it basically just says this is the block of memory that's got all the variables in for this particular class so that's really what self is doing it's like a pointer to some memory and what we're really doing with this one this is going to be a getter so what we need to have on there is just those three things and then to say gets the value gets the owner of the car perfect so returns self dot double underscore owner so whatever is in that variable up there now the other cool thing with visual studio is it will tell you if your variables are being used or not so you can actually make your code more efficient so you can see there double underscore color isn't used anywhere in our code yet uh same for all the rest of them whereas owner is actually being used because we've used it here so that's a really cool way of seeing whether your variables are actually being used and whether you can actually get rid of that code or not so the next thing we need to do is a setter it's already guessing there this is co-pilot guessing for um what code we need to have so def def owner and i don't like to use the actual name that i i like to use value instead it just i think it makes it more understandable for me so it sets the owner of the car and self.double unscore owner equals value so whatever we pass in there now we could make some extra piece of logic in here that says like um so say my brother stephen so if value equals stephen something like that um then print such as that and then we could just say else like that um we need double equals because comparison instead of saying equals we could also say in which is another cool thing you can do in python you can basically just pass it a list of things so we could have stephen john i don't know bill shirley oh gene and alex there we go all those people can't own cars apparently they're gonna do this now um so if it's in there you can't on the count it'll basically just break out at that point if it's not within that list then it'll basically set that value so this is a way that we can introduce protection and more advanced logic but treat it as a variable so let's just see what we mean by that down here so if i create a new car down here so my very first car was a tigra and let's make the car and i'm not going to pass any details i can just do that so i can say that the owner of this car is kevin let's run that and it'll not do anything because i've not put any extra code in there yet but let's try making john the owner of the car you cannot own this car so we've got some extra protection in there look owner doesn't have brackets even though that's a function because it's treating it as a property and that's what that decorator at the top there does it means that we don't need to put brackets around that and pass in like the variable like john we can just assign it as if it was just a regular variable that's one of the really cool things about classes so let's just uh get rid of that and let's have a see if there's anything else what i need to do so really the next part of the code would basically be me replicating properties and setters for each of those internal variables i've got their color fuel type model engine size and light status so that would be quite a boring thing for me to type out for i'm just looking at time as well but what we can do is we can have some other functions in there um such as that show details so we could just create that one at the very bottom there let's just do that so def show details we can just have self we don't need to pass anything else in because we can refer to all those variables that we have already look it's even guessed what i want to do there so let's just run let's create that car again so car one equals car that'll do and then let's just do car one dot show details like so let's run that so car is not defined car one we need that so the red car is an electric power tesla and this one by steven apparently that's cool so if you're wondering how it's completing all this code and writing it for me this thing down here is called copilot so there's a new functionality that you can hook into if i go to the marketplace there and search for github copilot it's like an ai paired programmer so there's an ai working in the background trying to guess what it thinks the next line of code you're going to write is and it suggests that and all you need to do is press tab to auto complete it so this is uh currently in beta and i don't think it's widely available but you can sign up for it and mine was clearly accepted quite recently so you just go to github co-pilot google that you'll find on on github um how to sign up your interest for that and today it just popped up and said that it's working so i've now got co-pilot working which is pretty cool okay so let me just see if there's anything else i wanted to cover off on there um i don't think so um so we could do one about the lights for example let's just very quickly do the light status so light status is false so just down here while we're still within our class let's define uh lights on and we'll say um yep turn the lights on self light status equals true and let's also do lights off and then whatever it also suggests there and then we can do that one which is light status okay so if we go down to car details we say car one dot lights on like so and then let's do car one dot light status so lights are on if we then turn them off car one not the lights off and then do the light status again we can see the lights around the lights are off it works the way you'd expect it to but they're related to car one so all them variables all those functions and parameters are all in that one class which is called car awesome and if we can also go over to our explorer of code down here and if we click on this outline you can actually see that the car class and all the different properties that are available to you and also all the different functions available to you if we click on one of them i think we can also hover over perhaps get some of the docs strings if we provided them so yes it's good to to comment in your code right i want to go back over to the keynote so we talked about animal classes yes i want to i want to go through that but before i do that i also want to show you something really cool so let me go back over to here let me go into classes.md right so there's a really cool function in visual studio and github that's called mermaid and it's a way of creating documents but diagrams but using code to create the diagram so on here i'm i've got the um the fence block which is these you have three backticks and then the word mermaid and that tells it this piece of code is now going to be uh some mermaid and this is a markdown file so dot md we tell it's a class diagram and the direction is left to right and then we're going to create a lot of classes animal mammal reptile dog cat snake insect and fly and then we're going to tell it that animal is derived from mammal animal sorry rept mammal is derived from animal reptile is derived from animal dog is derived from mammal and it will work out the tree structure of this now i click over here on this little um preview you'll see there that this uh let's move out the way there you can see that it's created this diagram for us and github also understands this and will create the exact same diagram within your code so because this is markdown i can create some text if i do heading 1 and just call this class hierarchy i cannot spell are you right okay is that right um and then i can just say this is a this is a self-generated diagram like so and then we've got the the diagram beneath it there which is just in this cold block and this is just using regular markdown but mixed in with it we've got some um mermaid which is this diagramming thing you can do all kinds of things with mermaid it's very cool it's something you should probably look into cool so what i'm going to do now is we're going to go over to our animals demo so i've created these already so that we don't need to go and create loads and loads of things so the very first thing we're going to look at is our animal class so let me just find that animals.pie so again this is an advanced python thing we're going to look at abstract properties and abstract base classes so abc is our abstract based class and we can bring in from that things like abstract properties and abstract um methods what we mean by abstract when we create something that's in our class we call that concrete method or concrete property and if you're creating the structure of class so say you're like author in a template um come back there say you're authoring a kind of template class that you want everything else to follow you can define what you want to be in there without actually defining how that should work and that's what an abstract class is it's kind of like you're creating the skeleton for a class without actually providing any details and because we're defining it as a an abstract based class anything that's then inherited from that has to provide that otherwise it'll be a compilation error so what i'm doing in here is i'm saying that we're going to have a abstract base class that's called animal and we're defining the animal class to be inherited by other classes um every single class that's def derived from this has to have a name and we provided the getter and the setter for the name and we've also got the number of legs that the animal has and i'm using pass there basically just to say these are not the droids you're looking for move along don't worry about what's going on there and we've got these decorators that say abstract property and they mean you have to provide this but this particular instance doesn't have anything in it it's just got the the placeholder there so we've got legs we've got birth type like is it a live birth or an egg blood type is it hot or cold blooded uh what classification is it so is it an animal is it a not genus and all that kind of thing does it come from domains and so on and we then say if name is provided then set the name to name if it's not provided then set it to no name and then we've got a show thing a bit like our show details earlier on and we can use this this is a bit more advanced python if we want to draw 40 stars in a row we can basically just say um the string star times that by 40. so do that thing 40 times it just gives a nice of underline and then we say using our f string name is self.name number of legs is itself.legs and so on so every class that inherits this will have this function automatically built in so that is our animals class so now we're gonna have a mammal class um notice we don't use the abc so we can actually take that out there can tell because these are all in lowercase in sort of faded out and not being used so i can actually get rid of that and i'm saying from animal which is that one we just created a second ago here import animal which is the the class that we want to use our base class so the class mammal inherits from animal so everything the animal had mammal also has and it has some extra things too so when we create our constructor such as this um one here we're passing a name in optionally we're also using super and super means call the initialization the constructor of the the class the base class if we don't include that it won't do that automatically and we won't get anything any of those values are passed in properly constructed properly so then the the properties that we have to have because they were defined in the abstract base class legs we've we can say return four so mammals in this case have got four legs i don't know if all mammals have got four legs humans don't but in here i've just uh overridden that blood type warm i think all mammals have warm blood they all have live births the classification is mammal and if we show that we basically just pass it up to the super whatever is in the one above it show that thing there so that's mammal we then got cats and dogs so let's choose cats so that's going to import from mammals so again this is the hierarchy in place here we don't need to import animals because mammals already imports animals excuse me so then we say class is cat and cat inherits from mammal we can then say what breed of cats this is the thing i'm enhancing in cats so what kind of cat breed have we got we've got our constructor there so we're passing an optionally name and optionally breed as well if we want to pass that in when we create it we're doing the super.init so whatever is in the mammal class we want to run that as well if breed is not none then set the breed to breed otherwise um don't do anything if the name is passed in then set the internal name the private name to name as well and then we have these getters and setters so return the breed and set the breed and we've also got show the breed so um that is that just got a question there is this going to be available after the stream ends yes i'll i shall post up the um i think it's actually in the explorer if you go to um the show notes there is actually a link to the python library that's used on the youtube and on the facebook post and it's it's the link to github in there so it's explorer it's under the lessons uh folder within github um so yes that's that so let's actually create um some animals so in my animal demo i'm going to import cats dog snakes from fly um these are all ones i've created basically just the same what you've seen before i'm going to create some animals so we're going to create a cat called tigger and the breed is a british short hair is that right is she a pretty short hair yep minnie is a dog so i mean he's a chihuahua archie's a chihuahua syd is a snake we don't have a snake but i wanted to create a snake and we've got a flag called buzz so we can also put them in the list so take a mini sid and archie and buzz which are these um objects here we can put them in a list and then we can just do a loop through those um so for each animal in animals show so let's run this and see what happens so we've actually got quite a lot of things going on here so name tigger number of legs for birth type live zoological classification mammal breed british short hair it doesn't say it's a cat actually on there which we probably add in minnie is a chihuahua mammal live four legs sid has zero legs because he's a snake the birth type is egg and the classification is a reptile and we have another four-legged animal which is a chihuahua which is archie and then finally buzz which has got six legs because it's a fly um birth is egg and it's an insect so you can see what happens when we we run these various different things when we say animal.show it it's going through each of these and saying whatever the cat.show function is and it has to go find the cat library has to find the show it says breed is a self-breed so if we have a cat it will show the breed which the other ones don't do so see their british short hair is on cats but sid the snake doesn't have a breed we haven't included that in that particular type of that particular class so we can make our classes more and more refined and more specific the further down the hierarchy we go but they all inherit everything from the previous one and we can see that when we're looking through here so cat has got breed it's got a name and it's got a show function if we go to the dogs we can see dogs have a weight that's different than the rest of them the dogs can wag the tail as well so if we go back to our animals demo we can make one of our dogs so we could say if animal dot breed equals chihuahua then we can say wag does it work let's try that um no it doesn't have the thing called breed so what do we call that in dogs um what do we call that though we called it chower so it was breed oh snake has no object breed yep there we go so that's that's the problem that it's having there so so that breaks my code there so that's something to think about there we can have all kinds of different things depending on what the type is now yeah we can actually look at types as well so if i go into the interactive python editor here and oops python3 and i import um cats i think i need to be in the correct folder which is actually lessons and then animals yep so if i now run python3 i can then do it from cat import cat like so i can then say tricksy equals cat like so and then if i do dir cat i can see all the different things within that class so i can see the breed the birth type all that kind of good stuff and i can also say type so what type of thing is trixie and it will say it's of type class of cat so we could use um we can use type to define and to check for things as well cool so i think that's all the code there i wanted to show you for animals and mammals just checking through there's anything else that was cool that wanted to look at so yeah abstract based classes concrete based classes sorry concrete classes uh that's something to look into if you've not to those before and it's a way of just sort of defining your classes and what you want this thing to do and kind of creating like um a skeleton for that there is another technique that's called protocols which um that's called duck typing so if something looks like a duck sounds like a duck then it probably is a duck that's what i mean by that whereas when we do inheritance we're actually saying it inherits the values and protocols basically just says it has to have these variables and these functions for it to adhere to a particular protocol but it doesn't actually inherit the class it just has to have those okay so let me get back to my keynote i think we are nearly done on there now so yeah if you want to join me on discord you can head over to action.smartfan.com join discord and you can join our discord server and continue the conversation at deeper level and finally we'll have a look at the explorer code so the robot i have that's called explorer which is um sat over there so the yellow and the white robot are both explorer robots they use the uh the explorer uh hat from pimeroni and um they're a robot i've been working on for quite some time and recently let me just find on my uh my browser here i wrote an article for tom's hardware about how to create your own 3d printed robot and that's the explore robot so part one is basically how you print out so you scroll down there got all the all the bits and pieces you need such as the explorer hat all the different tools you need and it's got step by step how to create that and how long these things take to print and so on but basically you can print your own robot and join along so that's part one and part two is going to be the code that brings this to life so that's what this show is basically about today and if i get back over to visual studio i can give you a bit of a sneaky peek of what the code looks like there okay so let's go back over to visual studio so what i have on the screen if i just um move this out of the way just get rid of that so the first thing i'm doing is i'm importing explorer hat which is the pimmeroni python library for using the explorer hat i'm then defining my own class for my robot and my robot only needs a couple of variables so i didn't have a name so you can name your robot and just having a speed so we've got an overall how fast should the motors be turning if just as a default speed because we use that throughout the code we've then got an initialization function and it just says um the name is explorer and explorer equals explorer i don't think i actually use that given that that is um i think that needs to be self dot to actually work properly that's probably why it's in gray like that there we go and then i've defined some properties the getters and setters so we're on for speed and that's where i took that example from before which was if the speed is between minus 100 and 100 then we can set the internal private value otherwise we can raise an error if you like and say the speed must be an integer between -100 and 100.
we then um allow the user to set or get the robot's name and then we've got some movement functions so we want to move the robot forward we can pass in a speed which needs to be an integer so the colon says this is what type is a type hint should be an integer but it can also be optional we can just use that internal speed value that we've got further up the code so it moves the robot forward and we use the stop function which is further down to stop the robot rolling forward so if the speed is none then the speed becomes equal to self dot double underscore speed that value we've defaulted to and then self.explorer hat motor one forwards and itself explorer hat motor two backwards and that's because the motors are actually facing in opposite directions and therefore the direction they're turning in is kind of the opposite to make them go in the same direction so that's why one's folding one's backwards to make the robot go backwards it's basically the reverse of that so backwards and forwards uh to turn left they both go forwards to turn right they both go backwards and um to stop it we basically just pass in stop and that passes in motor one dot stop i think that probably just needs to have that at the end too okay i need to test this code out before we uh we run this and then finally the ping is for the rangefinder now i'm actually not going to do it like this i'm going to create a new class for the rangefinder because i've actually created that previously and all the internal workings of how that work we don't need to worry about in our explorer hack code we can basically just say ping and it will return the distance so we can just do dot distance and we can figure out what that is in front of us and it will figure out how to do all the measurements and the speed of sound halved and all that kind of stuff uh that could be in a separate rangefinder class so i'll create that as a separate piece of code look i've started to do that there but i've actually not finished that yet so that's kind of where i'm up to with that code i just wanted to give you a sneaky peek of that okay so let me just have a look back on the keynote because i think that's pretty much everything i wanted to cover off today yes it is so um the other things i wanted to cover off while we're all together is um this book i bought which is by rachel i'm going to try that name ignoty skye oh ignot of sky and um this is a fantastic book um i'm not sponsored at all i just love the artwork in this book and i thought i wanted to sort of show this off um on youtube so it's a history of computers and the artwork in here is absolutely amazing just take a look at some of the uh the artwork in there i don't want to sort of show the entire book that you need to go buy your own copy of that but if you work in a school work in a library or you just love computers as much as i do and you want to have your own copy of this then seek that out it's the history of computer and it's by rachel ignot of sky and i'm probably butchering her name there i just wanted to show that because it's so nice the other couple of things i wanted to show you as well before we get into the q a is a couple of things we talked about the the tom's hardware article so i'm now writing articles for tom's hardware um very detailed articles as well they are in there and also i was recently interviewed by magpie magazine for the magpie uh magazine so here we are so on page 86 it's where they normally have the the interviews there i am interviewed there's my cat tigger up there and you can see we've also got me speaking to even upton there evan upton at the uh raspberry pi exhibit launch um we've also got just over here this thing is just behind me over here which is the clustered pie so i'm really really honored to be in the magazine um hopefully that'll raise the profile and get me known by a couple more people so if you want to get that copy you can buy that from um magpie you go to magpie dot raspberry pi dot com you can either buy it subscribe to the magazine if you subscribe you actually get a raspberry pi zero and i believe they do actually honor that even though the supplies really short you do get a raspberry pi zero if you subscribe to the magazine so if you want to get yourself a raspberry pi zero um that's the way to do it you can actually download the pdf for free as well so if you click on that you can just say just take me to the 3d pdf and it'll download it completely for free and then you can read all about all the cool raspberry pi stuff they're very generous with that and the idea is if you can afford to pay for it pay for it if you can't then you can have it anyway and they have all the back issues as well all the way back to the very first one i would try and get myself in the magazine every single month um by on monday they tweet out magpiemonday on twitter and if you created something to do with the raspberry pi that week you can tweet back to them retweet back to them reply back to them even uh with whatever it is so for example his um the little mechanim robot that i developed earlier and um you know if i take a picture of that talk about what it is often they include that in the readers page at the very back of the magazine so i just wanted to say that um i'm in that magazine tom's hardware um and basically you'll start seeing me all over the show as well so i also do the introduction videos on pimron's website so you'll find there too so if you're watching this on replay this is a section of the video where i'll say thank you very much for watching and i shall see you next time
Up Next

52:07
Linux Terminal Crash Course: Essential Skills for Beginners
@NeuralNine
4.9K views•2025-12-22

87:26
Introduction to Secure Multiparty Computation with Yehuda Lindell
@fhe_org
7.7K views•2021-02-04

4:55
HTTP Requests Explained: GET, POST, PUT, DELETE
@codecademy
103.1K views•2021-10-07

19:25
Enigma Machine Mechanics: WWII Encryption Explained
@JaredOwen
13.2M views•2021-12-11
Related Study Plans & Knowledge Roadmaps
Structured learning paths in Computer Science
computer-science
Container Runtimes: Namespaces, Cgroups & Go
01Linux Systems & Go Programming Foundations
02The Core of Isolation: Chroot and Filesystems
03Linux Namespaces: Process Isolation
+ 3 more learning modules
32h6 modules
Explore Roadmap
computer-science
Building a CHIP-8 Emulator: Rust & CPU Basics
01Computer Architecture Foundations (Bits & Bytes)
02Rust Programming for Systems Development
03CHIP-8 Virtual Hardware Specifications
+ 2 more learning modules
32h5 modules
Explore Roadmap
computer-science
Building BitTorrent: Go, P2P & Concurrency
01Go Fundamentals & Concurrency
02Networking Foundations & P2P Architecture
03Bencode Parsing & Torrent Metadata
+ 3 more learning modules
26h6 modules
Explore Roadmap
computer-science
Actor Models (C++ Concurrency & Lock-Free)
01C++ Multi-Threading Foundations
02Thread Pools and Task Scheduling
03Atomics and Lock-Free Queue Design
+ 3 more learning modules
45h6 modules
Explore Roadmap