






![Биология поведения человека: Лекция #5. Молекулярная генетика, II [Роберт Сапольски, 2010. Стэнфорд]](https://i.ytimg.com/vi/E5eMH0HLEno/maxresdefault.jpg)


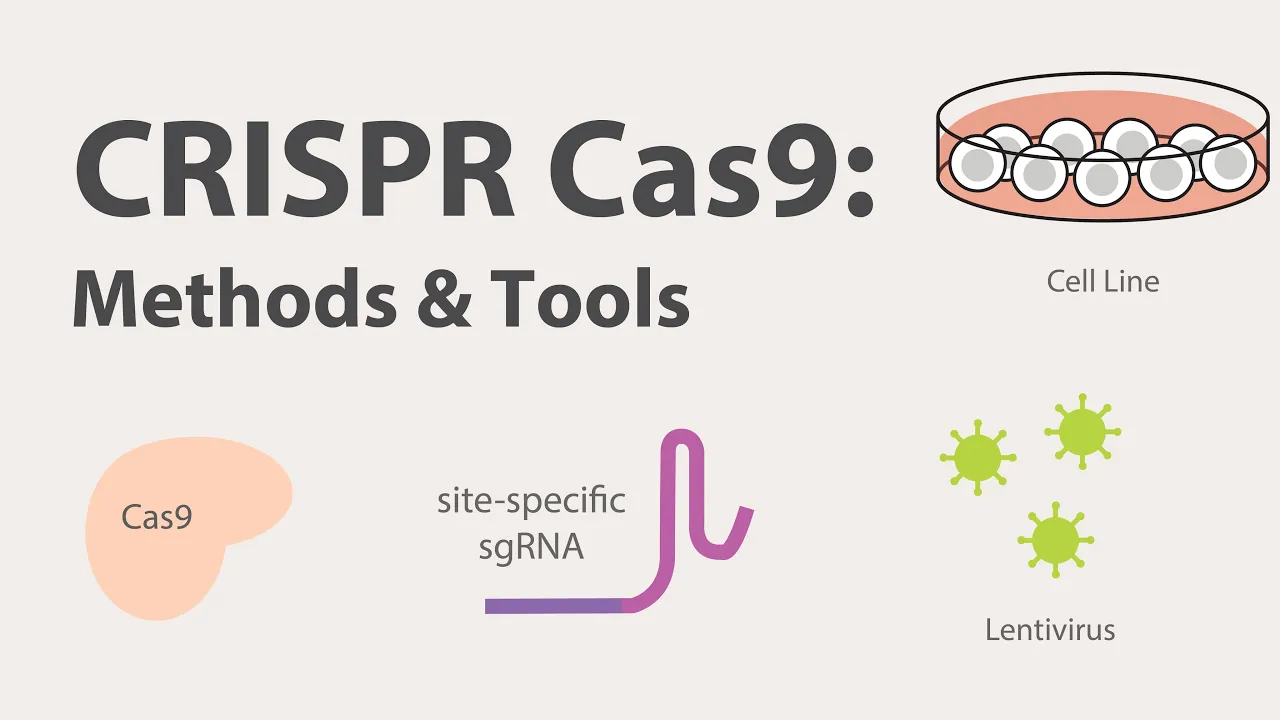


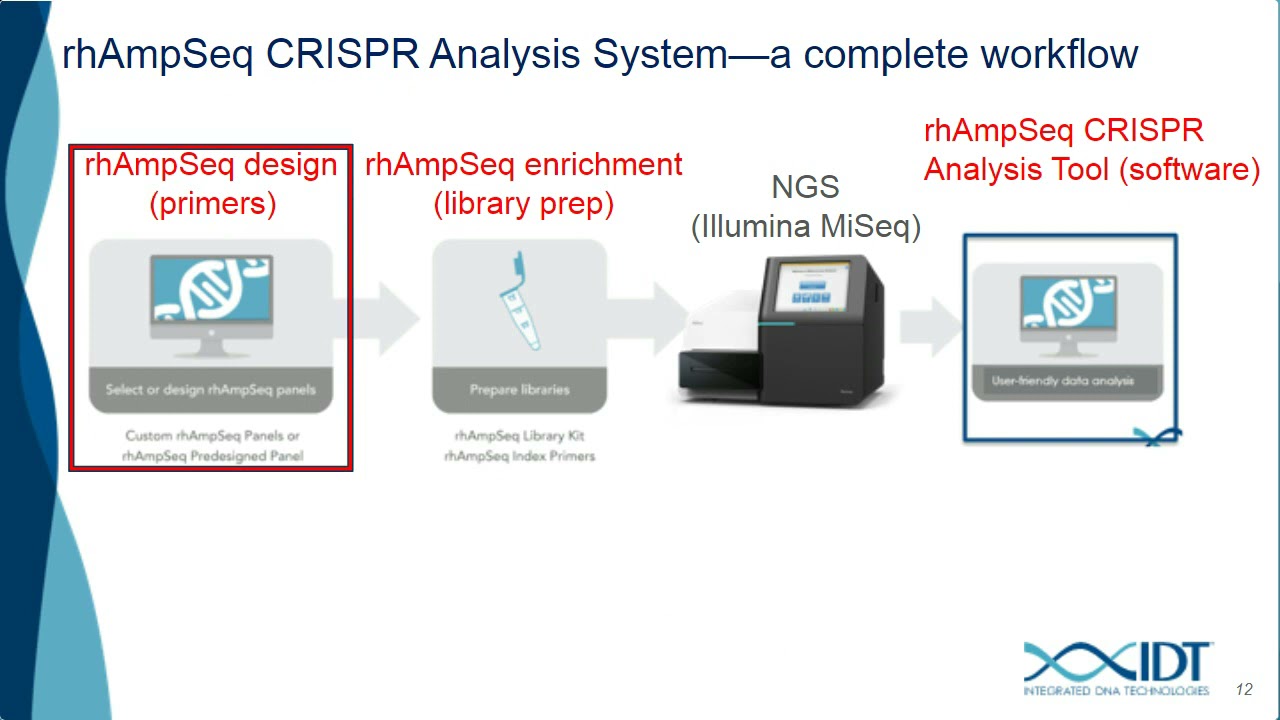



This webinar introduces two complementary online tools for CRISPR-Cas9 gene editing: the TrueDesign Genome Editor for designing guide RNAs and donor sequences, and the SeqScreener Gene Edit Confirmation App for analyzing Sanger sequencing data. The design tool helps users identify optimal guide RNAs within 10 bases of their edit site, use high-efficiency Cas9 enzymes, and design minimal 30-nucleotide homology arms for successful knock-ins. The confirmation app analyzes convoluted sequencing traces to determine editing efficiency, identify frame shifts, and distinguish successful edits from wild-type or off-target events, streamlining the genome editing workflow from design to validation.
CRISPR-Cas9 Gene Editing Design & Confirmation Tools Tutorial
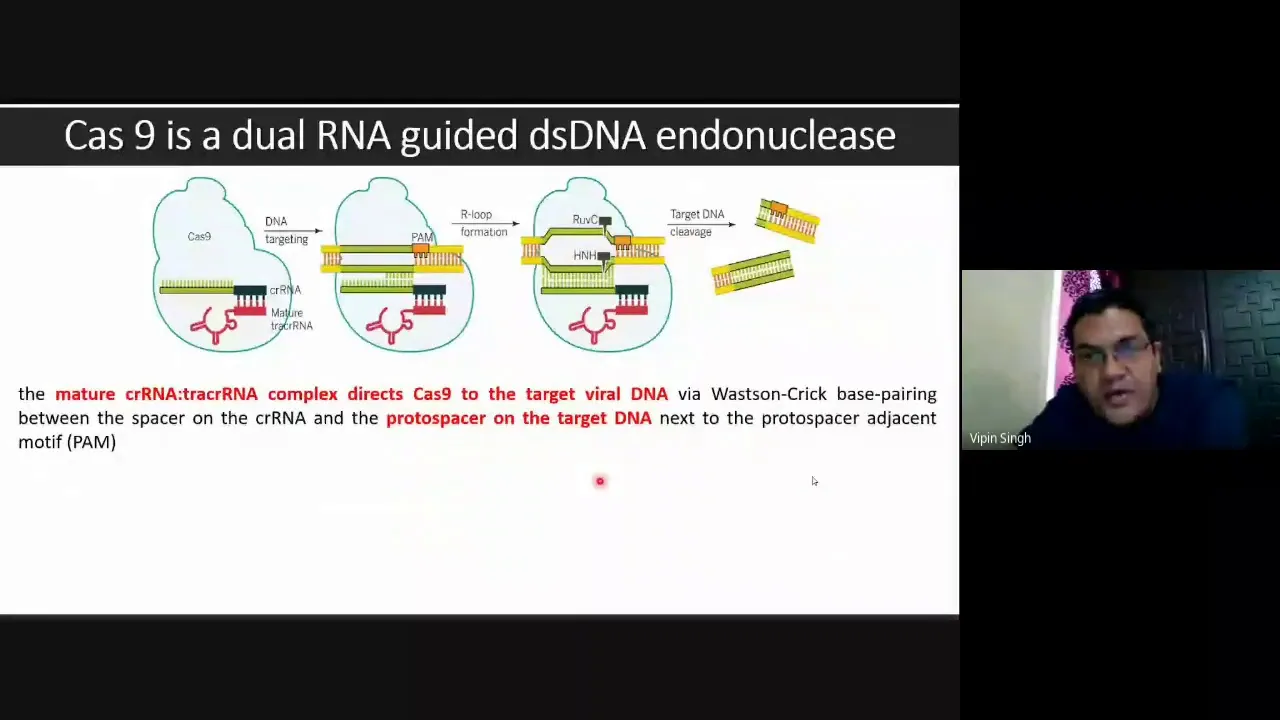
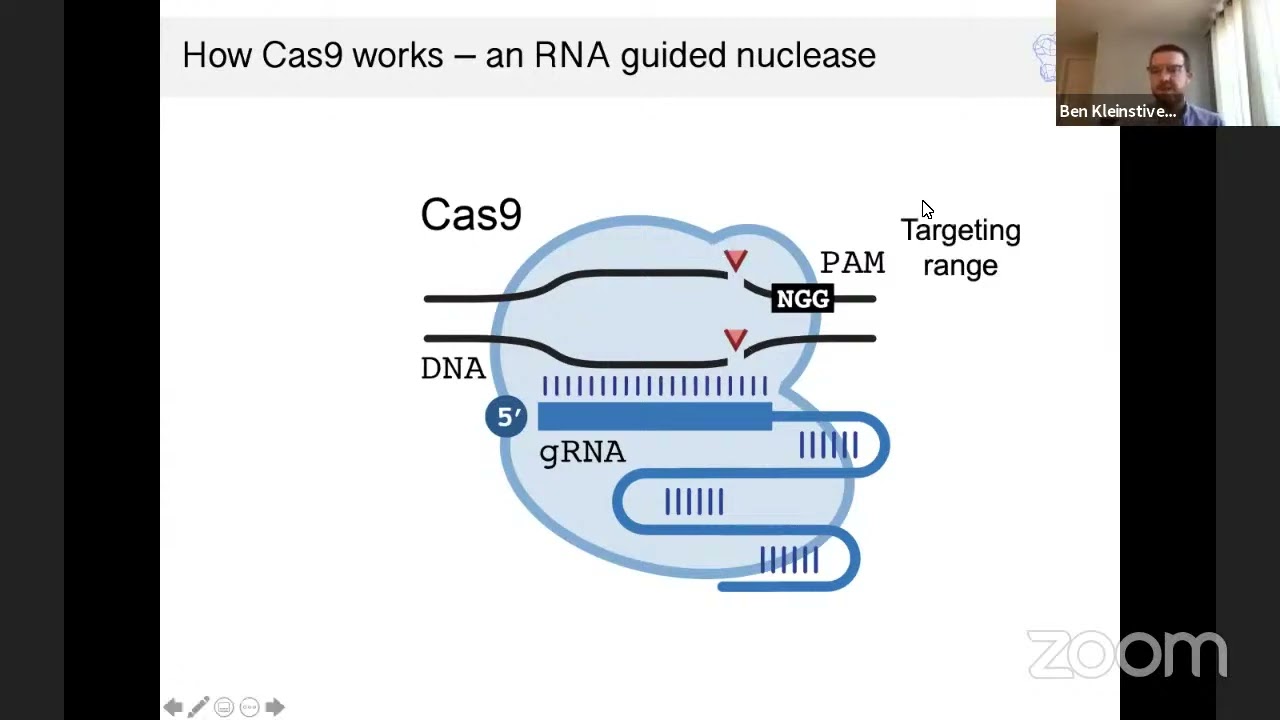
Added:Fundamental mechanism of CRISPR-Cas9, including the specific roles of the Cas9 endonuclease, single guide RNA (sgRNA), and the Protospacer Adjacent Motif (PAM).
Cellular DNA repair pathways, specifically comparing Non-Homologous End Joining (NHEJ) for gene knockouts and Homology-Directed Repair (HDR) for precise knock-ins or donor integration.
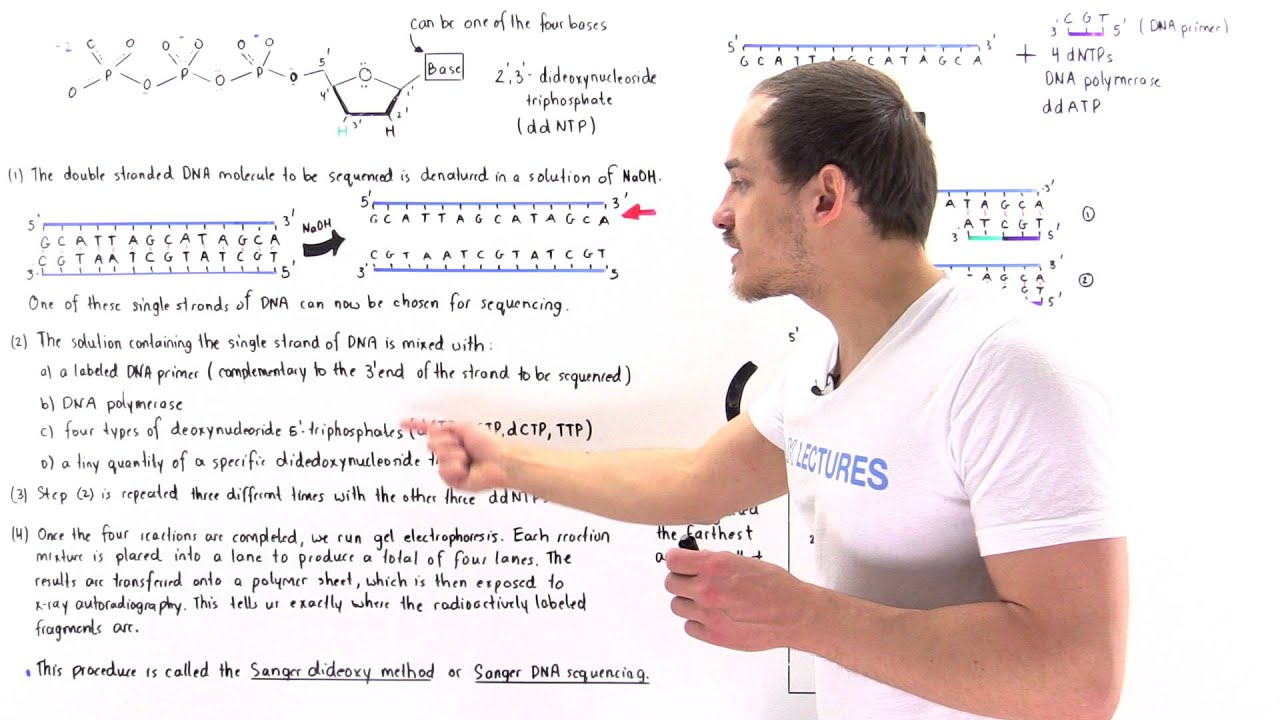
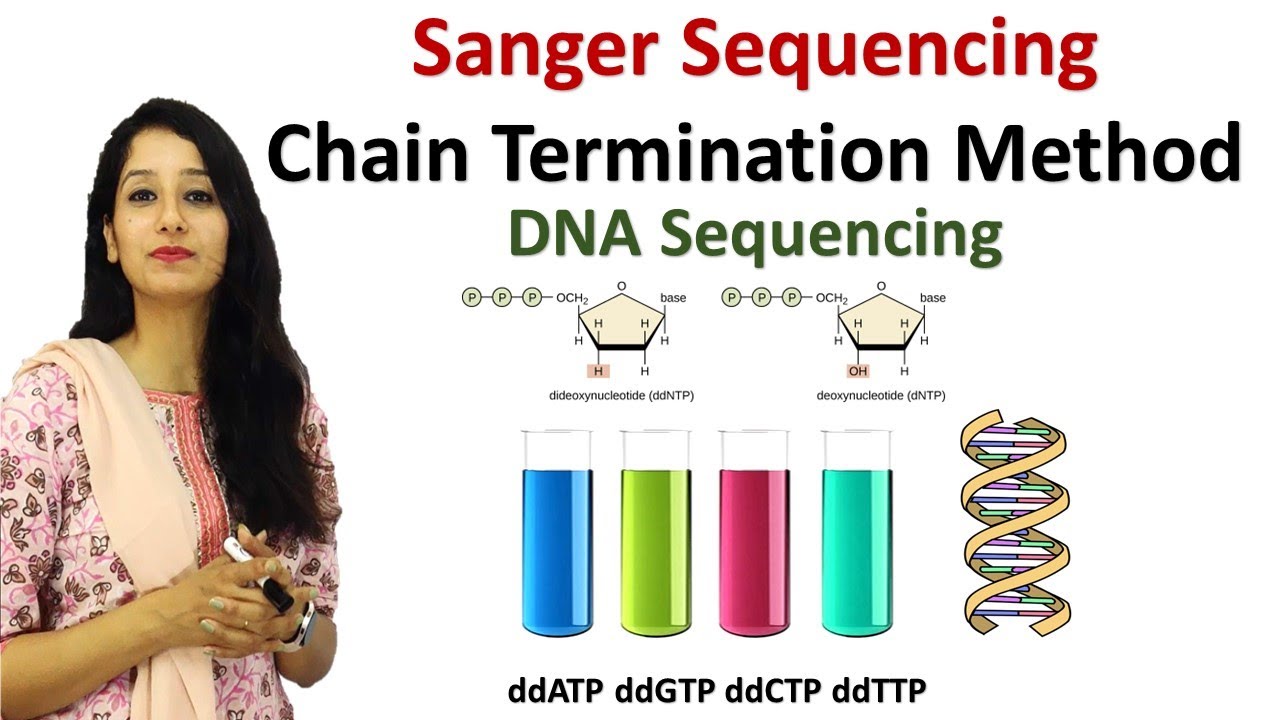
The basic principles of Sanger sequencing, including dideoxy chain termination and how to interpret sequencing chromatograms.
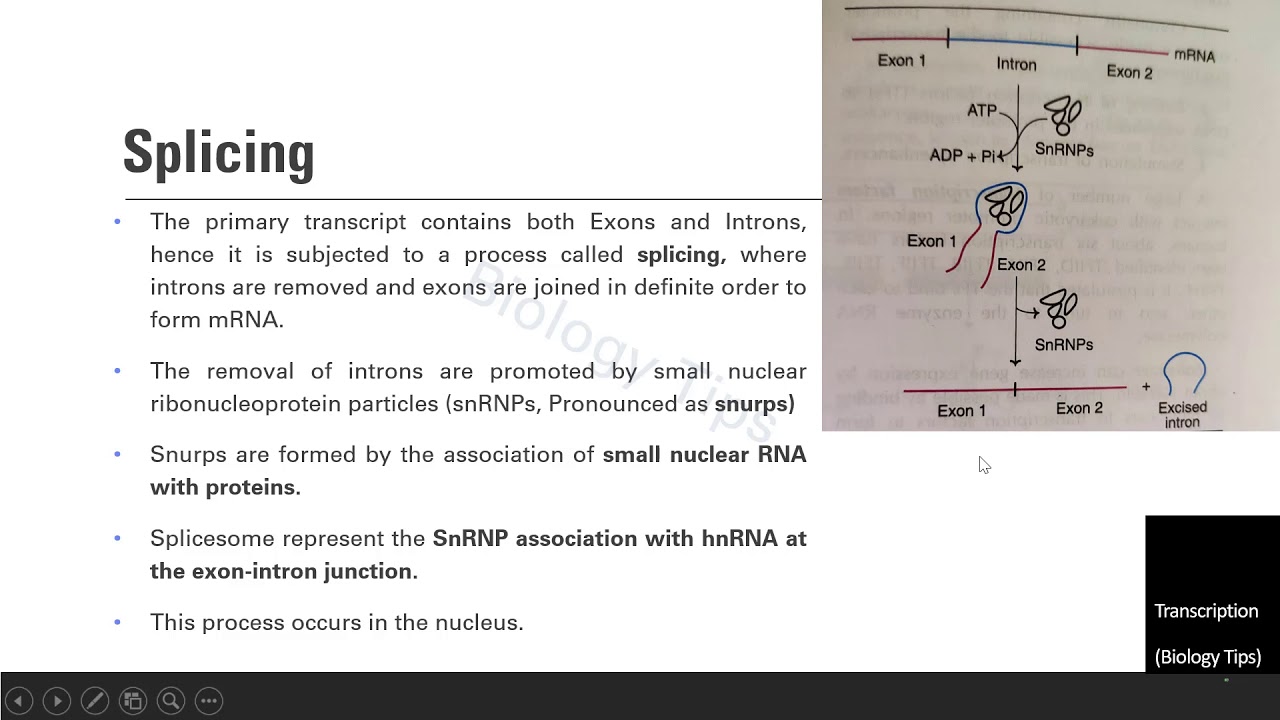
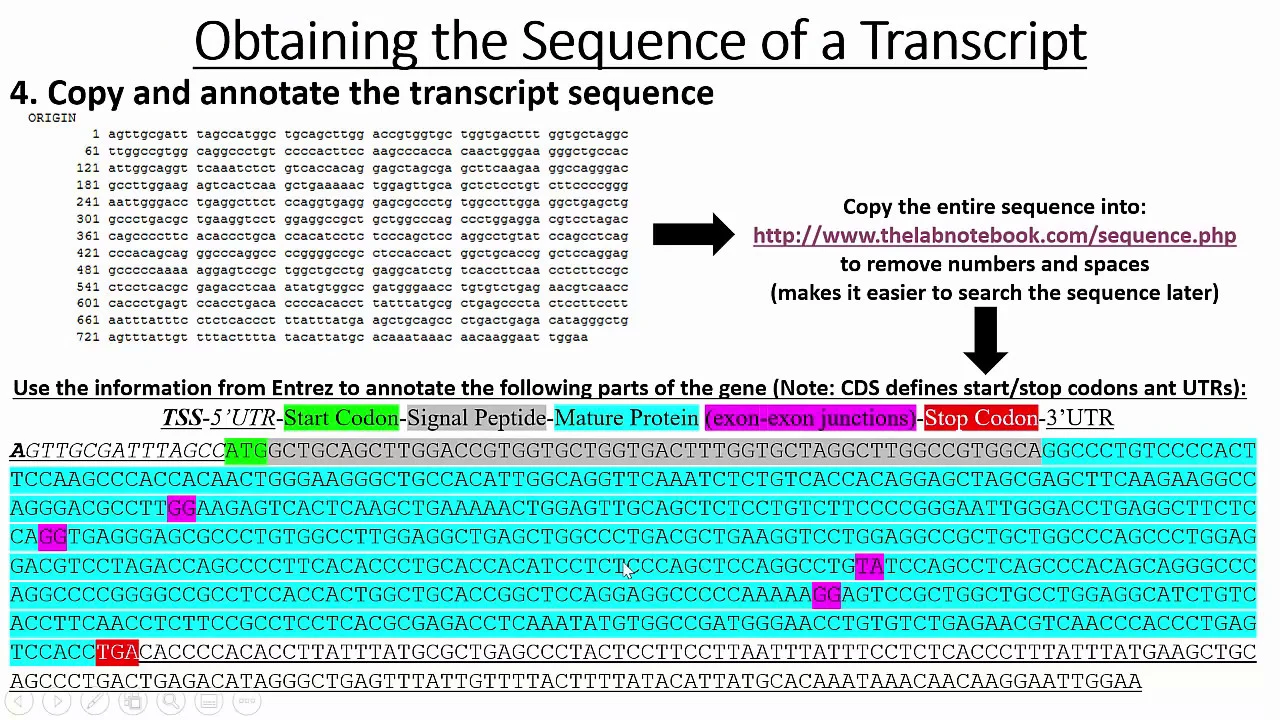
Standard molecular biology concepts of gene structure, including exons, introns, open reading frames, and target site selection.
Practical methods for delivering designed CRISPR components into host cells, such as lipofection, electroporation, and viral transduction.
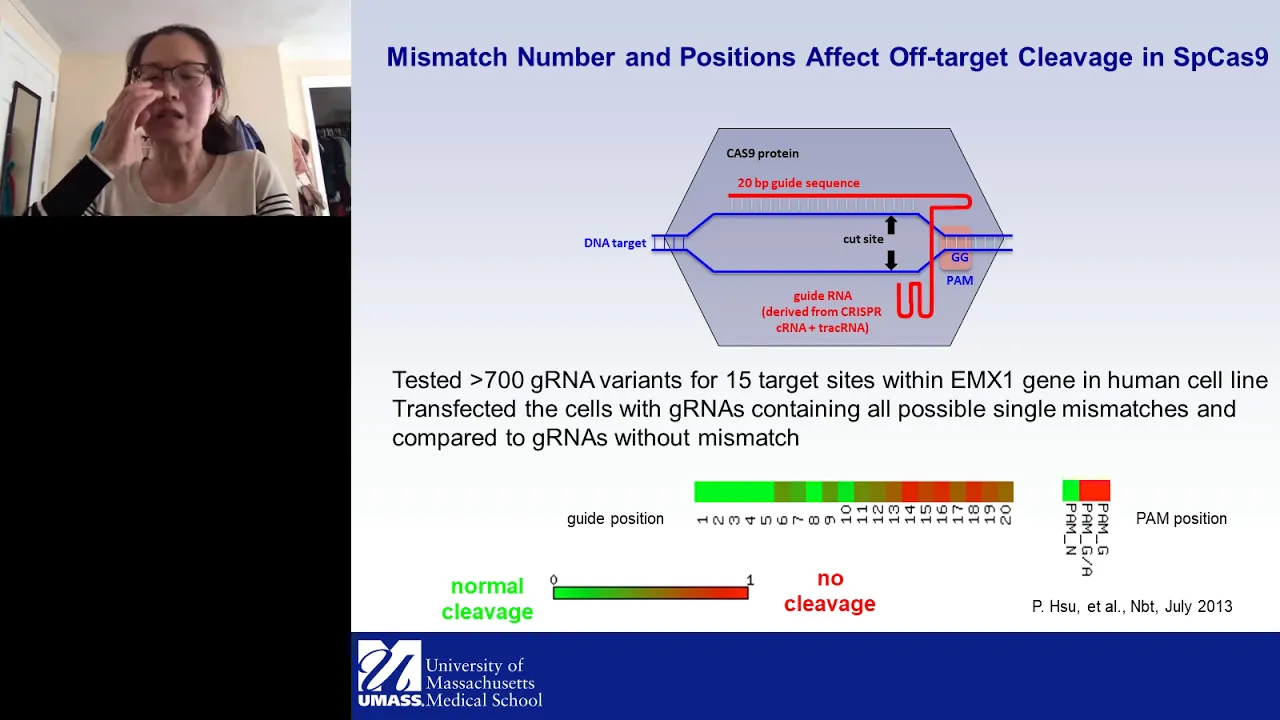
Strategies for identifying, predicting, and minimizing off-target genomic cleavage effects using high-fidelity Cas9 enzymes and advanced guide design algorithms.
Utilizing Next-Generation Sequencing (NGS) and amplicon sequencing workflows for high-throughput, quantitative validation of editing efficiency in heterogeneous cell populations.
Advanced gene-editing modalities beyond standard Cas9, such as base editing, prime editing, and CRISPR-mediated transcriptional regulation (CRISPRi/CRISPRa).
13.1K views258likes1:02:50Original Release: 2021-04-27
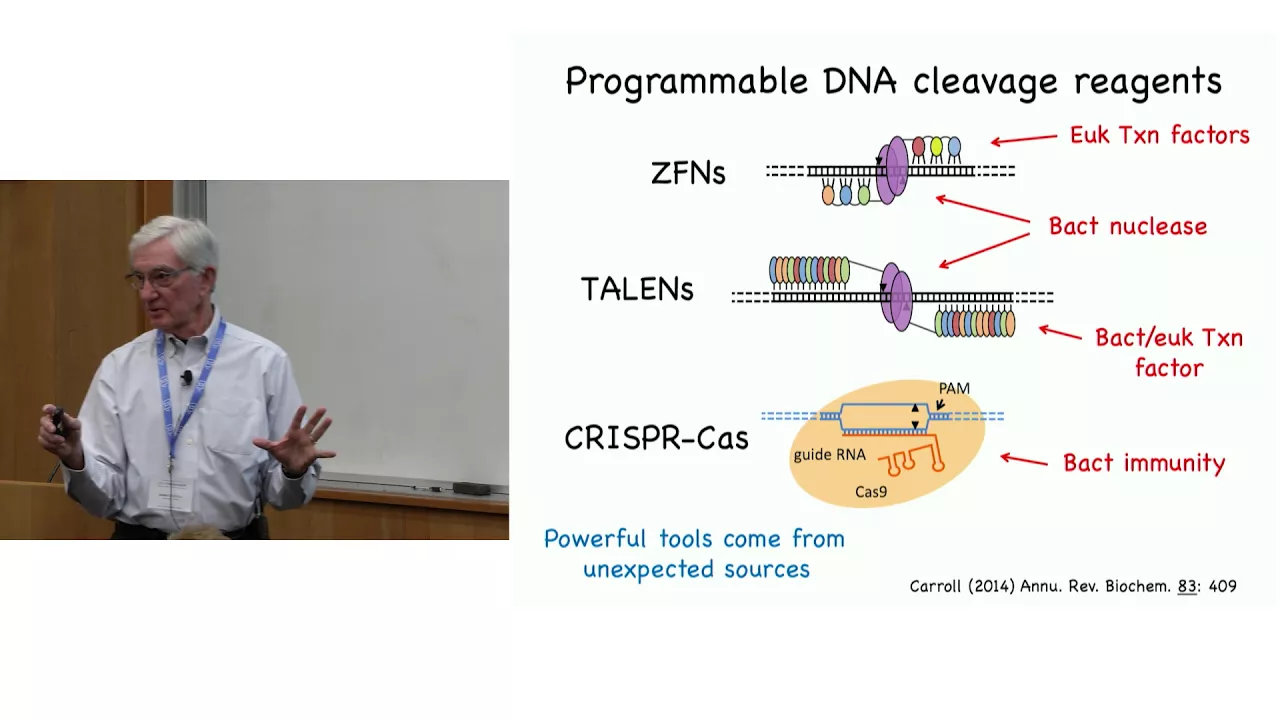
hello everyone and welcome to today's webinar simplified online tools for crispr cast 9 gene editing design and confirmation my name is louise baskin and i'll be the moderator for today's event today's educational web seminar is presented by lab roots and brought to you by thermo fisher scientific we encourage you to participate by submitting any questions you may have during the presentation to do this you just simply type them into the ask a question box and click on send we'll answer as many questions as we have time for at the end of the presentation you can also use this to submit any technical issues as well if you have any trouble seeing or hearing the presenter so i'd now like to welcome our speaker dr matthew polling he's a product manager for genome editing at thermo fisher scientific and matt you can go ahead and begin fantastic thank you luis all right i will go ahead and get started with today's presentation so for today's agenda we've got four main topics that we're going to cover we're going to do a quick review of genome editing and kind of how the mechanisms of action happen at the molecular level and how we're going to be kind of tying these tools together to allow you know users at the bench to have more successful gene editing experiments the first tool we'll talk about is our true design genome editor which is our design platform that pulls all of these reagents together into a nice clean package and makes genome editing much simpler for life scientists we'll then come back and talk a little bit about how we can confirm successful edits using sanger sequencing and the tools that we've developed to help that workflow and then we'll kind of uh wrap up by doing a demonstration of the seek screener gene editing confirmation app um as well as kind of our some wrap up and closing comments and then take the questions from the audience and to go ahead and get started we'll we'll do our review of genome editing and at the most basic level when we really kind of simplify this down to cartoons ultimately what we're trying to do when genome editing occurs is we've got a piece of double-stranded dna that's represented by those red lines and some sort of engineered nuclease that's going in and cleaving that dna in a specific locus this engineered nuclease can be crispr cas9 that's kind of become the most popular variant of this but these fundamentals can also apply to systems like crispr cast 12 or tall effector nucleases or zinc fingers nucleases as well but ultimately depending no matter what enzyme system you're choosing what we're trying to do here is go in and cause specific double-stranded breaks of this dna now when dna is broken in this manner the cells attempt to repair it and attempt to repair it rather quickly broken dna is generally not a very favorable physiological condition and these repair mechanisms are always faithful and have opportunities for incorrect repair to occur and when this happens we can end up with gene knockouts by mechanisms of non-homologous end joining that can be imperfect we can get frame shifts or premature stop codons occurring which will disrupt open reading frames and disrupt the functional proteins these will be used to create knockout cell models or if you're doing something like a crispr library screening this is generally the main genomic readout that you're looking for and then you'll be screening against any kind of phenotypic changes that might occur the second pathway for this is going to be my homology directed repair or hdr and this occurs when a donor molecule is provided in excess during the reaction and during the repair process in the cell these zoners generally have left and right homology arms that align around the flanking or excuse me that will flank that edit site and allow them to be incorporated into the genome at that break point and scientists will use this to create you know kind of reporter genes or fusion proteins we'll do an example here in this presentation about like adding a gfp to the act b gene we can also do this to go in and change specific nucleic acid sequences like making snip changes either correcting snips or introducing snips to mimic disease models and this can be a very powerful tool to make very specific changes to the genome and for either of these examples you ultimately need three sets of materials to have a successful experiment the first is going to be that specific and efficient nuclear system the second is going to be a repair template with that desired change if you're doing knock-ins you obviously need to be providing that donor molecule or providing that template at the time of the editing is occurring and then lastly it's going to be a method to deliver all of these materials into your cells we need to be able to kind of package this and deliver this effectively into the nucleus now like we talked about the most popular version of this that we see you know kind of in the life science community is obviously going to be the crispr cast 9 system you know over almost the last 10 years this has kind of blown up and really advanced our ability to do genome editing successfully because of this rna-guided dna nuclease system if you look at kind of our green bean picture on the right hand side there we've got our cas9 protein and our guide rna molecules being the two main components this is adapted from a bacterial immune response pathway kind of from that adaptive immune response system where bacteria would try to prevent phage infections and have specific nucleases designed against those various infections and what we're able to do here with this rna guided system is break it down into kind of usable parts such as our cas9 protein or and the duplex of the crispr rna and the tracer molecules we know we use those as single guide rnas in most experiments but ultimately we're able to take these parts combine them together and deliver them into cells to have successful editing when thinking about designing these experiments we also have to take into consideration some of the context specific sequences and for streptococcus pyogenes cas9 which is the most common one that we work with at thermo fisher scientific we're looking at a protostas or a json motif or a pan that's an ngg and that's going to become important when we talk about how we analyze and look for possible binding sites and possible cutting sites it's important to keep in mind that the cast 9 system produces blunt-ended dna breaks some of the other systems like cast 12 or tall effector nucleuses will create staggered cuts but for today's presentation of the tools we're talking about we're going to be really looking at those those blunt-ended breaks and how they're formed how that can be advantageous and how we look for that from a sequencing perspective and then lastly you know when we think about how actually one will do this in the lab what materials they need at the bench we're looking at you know using these either as a plasmid or as mrnas made by in vitro transcription or synthetically or combining those with a recombinant protein to do an rnp format using a recombinant cas9 protein and a single synthetic guide rna now from the thermo fisher perspective and how we look and want to be enabling scientists that work with us is we ultimately want to be helping you know their goal of getting any edit into any cell line and to that end we try to break it down into kind of three basic steps for this design deliver detect and how can we support scientists wanting to move from this design to delivering these into their cells and then detecting if they've had successful outcomes and for today's presentation we're really going to focus on kind of the first and the third pillow here uh the design piece how do we design you know the proper materials to ensure success have successful knock-ins and then how do we go about detecting that from a sequencing perspective we do have a number of presentations also available via lab roots on our website around our delivery platforms such as the lipofectamine reagents or the neon electroporation system and we have additional assets available to talk about that if you're interested now from the design perspective we're going to talk a lot about guide rnas and donors but it's also important to talk about the cas9 nuclease in having the most efficient enzyme possible for that and to that end we do have our true cas9 enzyme this is a next generation protein that has high editing efficiencies and i'm not going to spend too much time on this but ultimately you know you want to be starting experiments off with something that's going to have very high efficiencies and be able to be effectively delivered into your cell types using something like a plasmid can be effective for some examples but ultimately we've shown you know in numerous examples that delivering a cas9 protein can lead to higher editing efficiencies and overall higher experience overall higher success and experimental outcome and that's why we generally recommend a cas9 protein for all of our protocols and approaches here and you'll see that as we go through the tool as well now to think about designing experiments here and designing those sequences you know it can be misleading to think that you can just use any guide rna for any crispr experiment and get success because not every guide rna is actually appropriate and not all rnas are kind of created equally you know the stem basically the the basics of a guide rna will be the same from experiment to experiment but that seed and spacer region can be different for each experiment and those can significantly affect the outcome and to kind of break it down we're looking at two main variables here one is the efficiency how well is this guide rna going to target and cleave that locus how well and how can we predict these outcomes uh in silico before even needing to go to the bench you know how close you know what's the gc composition of that region what kind of repeats are there is there possibility of any secondary structure because when we use inefficient guides it can lead to you know kind of wasted resources and time and ultimately frustration because of a lack of success so you want to be going in when using something where you know you're going to have that good efficiency and high likelihood of success the second piece of this is off targets so while we assume that guide rnas are going to be specific for the locus that we've designed them to we and others have often found that off-target effects can occur even you know even if you don't have perfect base pairing you know some single base substitutions can still even lead to editing at unintended loci and when we don't take this under consideration or control for it you can actually disrupt other major genes and significantly affect your outcomes and confound results it can be very difficult to make meaningful interpretations from the data and if you're an investigator thinking about going into clinical applications this can be even more important as these off targets could be genotoxic and ultimately you know damages cells that you're editing or oncogenic and creating unintended you know cancerous phenotypes and so off targets can be a very important consideration as well and we can address that within silico predictions and so ultimately you know how does one contend with this um it's really using you know kind of the the knowledge from these data sets to build an in silico prediction model and at the basic level how this will work is that we'll look at a nucleic acid sequence here we've got about 51 bases on the screen here uh you know of our double stranded dna and the first thing we'll do is we'll look for those pam sites we'll try to identify that ngg sequence on the top and the bottom strand that are going to be suitable for streptococcus pyogenes cas9 and guide rna binding we'll take those sequences and we can do alignments on them and we can start to rank them and then we can ultimately do binding and off target predictions using our software here so we can go through and make predictions of you know these guide rnas are going to have really high scores we think that they're going to be highly efficient and then look at those number of off target effects and we can do kind of this forced ranking and weighted prioritization of binding and possible off targets and then ultimately provide recommendations to the user as to which ones we think would be suitable given their experimental inputs now the other molecule that's going to be important for this as well especially if you're going to be doing those knocking experiments is the donor design and for that we've also you know been hit with a lot of questions on that end as well of you know like how close does you know that edit site need to be to that cut site you know how long do the homology arms need to be should we be using something that's symmetrical or asymmetric should we be using single stranded or double stranded and ultimately we kind of you know end up in the same general question of can you help me design my donor i don't know what i need to be doing here and to that end we you know really the the the origin of the software that we built here was really to help address this problem and we acknowledged that we needed to establish kind of like consistent and simple rules for this make this design tool easy to use we want to be helping you know investigators you know who are just beginning their journey as well as our experts so we need some sort of intuitive interface that makes it that makes it simple for everyone and we want to make sure that this is free and available to scientists globally and being from thermo fisher we have the opportunity to do that with our cloud platform and so we made this free software available on thermo fisher connect and i'll be demonstrating that and then you also might be thinking too well like you know you've come up with these rules but how do we know that they work and to that and we've actually published in in a peer-reviewed journal our design considerations for this you know how do we need to be designing donor molecules to ensure success and make it as simple as possible for users and so we published just a few years ago in the journal of biotechnology and this article is available or is linked excuse me on our on our marketing page that i'll be sharing and it is available uh for anyone who wishes to go view it so that information is available as part of the resources so to that in and some of the data from this publication this is not an exhaustive review of that but looked at trying to understand the proximity of these cut sites using a single stranded donor so across the top here we've got about a 70 base pair region with position zero being marked as our possible insertion and we're doing a six base pair insertion to repair gfp so ultimately when we get successful insertion here our cells will turn green and that is our readout and so we see that we have possible guide rnas from the minus 34 position all the way up to the plus 30.
and when we look at our cleavage events across this entire span we can see that we get a variety of guide rna effectiveness if we look at our percent zindale we're averaging around 50 overall with some getting closer to 80 and others like our plus 21 guy being you know pretty poor less than 20 editing but overall kind of across this range we've got you know kind of average outcomes here from gene editing from a from an indel perspective but when we look at our ability to repair gfp to have the successful six base pair insertion that's going to allow that protein to be functional we really only see success when we're within 10 bases of that insertion site so remember the insertion is at position zero and if we look from minus seven to plus eight that's where we start to see significant differences here and we're seeing that gfp repair and that knock-in rate actually start to go up several fold and so if we kind of think about this holistically you know when we're flanking within 10 base pairs of either side that's where we really start to see this this effect and improve and even you know and you can also see that there's a secondary issue here with that plus three guide rna that doesn't perform very well we actually see that knock-in rate drops significantly and so kind of with these data and supplementary data as well that i'm not showing here we kind of try to come up with some guidelines and general rules and the first being using ensuring that your insertion site is in within 10 bases of that dna break and utilize kind of the highest cleaving cas9 guide rna pairing that's available for your design and trying to you know kind of ensure your success by having those tools be complementary um and and high efficiency so to that end we kind of have our three simple rules for genome editing you'll kind of see a trend here where we try to break things down into into three things design deliver detect our three simple rules but ultimately we've got break excuse me our first rule being have your dna break less than 10 bases of your desired edit site ultimately wherever you want to be causing that edit to occur you really want to be using a design that's within 10 bases of either side of that edit site because we really start to see the performance drop off when we go outside that range and so we have rules in place to try to keep you localized around that locus to have that efficiency be the highest the second is to use the most efficient enzyme system possible so that'd be using the highest scoring guide rna available it might be changing out your tool set and considering something like tal effector nucleases if that will be predicted to be higher editing than the crispr cast 9 system and the last is use at minimum of 30 nucleotide homology arms we really want to keep the system compact and easy to use and we found that 30 nucleotide homology arms are sufficient to get high knock-in editing and that really around designing you know as close to that edit site as possible is really going to be delivering the higher level of success and so so using minimal homology arms when using a donor can be a very effective tool so to that end what we've tried to do here today or excuse me what we've tried to do is uh build our true design genome editor platform and this is a software that lives on thermo fisher connect i'll be doing a demonstration of that in just a moment but what we ultimately want uh what we're supporting our users with is searching for their gene of interest we've got five different species in the software now human mouse rat zebrafish and roundworm allowing them to go in and find the specific transcript that they're looking for find the amino acid and nucleic acid sequences they want to modify and make those specific changes and then ultimately giving them a complete design giving them the cas9 guide rna sequence giving them the donor molecules so that they can have a complete solution and have a successful editing experiment at the bench once they receive those materials so for our first example i want to talk a little bit about how we support this with fluorescent tagging and what we have here is our true tag donor dna system so this is our our solution for doing kind of larger insertions such as tagging and the way that the system works is that we have n-terminal or c-terminal templates that can be customized to the locus of interest by pcr and so these templates are are provided to the user and by a simple pcr reaction we can add those homology arms which you can kind of see in orange there on our schematic to these donors and make them specific for that particular locus and a guide rna and to this end we're able to get editing efficiencies or excuse me get high editing efficiencies and get up to 99 edited cells using those resistance markers that are built into the donors by applying pyromycin or blastocyte and selection we can really drive that cell population uh to being greater than 90 percent almost 99 edit itself and you can see an example here and the upper right hand side of some photographs of a gfp tagged actin excuse me gfp tag cells at the actin locus and nice actin filaments actually being stained green from that gfp and endogenous gfp in that system and then looking at the graph from the lower right hand side you can see how we were able to drive that editing efficiency and that overall edited population to being greater than 80 percent now the way that this is going to work from kind of a textbook illustration perspective is that we have our single guide rna we have our cas9 protein we have our true tag donor that we've customized by pcr to our locus of interest all being combined together with the crispr max lipofectamine reagent and once we create these little lipid delivery vessels we'll be transfecting them and delivering them into the cell these materials will be delivered into the cytoplasm they'll be taken up by nuclear import and ultimately go in and modify the genomic locus so we've got our cas9 going in and cutting the dna we've got our donor molecule being incorporated at the locus of interest and then ultimately leading to the expression of a gfp tag protein as you can see there in step seven and so what we're trying to do is you know again trying to simplify this process and really provide all of the design considerations and all of the the necessary materials for this to be successful up front in a single tool and then again to kind of briefly go over kind of the illustrations here of how we use trutag you know we start off with kind of a basic donor where we then use left or right homology arm pcr primers to extend those out and make them specific to the locus of interest and this is an example of doing end terminal tagging so doing it to kind of the front end of the gene at the start codon or for c terminal tagging and doing it at the the back end of the gene near the stop codon as well and these illustrations are available within the true design tool if you're looking to see more of them and without any further ado i'm going to go ahead and switch over to my browser for a demonstration of how to get into the tool and how to use the software so give me one second while i change my screens okay hopefully i am now sharing my browser for all of you and we can go ahead and look at where this tool lives on thermofisher.com so this page can be reached via thermofisher.com and this is our landing page page for the true design software when you first come to this page you'll be greeted with a button that's in bright red here that is to launch the application and then we also have a number of assets available on this page as you scroll down that speak to the capabilities of the software some screenshots of the workflow as well as additional resources for getting started now for the sake of time i'm going to go ahead and go straight into the tool by clicking the launch the app button this will go ahead and open a new window for you and then it will also then redirect you to our thermo fisher connect login page now if you have an account with thermofisher.com already you can go ahead and use that username and password to sign in if you don't have a login with us as of yet you can go ahead and create an account with just a few steps and i'll demonstrate that here when we click create an account so when we go ahead and do that we are going to be just asking for your first name last name and email address to create an account you don't need your full billing and shipping information um really just the basic logins that you need to to access a cloud tool so for this example i will just use a gmail address here oops if i can type and then we'll go ahead and give a strong password that no one can guess and then the last thing we ask for you is uh to say if you're interested in receiving uh informa more additional information from us about our products and services obviously we like to be able to reach out um to all our scientists that we support but if you're not interested in receiving uh email communications from us go ahead and feel free to click that no button and create an account we'll just take a moment to process all right here looks like our registration was successful and what we can do at this point is you can go ahead and complete the rest of your institution info but you don't need to do that at this stage we can go ahead and go back to our true design genome editor tab click launch the app and then we'll go ahead and be presented with the tool once this page loads just give me one second here all right and as we're accessing our thermo fisher connect platform for the first time with this account that i just made we're going to be accepting our terms and conditions of use for the platform as well as specifically for the true design software all right now we are in true design and we are ready to do our first experiment so as you can see we're presented with five different experiment options gene knockout fluorescent tagging insertion deletion and snip edit for our insertions and deletions we are limited to 30 bases we are supporting designs of that smaller side because we are trying to keep everything contained with a within a single dna oligo and to that end we can support up to 30 bases plus those homology arms that i was speaking to for this first example we'll do fluorescent tagging so i'll go ahead and select the button and click next we'll then have our five species to choose from we've got human mouse rat zebrafish and c elegans the round one i'm going to go ahead and do the human example we can then search by gene symbol dna sequence or chromosomal locus i'm going to do gene symbol and then what the tool will allow you to do is it has some predictive text recommendations so as i start to type in act b to go for the actin b gene you'll see that those lists start to refresh and we can see that the first one on our list here is that act b gene we go ahead and search for that and it'll pull all of the relevant transcripts for the actin b gene on ncbi and so we can see we've got our transcript here on the list we've got our if we click on that hyperlink it'll actually go ahead and take you out to the ncbi sequence for your gene so that you can cross-reference and confirm that you're ultimately going to be working with the right gene here we know this is the right one and so we're going to go ahead and select edit so now that we're on our second step of the software we're on our edit page we now have a number of new features available starting at the top of our screen here we have a topology map of the actb locus we can see our introns kind of labeled here we've got a very large exon 4 we've got our exon 6 here and if you click these plus minus buttons you can kind of zoom in and get better definition of this topology and so we can see here we've got kind of our exon 2 we've got a little bit of an untranslated region our intron and the following exon if you go below that the sequence editor is going to be showing a detailed view of what's in that blue box and so we can see again here our annotations for intron 1.
we can see our second exon here and we've got a little bit of untranslated region before this methionine of our start codon so for our tagging experiment we're going to be doing choosing from these pre-selected options so the first thing that we're going to choose is our n or excuse me doing an n-terminal tag so we're going to choose amino and terminus we could also choose carboxy terminus if that's the position you want to be tagging we're going to choose between our gfp or rfp reporter and then we're going to choose our blast seeden or pyramic and resistance marker once we have our selections chosen the add tag button will turn red and it'll go ahead and insert that into our genome basically at that start codon position so we can see our pure gfp arrow here right after that start codon and we can see that summarized here on our edit list if we want to go back and make changes we can click this undo button and that selection will be taken out and we could switch this over to rfp or switch to the blast aside marker but we'll keep with those initial selection choices and we add them in and then we'll go ahead and click design and this is where all the bioinformatics fun part comes from on the back end here so what the software is doing at this point is it's scanning this region looking for possible pam sites near that edit site if you recall we're trying to keep everything within 10 bases of our perspective edit site which is going to be right after that start codon once we've identified all of those guide rna sequences we're going to start to do blast alignments for them try to predict where those off targets might be what the prevalence prevalences of those what the scores of those off targets might be to give an overall ranking and recommendations of guide rna targets once that's done the last thing it's going to do is it's going to go ahead and design those forward and reverse primers for those large knock-in donors that will do that gfp knock-in for us and so the software will kind of run through and do all of this bioinformatic power on the back end using the thermo-fisher connect cloud and then ultimately present the results to us and as you can see here we now have our two possible guide rnas that were identified being within 10 bases of this insertion site we can see our first one here has our green check mark saying it's recommended if i click on this row we can see it showing up in our sequence editor here the green box being kind of that binding sequence and the purple box being our pam site we can see our score here of 95.9 so a really nice high scoring guide rna we've got nine possible off targets if i click this hyperlink it'll show a pop-up modal that has all of those sequences uh and possible off-target sites here if you see one where it does have a zero also in chromosome 7 this is actually our on target site here and basically showing that we are successfully identifying our on target locus and then if we look at the far right side of this table we're going to have our fluorescent tagging primers with that forward and reverse primers that'll customize that donor template to be for this actin b locus you can see we've got a second guide rna that came up here it does not have our green check mark and that's because we have a score of 35 even though it's a little bit closer to our edit site the gc composition here is considered unfavorable for editing efficiencies and ultimately we get a score of 35 and this is really not the best choice to move forward with um and we can see this guide rna as well see that it's on the bottom strand by selecting the row and it's highlighted up here in the sequence editor we're going to go ahead and select this guy by checking our blue check mark here and then we're going to go to our summary page now on our summary page we're going to have all of the design inputs that were put in summarized for you as well as some product selections to ultimately pull this all together starting from our top left hand side we have our guide or excuse me our casino format we have our true cut cas9 protein or our crispr nuclease mrna we have our single guide rnas or synthetic guides and a 1.5 nanomole scale and then we also have our transection reagent that crispr max region i was speaking to earlier that's going to be used to bundle this all together and deliver this payload into the cells you can view your crispr designs and donors in this little pop-up model so we'll see we've got our act b crispr number one we've got our sequence here and then we've got that forward and reverse primers being presented as well we also have kind of our total product summary here of everything that's needed for this to be successful and then we also have additional products such as sequencing primers which will come into play when we talk about seek screener in the second half of this presentation as well as positive and negative controls which are essential for for properly controlling for the experiment if you wish to view the illustrations that i showed earlier in the presentation the powerpoint these are also available within the software and can be used for review or for presentations you know lab presentations are being saved for notebooks and then the lastly is to export your results and protocol and if you click this button you'll go ahead and have a download that shows up in a save to your local disk that'll have all of those gene editing outcomes saved in a downloaded excel file for future reference so i'll just wait for my excel to open up here fantastic so you can see we've got our our guide rna sequence here we've got our forward and reverse primers if we go to our gene editing design information you can see all of the input information kind of our our specific locus the transcript we're working with that gene symbol and kind of the last thing to call out here is that we also have a protocol helper so we have an overview of the crispr max transaction protocol as well as a complete transfection table and then lastly if you're ready to move forward and acquire these materials you can click add to cart and all of the materials will be added to your thermofisher.com cart so let's go back and do another example here real quick so instead of doing fluorescent tagging i'm going to go ahead and do a snip change and for this example we're going to do something in mouse now to search for this gene i'm going to actually use our dna sequence search option and what this allows you to do is to enter a 500 to 200 base pair region i'm going to copy this from my other window that's off screen i've got a i believe this is about 120 nucleic acid sequence and we're going to go ahead and map that sequence against the mouse genome and it's pulling up the myostatin mouse gene and so we see that that's our transcript that we're looking for and we're going to go ahead and edit that now what's happened here is that since we put in the sequence that corresponds to exon 1 we're actually being delivered and dropped into that region of the mouse gene so we're already centered on this part of exon one now what i'm going to be doing here is i'm going to be selecting this particular base at position 2008 6. oops let's see here i meant selected didn't quite go there we go and we're going to be doing a specific g to t mutation here that's actually going to be inserting and converting this to a stop codon so we've changed that into a stop codon position here that will ultimately disrupt the open reading frame of this myostatin gene in the mouse and so if we're doing this like in mouse embryos we could be making you know kind of those mice that have excessive muscle formation can be kind of an interesting model for gene editing but we've got a single stop here and you know we maybe want to be ensuring that we're really going to be truncating this protein and have absolutely no risk of any possible read through so we might do a second edit on top of this and we'll do a secondary insertion right after this stop codon we just put in and we're going to put in two additional stop codons so i'm going to do tga and tga i'm going to go ahead and insert that and now we've got a triplet of stop codons that have been inserted at this secondary position so again we did a snip change at this first position and then we've done a secondary six base pair insertion at this secondary position just three bases down so this is a rather complex edit that we're supporting here with the tool and we'll go ahead and see what comes out the other end in terms of guide rna design and what our donors look like so again we'll go ahead and click the design button and the software will go through and do in this entire bioinformatic analysis for us looking at you know possible guide rna sequences possible off targets for that as well as those donor molecules and with that we'll let this run and i will take a sip of water and catch my breath all right and there are our results for this particular design so we've got our two edits being incorporated into our donor molecule we have our single guide rna that's being recommended here it does meet our thresholds of being suitable and getting that green check mark we've got an 85.8 score here we do have a higher number of off targets but since we're trying to do some very specific changes here this is going to be our best recommended guide for this knock-in experience for this knock-in experiment excuse me again we can see the guide rna binding site relative to these insertion sites and we can go ahead and select that to move forward with a little bit different for this view since we're doing a snip change when we go ahead and view our donors we'll see our guide rna sequence here excuse me and then we'll also see that donor molecule with those specific changes being presented as well and then we can also do the same thing as well with this where you can view your gene editing experiment our illustration is revised to reflect these kind of snip insertion deletion changes as well as export these results to save them to your local disk or you can add all of these products to your thermo fisher.com cart if you're ready to try them in the lab yourself with those two demonstrations i'm going to go ahead and switch back to my powerpoint just give me one second while we load that back up all right now that we're back in the powerpoint we'll review briefly kind of the benefits for the true design genome editor this allows users to search for their gene of interest you can go ahead and craft the specific changes you're looking to do and then ultimately kind of complete your design and have a complete package of materials to have a successful editing experiment at the bench again this can be found at thermofisher.com true design now once you've done this experiment you need to think about how you're going to go about confirming it how are we going to actually determine if these results were successful and so we've delivered cas9 and guide rna to our cells we've made a pool of mutant clones but ultimately you know what's happening here we've caused that double-stranded break and we've had dna repair occur but did we get the outcome that we needed and ultimately what happens here is you'll end up with a pool of edited cells you might be working in like a 24-well dish and within that single 24 single well of the dish there's going to be a pool of various editing outcomes that occurred you're going to have some cells that might be wild type you're going to have cells that are going to be homozygous that have both you know both alleles have the correct edit you might have cells that are only heterozygous you know that have one you know one allele corrected but one allele different and how are you going to kind of tease those apart how are you going to understand the editing efficiency and so there's a need to do kind of a pooled screening or do kind of a pooled analysis to verifying what kind of editing efficiency what kind of outcomes you have from that pool of you know mixed population of cells and then after that you'll need to go into a clonal expansion step where you're going to be kind of pulling out either your heterozygous your homozygous or your you know kind of isogenic wild-type controls for further analysis and so for this clonal screening there's also a need to understand kind of these various allelic states do we have the cells that are a wild type in this population in this particular world do we have ones that have both alleles edited or just one allele edited was our clonal isolation protocol not super clean and we have a contamination where we have a mixed population of cells here even though we were trying to do single clones and the way that we can go about doing that is actually through sanger sequencing so sanger sequencing is actually pretty straightforward process at this point something that we've really optimized at thermo fisher scientific and what you're going to be doing is doing a simple pcr reaction and a cleanup and then going through a site or excuse me then going through a cycle sequencing reaction that's going to ultimately create the various lengths of dna for a sanger sequencing run that material gets further cleaned up and then it's going to get run on a genetic analyzer through capillary electrophoresis and through that process we're able to do specific base calls to understand the nucleic acid sequence as it gets run through that capillary but kind of a new piece to this is doing that data analysis because it's actually not quite as simple as i just i just said so when you have your your edited sample and come that kind of comes out the other end of the the capillary electrophoresis system if you look kind of to the right of our that dashed line there where our double stranded break occurs you can start to see that the base calls become kind of jar bold we kind of kind of mix peaks where we've got you know maybe it's clearly an a and some are maybe clearly a t but other ones you can kind of see multiple base calls coming through and ultimately as you read across the top you know we start to see more and more degenerate base code showing up as the reads here and this is because ultimately when the dna repair occurs we don't have kind of this unique clean sequence to read anymore after that break site after that edit site and so how are we going to align and interpret these results and how can we do this from a software perspective well the the deconvolution of all of these reads has been done by a number of different groups but we've been able to take that base software and expanded it to create it more to make a more useful piece of software for the genome editing scientist base and so what we what most tools have is kind of ability to do some primary screening and kind of kind of do batch mode analysis where they can take a lot of samples but they don't really have the ability to support that secondary screening workflow when you're thinking about looking at clones and how do you do that these softwares can be pretty slow they take a long time to analyze the data and they don't really save the information on the local disk it's generally you load it to a website the information's there you need to capture a screenshot because it's not going to be there when you come back later and so they're not connected to any kind of data repository or ability to save this and so what we wanted to do with the seek screener platform is kind of create something that's going to add additional value and additional excuse me be more user friendly for for the genome editing users and one of the most common things that we you know we will get asked from from users is you know kind of how does this compare to next generation sequencing are we seeing equivalent results can we trust these results relative to next generation sequencing which you know has been kind of considered you know the standard uh for a lot of these outcomes but is a much more labor intensive and complicated process and so we did some benchmarking here and you can see that we've got some really nice linearity um in terms of editing efficiencies for something for sanger sequencing across the x-axis versus ngs across the the y-axis there giving us that we have some pretty good confidence in the editing outcomes that the that this finger sequencing tool can give us and to that end we built out the the seek screener gene editing confirmation app and trying to use kind of the same uh look and feel and uh intuitiveness that we have with our thermo fisher connect platform you know building a software that allows for quick identification of successful edits we want something that's going to be fast and accurate we wanted our algorithm to be robust to have that strong linearity with ngs data which we use as our as our baseline like i showed on the previous slide and then having it kind of widely available by having it on thermo fisher connect you know having this be a platform that that any investigator can access with just a simple login like i demonstrated before and so again you know really wanting to to have you know multiple pieces of software and having multiple solutions to support you know life or excuse me gene editing users here and with that i'm going to go ahead and switch back to my browser and we'll do a demonstration of the seek screener software all right hopefully i am sharing my browser again and now we have our seek screener gene editing confirmation app up um as i'm still using that new account that i just made for the thermo fisher connect platform i'm going to be accepting on these uh terms of use in the eula and we'll be saving this information onto the thermo fisher connect platform i'm going to go ahead and close this out and we'll close the quick tips because i'm going to show that to you and kind of the way that this software's set up is you're going to be able to save your data into the platform and we're going to be importing edited samples as well as control file samples here to be doing these comparisons in these analysis so the first thing i'm going to go ahead and do is i'm going to go ahead and pull up my data sets here so for our import our edited samples i'm going to be dragging in a folder of samples here and this is going to have six samples within it and i'm going to go ahead and control the matching control files for all of those samples and the software is going to go ahead and take those ab1 files coming from the genetic analyzer and validating them and then presenting these out basically these edited sample files in a table form here now we do need to map these out so that they know which control file they're going to match with or which guide rna was used for cutting this we also have the option for aligning and analyzing a donor sequence as well so you're able to put in your guide rna sequence and a donor sequence and the tool will take those under consideration for predicting the editing efficiency and doing that analysis um the fastest way to do this for a lot of samples is to go ahead and add or upload a mapping file and i'm going to go ahead and just do that from my saved files here i'm going to go back to our primary sample here there we go and we're going to go ahead and load those files and so you can see that using our mapping file here we've got all of our various guide rnas that we're testing here loaded up we've got our match control files and then we've got our sample files here and we can go ahead and hit analyze and now the software is going to go through and you'll see how fast it is to do all of these analyses and provide us with meaningful outcomes so when you end up on your results page you'll be able to see kind of at a quick view here kind of the grading of the wells so basically how we're scoring these what plate it came from what well on what plate it came from how we've titled it whether we've analyzed this as a knockout or a knock in those target sequences and then kind of the main outcomes here are model fit and our editing percentages and kind of our frame shift editing and then the last thing here being diversity of edits or the number of edits that have been identified in this sample starting off with our grade if we hover over this you'll see that we have recommendations for you know kind of like ideal good or needs review ideal meaning samples that are going to have you know very high confidence high model fit scores high editing efficiencies we have very high confidence that the sample that you're analyzing here was a good knockout and it's something that you could be considering and propagating further good knockout is kind of in that middle ground with something where we have that high editing efficiency our model fits good but it's not as high as kind of that ideal knockout model here the remaining ones are going to be kind of in the needs review something like a model fit might not be great like if you look at this one here the sample four our model fit score is.44 so we don't have a whole lot of confidence that this reads these reads were clean enough to make that call and then the ones marked in w are going to be wild type and we can see overall we have either very little to almost none editing efficiency you know less than five percent here this is basically a wild type sample and 0.77 here so we had very poor efficiencies of this guy at rna if you want to go in and look at any of these examples you can just click on the row and it'll take you into an overview of the plate map and this will be important when we do the the clonal screening view but really what i want to show you is this indel frequency chart and overall what you can see here is that we are displaying out bar charts of the predicted frequency of that editing outcome in this sample so you can see here that we've got you know kind of a plus one insertion contributing almost 65 percent of the data that came out of the sample we've got a minus 1 being about 15 and we've got some minor variants as well that are also showing up if we scroll down we can kind of see the alignment here of our control here's our break site in the dotted line and then where this plus one insertion here so we've got that plus sign here and then here's how the rest of the sequence is aligning and then looking overall here for basically anything over five percent we have it highlighted here you know kind of our plus one being the major contributor minus one being a secondary contributor and kind of this -10 also being a tertiary contributor to this editing efficiency going across the top here we see our model fit is 98 so this is a pretty strong linearity we have high confidence in this data our overall editing efficiency is going to be 96.25 so that's the sum of all of these variants basically that are not zero and then our percent frame shift which is accounting for everything that's not going to be a plus 3 or a minus 3.
so you know a plus 3 insertion might have the same reading frame as the wild type protein just with an additional amino acid or a minus 3 might just have removed a single amino acid and so we're considering here you know how this might be overall disrupting the the reading frame and the production of a functional protein and then the last thing you can do here too is you can look at the sequencing traces oh there we go rid of the quick tips here since you have me demoing it for you and we can see the actual traces that came out of the genetic analyzer and being able to see kind of how this data you know kind of became convoluted and kind of messy after our edit site relative to the wild type control you know our unedited sample where we have really nice clean reads throughout the sample and so you can see here kind of how messy this data is and how our software is able to kind of pull out meaningful outcomes from this from this messy data going back to our results tab we can look at any of these samples that way so for example if i take you know kind of this let's see here let's go to this guy let's go to number one sample number one and we go to its in dell frequency chart we can see yeah the majority of the sequences we're pulling out are still that position zero so really no change 64 percent of that still being wild type and then we've got some minus one and then some other minor variance here like let's see here this is less than one percent uh for this -10 position so again able to pull out kind of the main editing result that came from this particular guide rna and allowing you to quickly screen and see what kind of results this guide rna is providing for you now the second experiment type that we're going to do and i'm going to start a new project load up is going to be clonal screening and so if we switch our toggle over here the software is going to kind of take in different parameters for this analysis but ultimately the setup is very similar so i'm going to be loading in our control file here so we drop in our single control file we're going to be dropping in 95 edited samples here because we're going to be screening an entire 96 well plate of samples you can see how fast that was uploaded and is being validated by the software and then i'm going to be importing a mapping template from my computer as well that's going to identify all of those particular samples so this is our clonal mapping templates and you can see for this example we have our guide rna sequence which is consistent for all of the results here as well as a donor sequence that's been incorporated here to be used for doing a specific snip change for this particular example i'll go ahead and click analyze and it will do the analysis for all 95 of these samples all right and now we have our results here we've got a very long table a whole lot of results here that we need to look at but what's nice is that it's going to be auto sorting this based on this grading system that we've put into place looking at that percent editing looking at percent hdr and that edit diversity so if we take a look at kind of our our sample here that was in well h1 we can see that we've got some a very clean result here so if we look at our plate view we can see in this 96.4 or excuse me 96 well plate view all of our our samples that we were looking at we've got our blue ones that are kind of maybe are less likely to be successful samples we've got our stars here which are going to be our ideal case scenarios we've got our control file here we've got a well that's a true wild type you know very low editing efficiencies and we can see here are our kind of our top of the list guy here that has a model fit of one we've got like almost we've got 100 editing efficiency and we've got that diversity of edit being one we've got only one outcome from this and so we have you know we look at our indel frequency chart we have just that snip change occurring we have a very clean outcome here for the editing outcome that we were looking for if we go back to some of these other examples here you know we've got a diversity of edits of two and i go and look at this indel frequency chart i can see that we have some examples here where we have our successful knock-in with that snip change as well as some other ones and some minor variants here we've got that plus one insertion so we've got fifty percent being um having the snip correction done and fifty percent with this um excuse me with a single base insertion here um let's see here let's see what i'm going to do and then for reference here the snip change that we're trying to do just to make it super clear is at this position here we're doing a c to g mutation with this snip so we've got our edit site here and going back about nine bases i believe we've got our snip change here for our knock-in examples you can do a donor to control alignment so you can see how well your donor lines up with your control sample you can see that g to c base being highlighted here those are where our changes are so that we know what our donor was specifically trying to do and then we can also see our sequencing traces as well if you need to look at that raw data going back to our plate overview here again we can look at a glance at our 96 well plate and clearly see you know our strongest candidates from our clonal isolation and moving them forward this is a has been a great powerful tool for a lot of our custom services team um that supports cell line model generation and they were the alpha users for this for this software and it has definitely improved the efficiencies of those systems so it's really a great platform for that and with that i'm going to switch back to my powerpoint for some closing remarks and our q a just give me one second here all right hopefully you guys can see my powerpoint again and we'll just wrap up here so again kind of uh to wrap things up in as a summary we have our true design genome editor being able to support all of the design input needs and take those considerations for your experimental needs identify the appropriate sequences and provide you kind of a complete solution to have a successful edit at the bench and then we have our seek screener confirmation app to be used kind of as an analysis tool after your gene editing is done for both primary screening kind of understanding how well a guide rna is going to be working how well your donor is being incorporated into a pool and then as well as supporting kind of that clonal isolation and screening workflow as well when you need to be analyzing you know dozens of possible clones and figuring out which ones successfully have your specific snip changes or specific editing outcomes and again in summary we did a quick review of our genome editing and the the r d data that went behind this we did a demonstration of true design genome editor and then we wrapped up doing a demonstration of the seek screener gene edit confirmation app and with that i thank everyone for their attendance and looking forward to answering your questions all right that was great matt thank you um we are just about at time but i'll go ahead and we'll fit in some of these questions that have come in um if you still have a question that you'd like to ask you can still do so um just click on the ask a question box located on the far left of your screen i'll have matt answer a few now but any of those um that come in that we don't have time to answer and then anything that gets submitted during the on-demand viewing period we will address them using the contact information you provided at the time of your registration okay so matt there's a handful these i will try to pick some that are going to be most relevant to the biggest group um here's one that i know i know we've heard once or twice um why do i have to log in to use these tools right yes so um both the true design and the seek screener do live on our thermo fisher connect platform we do require registration to access those it is not really our intent for it for for marketing purposes but we do have the opportunity like i showed for seek screener for that data to be saved on our cloud platform so that you can access it there's also a whole variety of other applications that i did that i didn't talk about in this presentation and since this is kind of our larger ecosystem of bioinformatics tools they do require a login for that just a reminder is just a first name last name email and password you don't need to be providing you know kind of all of your institutional info you know if you have a purchasing agent that does stuff for you you know obviously you can still go through those channels it's really just some basic identity information um to access the tool and so we hope that that is uh suitable for you guys to access the kind of the power here right right um so one um kind of sounds like a usability question what is the difference between knock out with indel and a deletion so i think this is speaking to some of the options on the the true design tool right right right so what the deletion is trying what we're supporting with the deletion functionalities there is to do a very targeted removal of bases now like the idea for that would be is like if you just needed to remove a series of amino acids and still keep the rest of the functional protein by the knockout by indels you can get that outcome but what's more likely to happen is that indel is going to be disrupting the reading frame and leading to a completely truncated protein or a bunch of missense mutations that's going to lead to the entire protein being degraded the deletion settings there is really to try to make that targeted to do specific amino acid removals while still keeping the larger functional protein and functional sequence intact so it's kind of more of a precision removal of dna versus kind of the more of a blunt-ended response of using you know using indels to cause knockouts got it and then the other distinction then though i suppose is that the knockout with indel is simply we're making a cut and letting the cells repair themselves exactly yeah whereas the deletion uses a donor it uses a donor yeah yeah no thank you no thank you for that yeah and you're right so the the deletion where we're doing those specific amino acid removals is going to have a donor included with that uh to tell the cells kind of how this needs to be repaired um when you're doing this as an indel it's in the absence of a donor so the cell is just repairing it by that non-homologous and joining uh somewhat randomly depending on the cell type all right makes sense okay so here's one for the second tool that you showed um does seek screener only work on sanger sequencing yeah so seek screener is a sanger sequencing analysis tool so it's specifically for uh doing data convolution from those kind of base calls that come out of the capillary electrophoresis now it will use any you know dot ab1 file that comes out of any genetic analyzer it doesn't have to be a thermal fisher piece of equipment to do that but it is specific for stanger sequencing analysis of genome of gene editing events there are other tools that are in development around the next generation sequencing platform and we hope to be sharing those with you uh in some future webinars excellent all right well we've gone a little bit over hopefully some people have hung in to hear their questions answered um no it's fine um so thanks again for your time and showing us this these great tools that are available we also need to thank lab roots and our sponsor thermo fisher scientific for underwriting today's educational webcast and then of course thanking the audience for joining us today this webcast is going to be able to be viewed on demand so lab roots will alert you by email when it's available for for replay so please we encourage you to share that email with your colleagues or anyone who may have missed today's event that might be interested and until then have a great day it has a hard
Up Next

6:40
Human Ear Structure & Functions 3D Anatomy Animation
@zeneducationaltechnologies1424
311.3K views•2015-08-28
50:12
Bacterial Communication: Quorum Sensing and Biofilm Formation Explained
@JHUAAP
12.6K views•2011-06-28

5:35
Enteric Nervous System Explained: The Gut's Brain | Neurobiology Lecture
@alumniu6029
438 views•2018-09-12
7:08
Bacteriophages: Earth's Deadliest Killers and Future Antibiotics
@kurzgesagt
34.6M views•2018-05-13
Related Study Plans & Knowledge Roadmaps
Structured learning paths in Biology
biology
RNAi: Biogenesis, RISC & Gene Silencing
01Molecular Biology Foundations: DNA to Protein
02Introduction to RNA Interference (RNAi)
03Molecular Biogenesis of miRNA and siRNA
+ 2 more learning modules
10h5 modules
Explore Roadmap
biology
Mycorrhizae: Signaling, Biophysics & Ecology
01Foundations of Mycorrhizal Symbiosis
02Molecular Signaling and Root Colonization
03Biophysics and Bioenergetics of Nutrient Exchange
+ 1 more learning modules
11h4 modules
Explore Roadmap
biology
Circadian Clocks: TTFL, SCN & Periphery
01Foundations of Molecular Biology & Gene Expression
02Introduction to Chronobiology and Actograms
03The Core TTFL: Molecular Architecture of the Clock
+ 3 more learning modules
14h6 modules
Explore Roadmap
biology
Population Genetics: Math, Drift & Selection
01Genetic & Probability Foundations
02The Hardy-Weinberg Principle and Baseline Models
03Mathematical Modeling of Natural Selection
+ 3 more learning modules
18h6 modules
Explore Roadmap