
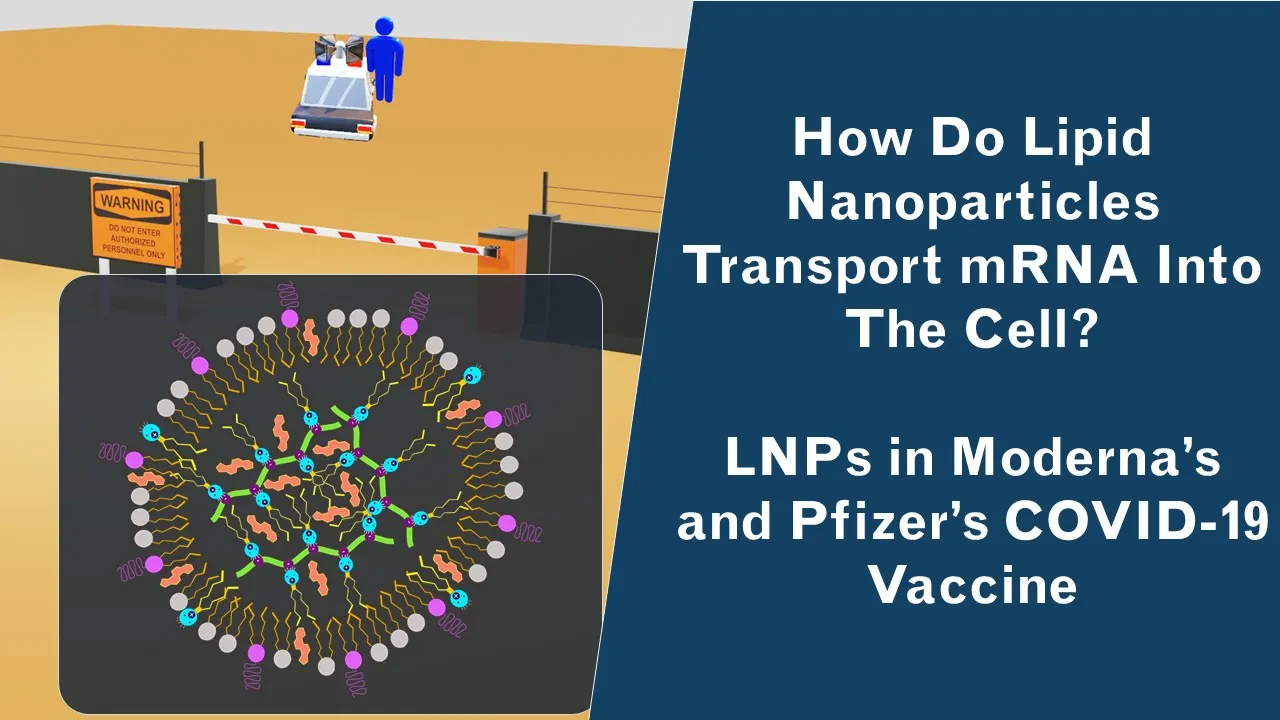















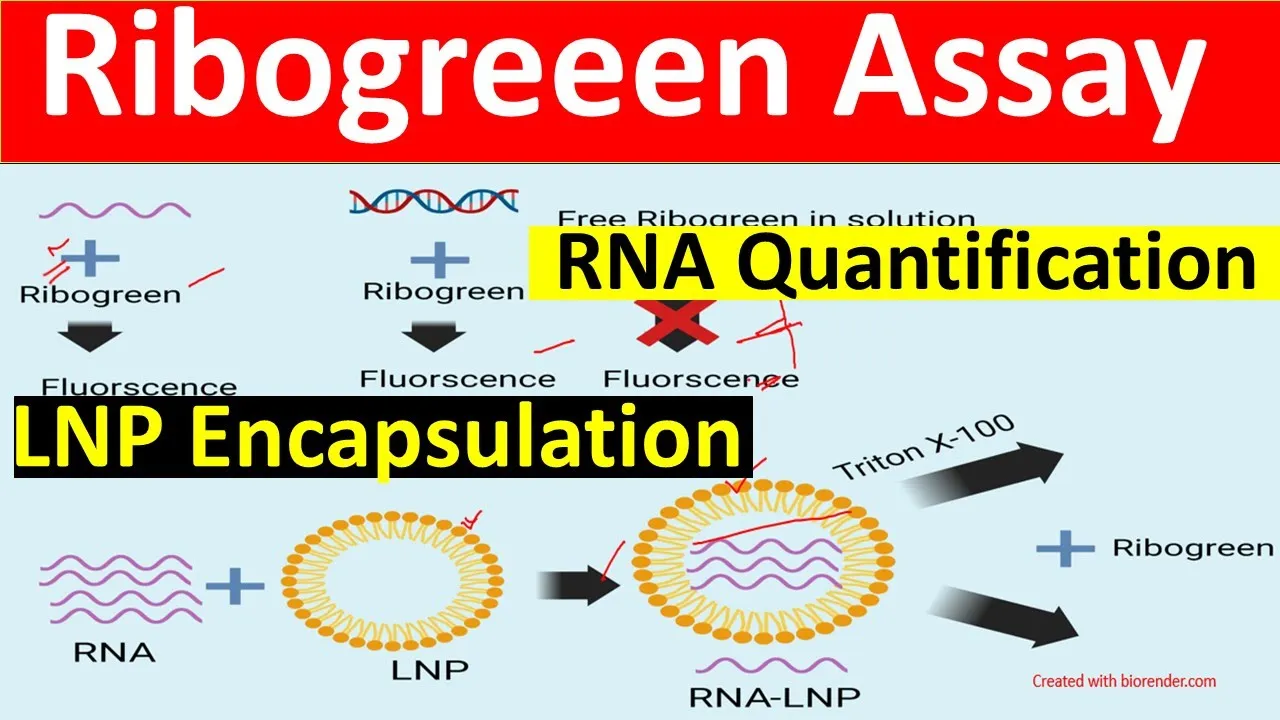






The modified Ribogreen assay quantifies RNA encapsulation efficiency in lipid nanoparticles by measuring the difference between total RNA (measured after lysing particles with Triton X-100) and unencapsulated RNA (measured without lysis), using a fluorescent dye that specifically binds to RNA; the assay involves preparing 1x TE buffer, diluting RNA samples to fall within the standard curve range (0.12-2.5 μg/μL), plating samples in a 96-well plate with Triton-treated and non-Triton-treated wells, adding Ribogreen reagent diluted 1:100, and calculating encapsulation efficiency using Excel with blank subtraction and standard curve analysis.
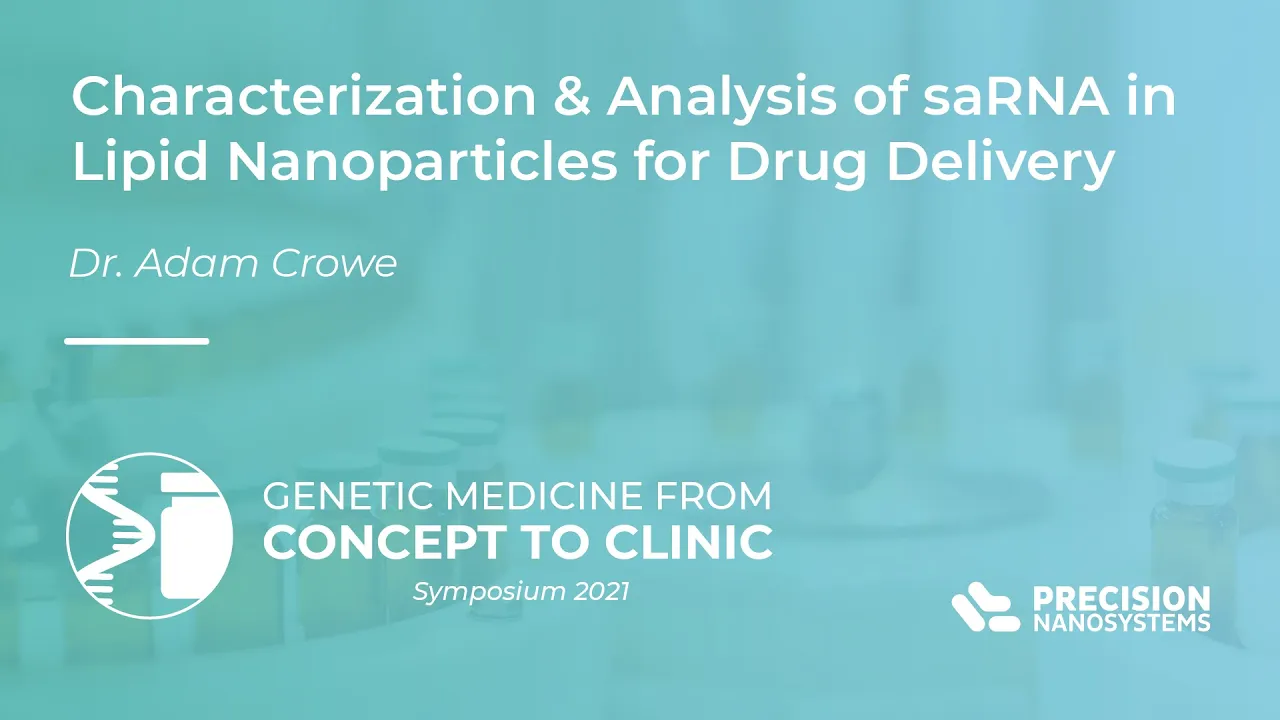
Quantifying RNA Encapsulation in LNPs Using the Modified RiboGreen Assay
Added:Fundamental structure and components of Lipid Nanoparticles (LNPs), including ionizable lipids, helper lipids, cholesterol, and PEGylated lipids.
Basic principles of fluorescence spectroscopy, specifically how fluorophores interact with nucleic acids to emit light.
The chemistry of RNA, including its stability, vulnerability to RNases, and structural differences compared to DNA.
Principles of quantitative analysis, including preparing standard curves, serial dilutions, and using spectrophotometers or microplate readers.
The role of detergents (such as Triton X-100) in disrupting lipid bilayers to release encapsulated cargo.
Complementary LNP characterization techniques, such as Dynamic Light Scattering (DLS) for particle sizing and Zeta Potential for surface charge determination.
In vitro and in vivo transfection assays to correlate RNA encapsulation efficiency with functional gene expression or knockdown.
LNP stability testing protocols, exploring how encapsulation efficiency changes over time under various storage temperatures and pH conditions.
Quality Control (QC) and regulatory standards (such as GMP) required for scaling up LNP-RNA formulations for clinical use.
Advanced formulation engineering, such as modifying lipid ratios or incorporating targeting ligands, and evaluating their impact on encapsulation and release kinetics.
13.3K views110likes42:19Original Release: 2020-06-27
well everyone thank you for joining us today on behalf of the east team I'd like to say welcome just some quick introductions here my name is Jason Coleman on the fabrication scientist the other members of the east team which is the eastern part of North America includes todd quick off he's a sales director of the region sri kakou manu who's a manager of new england region and then pratik Goswami who is the field application scientist for the New England region so you know thank you again for joining us and the topic today we're going to talk about you know using the Reiber green assay to measure RNA encapsulation inside a lipid nanoparticle next week June 17th at the same time our next webinar I just want to introduce this this to you the speaker is going to be dr. David Evans who's the chief scientific officer at Saren omics and he's going to talk about the work that ceramics had done using our Nano assemblers GMP system where the next gen micro fluidics technology to scale up a nanoparticle containing two different SI rnas and this was all done under GMP conditions all right so with that being said let me get started with where we're going to talk about today so the topic today as you all know is is we're gonna be quantifying RNA and lipid nanoparticles using a modified private green assay and then and the reason for the modified comes into play is because it's modified with the sense that we need to measure RNA that's encapsulated inside of a lipid nanoparticle so as well as doing the essay itself yeah we'll go through those modifications and how that is done so as I mentioned earlier my name is Jason Coleman on the fed application scientist for the North American Eastern region so I'm going to give some intro about the Robert Greene assay and how and kind of the overview of the of the assay how it's going to work and after I got through a few slides and then we're going to go to a video which is going to feature Andrew Brown he's our D scientist that works out of our headquarters in Vancouver and he's going to take you through a step-by-step procedure on kind of hands-on how to do the actual essay and then when he and rehearse today Andrew Dunn is going through the essay it'll come back to me and I'll walk you through how to do the calculations in Excel and then at the end you know we get to all your questions pratik is going to is going to come on board come online and he'll be the moderator for for posing those questions and helping answering them so just to get started here so go through some background of the essay itself first thing when I ask ourselves is so why do we need to quantify RNA and really and ultimately what does the essay want to tell us so we really need to know the accurate dosing and what this essay will tell us it'll tell us the amount of encapsulated RNA inside of the lipid nanoparticle and that's important because our dose is going to be based on the amount of RNA that's encapsulated and then I'll also tell us the encapsulation efficiency which is a you know a measure of how much of our RNA gets inside that lip banana part of them gets encapsulated and that's important because you know it's it's a you know poor encapsulation efficacy can result in poor biological activity and the other thing being it's also a sign of kind of our quality where if we have you know poor encapsulation efficiency you know either the the formulation is isn't good or the process isn't is it good for the lipid nanoparticle and then it's you know if you know your encapsulation efficiency is you know you can you can see if there's any changes in product quality over time with as you run you know different formulations and also it's a way you know if you're looking at your product stability or the stability of the lip banana particle you know to be able to maintain that that encapsulation efficiency is being maintained over time to make sure the you know RNA that leeching out of your particles or the particles aren't being damaged by some way shape or form so you know as a quick kind of summary so what so why Reiber green as the SA so what Rio green is it's ultimately a dye that flores's went bound to RNA so it gives you a very high detection limit and it's you know as opposed to UV quantification method yeah where you'd be prone to interference from other things and solutions are particularly in this case interference from the lipid nanoparticle and if we look at the essay itself here cuz what we want to do for as far as for encapsulation efficacy and what the what the assay will tell us is we want to know the difference between the amount of RNA that's inside the lip and nanoparticle versus outside the liver that banana' particle and a big part of the assay what we'll go through is you know tune there that difference but there's no so there's no easy way to measure the encapsulation over the RNA that's encapsulated directly you know part of the essay is why singh but the lipid nanoparticles and then measuring the RNA after it sliced out of the particles and one thing to note here you'll notice so that so the Reiber green assay is specific for RNA so we'll go through you know a lot of these procedures in reference to RNA but just know you could use a peeker green assay for DNA and really follow the same procedure that's what we're going to talk about kind of the overview for the modify driver green essay and this is what what andrew is gonna go over with you and I'll just kind of give us some right here so step one it's gonna prepare your buffers which includes a te buffer and then also your Triton buffer and then also you know diluting your your RNA to be within this standard range of the essay and then plating all of your samples in a 96-well plate then finds I'm mentioning applying to try into your lice the the particles preparing the standards and then ultimately incubating the particles so that it can be lice preparing the reagent and then it'll come back to me so we can do use a farce on plate reader to measure the person's values and I'll go over with you in Excel how to do those calculations so we do have a video we like to go to now and this video it is a recording just a heads up because just to be able to fit this within the confines of a webinar we did want to preview some things the Andrew goes through to just bear that in mind as we go through it everyone my name is Andrew Brown I'm a scientist here at precision data systems so today I'm going to be walking you through how to run a rival green assay and that's for measuring the concentration of encapsulated mRNA inside the LM piece so this assay is based off of a modification of the rival green assay from in vitro gen so when you buy the rival green kit from envy children it comes with a couple different components the first is te buffer so this is it comes as 20x te buffer which we're going to dilute down to 1x te and that's going to be the W went for this assay next is the rival green reagent so this has already been allocated out we usually aliquot it in the dark and keep it in the dark and then only use a single aliquot once for this assay as it is light-sensitive the other component of the kit which is not shown here is an RNA standard you can use the RNA standard that comes with the rebel green kit however if you have very sensitive dosing requirements we do recommend that you use the mRNA that you're going to encapsulate in your LM piece so when you prepare the mRNA for your egnyte formulations just set aside a little bit for preparation of the standard so now we're going to start with the plate setup so in this in this assay we we are going to be using the first row a as a reservoir for setting up the rest of the plate so step a is just a mixing mixing step and then the plate the wells that are actually going to be red are in rows B C D and E so B and C are replicates and DNA are replicates B and C are going to contain our sample te buffer and Rabbo green reagent so these are going to be measuring only the mRNA that's on encapsulated on the outside of the LM piece then for rows D and E that's going to contain sample rival green and tea with tridon better so the tribal buffer is bought separately and we're using this to burst DLN piece so by doing this we're going to be measuring the total mRNA concentration so in this acid what we're going to do in order to get being encapsulated mRNA concentration is measure the total mRNA concentration in rows D and E and then measure the unning capsulated in rows DNC and subtract those two get the encapsulated concentration finally we'll use rows F and G for plating our standard the first step of this protocol is to do the buffer preparation so the first thing we're going to do is prepare our 1 x te [Music] I'll just take a moment to explain how we know how much sample to add to our assay plate so the important thing to start with is the concentration range in the standard curve for this assay so the concentration range is 0.12 2.5 micrograms per mil and so we're gonna want to aim for the concentration of our sample in the well to be somewhere in the middle of the standard curve so we're gonna aim for about one microgram per mil of our sample in the well now when we're preparing our lmps and if you're following the gen Boyd protocol the last step is to concentrate your sample using a makan central filtration units and we typically recommend that you concentrate back to the original volume of the formulation so for example if you started with 2 mils of formulation then you'll concentrate in the a makan back to about 2 miles in this case you will end up with an mRNA concentration in the range of somewhere between 20 and 150 micrograms per mil in this case the volume of sample that you'll want to add into the first row is 15 microliters however there are some cases where you may want to concentrate your sample further for example for higher dosing so in that case we're gonna need to add less sample so you stay on the standard curve so I have two sets of samples here these first ones I were following the typical Jen Boyd protocol and just concentrating back to the original formulation volume and these ones I've concentrated further so with these samples I've concentrated them to one third of the original formulation volume so I'm expecting our concentration three times higher in that case because for the original samples we normally add 15 microliters I'm only going to add 5 microliters for these samples so now that we have our tridon buffer dissolved we can start doing the plate setup so in order to do that the first thing we need to do is load te buffer and then our sample in to grow a [Music] [Music] and now to continue our plate setup we need to start filling rows B and C so these are gonna be our T only wells so we're gonna again use a multi-channel pipette and add 50 microliters of T you you so now our next step is to add the Triton buffer into rows D and E so again I'm going to be using a multi-channel to do that and so we have to be a little bit careful when we're pipetting the titan because it is a surfactant and so it tends to bubble a lot so I'm going to be using a reverse pipetting technique in order to do that because having a lot of bubbles in the well can affect the fluorescence reading also make sure that the multi-channel pipette that you're doing can hold a mess valium so even though I'm only pipetting 50 microliters I'm using a 300 micro litre pipette here so to do this I'm gonna start by depressing the plunger all the way to the second stuff then drawing up my liquid all the way to the top and then I can go up and down a couple of times and you can see already there's a lot of bubbling so I'm just gonna depress it all the way again and try again you can see a lot of bubbles happen with Titan so now that's pretty good there's not too many bubbles in there now to do my sample addition I'm only going to depress to the first stop in the weld and I can just go directly I don't need to eject all the liquid yet I can just go in for my second one you so just to summarize the plate setup that we've done so far we've added our te buffer and sample into row a so that's an initial dilutions and we're also going to be using row a as a reservoir for adding our samples into the subsequent rows we've added te buffer which our replicates are in two rows B and C so those are two replicates and then two replicates of our triton samples in rows D and G so now what I'm going to be doing is adding our moving art our sample from Rho a into B C D and E you and we just want to make sure because I only was using a 15 micro litre pipette that we pipe it up and down a couple of times at least five I think this is a little bit loose you right and then we're gonna go down each route and again do a little bit of mixing [Music] [Music] so the next step in our particle is going to be setting up the RNA standard to do that we need to first figure out what the current concentration of our mRNA is so that we can figure out what dilutions we need to do in order to prepare the standard for the assay so I have a small outline of my mRNA here and I'm gonna use the nanodrop first to figure out what its current concentration is this RNA is just in water at the moment so I'm going to first blank the nanodrop with water [Music] [Music] so now that our blank is done we're ready to measure our sample [Music] and test measure [Music] okay so it's reading 1876 micrograms per mil so now I'm gonna do a quick calculation to figure out what concentrate or how much of this RNA I'm gonna use to prepare my standard so I'm looking for a total concentration of twenty micrograms per mil and then so currently at 1876 micrograms per mil so you need to do quite a big dilution in total we need less than 100 microliters we're setting up the standard in the plate but I'm going to prepare a volume of 200 microliters so that we have a little bit extra and often people will typically do more than one essay in a day so I'm just doing c1v1 equals c2v2 type calculation so okay so I need to add 2.13 microliters of my mRNA stock in to 198 microliters of T so I'm just gonna get that set up I have a tube here for my RNA standard you I'm just going to take directly from our team reservoir 2.13 microliters of our RNA [Music] because I I pad it's such a small volume I'm just gonna use the 200 again to make sure it's nicely mixed up and I'm just also going to be blank the nanodrop because the first time we've linked in water and now this is in te so I'm gonna read blank with titi that's the blank you so in the rival dream protocol in order to set this standard up we need to have a starting concentration of mRNA of 20 micrograms per mil and we need the concentration range to be fairly narrow because even a small difference in the starting RNA concentration in the standard could play a big role in the actual concentration that you calculate so for example a 2 microgram per mil difference when you start from only 20 micrograms per mil is actually 10% so that means that error will carry forward and your concentration could be up to 10% off of the true value so we want to keep that this standard preparation as close to 20 micrograms per mil as possible and the acceptable range that we're looking for is about nineteen point five to twenty point five micrograms per mil so what I'm reading here is twenty four point three micrograms per ml which means I actually need to dilute this a little bit more so I'm going to do a dilution with T and so I'm because I'm over I can also do a c1v1 equals c2v2 type calculation okay so because I'm over I need to do a dilation and the total volume based on this current RNA concentration that I need is 243 microliters so the current volume is 200 so I need to add an additional 43 microliters I'm actually not going to do this all at once I'm going to do this a little bit empirically where I'm gonna say add about half the volume so about say 23 microliters to start remesh and see where the concentration is at the reason for doing it this way a little bit stepwise is so that we don't fall below 20 micrograms per mil because now then we'll have to do the opposite where we add more RNA probably overshoot and then have to bring the concentration back down again so to avoid repeating these steps I'm going to slowly bring the concentration closer to 20 micrograms per ml [Music] [Music] all right so 20.1 sore almost exactly at 20 micrograms per mil so as you've seen here it is quite common to have to adjust this several times to get the concentration just right so now that we have our RNA standard at the right concentration we can start plating our standard so first I'm going to add te into each of the standard wells so that we can then add the RNA Center to the TE and then I'll end with tripe and this is all listed in the table in the Bible game protocol so I'm just going to start plating all of my TG Sh so the standard is going to be plated in rows F and G and I'm going to plate them from largest to smallest concentration so the first one is 25 microliters of GE - 40 microliters you [Music] [Music] and so that's our plate setup for now the next step in our protocol is to incubate the plate at 37 and that will help the Triton to break out the lmps in the Triton wells and then we can continue gassing alright so this plate is going to go into the oven at 37 degrees for 10 minutes alright so now that the plate is out of the oven it's good sleeping for about five minutes on the bench to let it cool to room temperature before opening it up but now we're ready to start preparing our rival green reagent so the first thing we need to do is calculate how much of the rival green reagent we need to prepare for the plate so I'll start by figuring out how many wells we need to a drive of green so that's gonna be all of the wells that have te all the wells to have Triton and the standard so we have four samples plus a blank so five columns and then to te rows and - Triton rows so that's four rows in total of 20 wells plus five standards in duplicate is 10 so we have 30 wells that we need rival green reagent in I'm gonna add assume when you have about 4 wells extra just to give us a little bit more room for pipetting so I'm gonna prepare enough as if we had 34 wells now we need 100 microliters of Fryeburg green for each well so that's gonna take three thousand four hundred microliters of Reber green in total with a 1 to 100 dilation of rival green region to te so that's that'll mean thirty-four microliters of our rival green reagent added to te to make up a total volume of 3400 [Music] so I'm going to use a multi-channel pipette to add 100 microliters to every well that gets Rio green just make sure that you don't add any rival cream into row a because that's not where the samples are going to be measured [Music] [Music] okay so now that the rival green has been added just wait five minutes and then the plate is ready to be alright so the last step we have before we're ready to read the plate is just to make sure we don't have any bubbles because I can affect the fluorescence reading so the way to get rid of them is just to use a needle in case you have any bubbles and you're gonna find these specifically in the wells that have Triton so either the sample or the standard so these ones are pretty good because we're using reverse pipetting but if there is any error and pipetting and air got in there you can use a needle and now that the plate is ready you can refer to the rebel green protocol because there's a list of plate reader settings that we recommend for reading this plate so I have my software open here and I'm just going to input the parameters based on the rival green protocol so we want to read this in fluorescence mode and when I click OK I want to input the excitation and emission wavelengths which are 485 and 528 so these are already default in this software the optics position we're going to do a top read which is also the default in this software I'm going to change the game to 55 and change the read height to 8 millimeters and then I'll click are okay for this assay we don't need to setup any temperature shake or dispensed so I'm just going to click through and that will open up my the port for the plate and once the plate is I'm just gonna click okay and it started reading the Pleasants from the plate so in row a we don't really see any signal because we didn't add any rabble green region so it has very low background and now that the TE and triton wells had started to be red you can see that there's much more signal coming from the triton wells because this is measuring the total RNA whereas the TE wells are only measuring the of encapsulated and mRNA so this is actually what you want to see where the majority of the signal is in the Titan wells with very little signal and it's us because this indicates high encapsulation efficiency okay and you can save your data and export it and do the calculations in Excel afterwards if everyone got a lot out of that so let's go through the excel sheet and how to do the calculations so bear with me you know going through Excel can be tedious but yes so part of like when we do training with any equipment like it's not just always how to run the equipment it's also how to do these assays and measure encapsulation also you know so anyone you know who has nano or nano assembler platform has access to this excel sheet I'm about to go over with you so yeah so what you'll see here that I haven't open on my screen here I hope everyone can see it okay but in the end excel file there'll be three different sheets one is plate setup which is basically gives you a template for where you want to put all the values that are in your 96 12 plate the other one is RNA quantification which is where you're going to put your actual values and where the calculations will be done and the other one is your dilution factor calculation to calculate cost when you you diluted the sample so to calculate how much that sample was diluted but let's start by going through plate set up first then go through each one of these in order so in green here kind of it's green because this indicates where you would enter values into and then the blue is where all the the output outputs would be from Excel so first thing you look at is right here so you'll see so you can see here's your sample ID and you see this is without Triton and this is with Tryon so this will be not why cells this would be the RNA that's on the outside of the particles and this would be your I started said it's your life's particle so this would be the total amount of RNA both inside and outside so we can see here did you see it's a sample of 1 through 11 so because you have a 96-well plate you could do up to 11 different samples on one plate so 11 different columns and then the 12th column is always going to be used for your blanks but if your te blank and then you're trying blank as well so and then and here's where you put your donation factor which I'll show you how to calculate now I'm the sample that Andrew had done he did four samples so the four rows sorry four columns or the four different samples on the fifth column was the blanks so as far as where you put in your information for your blanks like here's where you put in your information from your standard curve and then you have your blank from your your train and then also the blank from just your te buffer because that ultimately gets subtracted out from you from your readings and I'll show you that I want to get to the actual calculations all right so how do you do dilution factor so you remember Andrew did two different concentrations he did the samples 1 & 2 or just the standard it was brought back to the to the same volume as I was coming off of the health of an assembler and then he had another sample that he concentrated it 3 times further so one that samples he took 15 microliters so he took 15 microliters and added into row a so when he do that he diluted it 15 microliters into a total of 250 microliters which was the vibe in row a and then he Alec wanted from that into the rows BC DNA so he took 50 microliters into what was a total 200 microliters so when he took 15 microliters and added to row a that was a dilution factor of 66.7 and then when he did the more concentrated sample here he took 5 microliters and then he had a higher dilution factor of 200 so the reason the dilution factor is important is when you're doing the readings in the in the plate it's going to gaps to give you the concentration the plate and then you want to multiply that reading times your dilution factor to figure out what your starting concentration was all right so now doing those calculations so here so you see this is the same setup as this just this is just where you put in your actual values so here is his columns 1 & 2 so it samples 1 & 2 & then columns 3 & 4 where you had is this is normal and then is more concentrated and more nal and peas so first thing you notice so that the the values without trains are the non lice particles you get a lower reading lower fluorescence because obviously this is just the RNA that's not inside the particles and then the width Triton that's always a much higher reading because that's where your particles are life so this includes everything but it's inside and outside the particles so that's that's your two values there and then with your blanks what you'll see so this was your blank with training and this was your blank without training so the first thing you notice is that the blank so this is just your PBS and trying this you're just your PBS and te buffer so this was column 5 that Andrew had done this was Road PNE and this is where B and C but you notice that with Traian is a higher fluorescence than without so you can see right away that the Triton does give a little bit of fluorescence so what we're going to do and I won't go into all the you know backwards that the calculations basically the width training we're going to subtract out the absorb the fluorescence is from train and without train will strike out their fluorescence is from from from just a te buffer and the same with our standards because our standards have traded them as well so we'll subtract out the average of these values from our standard readings to and then what that will give us is it allows it so what it will give us it will give us our encapsulation efficiency and our calculation efficiency is a measure the percentage difference between our with and without right and reading and then because we have a standard curve we can it's a linear standard curve and here's our equation for the curve it's just I say curve it's just a lines it's just y equals MX plus B and then you can get r-squared just this to give an indication of the fit so you'll plug your absorbance values into that standard curve but that'll give you a turtle concentration reading so that's the total amount of RNA both inside and outside of the particle but what we really care about is the amount of encapsulated RNA because that's what our dose is going to be based on for doing anything further in vitro or in vivo studies so that's calculated by our total amount times our encapsulation efficiency and that gives us our encapsulated mRNA concentration which ultimately is or is our working concentration and here you can see here you know this is this is just a standard mRNA LMP coming off of the Nano assembler and then here you see the more concentrated LM peas and peas here so that's all well thank you Jason hi everybody thank station for the wonderful presentation and thanks to Andrew for actually walking through all the different steps involved in arrival Grand Ave I'm sure this will be helpful for a number of of our of our customers who are new to this or somebody who have been doing it for some time even for those just knowing all the nitty gritty thank you thank you everybody I hope I hope you learned a lot and look forward to working with a lot of you too thank you very much
Up Next

7:27
Learn to Play Your First Drum Beat Without a Drum Set
@COOP3RDRUMM3R
251K views•2015-10-19

12:54
Triumph of Orthodoxy Icon: Byzantine Art & History Explained
@BenCallan
2.1K views•2024-08-06

9:49
FastAPI vs Flask vs Django: Choosing the Right Python Web Framework
@TechWithTim
302.5K views•2024-05-26

1:42
Game of Thrones Opening Credits: A Cinematic Analysis
@gameofthrones
46.3M views•2011-04-18
Related Study Plans & Knowledge Roadmaps
Structured learning paths in General & Interdisciplinary Studies
general-studies
Elevator Engineering: History, Physics & Cities
01From Hoists to Safety Brakes: The Dawn of Vertical Lift
02Hydraulic vs. Traction: The Engineering Physics of Elevators
03Modern Speed, Safety, and Algorithms
+ 2 more learning modules
12h5 modules
Explore Roadmap
general-studies
Rubber: Material Science, History & Geopolitics
01Origins of Natural Rubber & Mesoamerican History
02The Chemistry of Natural Rubber & Vulcanization
03The Geopolitics of the Rubber Boom & Colonization
+ 2 more learning modules
12h5 modules
Explore Roadmap
general-studies
Containerization: Evolution, Logistics & Trade
01Ancient Trade & Bulk Cargo: Amphorae to Barrels
02The Industrial Revolution & Cardboard Packaging
03The Containerization Revolution: Malcom McLean
+ 2 more learning modules
12h5 modules
Explore Roadmap
general-studies
Textile Tech: Evolution, Labor & Global Impact
01Pre-Industrial Textiles: Handloom & Cottage Industry
02Mechanization: The Spinning Jenny to the Power Loom
03The Factory System & Global Labor Transformation
+ 2 more learning modules
10h5 modules
Explore Roadmap