








![[35 phút] điều khiển motor encoder - sừ dụng QEI module - PIC18F4431](https://i.ytimg.com/vi/sYh2bfcbVe0/maxresdefault.jpg)









![[WORKSHOP] MEMBANGUN WEB DASHBOARD UNTUK KENDALI DAN MONITORING ARM ROBOT](https://i.ytimg.com/vi/_cf626UfCgw/maxresdefault.jpg)



In robot design, lowering the center of gravity by adding mass to the bottom or repositioning existing mass improves stability and reduces tipping, while dynamic mass shifting can counteract unwanted wobble; this principle was demonstrated by adjusting the BB-8 droid's flywheel position and adding shims to achieve better balance and control.
BB-8 Droid Build V3: Flywheel & Head Rotation Testing
Added:Principles of angular momentum, rotational inertia, and how flywheels store and transfer kinetic energy for stabilization.
Fundamentals of rigid-body dynamics, including center of mass, gravity offsets, and balance in spherical rolling mechanisms.
Basic control theory, specifically PID (Proportional-Integral-Derivative) feedback loops used for precise motor speed and position control.
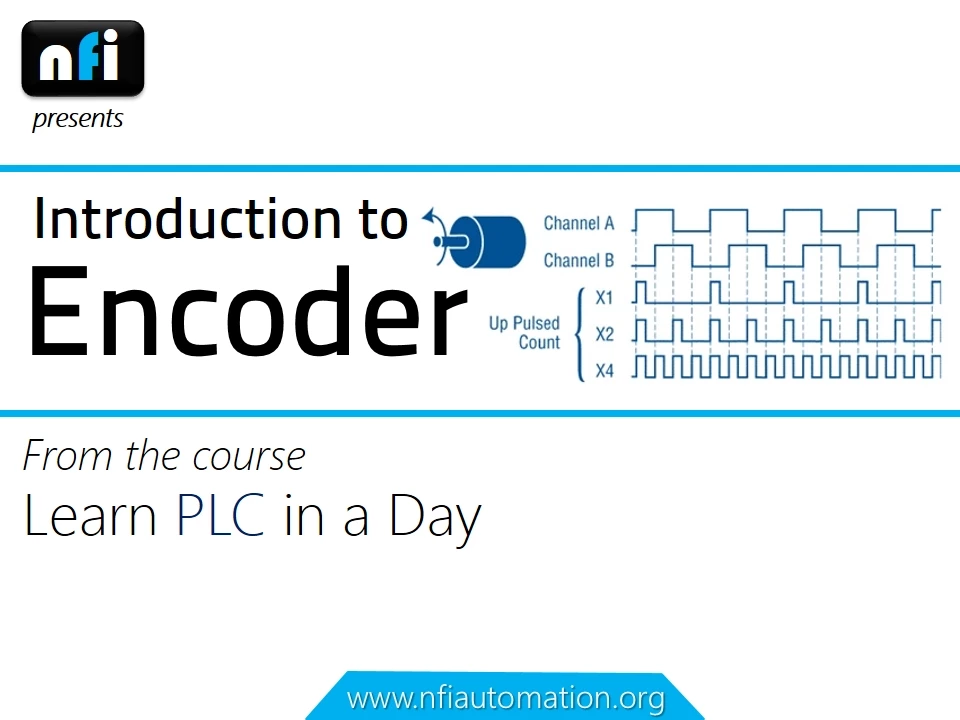
Introduction to mechatronics, including microcontroller integration, motor drivers, and optical or magnetic encoders for feedback.
Advanced sensor fusion techniques, such as combining IMU (Inertial Measurement Unit) data using Kalman filters for active stabilization.
Non-holonomic motion planning and kinematics specifically designed for spherical and omnidirectional mobile robots.
Design and implementation of low-latency wireless communication protocols and telemetry systems for real-time robot monitoring.
Comparative analysis of alternative drive architectures, such as magnetic coupling systems and multi-axis internal drive configurations.
83.1K views1.9Klikes19:07Original Release: 2016-04-08
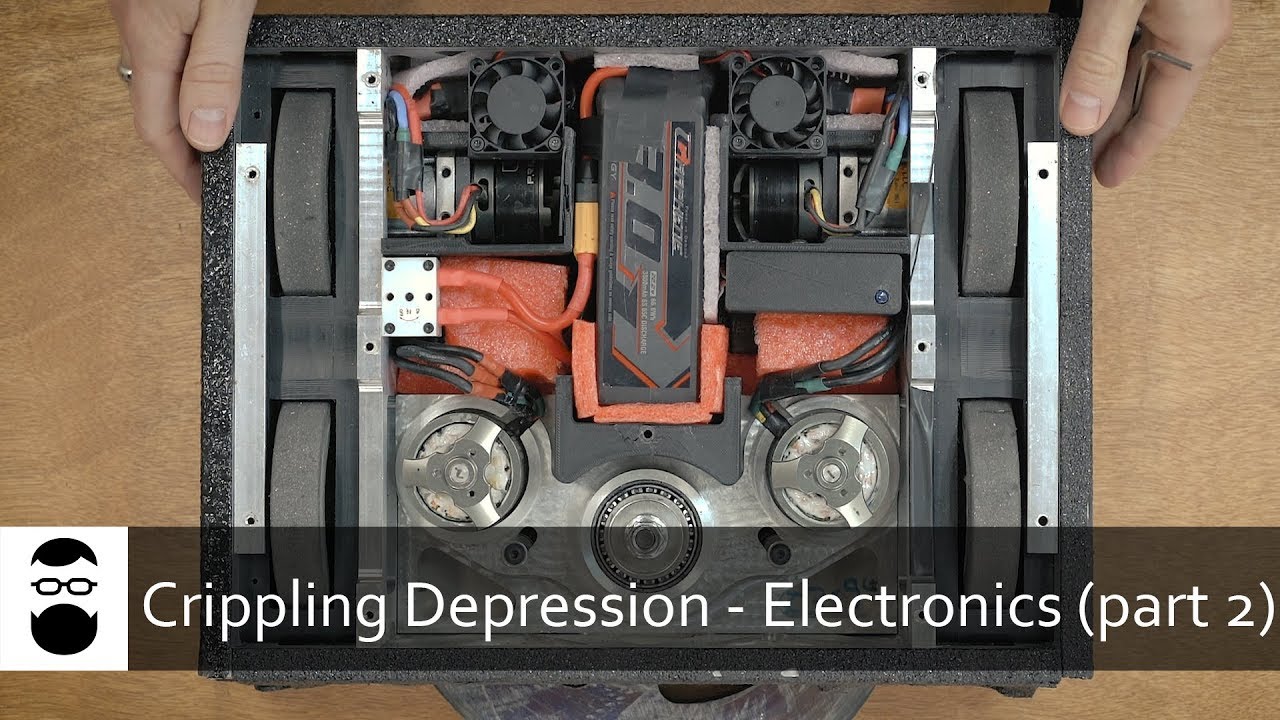
hello it's James from X robots. co.uk this is part 10 of my bb-8 version 3 build I've got quite a way along with the build and last time we did some driving testing and that's stabilizing side to side by moving Mass dynamically to kill the wobble and also front to back although there are some ridges in the ball still so it's quite hard to tell how well that's working but it should be working as well as at least version two which you can see in my channel already we've got some stuff working with the head it still doesn't rotate and my fly wheel doesn't spin which will help this spin on the spot so those things we're going to try and do in this episode last time I mentioned I was feeling a bit topheavy so although I can kill the wobble it's not as good as it should be and it's still possible to tip this over of course with the sides on the ball that won't be quite as easy but I really want to make it a little bit more stable and I was thinking about ways of putting more mass in the bottom or lowering the mass so I've had some thoughts about that since last time so let's take a closer look the plan was either going to be putting some more mass in Pockets down here or moving down the main mass that I've got already and this is the flywheel that spins to turn on the spot so that has 6 kg of lead in originally it was mounted higher than I wanted and there's a gap just here of about 15 mil where I've moved everything up and that was because as this swings sideways it hits the guide wheels in the bottom otherwise so I'd have to make those guide Wheels smaller so I can move this back down I'm not sure I actually want to do that because the guide Wheels work quite well the size they are and obviously they'll be um well they'll have to turn faster basically if they're smaller and there'll be more force on them so quite happy with them being that big and it runs quite well at the moment similarly if I put more mass in the bottom then um then the whole thing has to carry more mass which means the plastic frame is more likely to bend and so on um although it probably perform better and I think it might be aave a little bit more uh what I remembered though was I actually moved this up further than I had to and that's because I put two screw holes in the side when I made it you can just see one there and there's one above it that maybe you can just see it's hidden behind those and those are 15 mil apart and that's basically why it's 15 mil higher cuz I just used the next screw hole in fact I only really needed it to move 10 mil higher so what I'm going to do is put it down by 5 mil by printing a shim to fit in here and screwing it from the top and then we'll see how that performs and if it makes any difference at all I've made some shims which are 10 mil and also one that's 5 mil so those are going to fit in that Gap there which is currently 15 mil so it can drop down so got two 10 for that and I need one to go and go underneath the pot Mount so I put a pot that measures the side to side motion which is basically mounted on that bracket so that's going to need to stay where it is so I've got a smaller 5 mil shim to go under that so instead of being 15 mil higher everything's 10 mil higher and because I'm moving it down by 5 mil the pot goes 5 mil higher on top of the piece that's moving down but we'll get those fitted and see how much better it drives going to give that a test with the mass lower it was a bit harder to tune up because of course the reaction force of the mass is better when it's higher up because it pushes the ball side to side more easily at the bottom that part of the ball stuck on the ground so um I do seem to have it fairly stable though and it's feeling not as topheavy so I think this might be where I actually leave it I think this is a good compromise between putting lots more mass in the ball and uh you know having those trousers higher or lower so um if I just drive forward here seems to work pretty well you can see that the front are back wobbles still there but side to side we've pretty much killed it now so um under normal driving circumstances let go back again there's a bit of A Wrinkle In My throw in the middle which is upsetting it a bit be better if it was smooth carpet tiles but anyway I can of course steer have to be careful not to tip over but let's just make a gradual turn that way let's see seems to work okay let's just very carefully go back over here so I've got a bit of side to side wobble there but you can see eventually it justes settle fairly quickly and I can Ste by moving the head around so if I move the head slightly to one side and just drive forwards we should be to see that's quite a good way of making a gradual turn as well so uh not too unhappy with that [Music] let's just go back that way a bit if I do end up stuck on one side or I end up with some wobble then it does deaden out there's a bit of a wobble but on the whole this is much better than version two just having something there to help stabilize it so I'm pretty much okay with this on the whole let's just put that head over and go over this way a bit hey it seems quite bbsh um it's going to be much better without this this wobble when I've smooth the ball out but I'm pretty happy with the way that drives it's pretty controllable um and it is you know pretty quick as well I'm driving over the ridge in the cloth there that's what's happening I can throw it around quite a bit and I can still get it to uh pretty much do what I want so when the ball's smooth and it's got the side on it's going to be a lot of fun I think I think there's going to be all sorts of tricks like doing fast three-point turns and things but on the whole whoops um pretty happy with the the sort of Dynamics and the overall balance I think I've been thinking about this for a couple of days and I'm not actually sure if putting the mass shifting sideways so low is a good idea because obviously the bottom of the ball doesn't move CU it's stuck on the floor it moves more at the top so to actually stabilize it would make more sense to have that Mass higher as long as it doesn't actually tip over so I'm not sure if the answer is that that should be higher perhaps and I should have more static mass in the bottom that keeps it upright but the side to side of the trousers there will actually help it kill the wobble um it's a bit annoying really because I can't really drive it properly because the ball's not smooth so as well as getting wobble this way where it wobbles on The Ridges that then causes some other wobble and if there's any side to side I end up kind of mixing around in a circle and it never Settles it's really hard to sort of tune up and tell what's going on so also my head won't move directly sideways without moving forward which causes even more wobble so what I'd really like to do is adjust those leverage angles again of the servo horns I changed last time to make that head move directly sideways and see if I can use anything there to help kill the wobble and of course that's on the top and then I can decide whether the uh Mass basically in the trousers goes this low or a bit higher or what I do so um I can't really wait to skin the ball up though because then most of this will be covered and it'll be rather inaccessible so in fact what I'm going to do is spend quite a long time which I probably should have done before actually smoothing this ball out and getting rid of the ridges and what I'm going to use to smooth it off is this rasp which I bought which is quite coarse it's co from one side than the other let's just take it out of the packet so hopefully you can see this thing uh has some quite sharp teeth on and I've already had a go a bit of the ball over here and that is uh after just a few minutes it's considerably smoother on the ridge so I need to go over all of this and there's 20 sections which means basically sitting down and getting covered in bits with a vacuum cleaner and this rasp and then sanding for a few hours I should think and trying to get rid of The Ridges around this ball then I can change the leverage angles of the servos again and we can see if we can actually tune this up that will give me much more confidence before I continue that took several hours to do um it was very hard work but it is quite satisfying now to see it much smoother there are still some flat spots in it as I've discovered when testing I can still kind of feel them but obviously it's much much better than having a bump on every seam there the ball still seems pretty strong I haven't bothered to cover of acetone or anything um of course this will be skinned up I will be putting 2 mil plastic sheets over it like I did with version two so um on the whole that's going to leave it completely smooth um I had a much um less smooth ball before I skinned it a version to and it still ran okay once it was skinned up I've also done some other things so I've taken that semiflex piece there was um a kind of two-prong thing which is where the two sticks attach for the head control arm and I've just replaced that with one that goes all the way across in one continuous piece so there's no Gap in the middle allowing it to bend so that's made my head control arm a lot stiffer I've also made new Servo horns with the 30 mil radius so if you remember I did have the 40 Ms and the 20 Ms and I've made one in between so now I can move my head all around backwards and forwards left and right I've also made thicker shims and moved this thing back up again so I'm back up to the 15 mil Mark so I now have 15 mil shims in there and that's made the mass a lot higher and now it is quite a lot more stable so let's give that a drive so now the head can move backwards and forwards um I can actually in fact well let's just do that manually there we go that works pretty well and side to side of course but now of course when I drive backwards and forwards it tries to compensate and it tries to keep the head on top so as best it can anyway so as I drive forward it moves forwards whoops and it should be to pull it up as it drives backwards again so um this is pretty good now I can throw it around quite a bit I've actually slowed the controls down so it's much more controllable now I can drive much better under control as well as being able to steer with the head and with the body at the same time here is my side to side head motion which of course makes the ball tip at the moment um if I move the trousers the other way then I can stay sort of on the spot like that which eventually will be an autonomous function so that I click a switch on the remote and it sort of stays in static mode where um the internals move the opposite direction but for now I can steer pretty well and I've T down the speed a bit and I found it's best to steer with both the trousers and the head at once to try and remain stable so I'm just going to try and drive it around and do a three-point turn it's the most controllable it's been so far so pretty happy with the changes I've made and of course smoothing the ball out so let's just steer to the left and back and we'll just try and do a three-point turn there we go so I'm feeling that's um quite a lot like bb-8 and I can throw it around quite a bit still if I want to and do all of these things so with the head rotates and everything I think that's going to be um you know pretty Puppeteer whoops so we can do all sorts of things um obviously this doesn't go as fast as it did but um I'm kind of okay with that really [Music] [Music] [Music] still a few flat spots on the ball but [Music] uh I can still throw that around quite a bit if I want to just with manual controls and it stabilizes pretty quick there I think so yeah pretty good with [Music] that few wobbles but uh probably tuned up a bit tight so yeah I think this is uh as I say pretty Puppeteer it's just getting used to driving it obviously with the sides on I'll be able to do more extreme stuff whoa because there'll be less chance of [Music] that I still have the option to add more mass in the bottom of course but I think I quite like it as it is I'm not really going to decide what to do with that till I've got the sides on and we'll see how much it tips and so on when I'm doing extreme things if I'm just driving normally it's absolutely fine um obviously there will be skins on so it will be to tip right over on the side without tipping over but you'll notice in fact when it did tip over the head stayed on so that means the magnetic head coupling is more than strong enough now I do have the two Mill of skins to go on but I think I've still got at least one mil of extra air gap at the top and bottom plus a bit so I can actually wind those magnetic couplings in to compensate for that and it may be in fact that the head runs smoother when there's more of a gap because there's not so much friction pulling the head on but we're not really going to know till we do it and the ball is perfectly smooth but for now it's trying time to get some of those other features working so we're going to try and spin this flywheel now and see if we can get it to turn on the spot I'm using the same Motors as I did before and these are the Como drills 918 DS and these are 30 to1 ratio I've put them in these plastic brackets and each one of those fits into another bracket which gets solvent welded onto the trousers and then that can be hinged out and I can wedge something in there to apply pressure so that fits on the inside of the flywheel I've moved the trousers over and the flywheel right up so we can see underneath here it's quite accessible actually this is going to fit at each end so we've got two of them one that fits in each end and that will fit just up in there it's rather hard to show you without my hand in the way but essentially it goes onto that gray piece and that surface solvent welds in so this pushes on the inside of the flywheel now my flywheel is slightly bigger than the last one so it's going to go slower but it is has got more mass so it should have hopefully the same effect and I've made these wheels slightly bigger so that they should turn it slightly faster so hopefully I get a better effect than I did in version two these motors are quite small as you can see so I'm really hoping this works out but I can't test it till I've put them in the flywheel is now fitted and motorized so if I hit the stick on here now we should be to see that rotating and obviously even though it doesn't go that fast it has quite an effect on turning the Droid round especially if I go really slow to start with in One Direction and then kick it back the other [Music] way no idea how well that will work on carpet but it seems like I've got pretty much enough Force to turn it and it is pretty much all of the ballast turning so pretty happy with that obviously it's clear enough that it can do it um at various angles as well let's just see if I can lean over which is quite good so the next thing is to get the head turning and then I can try driving it of all the functions head rotation is now working so I can turn the head there is a bit of wobble in it which is slopping the magnetic coupling um so I may turn one pair of magnets up the other way which I think will help that um and also implements a pit controller so it slows down as it reaches its Target and doesn't wobble which will probably kill it completely actually and I've just stuck a paint cap on the front there so you can see which way forward is so obviously now I can drive and move the head around and uh all of those things so it's becoming quite a lot more like bb-8 if I can get rid of the wobble anyway so spinning on the spot does actually work on this cloth and it does take the cloth with it and cause a wrinkle but nonetheless if I power up slowly in One Direction and kick it back I can do a complete 180 and that works pretty well on a smooth floor I can do a 360 with that flywheel and of course if I don't drive over the wrinkles we can uh Drive normally and steer and do all the things that we could before so um on the hole sort of pretty happy with that I think it's going to make quite a good bb8 let's just give that another spin I go this way there we go so pretty happy with that I think that's going the best it can be I still have a few options like putting more mass in the bottom of the ball if I want but I really want to see how it handles with the sides on which will make me less reserved controlling it and see you know how easily the head stays on with those extra thick skins and all of those things there is some more mass to go in the head as well so I may put more mass in the bottom to compensate for it I haven't really decided yet that's the beauty of 3D printing all the parts is I can chop and change as I wish but pretty much from a core mechanical point of view I think that's the best it's going to get next time I'm going to work on actually putting the sides on and thinking about the skins and I'm not sure if that video is going to come out in a week or in two weeks or possibly longer CU making all those skins and everything is actually quite a lot of work so don't forget to subscribe to my channel to check out more updates on this project and other projects also check out the social media links in the description to this video including Instagram accounts that's all for now [Music] I [Music]
Up Next
24:59
Build Your Own Remote-Controlled Robot Platform: A DIY Guide
@MakersMuse
102.9K views•2021-04-09

12:54
Triumph of Orthodoxy Icon: Byzantine Art & History Explained
@BenCallan
2.1K views•2024-08-06

17:29
Active Omni-Wheel Design and Mechanics for Two-Axis Control
@jamesbruton
2.8M views•2022-02-01

1:42
Game of Thrones Opening Credits: A Cinematic Analysis
@gameofthrones
46.3M views•2011-04-18
Related Study Plans & Knowledge Roadmaps
Structured learning paths in General & Interdisciplinary Studies
general-studies
Elevator Engineering: History, Physics & Cities
01From Hoists to Safety Brakes: The Dawn of Vertical Lift
02Hydraulic vs. Traction: The Engineering Physics of Elevators
03Modern Speed, Safety, and Algorithms
+ 2 more learning modules
12h5 modules
Explore Roadmap
general-studies
Rubber: Material Science, History & Geopolitics
01Origins of Natural Rubber & Mesoamerican History
02The Chemistry of Natural Rubber & Vulcanization
03The Geopolitics of the Rubber Boom & Colonization
+ 2 more learning modules
12h5 modules
Explore Roadmap
general-studies
Containerization: Evolution, Logistics & Trade
01Ancient Trade & Bulk Cargo: Amphorae to Barrels
02The Industrial Revolution & Cardboard Packaging
03The Containerization Revolution: Malcom McLean
+ 2 more learning modules
12h5 modules
Explore Roadmap
general-studies
Textile Tech: Evolution, Labor & Global Impact
01Pre-Industrial Textiles: Handloom & Cottage Industry
02Mechanization: The Spinning Jenny to the Power Loom
03The Factory System & Global Labor Transformation
+ 2 more learning modules
10h5 modules
Explore Roadmap