



















The EFAST examination is a systematic point-of-care ultrasound protocol used in trauma patients to rapidly assess for free intraperitoneal fluid and pneumothorax; it consists of seven standardized views (subxiphoid, IVC, right upper quadrant, left upper quadrant, sagittal pelvis, transverse pelvis, and intercostal lung views) performed in sequence using a curvilinear or phased array probe with abdominal preset, based on the principle that free fluid appears with sharp angular interfaces between rounded anatomical structures, while fluid within anatomical cavities maintains rounded contours.
EFAST Ultrasound Exam: Step-by-Step POCUS Tutorial
Added:Basic ultrasound physics and knobology, including transducer selection, depth, gain, and common acoustic artifacts.
Gross anatomy of the thoracic and abdominal cavities, specifically focusing on gravity-dependent spaces like Morison's pouch, the splenorenal recess, and the pouch of Douglas.
The pathophysiology of blunt and penetrating trauma, particularly how hemoperitoneum, hemothorax, and pneumothorax present clinically.
The core philosophy of Point-of-Care Ultrasound (POCUS) as a rapid, binary, goal-directed diagnostic tool rather than a comprehensive radiological study.
Integration of EFAST results into Advanced Trauma Life Support (ATLS) algorithms to guide immediate clinical decision-making (e.g., emergency laparotomy vs. CT imaging).
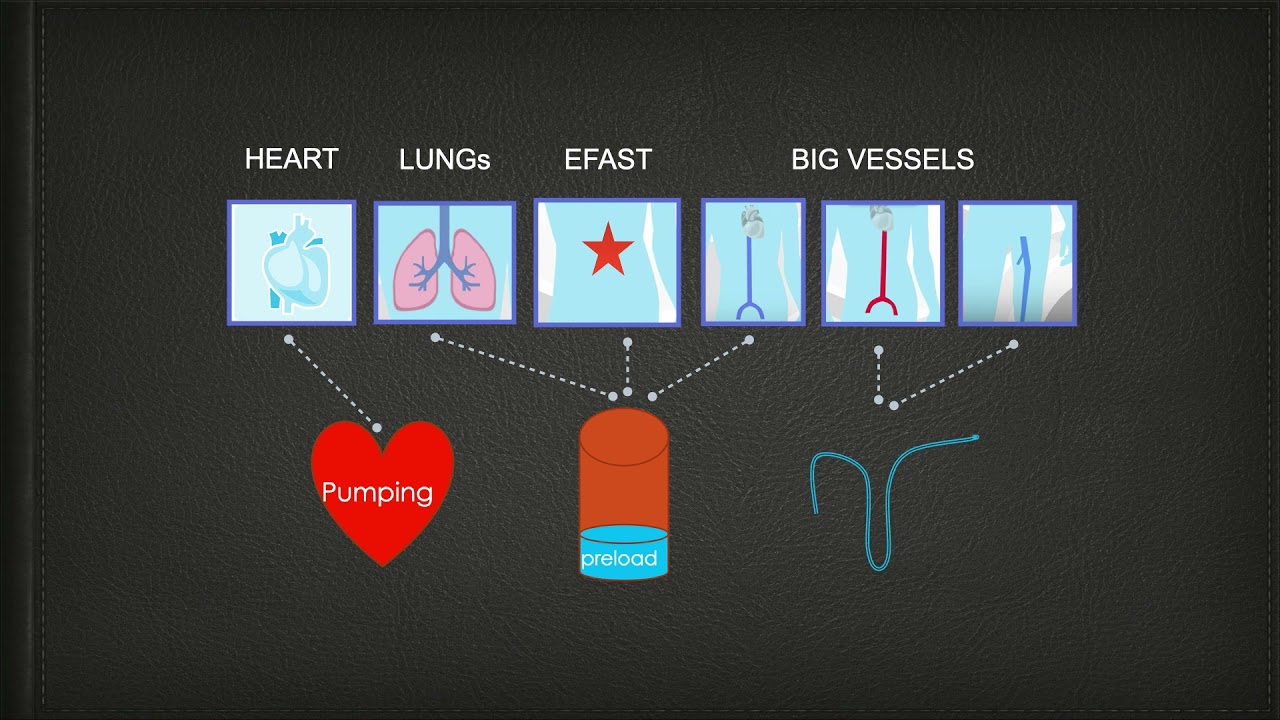
The RUSH (Rapid Ultrasound for Shock and Hypotension) protocol to evaluate undifferentiated shock by assessing the heart, fluid status, and major vessels.
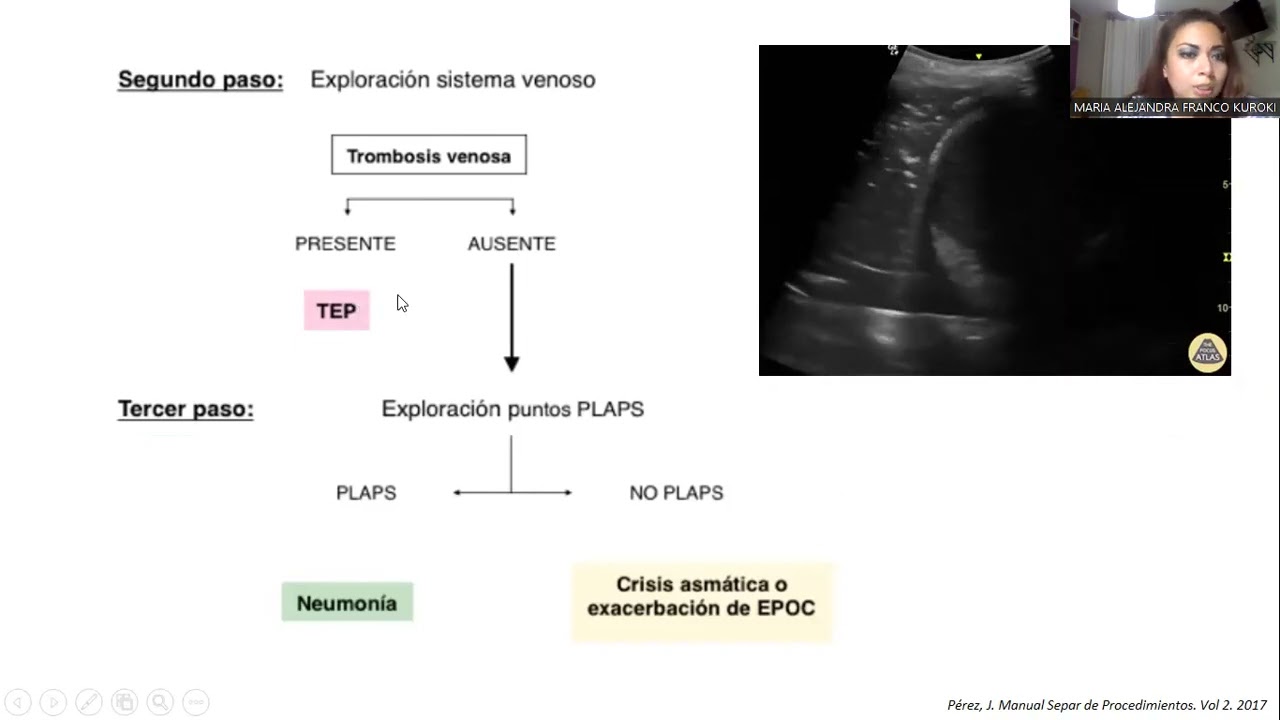
Advanced lung ultrasound protocols (such as the BLUE protocol) for differentiating various causes of acute respiratory failure.
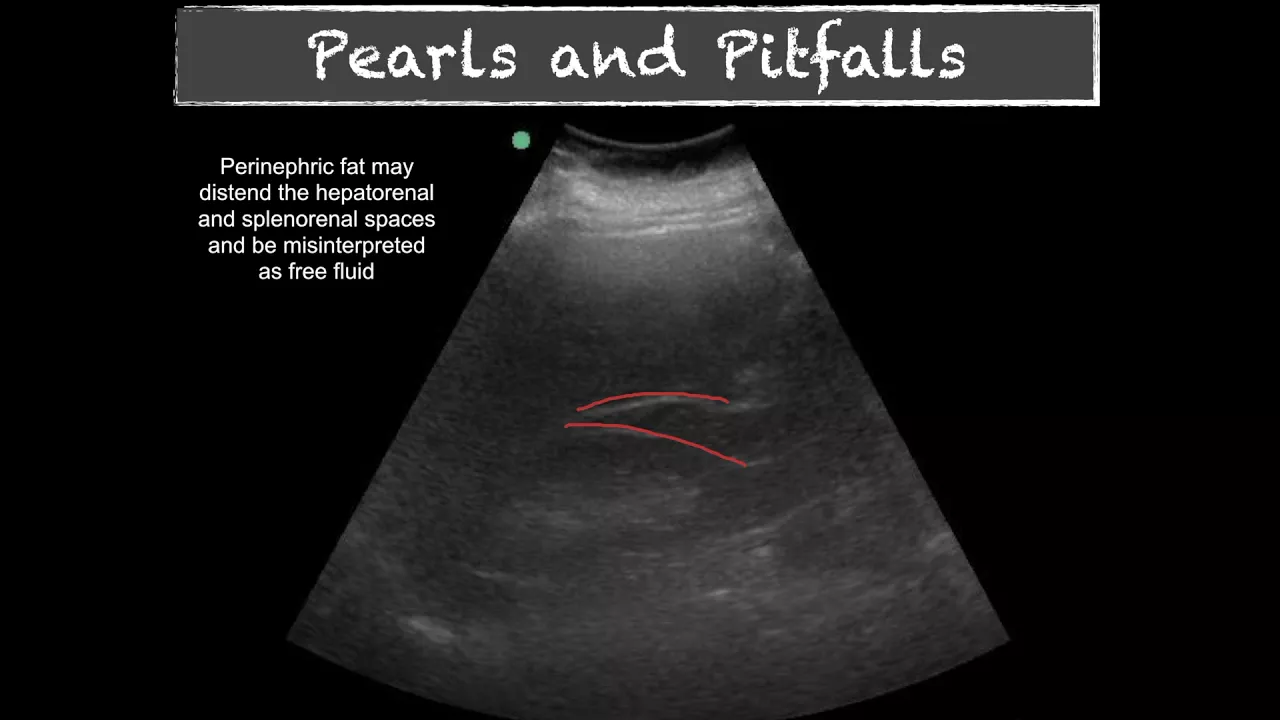
Identification of common EFAST pitfalls, false positives, and false negatives, such as distinguishing perinephric fat, pleural companion shadows, or pre-existing ascites from acute traumatic free fluid.
128K views2.1Klikes27:12Original Release: 2016-08-29
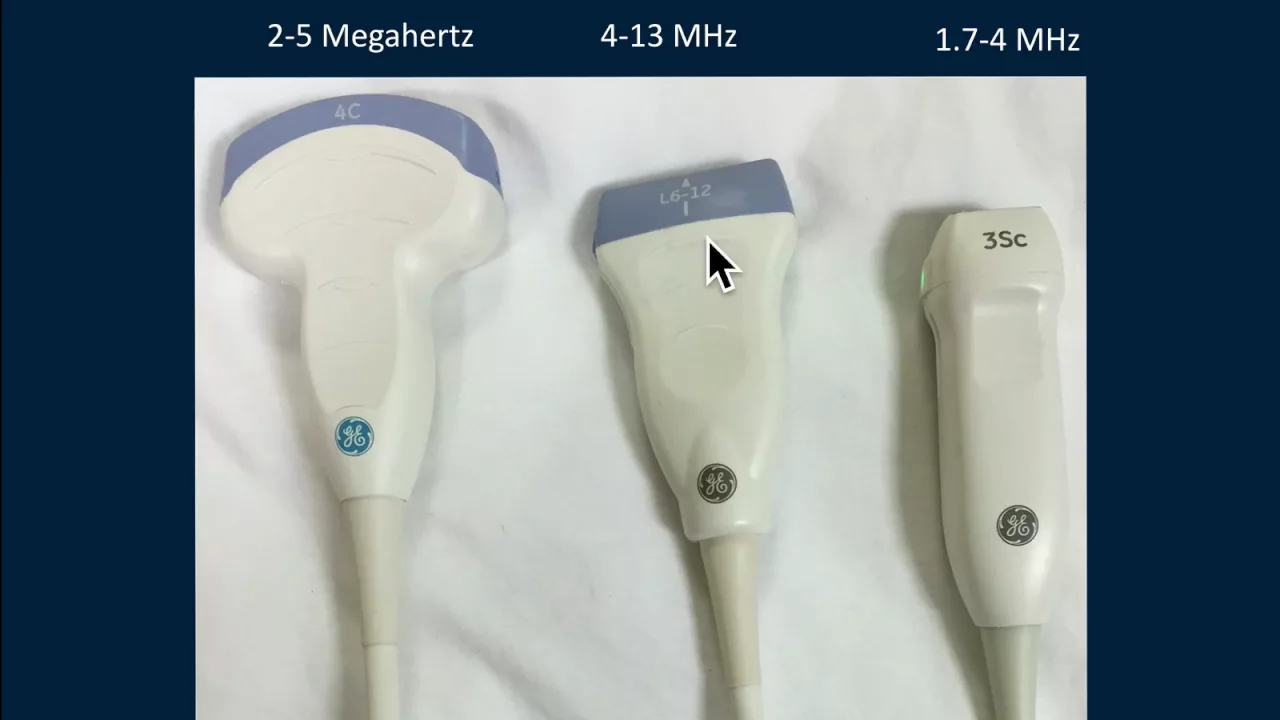
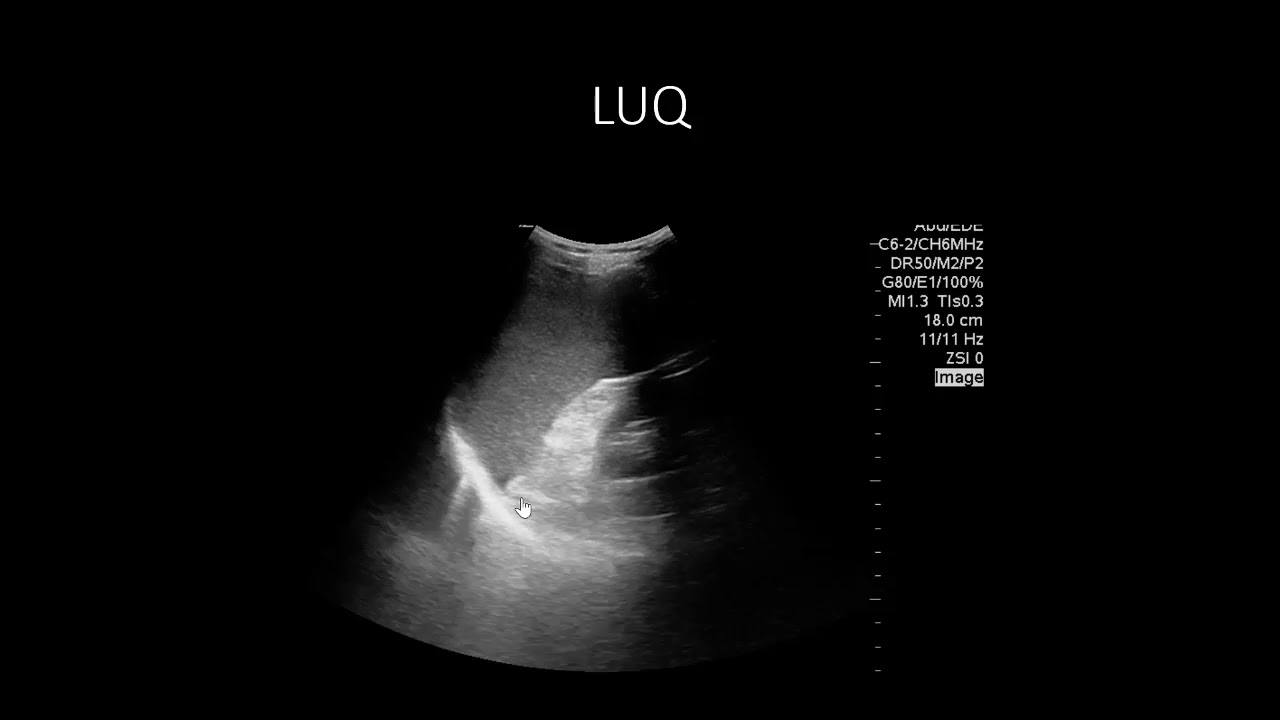
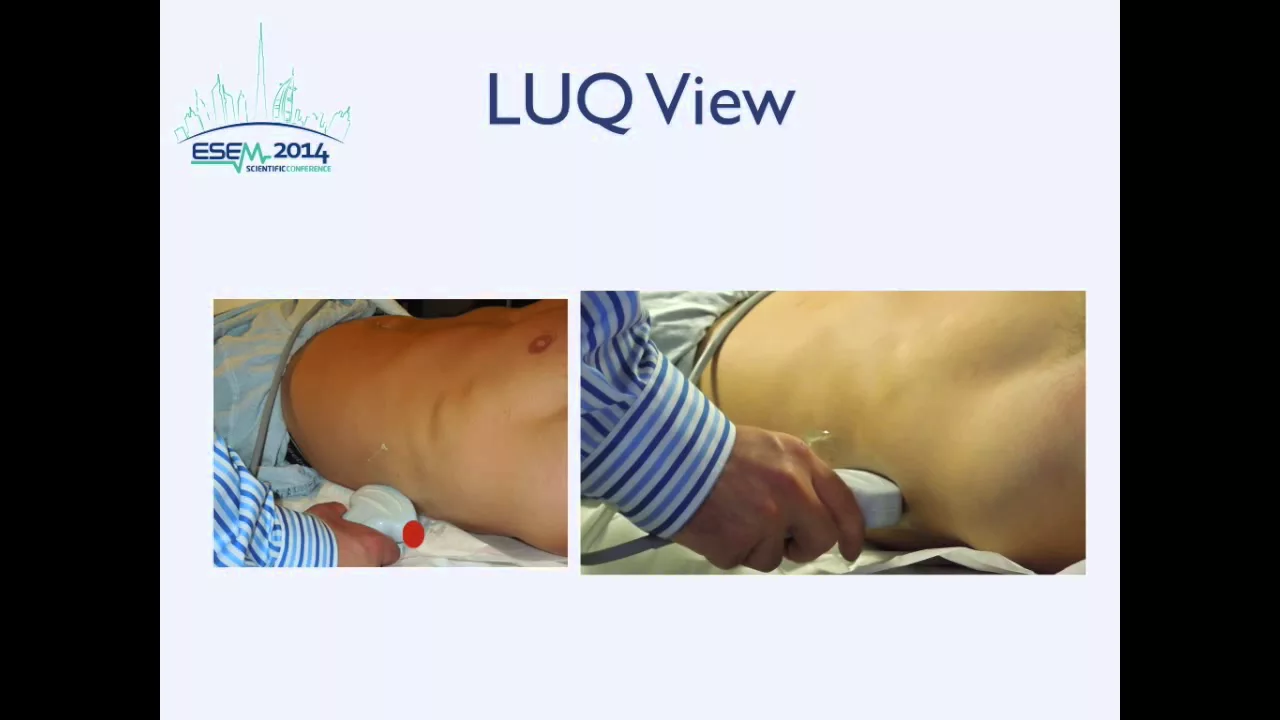
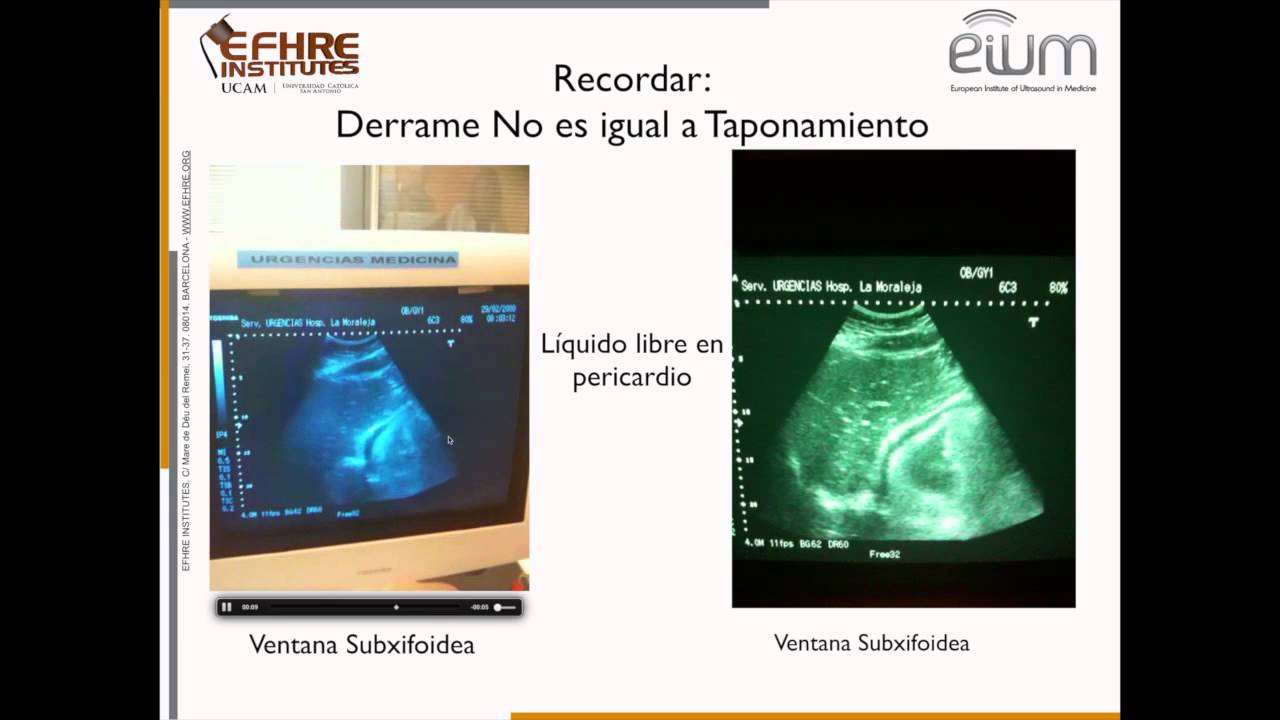
welcome we're going to have a short video discussing the East now the fast has been known as the focus assessment with sonography and Trauma the East adds the word extended so it's the extended Focus assessment with sonography and Trauma this is one of the earliest em Focus applications for point of care ultrasound over time the use has been expanded throughout penetrance into emergency medicine in other areas and as you can see even atls has caught up where the DPL is no longer mandatory but optional and the fast can be used as a replacement skill station now there's practice guidelines for the performance of The Fast and this is a guideline provided by the American Institute of ultrasound and Medicine in cooperation with the American College of Emergency Physicians the fast exam will be performed with a curval linear or a phase array probe in an abdominal preset abdominal preset means that the indicator will be pointed towards the patient's head or towards their right side our first view is going to be a subid view indicator poined towards the patient's right side then we're going to do a IBC view which is a Sagal view of the IBC as it goes through the liver to enter the right atrium indicator towards the patient's head a coronal right upper quadrant indicator towards the head a coronal left upper quadrant indicator towards the head we are then going to do a Sagal view of the pelvis indicator towards the head and then a transverse of the pelvis indicator towards the patient's right our final views are going to be sadal views at the second intercostal space in the midclavicular line looking for the presence or absence of numo thorax and we're going to do the right and left chest so in another schematic presentation first view subid indicator towards the right second view IVC indicator towards the head third view right upper quadrant indicator towards the head in a coronal plane fourth view left upper quadrant fifth view pelvis sagittal sixth view pelvis transverse and then seventh few is the intercostal sadal Plaines for pneumothorax our fast is the subid right upper quadrant left upper quadrant and two views of the pelvis the extended portion of the fast adds the IDC assessment and the lung views for numo thorax the basis of the fast exam is that natural anatomic structures are rounded and curved the basis of the fast exam is that anatomic structures are rounded and curved in the body and we do not have right angles generally when two rounded structures are abdd in each other there are sharp angles in between them so when we see anacor areas of fluid they will have sharp Corners as they are between an atomic structures compared to fluid within anatomic structures which is rounded and curved without those sharp angles so what we are looking for is a presence of free fluid which would be anaco with sharp angles because they are outside anatomic structures our first view is going to be that suboy view indicator towards the patient's right shooting through the liver to the heart and what we're looking for is a view through the liver to the heart both right and left side of structures and we're looking for the presence of cardiac activity and the presence or absence of paracardial fluid so we're going to see the liver we're going to see the diaphragm the right side of Chambers and the left side of Chambers we'll also have some view of lung and long artifact in this View and this is what your view is going to look like you're going to see the liver and you're going to see the heart shooting from an inferior toward Superior portion and we're going to look for cardiac activity and presence or absence of paracardial fluid here's another view where we're using a curve array shooting through the liver to the heart and you can see there is a little bit more gas artifact here both from the stomach and from the lung what we're looking at is the liver the stomach with air artifact from a air filed stomach the diaphragm right side of Chambers and the left side of Chambers we also see some Maring artifact because of irrated lung and here's a view where we can see a paracardial fusion with the anacor layer separating the heart and the paric cardium and the paric cardium is AB budding the diaphragm as one continuous line here we can see another sample where we have paric cardia fluid here we can see another example where we have paracardial fluid and a paracardial fusion we also see the presence of paracardial clot within that paracardial space here we see paracardial Fusion however this is concerning because the paracardial fusion is actually impacting cardiac function we see that the right side of structures both the right atrium and the right ventricle are not Contracting normally instead they have this undulating or collapsing effect and that's because of the paric cardia fluid inducing a tampeno physiology here we see lack of cardiac activity where we can clearly see the heart and there's no contraction of the heart so once again we're looking at our suboy view and we're shooting through through the liver to the heart if you have a large amount of stomach gas you see where the probe is located you can slide towards the patient's right to try and image through the liver and avoid the stomach bubble however if there's a lot of biog gas degrading your view and limiting your window your other option is to move up onto the chest and obtain A sagittal view of the heart or a parisal long access and in that we're looking at the heart here where we're looking for these structures we're going to mainly see the left-sided left atrium left ventricle with a small amount of right ventricle in view now we won't go into heavy detail on the parone Long View as that is covered in our Echo lecture but this is our alternative view where you can see the cardiac activity and presence or absence of paracardial fluid should your abdominal window be limited we can see a posterior paracardial fusion with the anaco wedge separating the heart and the parac cardio here you can see a paracardial fusion in the parasal Long View surrounding the heart and it is actually impacting cardiac function you can see the right ventricle having some impaired contraction our next view from the subid is going to rotate the probe to be a Sagal plane into D Ator towards the patient's head and from that midline view we're going to our next view is the IVC view where we're going to rotate the probe to have a sagittal View and while Imaging at the midline we're going to tilt the probe slightly to the patient's right to image the IVC which is just to the right of midline and you can see here we convert from that subho view to image through the liver to the IVC as it enters the right atrium and this is what we're looking for we're looking for the IVC traveling through the liver to confirm that it is the IVC and as it enters the right atrium those two anatomic boundaries allow us to identify the IBC reliably meaning it travels through the liver and connects to the right atrium we'll see the liver itself the diaphragm the IBC the right atrium the right ventricle here you can see a view where we're seeing the IBC running through the liver we see liver in the near field and the far field and you see how it connects to the right atrium here's another view where we can clearly see the IVC running through the liver to the right atrium and you can see some respiratory motion as the patient breathes the IVC collapses denoting a lower preload than the previous example where the IVC did not collapse so what we're looking for in this view to make sure we identifying the correct structure is liver on both sides of the IVC meaning the IVC runs through the liver not behind it like the aorta and we're looking for the right atrium which then lets us identify this tubular anacor blood vessel as the iidc and you can see here well inflated IVC versus a very flat IVC and that's what we're looking for the presence or absence of a flat IVC to denote preload so we can get a sense of preload and volume status should we have a hypotensive traumatically injured patient our next view is going to be the right upper quadrant and this is a corono view shooting from lateral to medial with the indicator pointed towards the patient's head now one concern is that the ultrasound beam is very thin somewhere between 1 and 1 and 1 12 mm in thickness so when we're Imaging in the right upper quadrant we are only getting a very small slice we have to image the entire right upper quadrant looking in the lower thoracic cage looking in the right upper quadrant around the liver around the the kidney and in the paracolic gutter so while this is a very thin beam and a very thin section there's a large area to view just like you would not look at a single CT scan you would not look at a single image from the right upper quadrant instead we're going to have to scan through the entire area to get an idea of what's going on in this threedimensional structure based on our two-dimensional image so we're going to start in the posterior area and we're going to come anterior and we're going to move throughout the interface and move anterior and posterior scanning through the entire three-dimensional area to get our information this is one of our Cardinal views of the right upper quadrant and you can see we're Imaging from lateral seeing the ribs to medial seeing the spine we're looking at the liver the kidney the Inner Space Between the liver and the kidney the hepatorenal space or Morin pouch as it's commonly known we're going to identify the spine and the spinal stripe as a hard Landmark we want to also identify the diaphragm and the lung and we want to look at fluid between the lung and the diaphragm and between the diaphragm and the liver now unfortunately there is a major artifact that you will see here the diaphragm is a specular reflector so what happens is sound beams leave the probe impact the diaphragm if there's arated lung above the diaphragm it reflects very well and that sound beam is reflected into the liver that sound beam hits liver tissue and then that sound beam is then redirected to the diaphragm and reflected back to the probe however the ultrasound machine assumes sound travels in a straight line so all of that sound is then plotted out in a straight line and it assumes that liver is now above the diaphragm this is called a mirroring artifact because the area above the diaphragm is mirrored from the area below due to the reflection this is a normal artifact that will tell you there is aerated lung above the diaphragm and you can see this because a spinal stripe stops at the diaphragm and as we all know the spine does continue past the diaphragm but what we see above the diaphragm is the absence of the spinal stripe and the presence of what appears to be liver and if you look closely the liver matches on both sides of the diaphragm with hepatic vessels noted on both sides sides you can see the spinal stripe stops there right at the diaphragm and we see this area mirroring there showing what looks like liver above the diaphragm this tells me that there is air rated lung opposed to the diaphragm or normal interface here's another example of the right upper quadrant and this is what we're looking for in the upper part of the right upper quadrant now the entire interface in the right upper quadrant may not be able to be obtained in a single video clip or single scan through and you may need several video clips to capture all the parts what we're looking for is the liver the kidney the hipat Rino space or Morrison's pouch and here we can see the upper portion of it but not necessarily the inferior portion we're looking for the spinal stripe or this bright corrugated hyperic line that denotes the spinal bodies it ends at the diaphragm which we can see here and beyond that we see miring telling me that there's no fluid above the diaphragm we're going to image a little more inferior here and we're also looking for the liver the kidney Morin's pouch and here we're looking at the mid and inferior portion of morison's pouch that we cannot see because of the size of the liver in order to get a clearer view of the diaphragm we will see the spinal stripe here as our hard Landmark we do see part of the diaphragm but we don't see above it as well and here we can see as we're scanning through we're looking more and more s's pouch seeing that hipo interface a little more clearly and you can see as we slide more inferior we're getting a better view of that distal portion here we can see a lot more of that area and we're also evaluating the inferior pole of the kidney which is the paracolic gutter when you see mention about IM the paracolic gutter in the fast exam what they're really talking about as a hard Landmark is the inferior pole of the kidney you will also see that we've evaluated the entire hepatorenal space as we see the liver tip now this may be anterior where you're seeing some B Gas pattern and normally we try to avoid the B gas because that tells us we're intrarenal versus the Hino space with the kidney being retrop pertino what we want to identify here is the liver and there's going to probably be Some Loops of bowel and what we're looking for as we slide inferior and anterior is that inferior tip of the liver and the reason being is fluid will begin to collect at the paracolic gutter at the inferior pole of the kidney or the inferior tip of the liver before that fluid begins to track into the hpao OR marson's pouch you will see the inferior tip of the liver which is the beginning of the Hino space and the paracolic gutter small amounts of fluid will collect here before it begins to dissect or track through morison's pouch so if the patient is very early in their course or has been transported very quickly or has has very small amounts of fluid you can miss it if you do not evaluate the inferior pole of the kidney and the inferior tip of the liver you can see here example of free fluid you see anacor areas with sharp Corners in between the liver and the kidney however you see a lot more fluid accumulating in the paracolic gutter near the inferior pole of the kidney and the inferior tip of the liver rather than Superior between the liver and the kidney so you can see that a lot more fluid accumulates in this area before it tracks into morison so if you're not evaluating the entire r quadrant you may miss small amounts of fluid here's an example of a large amount of free fluid separating the kidney and the liver in morison's pouch or the Hino space Here's another example with fluid in morison's pouch and you can see it's anaco with sharp angles because remember anatomic structures arounded and when you have two rounded structures next to each other that space will then have sharp points here's a view where we no longer see mirroring and what we're seeing is fluid above the diaphragm you can see the spinal stripe extends the spinal stripe does not end at the DI FR highlighted by this Arrow it instead extends past it and what we're seeing are the findings to diagnose a plural Fusion we see extension of the spinal stripe we see an absence of miroring and we see anic fluid above the diaphragm with those three findings we do have plural fluid and if it is a traumatically injured patient we are concerned about a hemo Thora the next step is the left upper quadrant which is going to be similar to the right however we have the Spen Areno space rather than the Pino space now a difference between the left upper quadrant and the right upper quadrant is that fluid tends to accumulate around the spleen rather than between the spleen and the kidney and this is because of the vascular hilum of the spleen which keeps it close to kidney instead we're going to see more fluid around the spleen such as between the spleen and the diaphragm and near the inferior pole of the spleen compared to the r upper quadrant where the liver is held to the diaphragm by the coronary ligament and we'll see more Hino fluid what we're looking to identify is our spleen our kidney the spleen Areno space our spinal stripe and the diaphragm we also want to get a view of above the diaphragm viewing long or miroring artifact just like we do in the right upper quadrant remember just like in the right upper quadrant because of the air rated lung we will have a specular reflector in the diaphragm and we'll have Maring artifact making it appear that there's spleening above the diaphragm another difference you'll note when Imaging the left upper quadrant the fast exam is that the left upper quadrant views will be slightly more Superior and posterior compared to the right likely one Inner Space higher and more posterior so what you want to do is when you reach over for the patient's right side you want to maintain your probe parallel to the bed and touch your knuckles to the bed as you slide in for the left upper quadrant and then work your way anterior we see here the left upper quadrant we can see our spleen spinal stripe diaphragm and our spleen Arenal space very nice view of the spleen and diaphragm space as we're going to see fluid accumulating around the spleen much more than between the spleen and the kidne once again we're seeing miring above the diaphragm we're getting good view between the diaphragm and the spleen and we're seeing the spleen Areno SP space itself here's your left upper quadron View and what we're looking to identify is the spleen itself the kidney the spleen Arena space the spinal strip that ends at the diaphragm and does not extend past it the diaphragm itself and miring artifact this allows us to evaluate for presence of fluid between the spleen and the diaphragm and around the spleen the other area that you also want to evaluate is the inferior pole of the kidney and the tip of the spleen once again fluid will accumulate near the spleen tip rather than in the spleen Arena space in early phases and you also want to evaluate the paracolic gutter which you denote by the presence of the inferior pole of the kidney so there is the sping tip looking for fluid there and you can see in this example we have free fluid we have anacor areas in the near field sharp corners and we see it around the spleen near the spleen tip rather than in the spleen Areno space we also have a very subtle free fluid here with fluid collecting around the spleen tip you can see that anacor border there and you can see H here highlighted where you have the anacor wedge and just a very small amount in the left upper quadrant surrounding the spleen tip if you do not evaluate the inferior pole of the solid organs you may miss small amounts of fluid here you can also see near the top of the spleen there was some free fluid with with anacor areas and sharp Corners that you may have missed on the initial scan next we're going to start with our Sagal view in the pelvis and remember we're not Imaging the bladder the bladder is a landmark and we're Imaging for the spaces around the bladder looking for free intrarenal fluid the reason we start off in the sadal view is because it is easier to evaluate for free fluid behind the bladder and solid organs and the fluid will be tracked towards midline the other reason is that if the bladder is decompressed you may have some difficulty finding all of your landmarks rather than trying to differentiate biog gas and decompressed bladder starting the Sagel view allows you to identify the pubic symphysis as a bony Landmark after the pubic symphysis we're going to identify some Landmark organs if it is a female patient we're going to identify the vaginal stripe then the bladder uterus and we're looking for fluid in the anterior culac and the posterior cldis if it is a male patient we are still looking for the pubic symphysis as our Hard Target Bing Landmark the bladder the retrov vesicular space and we also want to identify the prostate and as we're scanning through we can see the bladder and we do have some posterior acoustic enhancement because the bladder is filled with fluid so you may have to adjust your far field gain in order to differentiate tissue layers and pick out free fluid one of the common errors is that gain is not adjusted and the posterior field deep to the bladder is over gain and you miss free fluid because of the over gaining and the bleed through of echo once again we're looking for the pubic symphysis right hyperic line showing the Bony structure with posterior acoustic shadowing now when we're looking at the area around the bladder in this male patient we can see the prostate this area of the bladder wall and the area posterior to it shows the prostate in the pelvic floor remember this is not the intraretinal area this area is the int pertin area where we're looking for free fluid so you need to make sure you're Imaging the top of the bladder so as we're scanning now this person is scanning a little fast you want to scan a little slower because remember you're not just acquiring the images you're acquiring the images and interpreting them at the same time once again as we scan from lateral to lateral in a satal view of the pelvis we're looking for fluid around the bladder making sure we're catching that Superior Board of the bladder if the bladder is distended you may have to scan the bladder in two portions catching the inferior portion and the superior portion in two separate sweeps you can see here in a female patient you're going to evaluate around the uterus in both the anterior and posterior culdesac if the patient is pregnant you will note that there is an intun pregnancy however do not get distracted by the presence of the intun in pregnancy you still have to evaluate through the whole interface looking for the presence or absence of free fluid here you can see a patient with a large amount of free fluid making it difficult to find and identify all the anatomy here you can see a more common finding where you see the bladder and you see anacor fluid with sharp angles in the anterior and posterior culdesac around the uterus this shows the presence of free fluid in the posterior field you can see some free fluid deep to the bladder and a coric with sharp angles however the posterior acoustic enhancement has not been accommodated for and farfield gain has not been decreased making that anacor area appear to have Echoes within it you can also note there are echoes within the bladder showing that it is slightly over gained to compensate for this you would have to decrease farfield gain to make that fluid appear an aoic our next view is going to be a transverse view of the bladder meaning indicator towards the patient's right when once again we're going to look for the bladder we're going to look for the retrov vesicular structure such as uterus we're going to obtain a transverse view identifying the bladder in the transverse view the bladder is somewhat square or romboid shaped making it easier to differentiate from free fluid or cyst we're going to identify the retrov vascular structure whether it's the uterus or the prostate in this case in a male patient it will be the prostate that we see and then we're going to scan from inferior to Superior looking at the lateral portions of the bladder you may be able to see fluid in the posterior area to the bladder the transverse view makes it easier to identify fluid lateral to the bladder that may have been missed in the sadal plate once again the bladder does appear somewhat Square to round boid in shape making it easy to identify rounded Corners with a wall and as we scan through we are going to see the uterus pop into view if it is a female patient and once again we're looking lateral to the bladder and lateral to the uterus for free fluid that may have been missed in a Sagal plane once again if you identify inunit pregnancy return to it to evaluate it further if need be by however do not get distracted by it and forget to complete your scan here you can see the romboid shape bladder and as we scan through we note a large amount of free fluid an aor sharp angles surrounding the uterus in both the anterior and posterior culdesac here you can see the uterus with free fluid posterior the broad ligament and the bladder anterior you can see that the bladder has that romboid shape with a wall to it whereas the posterior area has those sharp angles without a clear wall here you can see another example where posterior AC ustic enhancement has not been compensated for and the posterior field is over gained you are unable to differentiate tissue layers and you would not be able to identify any free fluid in the far field our next view is going to be the intercostal view looking for the presence or absence of pneumothorax we are looking in the mid cicular line at the second intercostal space right where you would needle decompress and we're looking for the presence or absence of numo thorax now remember we are looking for large numo thores that would impact our care in the trauma Bay and need immediate decompression or treatment not necessarily small numo thores they can be evaluated further with ultrasound we're evaluting for the presence or absence of numo thorax under the probe meaning we are looking in a single spot for the presence or absis Nal thorax not excluding it throughout the entire thorax what we want to do is identify our key landmarks we're going to identify two ribs and we're going to look at a plural line in between to get a view of what's going on with the lung however there is going to be a large amount of air artifact which is the Hallmark of lung ultrasound and what we're paying attention to is the plural line between the two ribs you want to identify two ribs so you can have anchoring and landmarks to identify the plural line in between we're looking for our two ribs here and we're looking for that plural line in between the two ribs you want to Center on the plural line not on the rib and what we're looking for is what's called lung sliding or plural sliding and as the person is breathing you can see that plural line sliding back and forth with a shimmering or sliding effect and this is what we're looking at in the far field we're looking for the presence or absence of beines but however we are focusing on the inter however we are focusing on the intercostal space and the plural line there looking for sliding telling us that there is normal aerated lung or no sliding telling us the presence of a numo thorax here's another view with a linear probe showing the two ribs and the plural line sliding back and forth at a little higher resolution here's another view where we're seeing lungs sliding with the Cur a linear probe and what we want to do is turn off postprocessing meaning turning off compound Imaging or multibeam and harmonic Imaging and you you can see that the plural sliding is much clearer when these post-processing things are turned off they try to suppress artifacts and may reduce sliding if you are unsure if you see lung sliding with these items on be sure to turn off both harmonic and multi BMR compound Imaging to highlight sliding to ensure that there is lung sliding or no lung sliding the other option to evaluate for lung sliding is the use of M mode and what happens is you evaluate the plural line you drop your M mode Spike through it and you're looking at the M mode tracing and this allows you a better view of presence or absence along sliding so if you see long sliding clearly on B mode or 2D Imaging you don't have to do M mode however if you're unsure that's where M mode will come in handy to help you differentiate you drop the M mode Spike through the plur up and what happens is everything along that M mod spike is plotted over time so you see that single line plotted over time on the x-axis everything along the EMD Spike would be plotted over time so the chest wall which is not moving appears as straight lines as there there's very little to no movement whereas the lung and the plural line which has a lot of movement and artifacts shows this textured appearance over time this is called the seashore sign as it looks like there is Beach and water so along this area you see the plural line there you see the chest wall and the lung now the chest wall shows you no movement so there is a linear pattern whereas the lung shows you movement causing that speckled appearance here you have another example of lung sliding and what we can see here is a plural line we see the chest wall in the lung and no movement in the chest wall versus movement in the lung so once again we're going to get our view of the plural line anchored by two ribs on either side we're going to drop our M mode Spike and we're going to get our M mode tracing showing lung sliding or the sea shore sign here we have our two ribs anchoring The View and our plural line between them and you see that that plural line is not shimmering or sliding back and forth this is a patient with a normal thorax with no sliding here you can see another example two ribs plural line in between with a lot of Reverb artifact from free air within the hemithorax and we have no sliding at the plural line and we have a numo thorax here's another example every time the person tries to breathe you do see the chest wall move slightly however you do not see the plural line sliding this patient also has a normal thorax if we were to drop EMD Spike through that you see the linear pattern of no movement in the chest wall the plural line and a matched view of no movement below the plural line showing you absence lung sliding and a pneumothorax also referred to as a Stratosphere sign here's another example of numo thorax you can see the plural line there is a little blip where the chest wall is moving causing movement throughout the field and not just in the lung here you can differentiate between the two with lung sliding present on the left of your screen and numo thorax present on the right you can see the textured pattern of movement on the left below the plural line versus on the right below the hyperic plural line there is no movement either above or below it this is a finding that's called a lung point where you have area of pneumothorax and as the patient inspires the lung inflates and you see some irated lung slide into view so you see lung sliding appear and disappear this is at the very edge of the Nal thorax where the aided lung is moving into view this tells you that there is a numo thorax and this is the border so when we are doing our East exam we're going to start off with the subid view followed by the IVC followed by the right upper quadrant left upper quadrant pelvis and sagittal pelvis and transverse and anterior thorax for numo thorax evaluation the reason we go in this protocolized order are severalfold first you want to look at the heart if the heart is not beating very little other information in the abdomen is going to be as helpful you also want to view the heart as you have blood within the cardiac Chambers and you have a standardization of setting your gain for free fluid also as we progress through these views we are going to decrease the amount of gain and decrease our depth working our away from the subid to the lung so this way you are continually decreasing depth and decreasing gate gain rather than bouncing back and forth between increasing and decreasing both values making for a smoother and more efficient scan don't forget to subscribe and follow links are in the description below
Up Next
18:57
POCUS Lung Ultrasound: A Guide to Bedside Lung Imaging
@StanfordMedicine25
165K views•2022-06-08

48:47
Graphic Medicine: Comics for Collaborative Healthcare Communication
@nationalpatientadvocate
189 views•2023-12-04

10:28
Neuroanatomy: Central and Peripheral Nervous System Divisions Explained
@AKLECTURES
136.2K views•2014-09-20
3:05
Stages of Labor and Vaginal Birth | Childbirth Animation
@nucleusmedicalmedia
52.1M views•2017-08-18
Related Study Plans & Knowledge Roadmaps
Structured learning paths in Medicine
medicine
Abnormal LFTs: Diagnostic Workup & Pathology
01Liver Anatomy and Basic Physiology
02Introduction to Liver Function Tests (LFTs)
03Hepatocellular vs. Cholestatic Patterns
+ 3 more learning modules
12h6 modules
Explore Roadmap
medicine
Analyzing Blood Smears: RBC, WBC & Platelets
01Introduction to Blood Components & Smear Preparation
02Normal Morphology of Blood Cells
03Erythrocyte Pathologies & Morphological Variants
+ 2 more learning modules
12h5 modules
Explore Roadmap
medicine
Mechanical Ventilation: Waveforms & Alarms
01Anatomy and Physiology of Breathing
02Introduction to Mechanical Ventilation & Core Modes
03Ventilator Settings and Waveform Interpretation
+ 2 more learning modules
12h5 modules
Explore Roadmap
medicine
Neuro Exam: Localization & Stroke Syndromes
01Foundations of Neuroanatomy and Vascular Supply
02The Neurological Examination: Step-by-Step
03Principles of Neurological Localization
+ 3 more learning modules
18h6 modules
Explore Roadmap