























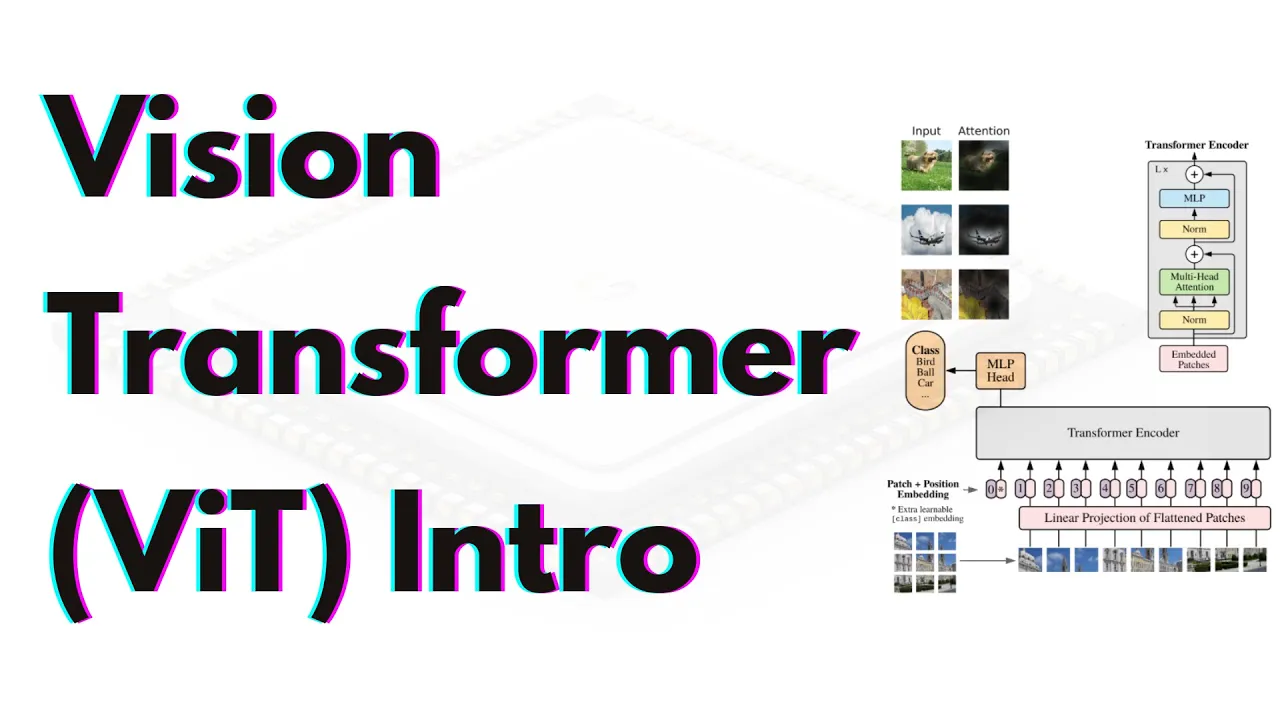


This video demonstrates how to implement a complete Transformer model for machine translation using PyTorch, covering the key components including input embeddings, positional encodings, layer normalization, feed-forward networks, and multi-head attention mechanisms, followed by training procedures and attention visualization techniques.
Transformer from Scratch in PyTorch: Full Tutorial
Added:Proficiency in Python and Object-Oriented Programming (OOP) to structure custom PyTorch classes.
Fundamental knowledge of PyTorch, including Tensors, autograd, 'nn.Module', and custom training loops.
Theoretical understanding of sequence-to-sequence models, tokenization, and word embeddings.
Conceptual familiarity with the Self-Attention mechanism (Queries, Keys, Values) as introduced in the 'Attention Is All You Need' paper.
Exploring specialized Transformer architectures like BERT (encoder-only) and GPT (decoder-only) to understand their structural differences.
Implementing parameter-efficient fine-tuning (PEFT) techniques, such as LoRA and QLoRA, on pre-trained models.
Studying modern optimization and efficiency techniques for Transformers, such as FlashAttention and mixed-precision training.
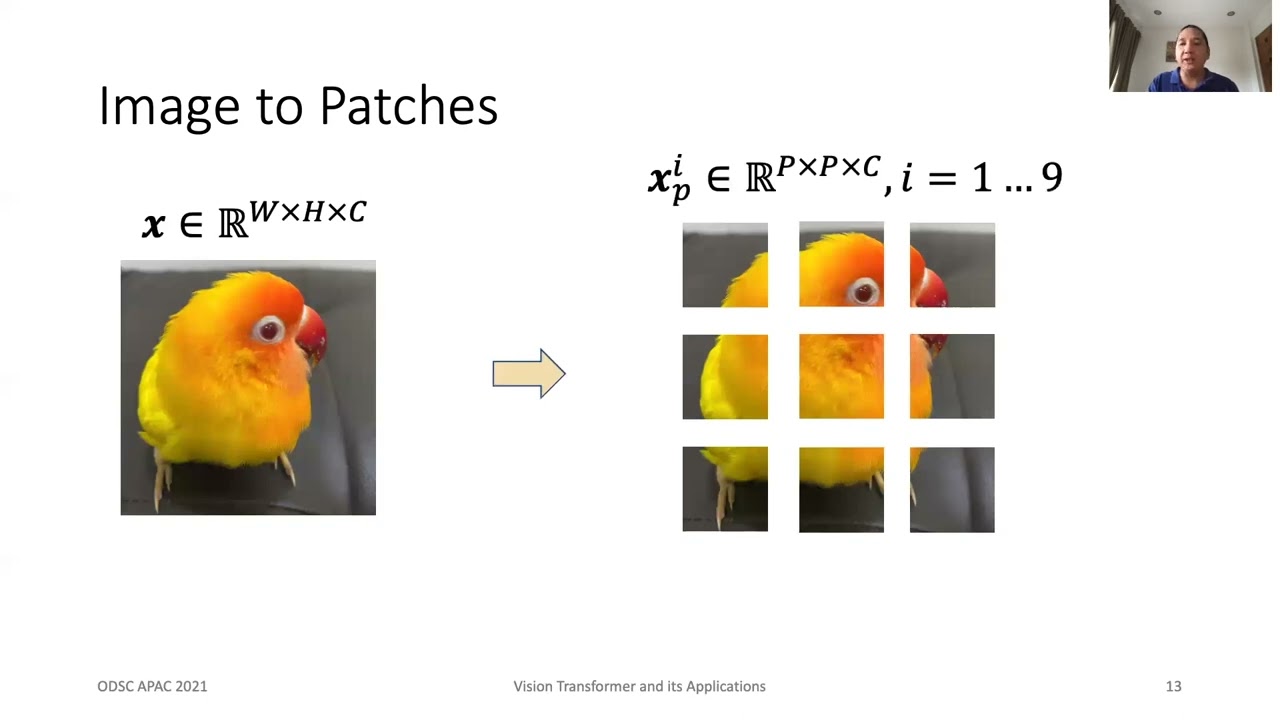
Applying the Transformer architecture to other domains, such as computer vision (Vision Transformers / ViTs) or speech processing.
344.8K views8.3Klikes2:59:24Original Release: 2023-05-25
hello guys welcome to another episode about the Transformer in this episode we will be building the Transformer from scratch using pytorque so coding it from zero we will building the model and we will also build the code for training it for inferencing and for visualizing the attention scores stick with me because it's going to be a long video but I assure you that by the end of the video you will have a deep knowledge of the Transformer model not only from a conceptual point of view but also from a practical point of view we will be building a translation model which means that we our model will be able to translate from one language to another I choose a data set that is called Opus books and it's a synthesis taken from famous books I chose the English to Italian because I am Italian so I can understand and I can tell that if the translation is good or not but I will show you which point you can change the language so you can test the same model with the language of your choice let's get started let's open the IDE of our choice in my case I really love Visual Studio code and let's create our first file which is the model of the Transformer okay let's go have a look at the Transformer model first so we know which one part we are going to build first and then we will build each part one by one the first part that we will be building is the input embeddings as you can see the input embeddings take the input and convert into an embedding what is the input embedding as you remember from my previous video the input embeddings allows to convert the original sentence into a vector of 512 dimensions for example in this sentence your cat is a lovely cat first we convert the sentence into a list of input IDs that is numbers that correspond to the position of each word inside the vocabulary and then each of this number corresponds to an embedding which is a vector of size 512 so let's build this layer first let's the first thing we need to do is to import torch and then we need to create our class this is the Constructor we will need to tell him what is the dimension of the model so the dimension of the vector in the paper this is called D model and we also need to tell him what is the vocabulary size so how many words there are in the vocabulary we save these two values and now we can create the actual embedding okay actually Pi torch already provides with a layer that does exactly what we want to do that is taken given a number it will provide you with the same Vector every time and this is exactly what a embedding does it's just a mapping between numbers and a vector of size 512 512 here in this uppercase is the D model so this is done by the embedding layer and N dot embedding and vocab size and D model let me check why am I auto complete is not working okay so now let's implement the forward method what we do in the embedding is that we just use the embedding layer provided by pi torch to do this mapping so return self-taught learning of act now actually there is a little detail that is written on the paper that is let's have a look at the paper actually let's go here and if we check the embedding and soft Max we will see that in this sentence in the embedding layer we multiply the weights of the embedding by square root of D model so what what the outers do they take the the embedding given by this embedding layer which I remind you is just a dictionary kind of a layer that just Maps numbers to the same Vector every time and this Vector is learned by the model so we just multiply this by Matt dot sqrt of the model you also need to import matte okay now the embedding the input embeddings are ready let's go to the next module the next module we are going to build is the positional encoding let's have also a look at what are the positional encoding very fast so we saw before that our original sentence gets mapped to a list of vectors by the embedding the the embeddings layer and this is our embeddings now we want to do we want to convey to the model the information about the position of each word inside the sentence and this is done by adding another Vector of the same size as the embedding so of size 512 that includes some special values given by a formula that I will show later that tells the model that this particular word occupies this position in the sentence so we will create these vectors called the position embedding and we will add them to the embedding okay let's go to it okay let's define the class position positional encoding and we Define The Constructor okay what we need to give to the Constructor is for sure the D model because this is the size of the vector that the positional encoding should be and the sequence length this is the maximum length of the sentence and because we need to create one vector for each position and we also need to give the dropout dropout is to make the model less overfit okay let's actually build a positional encoding okay first of all the positional encoding is a we will build a matrix of shape sequence length to D model y sequence like 2D model because we need vectors of D model size so 512 but we need sequence length number of them because the maximum length of the sentence is sequence length so let's do it okay before we calculate we create the Matrix and we know how to create the Matrix let's have a look at the formula used to create the positional encoding so let's go have a look at the formula used to create the positional encoding this is my previous uh the slide from my previous video and let's have a look at how to build the vectors so as you remember we have a sentence let's say in this case we have three words we use these two formulas taken from the paper we create a vector of size 512 and one for each possible position so up to sequence length and in the even positions we apply the first Formula in the odd positions of the vector we apply the second formula in this case I will actually simplify the calculation because I saw online it has been simplified also so we will do a slightly slightly modified calculation using log space this is for numerical stability so when you apply the exponential and then the log of something inside the exponential the the result is the same number but it's more numerically stable so first we create a vector called the position that will represent the position of the word inside the sentence and this word this Vector can go from 0 to sequence length minus 1.
so actually we are creating a tensor of shape sequence land to one this is wrong okay okay now we create the denominator of the formula and these are the two terms we see inside the formula let's go back to the slide so the first tensor that we built that's called position it's this pause here and the second answer that we build is the denominator here but we calculated it in log space for numerical stability the value actually will be slightly different but the result will be the same the model will learn this positional encoding don't worry if you don't fully understand this part it's just very special let's say functions that convey this impositional information to the model and if you watch my previous video you will also understand why now we apply this to a denominator and denominator to the sign and the cosine as you remember the sign is only used for the even positions and the cosine only for the odd position so we will apply it twice let's do it so apply foreign Position will have the sign but only so every word will have the sign but only the even Dimensions so starting from zero up to the end and going forward by two means every from zero then the number two then the number four etc etc position multiplied by div term then we do the same for the cosine in this case we start from one and go forward by two it means one three five Etc and then we need to add the batch Dimension to this tensor so that we can apply it to the whole sentences so to all the batch of sentence because now the shape is sequence length to the model but we will have a batch of sentences so what we do is we add a new dimension to this PE and this is done using unsqueeze and in the first position so it will become a tensor of shape one to sequence length to the model and finally we can register this tensor in the buffer of this module so what is the buffer of the module let's first do it register buffer so basically when you have a tensor that you want to keep inside the module not as a parameter learned parameter but but you want it to be saved when you save the file of the model you should register it as a buffer this way the tensor will be saved in the file along with the state of the model then we do the forward method so as you remember from before we need to add this positional encoding to every word inside the sentence so let's do it so we just do X is equal to X plus the positional encoding for this particular sentence and we also tell the model that we don't want to learn this positional encoding because they are fixed they will always be the same they are not learned along the training process so we just do it requires grad false this will make the this particular sensor not learned and then we apply the dropout and that's it this is the positional encoding let's have a look at the next module okay we first we will build the encoder part of the Transformer which is this left side here and we still have the multi-head attention to build the ADD and norm and the feed forward and actually there is another layer which connects this skip connection to all these sub layers so let's start with the easiest one let's start with laser normalization which is this add and Norm as you remember from my previous video let's have a look at the layer normalization a little briefing so later normalization basically means that if you have a batch of n items in this case only three each item will have some features let's say that these are actually sentences and each sentence is made up of many words with its numbers so this is our three items and layer normalization means that we for each item in this batch we calculate a mean and the variance independently from the other items of the batch and then we calculate the new values for each of them using their own mean and their own variants in the layer normalization usually we also introduce some parameters called the gamma and the beta some some people call it Alpha and beta some people call it Alpha and bias okay it doesn't matter one is multiplicative so it's multiplied by each of these X and one is additive so it's added to each one of these X Y because we want the model to have the possibility to amplify these values when he needs this value to be Amplified so the the model will learn to multiply this gamma by these values in such a way to amplify the values that it wants to be Amplified okay let's go to build the code for this layer let's define the layer normalization class and Constructor as usual in this case we don't need any parameter except for one that I will show you now which is Epsilon and usually EPS stands for Epsilon which is a very small number that you need to give to the model and I will also show you why you we need this number in this case we use a 10 to the power of -6 let's save it okay this Epsilon is needed because if we look at the slide we have this Epsilon here in the denominator of this formula here so x with cap is equal to x j minus mu divided by the square root of Sigma square plus Epsilon why we need this Epsilon because imagine this denominator if Sigma happens to be 0 or very close to zero this x Nu will become very big which is undesirable as we know that the CPU or the GPU can only represent numbers up to a certain position and the scale so we don't want very big numbers or very small numbers so usually for numerical stability we use this Epsilon also to avoid division by zero let's go forward so now let's introduce the two parameters that we will use for the layer normalization one is called Alpha which will be multiplied and one is bias which will be added usually the the additive is called the bias it's always added and the alpha is the one that is multiplied in this case we will use n n dot parameter this makes the parameter learnable and we Define also the bias this I want to remind you is multiplied and this is added let's define the forward okay as you remember we need to calculate the mean and the standard deviation or the variance for both of these we will calculate the standard deviation of the last Dimension so everything after the batch and we keep the dimension so this parameter keep Dimension means that usually the mean cancels the the dimension to which it is applied but we want to keep it and then we just apply the formula that we saw on the slide so Alpha multiplied by what x minus its mean divided by the standard deviation plus self PPS everything added to bias and this is our layer normalization okay let's go have a look at the next layer we are going to build the next layer we are going to build is the feed forward you can see here and the feed forward is basically a fully connected layer um that's the model uses both in the encoder and in the decoder let's first have a look at the paper to see what are the details of this feed forward layer in the paper the feed forward layer is basically two matrices one W one one W2 that are multiplied by this x one after another with a relu in between and with the bias we can do this in pytorch using a linear layer in which we Define the first one to be the Matrix with the W1 and B1 and the second one to be the W2 and the B2 and in between we apply in the paper we can also see the dimensions of these matrices so the first one is basically D model to dff and the second one is from dff to D model so dff is 2048 and D model is 512. let's go build it class feed forward block we also built in this case the Constructor and in the Constructor we need to Define these two values that we saw on the paper so D model dff and also in this case dropout we Define the first Matrix so W1 and B1 to be the linear one and it's from D model to dff and then we apply the dropout actually we Define the dropout and then we Define the second Matrix W2 and B2 so let me write the comments here it's W1 and B1 of dff to D model and this is W2 and B2 why we have B2 because actually as you can see here bias is by default it's true so it's already defining a bias Matrix for us okay let's define the forward method in this case what we are going to do is we have an input sentence which is batch it's a tensor with Dimension batch sequence length and D model first we will convert it using linear one into another tensor of patch to sequence land to dff because if we apply this linear it will convert the D model into dff and then we apply the linear to which will convert it back to the model you apply the Dropout in between and this is our feed forward block let's go have a look at the next block our next block is the most important and most interesting one and it's the multi-head attention uh we saw briefly uh in the not briefly actually in detail in the last video how the multi-head attention works so I will open now the slide again to show uh to rehearse how it actually works and then we will do it practically by coding as you remember in the encoder we have the multi-head attention that takes the input of the encoder and uses it three times one times it's called query one time it's called key and one time it's called values you can also think it like a duplication of the input three times or you can just say that it's the same input applied three times and the multi-headed tension basically works like this we have our input sequence which is sequence length by D model we transform into into three matrices q k and V which are exactly the same as the input in this case because we are talking about the encoder we will see that in the decoder it's a slightly different and then we multiply this by a matrices called wqw K and WV and this results in a new Matrix of Dimension sequence by D model we then split these matrices into H matrices molar matrices y h because it's the number of head we want for this multi-head attention and we split these matrices along the embedding Dimension not along the sequence Dimension which means that each head we will will have access to the full sentence but a different part of the embedding of each word we apply the attention to each of these smaller matrices using this formula which will give us smaller matrices as a result then we combine them back so we can cut them back just like the paper says so concatenation of head 1 up to head Edge and finally we multiply it by w o to get the multi-head attention output which again is a Matrix Matrix that has the same Dimension as the input Matrix as you can see it's the output of the multihead attention is also sequenced by D model in this slide actually I didn't show the batch Dimension because we are talking about one sentence but when we code the Transformer we don't work only with one sentence but with multiple sentences so we need to think that we have another dimension here which is the batch okay let's go to code this multi-head attention I will do it a little more slower so we can see in detail everything how it's done but I really wanted to you to have an overview again of how it works and why we are doing what we are doing so let's go code it class also in this case we Define the what's the Constructor and what we need to give to this multi-head attention as parameter for sure the D model of the model which is in our case 512 the number of heads which we call H just like in the paper so actually indicates the number of heads we want and then the Dropout value we save these values as you can see we need to divide this embedding Vector into H heads which means that this D model should be divisible by H otherwise we cannot divide equally the the same domain the same Vector representing the embedding into equal matrices for each head so we make sure that the model is divisible by H basically and this will make the check if we watch again my slide we can see that the the value D model divided by H is called Decay as we can see here if we divide the D model by D by H heads we get a new value which is called Decay and to be aligned with what the paper with the nomenclature used in the paper we will also call it DK so DK is D model divided by h okay let's also Define the matrices by which we will multiply the query the key and the values and also the output Matrix w o so this again is a linear so from D model to D model y from D model to the model because as you can see from my slides this is D model by D model so that the output will be sequenced by the model so this is WQ this is w k and this is WB finally we also have the output Matrix which is called wo here this wo is H by DV by D model so H by DV DV is what DV is actually equal to Decay because it's the D model divided by H but why it's called DV here and DK here because this head is actually the result or this head comes from this multiplication and the last multiplication is by V and in the paper they call this value DB but on a practical level it's equal to Decay so our wo is also a matrix that is D model by D model because H by DV is equal to the model foreign we create the dropout let's implement the forward method and let's see how the multi-head attention Works in detail during the coding process we Define the query the key and the values and there is this mask so what is this mask the mask is basically if we want some words to not interact with other words we mask them and we saw in my previous video but now let's go back to those slides to see what is the mask doing as you remember when we calculated the attention are using this formula So Soft Max of Q multiplied by KT divided by square root of DK and then by V we get this head Matrix but before we multiply by V so only this multiplication here with the Q by K we get this Matrix which is each word with each other word it's a sequence by sequence Matrix and if we don't want some words to interact with other words we basically replace their value so their attention score with something that is very small before we apply the soft Max and when we apply the softmax this values B will become zero because as you remember the soft Max on the numerator has e to the power of X so if x goes to minus infinity so very small number e to the power of minus infinity will become very small so very close to zero so basically we hide the uh the attention for those two words so this is the the the the the job of the Mask just following my slide we do the multiplication one by one so as we remember we calculate first the query are multiplied by the WQ so self.w Q multiplied with the query gives us a new Matrix which is called the Q Prime in my slides I just call it query here we do the same with the keys and the same with the values let me also write the dimensions so we are going from batch sequence length to D model with this multiplication we are going to another Matrix which is batch sequence length and D model and you can see that from the slides so when we do sequence by D model multiplied by D model by D model we get a new Matrix which has the same Dimension as the initial Matrix so sequence by D model and it's the same for all three of them now what we want to do is to we want to divide this query key and value into smaller matrices so that we can get give each small Matrix to a different head so let's do it we will divide into using the view method of Pi torch which means that we keep the batch Dimension because we don't want to split the sentence we want to split the embedding into H parts we also want to keep the second dimension which is the sequence because we don't want to split it and the third dimension so the D model we want to split it into two smaller Dimension which is H by d k so self dot h self Dot d k as you remember DK is basically D model by divided by H so this multiplied by this give you back gives you a D model and then we transpose one two why do we transpose because we prefer to have the um the edge Dimension instead of being the third dimension we want it to be the second dimension and this way each viewh head will see the all the sentence so we will see this Dimension so the sequence line by decay let me also write the comment here so we are going from batch sequence length key model to batch sequence length h d k and then by using the transposition we are going to patch Edge sequence length and decay this is really important because we will we want if we want each batch have um we want each head to watch this stuff so the sequence length by DK which means that each head we will see the full sentence so each word in the sentence but only a smaller part of the embedding we do the same thing for the query the key and the value [Music] okay now that we have the smaller matrices so let me go back to the slide so I can show you where we are so we did this multiplication we obtained query key and values we split into smaller matrices now we need to calculate the attention using this formula here before we can calculate the attention let's create a function to calculate the extension so if we create a new function that can be used also later so self attention let's define it as a static method so static method means basically that you can call this function without having an instance of this class you can just say multihead attention block dot attention instead of having an instance of this class we also give him the Dropout layer okay what we do is we get the Decay what is the Decay is the last dimension of the query key and the value and we will using this function here let me first call it so that you can understand how we will use it and then we we Define it so we want from this function we want two things the output and we want the attention scores so the output of the soft Max attention scores and we will call it like this so we give it the query the key the value the mask and the Dropout layer now let's go back here so we have the Decay now what we do is first we apply the first part of the formula that is the query multiplied by the transpose of the key divided by the square root of decay so these are our attention scores query matrix multiplication so this add sign means matrix multiplication in pi torch if we transpose the last two Dimensions minus two minus one means transpose the last two Dimensions so this will become the last Dimension is the sequence by sequence length by Decay it will become Decay by sequence length and then we divide this by math Dot DK we before as we saw before before applying the soft Max we need to apply the mask so we want to hide some interaction between words we apply the mask and then we apply the softmax so the softmax will take care of the values that we replaced how do we apply the mask we just all the values that we want to mask will replace them with very very small values so that the soft Max will replace them with zero so if a mask is defined apply it this means basically replace all the values for which this statement is true with this value okay the mask we will Define in such a way that um where this value with this expression is true it we want it to be replaced by this later we will see also how we we will build the mask for now just take it for granted that these are all all the values that we don't want to have in the attention so we don't want for example some word to watch future words for example when we will build the decoder or we don't want the padding values to to interact with other values because they are just filler words to reach the sequence length we will replace them with minus 1 to the power of minus 10 to the power of 9.
and which is a very big number in the negative range and which basically represents minus infinity and then when we apply now the soft Max it will be replaced by zero we applied to this Dimension okay let me write some comments so in this case we have a batch by H so each head will and then sequence length and sequence length all right if we also have a Dropout so if Dropout is not known we also apply the dropout and finally as we saw in the original slide we multiply this the output of the soft Max by the V Matrix matrix multiplication so we return attention scores multiplied by value and also the attention score itself so why are we returning a tuple because we want this of course we need it because for the model because we need to give it to the next layer but this will be used for visualization so the output of the um the self self attention so the multi had attention in this case is actually going to be here and we will use it for visualizing so for visualizing what is the score given by the model for that particular interaction let me also write some comments here so here we are doing like this batch and let's go back here so now we have our multi-head attention so the output of the multi-head attention what we do is finally we okay let's go back to the slide first Where We Are we calculated this smaller matrices here so we applied the softmax Q by KT divided by the square root of DV and then we multiplied it also by V we can see it here which gives us this small Matrix here head one head two head three and thread four now we need to combine them together concat just like the formula says from the paper and finally multiply it by w o so let's do it uh we transpose because before we transform the Matrix into sequence length by we had the sequence length as the third dimension we wanted back in the first place to combine them because the resulting tensor we want the sequence length to be in the second position so let me write it first what we want to do batch we started from this one so you can select first we do a transposition and then what we want is this so this transposition takes us here and then we we do a view but we cannot do it we need to use contiguous this means basically that Pi torch to to transform the shape of a tensor needs to to put the memory to be contiguous so he can just do it in place foreign and the self dot h multiplied by self.dk which as you remember this is the um the model because we defined DK to be here the model by H divided by h okay and finally we multiply this x by w o which is our output Matrix of x this will give us we go from batch to and this is and this is our multi-head attention block uh we have I think all the ingredients now to combine them all together we just miss one small layer let's go have a look at it first there is one last layer we need to build which is the connection we can see here for example here we have some output of this layer so add a norm that is taken here with this connection and this one part is sent here then the output of this is sent to the addend norm and then combined together by this layer so we need to create this the layer that manages this skip connection so we take the input we give it to to we skip it by one layer we take the output of the previous layer so in this case the multi-head attention we give it to this layer but also combining with this part so let's build this layer we I will call it a residual connection because it's basically a skip connection okay let's build this residual connection as usual we Define the Constructor and in this case we just need a dropout uh as you remember the the skip connection is between the ADD and the norm and the previous layer so we also need the norm which is our layer normalization which we defined before and then we Define the forward method so and the sub layer which is the previous layer what we do is we take the X and we combine it with the output of the next layer which is in this case is called sub layer and we apply the dropout so this is the definition of ADD and the norm actually there is a slight difference that we first apply the normalization and then we apply the sub layer in the case of the paper they apply first the sub layer and then the normalization I saw many implementation and most of them actually did it like this so we will also stick with this particular as you remember we have these blocks are combined together by this bigger block here and we have n of them so this big block we will call it encoder block and each of this encoder block is repeated n times where the output of the previous is sent to the next one and the output of the last one is sent to the decoder so we need to create this block which will contain one multi-het attention to add and the norm and one feed forward so let's do it we will call this block the encoder block because the decoder has three blocks inside the encoder has only two [Music] and as I so before we have the self-attention block inside which is the multi-head attention we call it self-attention because in the case of the encoder it is applied to the same input with three different roles the role of query of the key and the value which is our fifth forward and then we have a dropout which is a floating point and then we Define and then we Define the two residual connections we use the model list which is a way to organize a list of modules in this case we need two of them okay let's define the forward method I Define The Source mask what is the source mask is the mask that we want to apply to the input of the encoder and why do we need a mask for the input of the encoder because they we want to hide the interaction of the padding word with other words we don't want the padding word to interact with other words so we apply the mask and let's do the first residual connection let's go back to check the video actually to check the slide so we can understand what we are doing now so so the first script connection is this x here is going to here but before it's added and with add a norm we first need to apply the multi-headed tension so we take this x we send it to the multihead attention and at the same time we also send it here and then we combine the two so the first clip connection is between X and then the other X is coming from the self attention so this is a function so I will Define the sub layer user using a Lambda so this basically means first apply the self attention self-attention in which we give the query key and the value is over X so our input so this is why it's called self-attention because the role of the query key and the value is X itself so the input itself so it's the sentence that is watching itself so each word of one sentence is interacting with other words of the same sentence we will see that in the decoder it's different because we have the cross attention so the keys coming from the decoder are watching the sorry the query coming from the decoder are watching the key and the values coming from the encoder we give it the source mask so what is this basically we are calling this function the forward function of the multi-head attention block so we give query key value and the mask this will be combined with this by using the residual connection then again we do the second one the second one is the feed forward I will need Lambda here actually and then we return X so this means combine the the feed forward and then the X itself so the output of the previous layer which is this one and then apply the residual connection and this defines our encoder block now we can Define the encoder object so because the encoder is made up of many encoder blocks we can have up to n of them according to the paper so let's define the encoder [Music] how many layers we will have we will have n so we'll have many layers and they are applied in one after another so this is a model list and at the end we will apply a layer normalization [Music] so we apply one layer after another the output of the previous layer becomes the input for the next layer I here I forgot something and and finally we apply the normalization and this concludes our journey around the encoder let's go have a brief overview of what we have done we have taken the inputs send it to the we didn't okay we didn't combine all the blocks together for now we just built this big block here com control called encoder which contains two smaller blocks that are this clip connection the script connection first one is between the multi-header tension and this x that is sent here the second one is between this feed forward and this x that is sent here we have n of these blocks one after another the output of the last will be sent to the decoder before but before we apply the normalization now we will we build the the decoder part now in the decoder the output embeddings are the same as the input embeddings I mean the the class that we need to Define is the same so we will just initialize it twice and the same goes for the positional encodings we can use the same values that we use for the encoder also for the decoder what we need to Define is this big block here which is made of Muscat multi-head attention add a norm so one skip connection here another mostly had attention with another skip connection and the feed forward with the skip connection here the way we defined the multi-head attention class actually already takes into consideration The Mask so we don't need to reinvent the wheel also for the decoder we can just Define the decoder block which is this big block here made of three sub layers and then we build the decoder using this n n number of these decoder blocks so let's do it let's define first the decoder block in the decoder we have the self-attention which is let's go back this is a self-attention because we have this input that is used three times in the musket multi-hypertension so this is called self-attention because the same input plays the role of the query the key and the values which means that the same sentence is each word in the sentence is matched with each other word in the same sentence but in this part here we will have an attention calculated using the query coming from the decoder while the key and the values will come from the encoder so this is not a self-attention this is called cross attention because we are crossing two kind of different objects together and matching them somehow to calculate the relationship between them okay let's define this is the cross attention block which is basically the multi-hypertension but we will give it the different parameters is our feet forward and then we have a dropout okay we Define also the residual Connection in this case we have three of them wonderful okay let's build the forward method which is very similar to the encoder with a slight difference that I will highlight we need x what is X is the input of the decoder but we also need the output of the encoder we need the source mask which is the mask applied to the encoder and the target mask which is the mask applied to the decoder why they are called Source mask and Target mask because in this particular case we are dealing with a translation task so we have a source language in this case it's English and we have a target language which in our case is Italian so you can call it encoder mask or decoder mask but basically we have to mask one is the one coming from the encoder one is the one coming from the decoder so in our case we will call it source so the source mask is the one coming from the encoder so the source language and the target mask is the one coming from the decoder so the target language and just like before we calculate the self attention first which is the first part of the decoder block in which the query the key and the values are the same input but with the mask of the decoder because this is the self attention block of the decoder and then we need to combine the we need to calculate the cross attention which is our second residual connection we give him okay in this case we are giving the query coming from the decoder so the X the key and the values coming from the encoder and the mask of the encoder and finally the feed forward block just like before and that's it we have all the ingredients actually to build the decoder now which is just n times this block one after another just like we did for the encoder [Music] also in this case we will provide very many layers so layers it's just a model list and we will also have a normalization at the end just like before we apply the the input to the to one layer and then we use the use the output of the previous layer and give it as an input of the next layer so uh delay each layer is the decoder block so we need to give it X we need to give it the encoder output then the source mask and the target mask so each of them is this we are calling the forward method here so nothing different and finally we apply the normalization and this is our decoder there is one last ingredient we need to to have what is a full Transformer so let's have a look at it the last ingredient we need is this layer here the linear layer so as you remember from my slides the output of the multi-head attention is something that is sequenced by D model so here we expect to have the outputs to be sequenced by D model if we don't consider the batch dimension however we want to map these words into the work back into the vocabulary so that's why we need this linear layer which will convert the embedding into a position of the vocabulary I will call this a layer called the projection layer because it's projecting the embedding into the vocabulary let's go build it [Music] what we need for this layer is the D model so the B model which is an integer and the vocabulary size but this is basically a linear layer that is converting from the model to vocabulary size so so start projection layer is let's define the forward method okay what do we want to do let me write this little comment we want to batch sequence length remodel converted into patch sequence land vocabulary size and in this case we will also already apply the soft Max and actually we will apply the log soft Max for numerical stability um like that like I showed before to the last dimension and that's it this is our projection layer now we have all the ingredients we need for the Transformer so let's define our Transformer block in a Transformer we have an encoder which is our encoder we have a decoder which is our decoder we have a source embedding why we need the source embedding and the target embedding because we are dealing with multiple languages so we have one input embedding for the source language and one input embedding for the target language and we have the target embedding then we have the source position and the target position which will be the same actually and then we have the projection layer we just save this now we Define three methods one two encode one to the code and one to project we will apply them in succession uh why why we don't just build one forward method because as we will see during inferencing we can reuse the output of the encoder we don't need to calculate it every time and also we prefer to keep the uh that this outputs separate also for visualizing the attention so for the encoder we have the source of the because we have the source a language and the source mask so the so what we do is we apply first the embedding then we apply the positional encoding and finally we apply the encoder then we Define the decode method which takes the encoder output which is a tensor Source mask which is a tensor the target and the target mask and what we do is Target we first apply the target embedding to the Target sentence then we apply the positional encoding to the Target sensor sentence and finally with the code this is basically the method the forward method of this decoder so we have the same order of parameters yes finally we Define the project method in which we just apply the projection so we take from the embedding to the vocabulary size okay this is also the this is the last block we had to build but we didn't make a method to combine all these blocks together so we built many blocks we need one that given the hyper parameters of the Transformer builds for us one single Transformer in initializing all the encoder decoder the embeddings ETC so let's build this function let's call it the build Transformer that given all the hyper parameters will build the transformer for us and also initialize the parameters with some initial values what we need to define a transformer for sure in this case we are talking about translation okay this model that we're building we will be using for translation but you can use it for any task so the naming I'm using are basically the ones used in the translation task later you can change the naming but the structure is the same so you can use it for any other task for which the the Transformer is applicable so the first thing we need is the vocabulary size of the source and the target because we need to build the embedding the embedding because the embedding need to convert the from the token of the vocabulary into a vector of size 512 so it needs to know how much public is the vocabulary so how many vectors it needs to create then the target which is also an integer then we need to tell him what is the source sequence length and the target sequence length this is very important they could also be the same in our case it will be the same but they can also be different for example in case you are using the Transformer that is dealing with the two very different languages for example for translation in which the tokens needed for the source languages as language are much higher or much lower than the other one so you don't need to keep the same length you can use different lengths the next hyper parameter is the D model which we initialize with 512 because we want to keep the same values as the paper then we Define the hyper parameter n which is the number of layers so the number of encoder blocks and the number of decoder blocks that we will be using is according to the paper is six then we Define the hyper parameter H which is the number of heads we want and according to the paper it is eight the Dropout is 0.1 and finally we have the hidden layer dff of the feed forward layer which is 2048 as we saw before on the paper and this first we do is we create the embedding layers so Source embedding then the target embedding then we create the positional encoding layers we don't need to create two positional encoding layers because actually they do the same job they and we they also don't add any parameter but because they have the Dropout and also because I want to make it verbal so you can understand each part without making any optimization I think actually it's it's fine because this is for educational purpose so I don't want to optimize the code I want to make it as much comprehensible as possible so I do every part I need I don't take shortcuts and then we created the encoder blocks we have n of them so let's define create an empty array so we have n of them so each encoder block has a self-attention so I encoded potential which is a multi-head attention block the multi-head attention requires the D model the h and the Dropout value then we have a feed forward block as you can see also the name that I'm using are quite long mostly because I want to make it as comprehensible as possible for everyone so each encoder block is made of a self-attention and a feed forward and finally we tell him how much is the dropout finally we added this encoder block and then we can create the decoder blocks we also have the cross attention for the decoder block we also have the feed forward just like the encoder then we're defining decoder block itself which is decoder block cross attention and finally the feed forward and the dropout and finally we save it in its array we now can create the encoder and the decoder we give him all his blocks which are n and then also the decoder and we create the projection layer which will convert the model into vocabulary size which vocabulary of course the Target because we want to take from The Source language to the target language so we want to project our output into the target vocabulary and then we build the Transformer foreign er a decoder Source embedding Target embedding then in Source position encoding Target positional encoding and finally the projection layer and that's it now we can just initialize the parameters using the Xavier uniform this is a way to initialize the parameters to make the training faster so they don't don't just start with random values and there are many algorithms to do it I saw many implementations using Xavier so I think it's a quite good start for the model to learn from and finally we return our beloved Transformer and this is it this is how you build the model and now that we have built the model we will go further to use it so we will create the we will first have a look at the data set then we will build the training Loop after the training Loop we will also build the inferencing part and the code for visualizing the attention so hold on and take some coffee take some tea because it's gonna be a little long but it's gonna be worth it now that we have built the the code for the model our next step is to build the training code but before we do that we first I let's recheck the code because we may have some typos I actually already made this check and there are few mistakes in the code I compare the old with the new one it is various miners problems so we wrote feed forward instead of feed forward here and so the same problem is also present every in every reference to feed forward and also here when we are building the decoder block and the other problem is that here when we build the decoder block we just wrote NN dot module instead it should be NN dot module list and then the feed forward should be also fixed here and here in the build Transformer method now I can delete the old one so we don't need it anymore let me check the model it's the correct one with feed forward yes okay our next step is to build the training code but before we build the training code we have to look at the data what kind of data are we going to work with so as I said before we are dealing with the translation task and I have chosen this data set called Opus books which we can find on hugging face and we will also use the library from hugging face to download this data set for us and this is the only Library we will be using beside it to pytorch because we of course we cannot reinvent the head data set by ourselves so we will use this data set and we will also use the hugging fix tokenizer library to transform this text into a vocabulary because our the our goal is to build the Transformer so not already match the wheel about everything so we will be only focusing on building and training the Transformer and in my particular case I will be using the subset English to Italian but we will build the code in such a way that you can choose the language and the code will act accordingly if we look at the data we can see that each data item is a pair of sentences in English and in Italian for example there was no possibility of taking a walk that day which in Italian means so we will train our Transformer to translate from The Source language which is English into the target language which is Italian so let's do it we will do it step by step so first we will make the code to download this data set and to create the tokenizer so what is the tokenizer let's go back to the slides to just have a brief overview of what we are going to do with this data the tokenizer is what comes before the input embeddings so we have an English sentence so for example your cat is a lovely cat but this sentence will come from our data set the goal of the tokenizer is to create this token so split this sentence into single Words which has many strategies as you can see here we have a sentence which is your cat is a lovely cat and the goal of the tokenizer is to split this sentence into single Words which can be done in many ways there is the bpe to organizer there is the word level tokenizer there is the sub Word level word part organizer there are many tokenazers the one we will be using is the simplest one called the word level tokenizer so the word level tokenizer basically will split this sentence let's say by space so each space defines the boundary of a word and so into the single words and each word will be mapped to one number so this is the job of the tokenizer to build the vocabulary and of these numbers and to map each word into a number the one we built the tokenizer we can also create special tokens which we will use for the transformer for example the tokens called padding they call the token called the start of sentence end of sentence which are necessary for training the Transformer but we will do it step by step so let's build first the code for the um building the tokenizer and to download the data set okay let's create a new file let's call it train dot Pi okay let's import our usual Library so torch we will also import towards Dot and then and we also because we we are using a library from hugging phase we also need to import the these two libraries we will using the we will be using the data sets Library which you can install using pip so data sets actually we will be using load data set and we will also using we'll be using the tokenizers library also from hugging phase which you can install with Pip we also need the which tokenizer we need so we are using we will use the word level tokenizer and there is also the trainers so the the the tokenizer the the class that will train the tokenizer so that will create the vocabulary given the list of sentences and we will split the word according to the white space um I will build one method by one by one so I will build first the methods to create the tokenizer and I will describe each parameter for now you will not have the bigger picture but later when we combine all these methods together you will have the bigger picture so let's first make the method that builds the tokenizer so we will call it get or build tokenizer and this method takes the configuration which is the configuration of our model we will Define it later the data set and the language for which we are going to build the tokenizer we Define the tokenizer path so the file where we will be saved this tokenizer and we do it path of config okay let me Define some things first of all this path is coming from the path lead so from pathlib this is the library that allows you to create absolute path giving relative paths and we pretend that we have a configuration called the tokenizer file which is the path to the tokenizer file and this path is formattable using the language so for example we can have something like this for example something like this and this will be um given the language it will create a tokenizer English or synchronize or Italian for example doesn't exist we create it I took all this code actually from the hugging phase there is it's nothing complicated I just taken their quick tour of their tokenizers library and it's really easy to use it so and saves you a lot of time because tokenizer to build a tokenizer is really Reinventing the wheel and we will also introduce the unknown word uh unknown so what does it mean if our tokenizer sees a word that it doesn't recognize in its vocabulary it will replace it with this word unknown it will map it to the number corresponding to this word unknown the print organizer means basically that we split by white space and then we train we build the trainer to train our tokenizer okay this is the trainer what does it mean it means it will be a word level trainer so it will split words using the white space and using the single words and it will also have four special tokens one is unknown which means that if you cannot um find that particular word in the vocabulary just to replace it with unknown it will also have the padding which we will use to train the to train the Transformer the start of sentence and the end of sentence special tokens mean frequency means that a word for a word to appear in our vocabulary it has to have a frequency of at least two now we can train the tokenizer we use this method which means we built first a method that gives all the sentences from our data set and we will build it later okay so let's build also this method called get all sentence so that we can iterate through the data set to get all the sentences corresponding to the part the particular language for which we are creating the tokenizer as you remember each item in the data set it's a pair of sentences one in English one in Italian we just want to extract one particular language this is the item representing the pair and from this pair we extract only the one language that we want and this is the code to build the tokenizer now let's write the code to load the data set and then to build the tokenizer we will call this method to get data set and which also takes the configuration of the model which we will Define later so let's load the data set we will call it the S row okay hugging face allow us to download its data sets very easily we just need to tell him what is the name of the data set and then tell him what is the subset we want we want the subset that is English to Italian but we want to also make it configurable for you guys to change the language very fast so let's build this subset um dynamically we will have two parameters in the configuration one is called language source and one is called language Target later we can also Define what split we want of this data set in our case there is only the training split in the original data set from hugging phase but we will split by ourselves into the validation in the training data so let's build the tokenizer this is the raw data set and we also have the target okay now because we only have the training splits from hugging phase we can split it by by ourselves into a training and the validation we keep 90 of the data for training and 10 for validation the method random split allows it's a method from pytorch that allows to split a data set using the size that we give as input so in this case it means split this data set into this two smaller data set one of this size and one of this size but let's import the the the method from torch let's also import the one that we will need later and random split now we need to create the data set the data set that our model will use to access the 10 Source directly because now we just created the tokenizer and we just loaded the data but we need to create the tensors that our model will use so let's create the data set let's call it bilingual data set and for that we create a new file [Applause] also here we import torch and that's it we will call the data set we will call it bilingual data set okay as usual we Define the Constructor and in this contractor we need to give him the data set downloaded from hugging face the tokenizer of the source language the tokenizer of the target language The Source language the name of the source language the name of the target language and the sequence length that we will use okay we save all these values we can also save the the tokens the particular tokens that we will use to create the pencils for the model so we need the start of sentence end of sentence and the padding token so how do we convert the token start of sentence into a number into the input ID there is a special method of the tokenizer to do that so let's do it so this is the start of sentence token we want to build it into a tensor this stencil will contain only one number which is given by we can use this tokenizer from The Source or the target it doesn't matter because they both contain these particular tokens this is the method to convert into the token into a number so start of sentence and the type of this token of this tensor is we want it long because the vocabulary can be more than 32-bit long this vocabulary size so we usually use the long 64-bit and we do the same for the end of sentence and the padding token we also need to define the length method of this data set which tells the length of the the data set itself so basically just the length of the data set from hugging phase and then we need to define the get item method okay first of all we will extract the original pair from the hugging phase data set then we extract The Source text and the target text and finally we convert each text into a token into tokens and then into input IDs what does it mean we will first the tokenizer will first split the sentence into single words and then we'll map each word into its corresponding number in the vocabulary and it will do it in one path only this is done by the encode method dot IDs this gives us the input IDs so the numbers corresponding to each word in the original sentence and it will be given as an array we did the same for the decoder now as you remember we also need to pad the sentence to reach the sequence length this is really important because we we want our model to always work I mean the model always works with a fixed length sequence length but we don't have enough words in every sentence so we use the padding token so this pad here as the padding token to fill the sentence until it reaches the sequence length so we calculate how many padding toolkeys we need to add for the encoder side and for the decoder side which is basically how many we need to reach the sequence length minus 2 y minus 2 here so we already have this amount of tokens we need to reach this one but we will add also the starts of sentence token and the end of sentence token to this to the encoder side so we also have -2 here and here only -1 if you remember my previous video when we do the training we add only the start of sentence token to the decoder side and then in the label we only add the end of sentence token so in this case we only need to add one token special token to the sentence we also make sure that this sequence length that we have chosen is enough to represent all the sentences in our data set and if we choose a too small one we wanted to raise an exception so if so basically this number of padding tokens should never become negative okay now let's build the um the two tensors for the encoder input and for the decoder input but also for the label so one sentence will be sent to the input of the encoder one cent sentence will be sent to the input of the decoder and one sentence is the one that we expect as the output of the decoder and that output we will call label usually it's called Target or label I call it level we can cut the tensor of the start okay we can cut three tensors first is this start of sentence token then this the tokens of the source text okay then the end of sentence token and then enough padding tokens to reach the sequence length we already calculated how many embedding tokens we need to add to this sentence so let's just do it and this is the encoder input so let me write some comment here this is add SOS and ARS to the source text then we build the decoder input which is also a concatenation of tokens in this case we don't have the start of sentence we just have the we don't have the end of sentence we just have the start of strength sentence and finally we added the embed enough padding tokens to reach the sequence length we already calculated how many we need just use this value now and then we build the label in the label we only added the end of sentence token let me copy it's faster yeah because we need the same number of padding tokens as for the decoder input and let's double just for debugging let's double check that we actually reached this sequence length okay now that we have made this check uh let me also write some comments here here we are only adding EOS not here SOS with a decoder input and here is add EOS to the lab level but we expect is output from the decoder now we can return all these tensors so that our training can use them we return a dictionary comprised of encoder input what is the encoder input it's basically offside's sequence length then we have the decoder input which is also just a sequence length number of tokens I forgot a comma here and then we have the encoder mask so what is the encoder mask as you remember our we are increasing the size of the encoder input sentence by adding padding tokens but we don't want these padding tokens to participate in the self-attention so what we need is to build a mask that says that we don't want these tokens to be seen by the self-attention mechanism and so we built the mask for the encoder how do we build this mask we just say that all the tokens that are not padding are okay all the tokens that are padding are not okay we also on squeeze to add this sequence Dimension and also to add the batch Dimension later and we convert into integers so this is one one sequence length because this will be used in the self-attention mechanism however for the decoder we need a special mask that is a causal mask which means that each word can only look at the previous words and each word can only look at not known padding words so we don't want again that we don't want the padding tokens to participate in the self-attention we only want real words to participate in this and we also don't want each word to watch at words that come after it but only that words come come before it so I will use a method here called causal mask that will build it later we will build it also so now I just call it to show you how it's used and then we will proceed to build it also in this case we don't want the padding tokens and we add the necessary dimensions and also we do a Boolean end with capsule mask which is a method that we will build right now and this causal mask need to build a matrix of size sequence length to sequence length what is sequence length is basically the size of our decoder input and this let me write a comment for you so this is one two sequence line combined with so the end with one sequence length sequence and and this can be broadcasted Co Define this method causal mask so what is causal mask causal mask basically means that we want let's go back to the slides actually as you remember from the slides we want each word in the decoder to only watch words that come before it so what we want is to make all these values Above This diagonal that represents the multiplicity this Matrix represents the multiplication of the queries by the keys in the self-attention mechanism what we want is to hide all these values so your cannot watch the word cat is a lovely cat it can only watch itself but this word here for example this word lovely can watch everything that comes before it so from your up to lovely itself but not the word cat that comes after it so what we do is we want all these values here to be masked out so which also means that we want all the values Above This diagonal to be masked out and there is a very practical method in pytorch to do it so let's do it let's go build let's go build this method so the mask is basically torch dot t-r-i-u which means give me the every value that is above the diagonal that I am telling you so we want a matrix which Matrix Matrix made of all ones and this method will will return every value above the diagonal and everything else will become zero so we want diagonal one type we want it to be integer and what we do is return mask is equal to zero so this will return all the values above the diagonal and everything below the diagonal will become zero but we want actually the opposite so we say okay everything that is zero should will become true with this expression and everything that is not 0 will become false so we apply it here to build this mask so this mask will be um one by sequence length by sequence length which is exactly what we want okay let's add also the label the label is also oh I forgot the comma sequence length and then we have the source text just for visualization we can send it Source text and then the target text and this is our data set now let's go back to our Training Method to continue writing the training Loop so now that we have the data set we can create it we can create two data set one for training one for validation and then we send it to a data loader and finally to our training Loop uh we forgot to import the data set so let's import it here let's import the causal mask which we will need later what is our source language it's in the configuration what is our target language and what is our sequence length is also in the configuration we do the same for the validation but the only difference is that we use this one now and the rest is same we also just for choosing the max sequence length we also want to watch what is the maximum length of each sentence in the source and the target for each of the two splits that we created here so that if we choose as very small sequence length it we will know so basically we do I load each sentence from each language from the source and the target language I convert into IDs using the tokenizer and I check the length if the length is let's say 180 we can choose 200 as sequence length because it will cover all the possible sentences that we have in this data set if it's let's say 500 we we can use 510 or something like this because we also need to add the start of sentence and the end of sensor sentence tokens to this sentences foreign then let's create also the target IDs and this is the language of Target and then we just say the source maximum length is the maximum of the and the length of the current sentence the target is the Target and the target ID is then we print these two values we also do it for the Target and that's it now we can proceed to create the data loaders we Define the batch size according to our configuration which we still didn't Define but you can already guess what are its values we wanted to shuffled okay for the validation I will use a batch size of one because I want to process each sentence one by one and this method Returns the data order of the training the data loader of the validation the tokenizer of the source language and the tokenizer of the target language now we can start building the model so let's define a new method called get model which will according to our configuration our vocabulary size build the model the Transformer model so the model is we didn't import the model so let's import it build Transformer what is the first The Source vocabulary size and the target vocabulary size and then we have the sequence length and we have the sequence length of the source language and the sequence length of the target language we will use the same for both and then we have the D model which is the size of the embedding we can keep all the rest the default as in the paper if the model is too big for your GPU to be trained on you can try to reduce the number of heads or the number of layers of course it will impact the performance of the model but I think given the data set which is not so big and not so complicated it should not be a big problem because we are not building a huge data set anyway okay now that we have the model we can start building the training Loop but before we build the training Loop let me just Define this configuration because it keeps coming and I think it's better to define the the structure now so let's create a new file called config dot pi in which we Define two methods one is called get config and one is to map to get the the the path where we will save the weights of the model okay let's define the batch size I'll choose eight you can choose something bigger if your computer allows it the number of epochs for which we will be training I would say 20 is enough the learning rate I am using 10 to the power of -4 you can use other values um I saw I thought this learning rate is reasonable I it's possible to change the learning rate during training uh actually it's quite common to give a very high learning rate and then reduce it gradually with every Epoch we will not be using it because it will just complicate the code a little more and this is not actually the goal of this video the goal of this video is to teach how the Transformer works uh I have already checked this sequence uh length that we need for this particular data set from English to Italian which is 350 is more than enough and the D model that we will be using is the default of 512.
the language source is English so we are going from English the language Target is Italian we are going to translate into Italian we will save the model into the folder called weights and the file name of which model will be T model so Transformer model I also built the code to Prelude the model in case we want to restart the training after maybe it's crash and this is the tokenizer file so it will be saved like this or tokenizer n and tokenizer it according to the language and this is the experiment name for tensorboard on which we will save the the losses while training I think there is a comma here okay now let's define another method that allows to find the PATH where we need to save the weights why I'm creating such a complicated structure is because um we I will provide also notebooks to run this training on Google collab so we just need to change these parameters to make it work on Google collab and save the weights directly on your Google Drive I have already created actually this this code and it will be provided on GitHub and I will also provide the link in the video thank you okay the file is built according to model place name then the epoch dot PT let's import also here the path Library okay now let's go back to our training Loop okay we can build the training Loop now finally so train model given the configuration okay first we need to Define which device on which we will put all the tensors so Define the device if I have good on my computer so um okay then we also print we make sure that the weight folder is created and then we load our data set you can just take these values here and say it's equal to get DS of config which is also the model to get the vocabulary size there is Method called get for Hub size and I think we don't have any other parameter and finally we transfer the model to our device we also start sensorboard tensorboard allows to visualize the loss the the graphics the charts let's also import tensorboard let's go back let's also create the optimizer I will be using the Adam optimizer okay since we also have the configuration that allow us to resume the training in case the model crashes or something crashes let's Implement that one and that will allow us to restore the state of the model and the state of the optimizer let's Implement import this method we defined in the data set we load the file here we have a title okay the loss function we will be using is the cross entropy loss we need to tell him what is the ignore index so we don't we want him to ignore the padding token basically we don't want the loss to the padding token to contribute to the loss and we also will be using label smoothing label smoothing basically allows us our model to be less confident about its decision so um how to say imagine our model is telling us to choose the word number three and with a very high probability so what we will do with labels booting is take a little percentage of that probability and distribute to the other tokens so that our model becomes less sure of its choices so kind of less overfeed and this actually improves the accuracy of the model so we will use the levels putting of 0.1 which means from every highest probability probability token take 0.1 percent of score and give it to the others okay let's build finally the training Loop return the model to train I build a batch iterator for the um for the data loader using tkodm which will show a very nice progress bar and we need to import tqdm okay finally we get the tensors the encoder input what is the size of this tensor it's batch to sequence length the decoder input is batch of decoder input and we also move it to our device to sequence length we get the two masks also this is the size and then the decoder mask okay why these two masks are different because in the one case we are only telling him to hide only the padding tokens in the other case we are also telling him to hide all this subsequent words for each word to hide all the subsequent words to mask them out okay now we run the let's make some run the tensors to the Transformer so first we calculate the output of the encoder and we encode using what the encoder input and the mask of the encoder then we calculate the decoder output using the encoder output The Source the mask of the encoder then the decoder input and the decoder mask okay as we know this the result of this so the output of the model dot encode will be a batch sequence length D model also the output of the decoder will be batch sequence length T model but we want to map it back to the vocabulary so we need the projection so let's cut the projection output and this will produce a b so batch sequence length and Target vocabulary size okay now that we have the output of the model we want to compare it with our label so first let's extract the label from the batch and we also put it on another device so what is the label it's B so batch 2 sequence length in which each position tell so the label is already for each B and sequence length so so for each Dimension tells us what is the position in the vocabulary of that particular word and we want these two to be comparable so we first need to compute the loss into this I show you now projection output view -1 okay what does this do this basically transforms the I show you here this size into this size P multiplied by sequence length and then Target vocabulary size vocabularies okay because we want to compare it with this this is how the cross entropy wants the tensors to be and also the label okay now we can we have calculated the loss we can update our progress bar this one with the loss we have calculated and this is this will show the loss on our progress bar we can also log it on tensorboard essentially flush it okay now we can back propagate the loss so low start backward and finally we update the weights of the model so that is the job of the optimizer and finally we can zero out the the grid and remove the global step by one the global step is being used mostly for tensorboard to keep track of the loss we can save the model every yearbook OKAY model file name which we get from our special methods this one you tell him the configuration we have and the name of the file which is the epoch but with zeros in front and we save our model it is very good idea when we want to be able to resume the training to also save not only the the state of the model but also the state of the optimizer because the optimizer also keep tracks of some statistics one for each weight to to understand how to move each weight so independently and usually actually I I saw that the the optimizer the dictionary is quite big so even if it's big if you want your training to be resumable you need to save it otherwise the optimizer will always start from zero and will have to figure out from zero even if you start from a previous Epoch how to move each weight so every time we save some snapshot I always include it will state of the model this is all the weights of the model we also want to stay save the optimizer let's do also the global step and we want to save all this into the file name so model file name and that's it now let's build the code to run this so if name I really find the warnings frustrating so I want to filter them out because I have some some a lot of libraries especially Cuda I already know what's the content and so I don't want to visualize them every time but for sure for you guys I suggest watching them at least once to understand if there is any big problem otherwise they're just complaining from Cuda okay let's try to run this code and see if everything is working fine we should what we expect is that the code should download the data set the first time then it should create the tokenizer and save it into its file and it should also um start training the model for 30 epochs of course it will never finish but let's do it let me check again the configuration tokenizer okay let's run it foreign izer and we have some problem here sequence length okay finally the model is training I show you recap you guys what I had mistaken first of all the sequence length was written incorrectly there was a capital l here and also in the data set I forgot to save it here and here I had it also written capitalized so L was capital and now the training is going on and as you can see the training is quite fast or at least on my computer uh actually not so fast but because I choose a batch size of 8 I could try to increase it and it's happening on Cuda the loss is decreasing and the weights will be saved here so if we reach the end of the epoch it will create the first weight here so let's wait until the end of the ebook and see if the weight is actually created before actually finishing the training of the model let's do another thing we also would like to visualize the output of the model while we are training and this is called validation so we want to check how our model is evolving while it is getting trained so what we want to build is a validation Loop which will allow us to evaluate the model which also means that we want to inference from this model and change some sample sentences and see if how they get translated so let's start building the validation Loop the first thing we do is we build a new method called run validation and this method will accept some parameters that we will use for now I just write all of them and later I explain how they will be used okay the first thing we do uh to run the validation is we put our mode our model into evaluation mode so we do model dot eval and this means that this tells Pi torch that we are going to evaluate our model and then what we will do we will inference uh two sentences and see how they what is the output of the model so with the torch.not grad we are disabling the gradient calculation for this uh for every tensor that we will run inside this with block and this is exactly what we want we just want to inference from the model we don't want to train it during this Loop so let's get a batch from the validation data set because we're working friends only two so we keep a count of how many we have already processed and we get the input from this current patch I want to remind you that for the validation DS we only have a batch size of one this is the encoder input and we can also get the encoder mask let's just verify that the the size of the batch is actually one and now let's go to the interesting part so as you remember when we um calculate the where we want to inference the model we need to calculate the encoder output only once and reuse it for every token that we will the model will output from the decoder so let's create another function that will run the greedy decoding on our model and we'll use and we will see that it will run the encoder only once so let's call this function really decode okay let's create some tokens that we will need so the SOS token which is the start of sentence we can get it from either a tokenizer doesn't matter if it's the Target or the source they both have it ARS okay and then we what we do is we pre-compute the encoder output and reuse it for every token we get from the decoder so we just give the source and the source mask which is the encoder input and the encoder mask we can also call it encoder input and encoder mask then we get the then we okay how do we do the inferencing the first thing we do is we give to the decoder the start of sentence token so that the decoder will output the first token of the sentence of the translated sentence then at every iteration just like we saw in my slides at every iteration we add the previous token to the to the decoder input and so that the decoder can output the next token then we take the next token we put it again in front of the input to the decoder and we get the successive token so let's build the decoder input for the first iteration which is only the start of sentence token we fill this one with the start of sentence token and it has the same type as the encoder input okay now we will keep in asking the decoder to Output the next token until we reach either the end of sentence token or the max land we have defined here so we can do a while true and then our first stopping condition is if we the the decoder output which is becomes the input of The Next Step becomes large larger than Max plan or reaches Max land here why do we have two Dimensions one is for the batch and one is for the tokens of the of the decoder input now we also need to create a mask for this we can use our function causal mask to say that we don't want the input to watch future words and we don't need the other mask because here we don't have any padding token as you can see now we calculate the output we reuse the output of the encoder for every iteration of the loop we reuse the source mask so the input the mask of the encoder then we give the decoder input and along with its mask the recorder mask and then we get the next token so we get the probabilities of the next token using the projection layer but we only want the projection of the last token so the next token after the last we have given to the encoder now we can use the max so we get the token with the maximum probability this is the greedy search and then we get this word and we append it back to this one because it will become the input of the next iteration and we concat so we take the decoder input and we append the next token so we create another tensor for that yep should be correct okay if the next token so if the next word or token is equal equal to the end of sentence token then we also Stop the Loop and this is our greedy search now we can just return the output so the output is basically the decoder input because every time we are appending the next token to it and we remove the batch Dimension so we squeeze it and that's our greedy decoding now we can use it here in this function so in the validation function so we can finally get the model output is equal to 3D decode in which we we give him all the parameters and then we want to compare this model output with what we expected so with the label so let's append all of these so what we give to the input we gave to the model what the model output the output of the model so the predicted and what we expected as output we saved all of this in this lists and then at the end of the loop we will print them on the console to get the text of the output of the model we need to use the tokenizer again to convert the tokens back into text and we use of course the Target tokenizer because this is the target a language okay and now we save then all of this into their respective lists and we can also print it on the console while we are using why we are using this function called print message and why not just use the print of the Python because we are using here in the main Loop in the training Loop we are using uh here TKO DM which is our really nice looking progress bar but it is not suggested to print directly on the console when this progress bar is running so to print on the console there is one method called The Print provided by tqdm and we will give this method to this function so that the output does not interfere with the progress part printing can we print some bars and then we print all the messages and if we have already processed number of examples then we just break so why we have created these lists actually we can also send all of this to [Music] um to a tensorboard so we can so for example if we have tensorboard enabled we can send all of this to the tensorboard and to do that actually we need another library that allow us to calculate some metrics I think we can skip this part but if you are really interested I I in my in the code I published on GitHub you will find that I use this Library called the torch metrics that allows to calculate the Char error rate and the blue the blue metric which is really useful for translation tasks and the word error rate so if you really interested you can find the code on the GitHub but for our demonstration I think it's not necessary and actually this we can also remove it given that we are not doing this part okay so now that we have our run validation method we can just call it okay what I usually do is I run the validation at every few steps but because we want to see it as soon as possible uh the what we will do is we will first run it at our iteration and we also put this model.train inside of this Loop so that every time after we run the validation the model is back into it into its training mode so now we can just run validation and we give it all the parameter that it needs to to run the validation so give it more leader model okay for printing message are we printing any message we are so let's create a Lambda and we just do and this is the message to write with the tqdm then we need to give the global step and the writer which we will not use but okay now I think we can run the training again and see if the validation works all right looks like it is working so the model is okay it's running the validation at every step which is not desirable at all but at least we know that the greedy search is working and it's not at least looks like it is working and the model is not predicting anything useful actually it's just predicting a batch of commas because it's not trained at all but if we train the model after a while we should see that after a few epochs the model should become better and better and better so let's stop this training and let's put this one back to where it belongs so at the end of every ebook here and this one we can keep it here no problem yeah okay I will now skip fast forward to a model that has been pre-trained I pre-trained it for a few hours so that we can influence it and we can visualize the attention I have copied the pre-trained weights that I pre-calculated and I also created this notebook reusing the functions that we have defined before in the train file the code is very simple actually I just copy and pasted the code from the train file I just load the model and run the validation the same method that we just wrote and then I ran the validation on the pre-trained let's run it again for example and as you can see the model is inferencing 10 examples sentences and the result is not bad I mean we can see that 11 smile Levinson race 11 series it's matching and most of them matching actually we could also say that it's nearly over fit um for this particular data but this is the power of the Transformer I didn't train it for many days I just trained it for a few hours I if I remember correctly and the results are really really good and now let's write let's make the notebook that we will use to visualize the attention of this pre-trained model given the file that we built before so train.pi you can also train your own model choosing the language of your choice which I highly recommend that you change the language and try to see how the model is performing and try to diagnose why the model is performing bad if it's in performing bad or if it's performing well try to understand how can you improve it further so let's try to visualize the attention so let's create a new notebook let's call it let's say attention visualization okay so the first thing we do we import all the libraries we will need I will also be using this Library called altire uh it's a visualization library for charts it's nothing related to deep learning actually it's just a visualization function and the particular the visualization function actually I found it online it's not written by me just like most of the visualization functions you can find easily on the internet if you want to build a chart or if you want to build a histogram Etc so I am using this Library mostly because I copied the code from the internet to visualize it but all the rest is my own code so let's import it okay let's import all of these and of course you will have to install this particular Library when you run the code on your computer let's also Define the file the device you can just copy the code from here and then we load the model which we can copy from here like this okay let's paste it here and this one becomes vocabulary source and vocabulary Target foreign to load the batch oops I will convert the batch into tokens Now using the tokenizer and of course for the decoder we use the target vocabulary so the target tokenizer so let's just infer using our gridity code algorithm so we provide the model we return all this information okay now I will build the necessary functions to visualize the visualize the attention I will copy some functions from another file because actually what we are going to build is nothing interesting from a learning point of view for with regards to the Deep learning it's mostly functions to visualize the data so I will copy it because it's quite long to write and the Salient part I will explain of course and this is the function okay what does this function do basically we have the attention that we will get from the encoder how to get the attention from the encoder for example the attention we have in three positions first is in the encoder the second one is in the ink decoder at the beginning of the decoder so the self attention of the decoder and then we have the cross attention between the encoder and the decoder so we can visualize three type of attention how to get the information about the attention well we load the other model we have the encoder we choose which layer we want to get the attention from and then from each layer we can get the self-attention block and then its attention scores how do where does this variable come from if you remember when we defined the attention calculation here here when we calculate the attention we not only return the output to the next layer we also give this attention scores which is the output of the soft Max and we also and we save it here in this variable self dot attention scores now we can just retrieve it and visualize it so this function Will based on which attention we want to get from which layer and from which head we'll select the um the Matrix the correct Matrix this function builds a data frame to visualize the information so the tokens and the score extracted from this Matrix here so it will this Matrix we extract the row and the column and then we also built the chart the chart is built with Altair and what we will build actually is we will get the attention for all the we I built this method to get the attention for all the heads and all the layers that we pass to this function as input so let me run this cell now okay let's create a new cell and then let's just run it okay first we want to visualize the sentence that we are dealing with so the batch order input tokens so we load a batch and then we visualize what is the source and the target and to the Target finally we calculate also the length what is the length Okay it's uh basically all the characters that come before the padding character so the first occurrence of the padding character because this is the batch taken from the data set which is already the tensor build for training so they already include the padding in our case we just want to retrieve the number of actual uh characters in our sentence so this one we can the number of actual words in our sentence so we can check the number of words that come before padding so let's run this one and there is some problem here I forgot to this function was wrong so now it should work okay this sentence is too small let's get a longer one okay let me check the quality you cannot remain as you are especially you know okay looks not bad okay let's print the attention for the layers let's say 0 1 and 2 because we have six of them if you remember the parameter is n is equal to 6 so we will just visualize three layers and we will visualize all the heads we have eight of them for each layer so the head number zero one two three four five six seven and seven okay let's first visualize the encoder self attention and we do get all attention Maps which one we want so the encoder one and we want these layers and these heads and what are their row tokens the encoder input tokens and what are the what what do we want in a column because we are going to build a grid so as you know the the attention is a grid that correlates rows with columns in our case we are talking about the self attention of the encoder so it's the same sentence that is attending itself so we need to provide the input sentence of the encoder on both the rows and the columns and what is the maximum number of length that we want to visualize okay let's say we want to visualize no more than 20 so the minimum of 20 and sentence length okay this is a visualization we can see and as we expected actually when we visualize the attention we expect the values along the diagonals to be high because it's the dot product of each token with itself and we can see also that there are other interesting relationships for example we said that the start of sentence token and the end of sentence token at least for the head 0 and layer 0 they are not related to other words like I would expect actually and but other heads they do learn some very small mapping we can if we hover over each of the grid cells we can see the actual value of the self-attention so the score of the self-attention for example we can see the straw the attention is very strong here so the word especially and especially are related so it's the same word with itself but also especially and now and we can visualize this kind of attention for all the layers so because each head will will watch different aspect of each word because we are Distributing the word embedding among the heads equally so each head will see a different part of the embedding of the word we also hope that they learn different kind of mapping between the words and this is actually the case and between one layer and the next we also have different w q w k and WV metrics so they should also learn different relationships now we can also want we may also want to visualize the attention of the decoder so let's do it let me just copy the code and just change the parameters okay here we want the decoder one we want the same layers Etc but the tokens that we will be on the um rows and the columns are the decoder tokens so decoder input tokens and decoder input tokens let's visualize and also we should see Italian language now because we are using the decoder self attention and it is so here we see a different kind of attention on the decoder side and also here we have multiple heads that should learn different mapping and also different layers should learn different mappings between words the one I find most interesting is the cross attention so let's have a look at that okay let me just copy the code and run it again Okay so if you remember the method it's encoder decoder same layer so here on the rows we will show the encoder input and on the columns we will show the decoder input tokens because it's a cross attention between the encoder and the decoder okay this is how the um more or less how the interaction between the encoder and the decoder works and how it happens so this is where we find the the cross attention calculated using the keys and the values coming from the encoder while the query is coming from the decoder so this is actually where the translation task happens and so this is how the model learns to relate these two sentences to each other to actually calculate the translation so I invite you guys to run The Code by yourself so the first suggestion I give you is to write the code along with me with the video you can pause the video you can write run write the code for by yourself okay let me give you some practical examples for example when I'm writing the model code I suggest you watch me write the code for one particular layer and then stop the video write it by yourself take some time don't watch the solution right away try to figure out what is going wrong and if you really cannot after one two minutes you cannot really figure out what is the problem you can have a glimpse at the video but try to do it by yourself some things of course you cannot come up by yourself so for example for the positional encoding and all this calculation it's all basically just a application of formulas but the point is you should at least be able to come with a structure by yourself so oh how all the layers are interacting with each other this is my first recommendation and why about the training Loop the the training part actually is quite standard so it's very similar to other um training Loops that you may have seen the interesting part is how we calculate the loss and how we use the Transformer model and the last thing that is really important is how we inference the model which is in this greedy decode so thank you everyone for watching the video and for staying with me for so long I can assure you that it was worth it and I hope in the next videos to make more examples of Transformers and other models that I am familiar with and I also want to explore with you guys so let me know if you there is something that you don't understand or you want me to explain better I will also for sure follow the comment section and please write me thank you and have a nice day
Up Next

88:41
Electricity Demand Prediction with XGBoost: Complete ML Project in Python
@data_science_lovers
3.3K views•2025-07-17

87:26
Introduction to Secure Multiparty Computation with Yehuda Lindell
@fhe_org
7.7K views•2021-02-04

4:55
HTTP Requests Explained: GET, POST, PUT, DELETE
@codecademy
103.1K views•2021-10-07

19:25
Enigma Machine Mechanics: WWII Encryption Explained
@JaredOwen
13.2M views•2021-12-11
Related Study Plans & Knowledge Roadmaps
Structured learning paths in Computer Science
computer-science
Container Runtimes: Namespaces, Cgroups & Go
01Linux Systems & Go Programming Foundations
02The Core of Isolation: Chroot and Filesystems
03Linux Namespaces: Process Isolation
+ 3 more learning modules
32h6 modules
Explore Roadmap
computer-science
Building a CHIP-8 Emulator: Rust & CPU Basics
01Computer Architecture Foundations (Bits & Bytes)
02Rust Programming for Systems Development
03CHIP-8 Virtual Hardware Specifications
+ 2 more learning modules
32h5 modules
Explore Roadmap
computer-science
Building BitTorrent: Go, P2P & Concurrency
01Go Fundamentals & Concurrency
02Networking Foundations & P2P Architecture
03Bencode Parsing & Torrent Metadata
+ 3 more learning modules
26h6 modules
Explore Roadmap
computer-science
Actor Models (C++ Concurrency & Lock-Free)
01C++ Multi-Threading Foundations
02Thread Pools and Task Scheduling
03Atomics and Lock-Free Queue Design
+ 3 more learning modules
45h6 modules
Explore Roadmap