















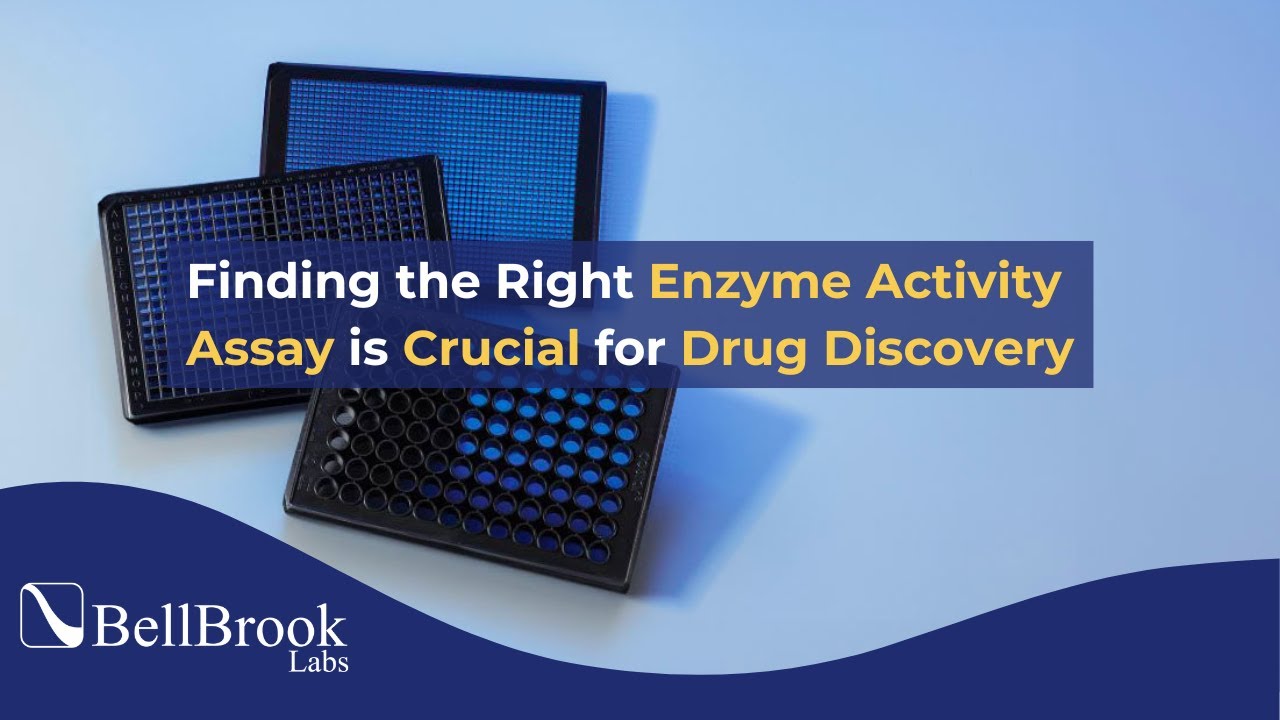



This video demonstrates the complete protocol for performing enzyme assays on protein fractions collected from DEAE column chromatography, including sample loading, substrate addition, 20-minute incubation, and plate reader analysis to characterize mutant proteins.
Enzyme Assay Protocol: Characterizing Mutant Proteins
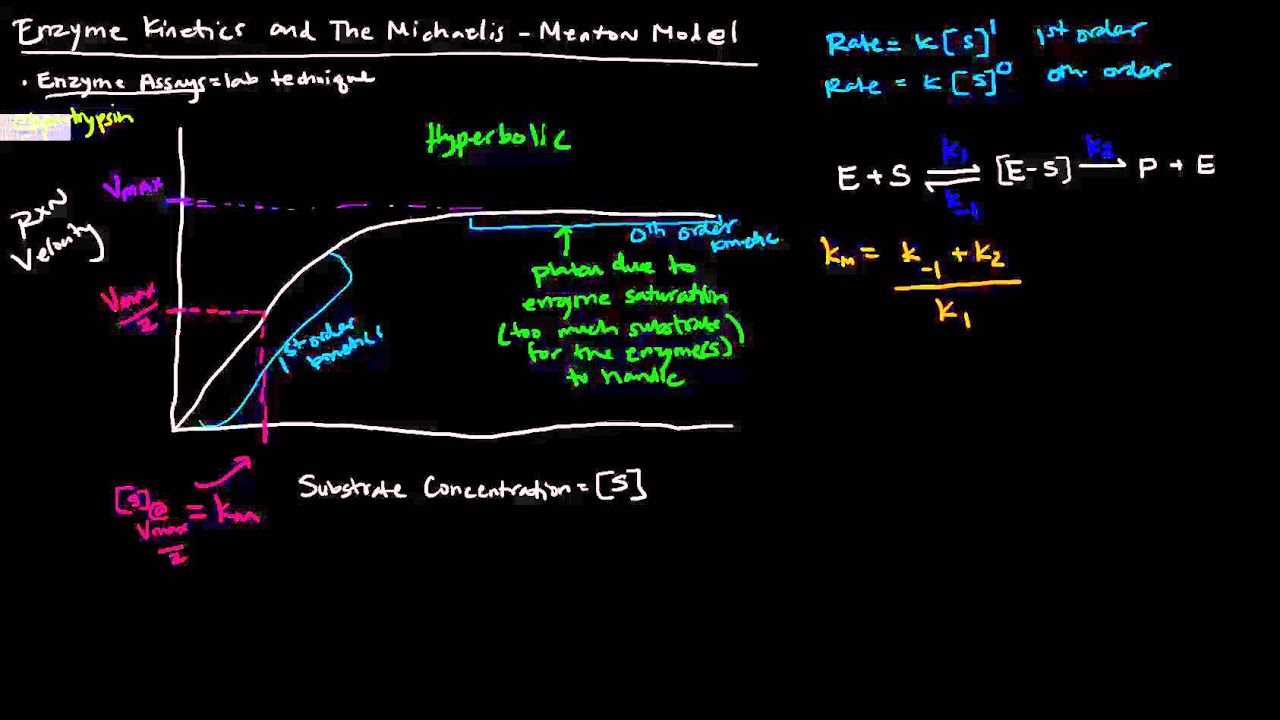
Added:Fundamental principles of enzyme kinetics, including substrate binding, active sites, and the Michaelis-Menten model.
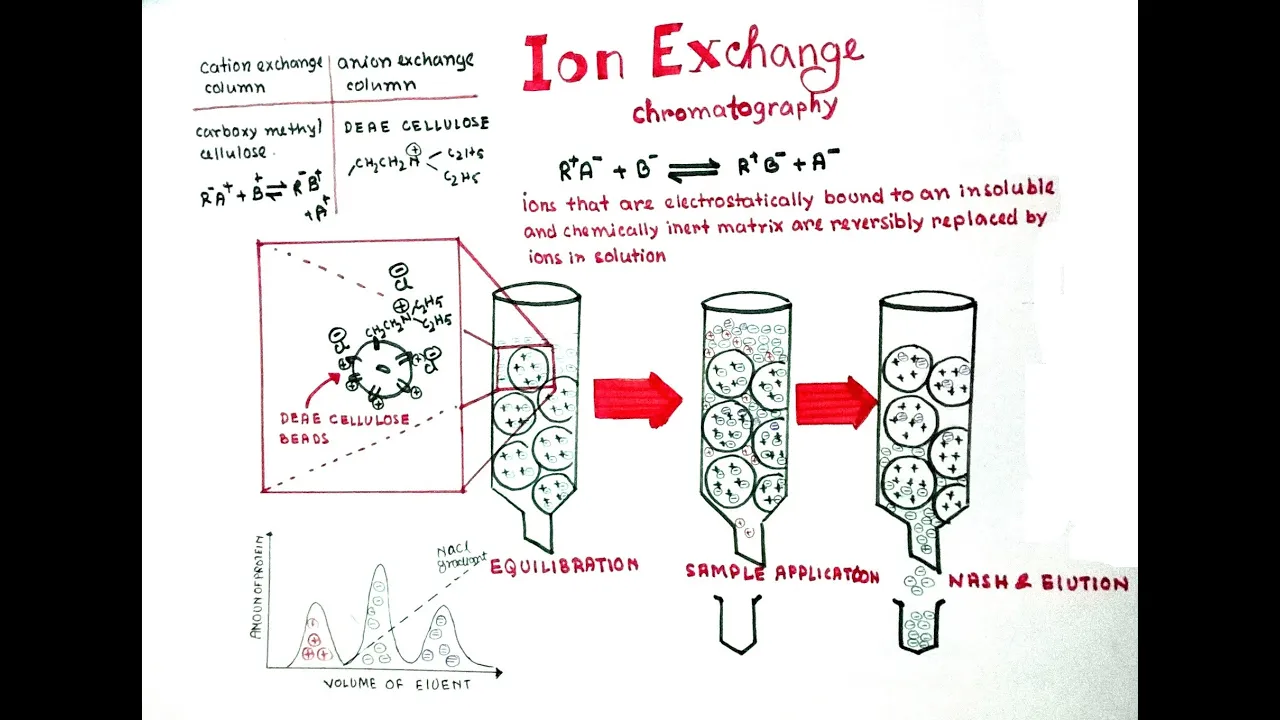
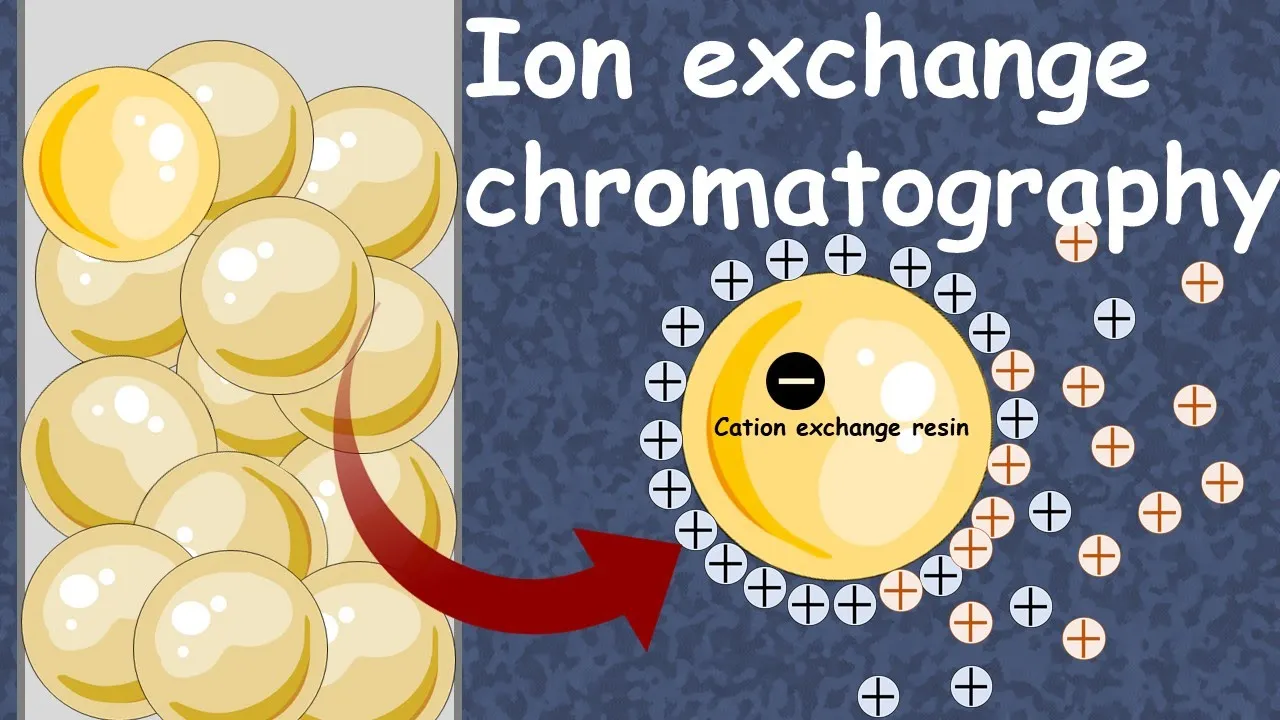
Concepts of protein purification, specifically anion exchange chromatography using DEAE (diethylaminoethyl) cellulose columns.
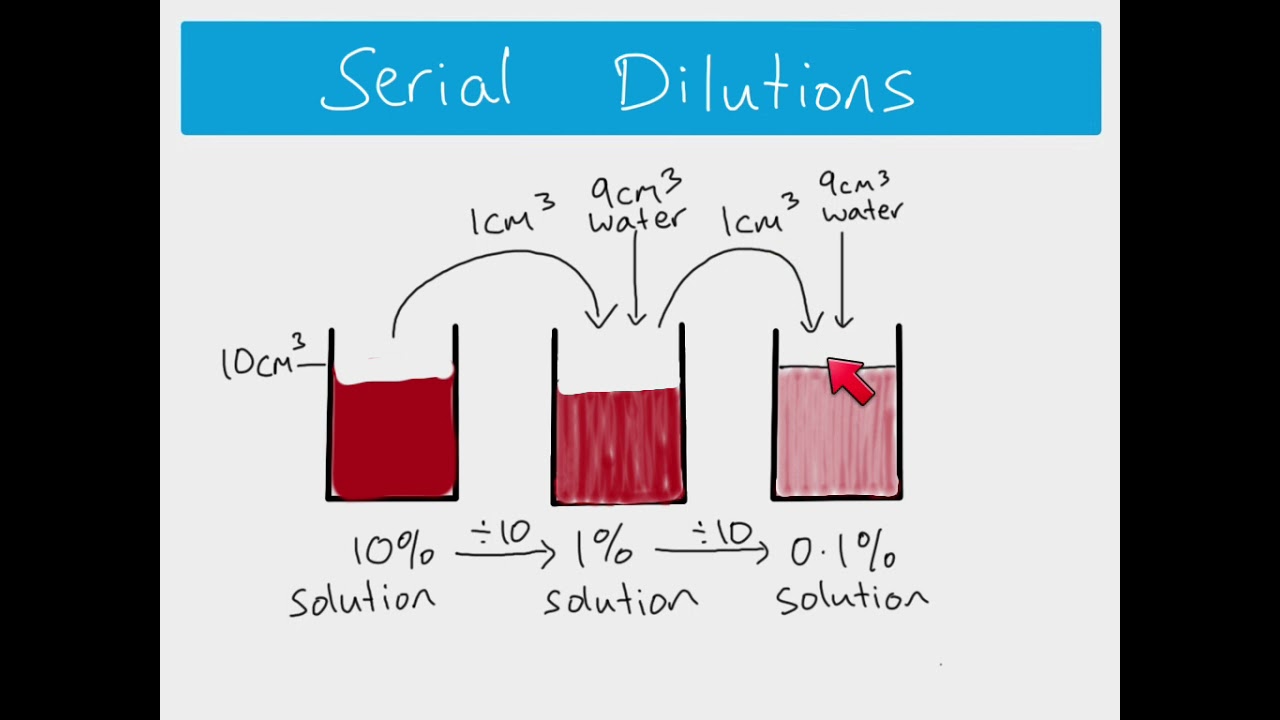
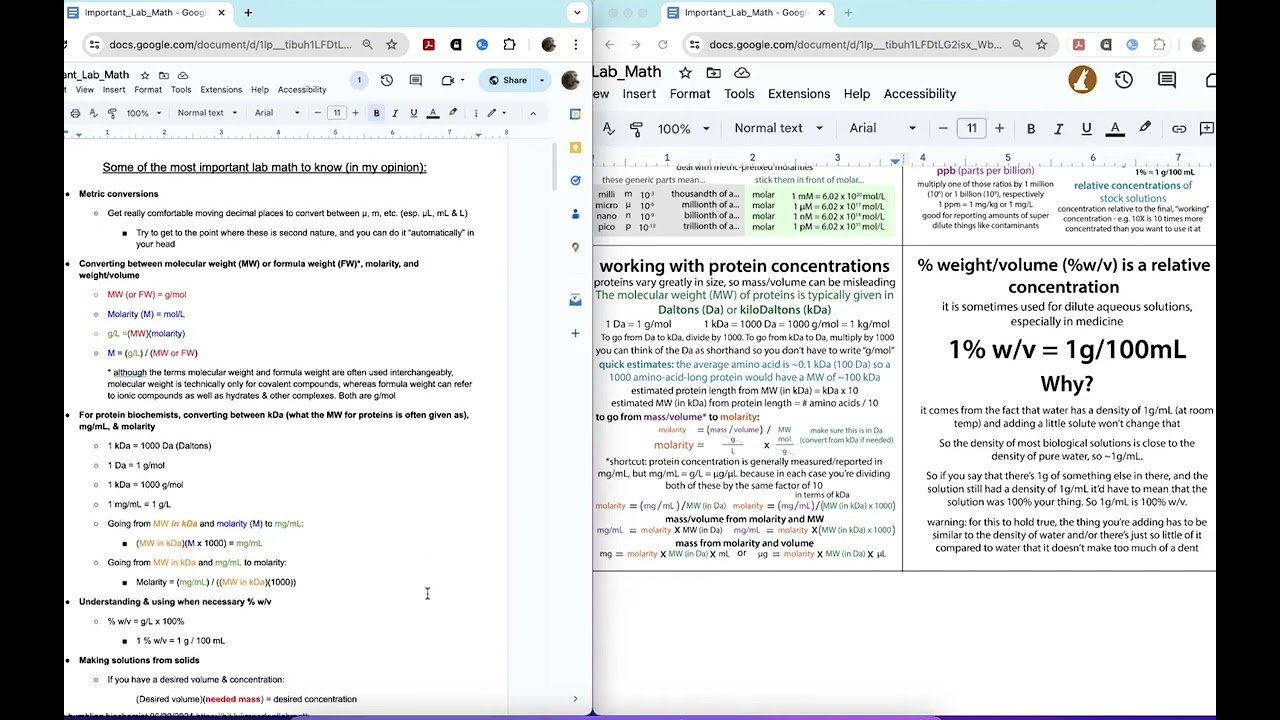
Basic laboratory math for calculating serial dilutions, stock concentrations, and multi-well plate layout planning.
Understanding how genetic mutations alter protein structure and potentially disrupt or enhance enzymatic function.
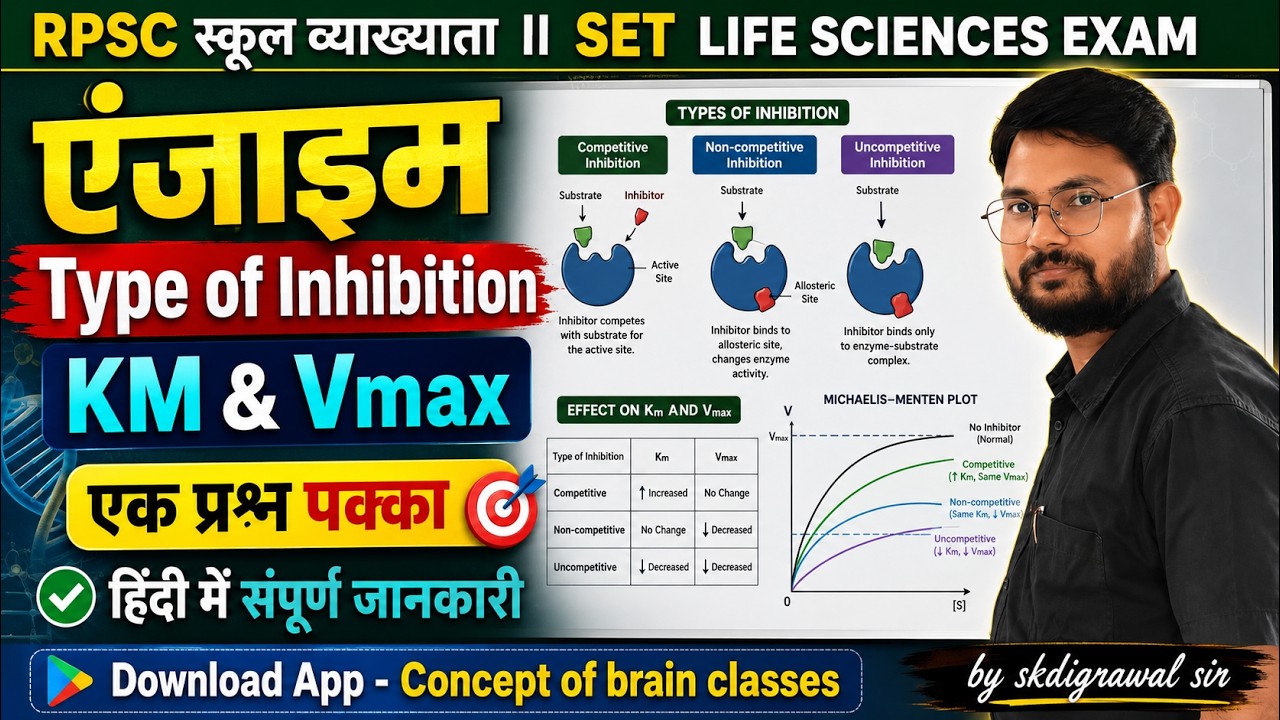
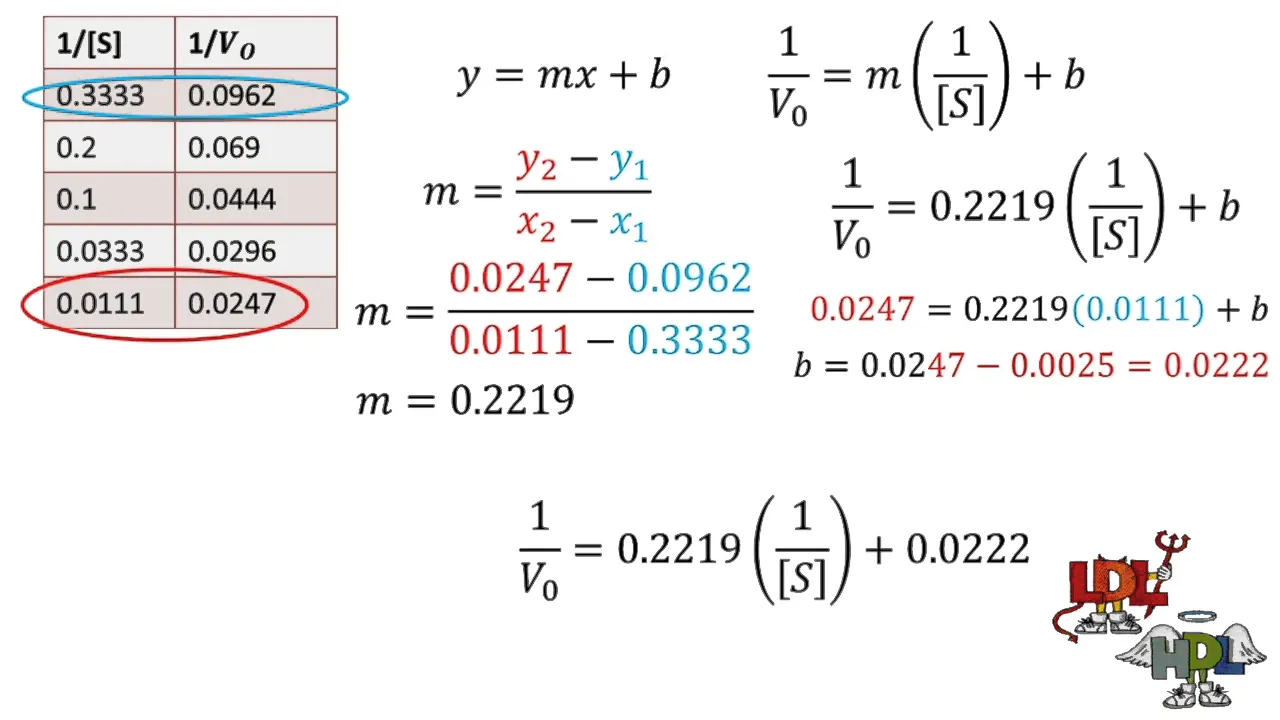
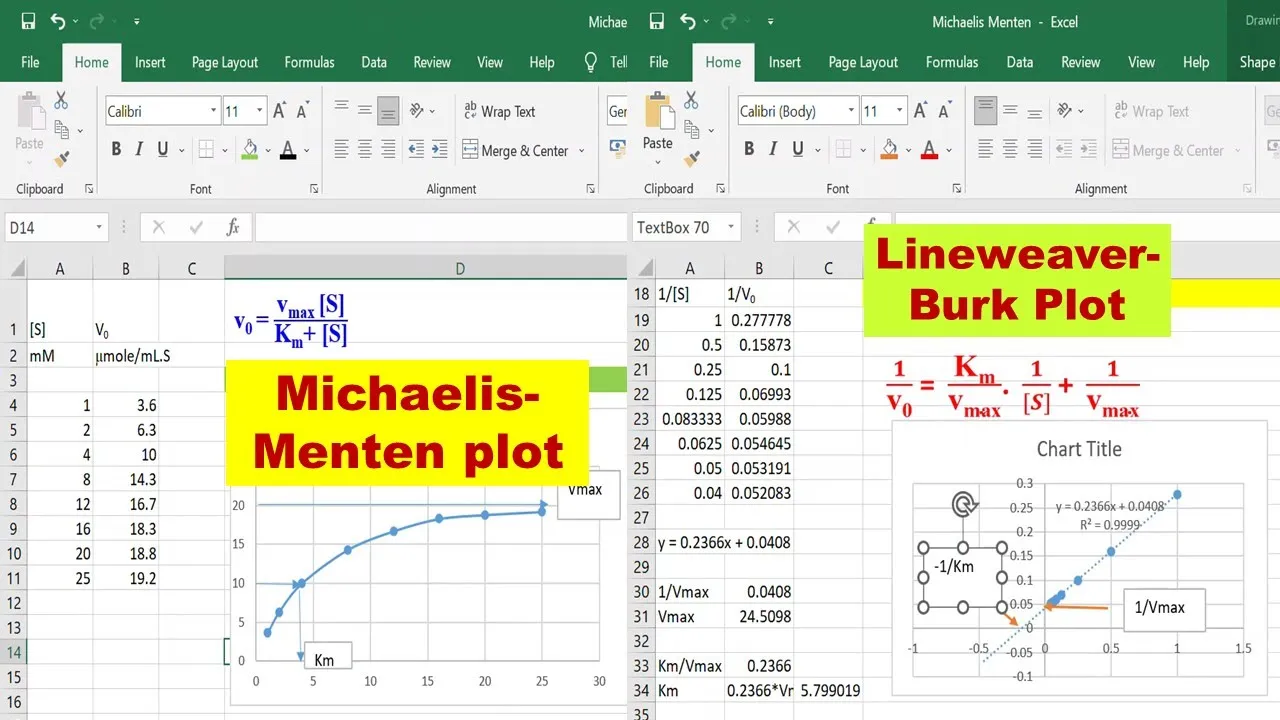
Mathematical analysis of assay data to calculate kinetic parameters such as Km, Vmax, and kcat using Lineweaver-Burk or non-linear regression plots.
Structure-function analysis to correlate the mutant's kinetic changes with 3D structural alterations (e.g., active site geometry).
Scaling up enzyme assays for high-throughput screening (HTS) in directed evolution or drug discovery workflows.
Industrial and therapeutic applications of engineered mutant enzymes, such as biocatalysis or enzyme replacement therapy.
552 views11likes18:17Original Release: 2022-04-04
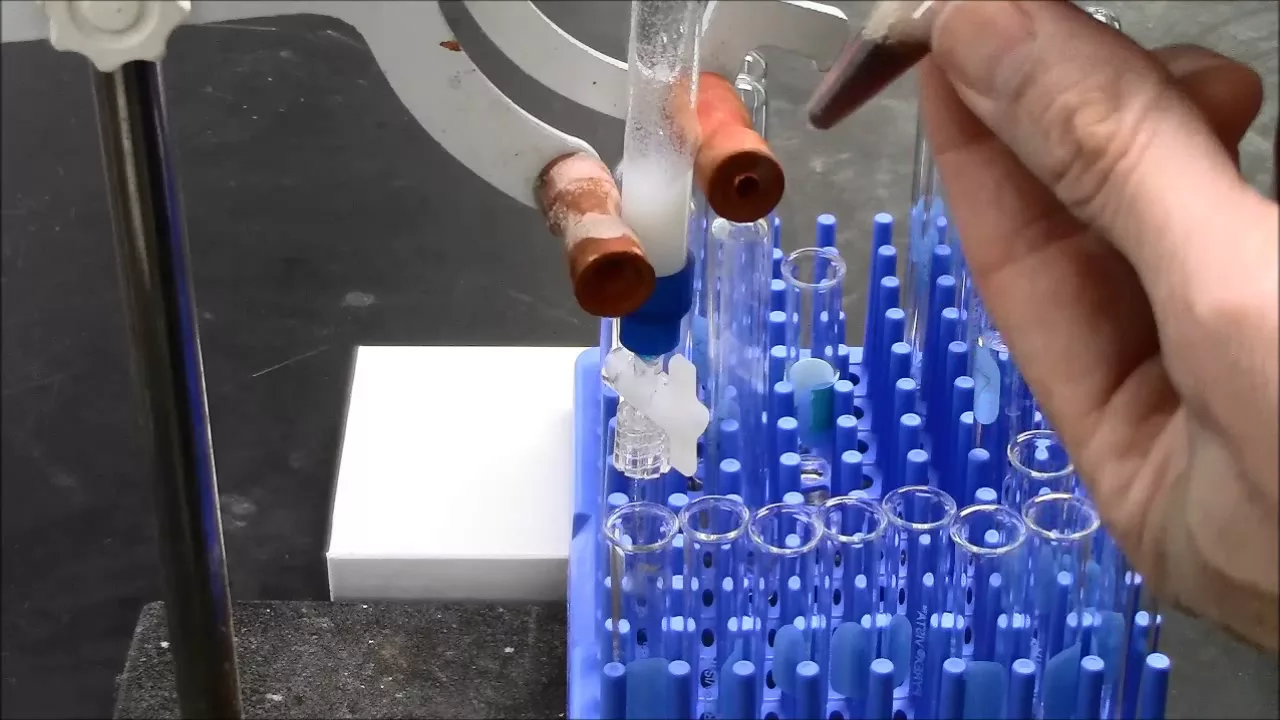
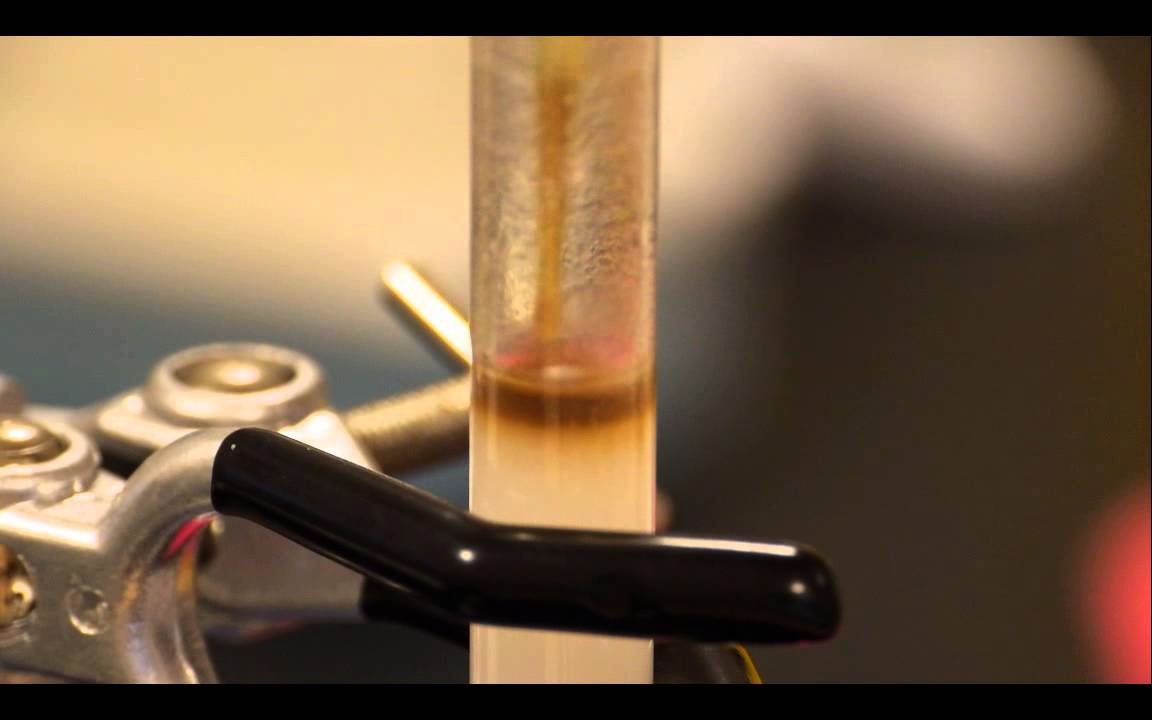
everyone we've been working all semester towards character creating a mutant then we're now we're starting to the phase of the class where we're going to start characterizing the mutant and what we did last week was we took the wild type and the in our in a mutant and we isolated protein from them if you remember right we ran a dea column and we generated a series of samples and have them all laid out here in the same order they are on this plate map and the protocol i find laying out the tubes having them in the right order makes so i can efficiently work through doing the assay but i want to go through this again and that we remember i'll do a quick review what we did is we loaded the column with lysate which is the sample right here and this is the 100 microliter sample that we took then we loaded that on the column we added some buffer and then we washed that we basically loaded that on the column and we collected two fractions which i called load one and two which i have in these positions right here then we loaded then i loaded 10 milliliters of 20 millimolar tris buffer at ph 8.1 and i collected five fractions and there are these fractions right here one through five and then we added 10 milliliters of point one molar salt and collected five fractions and they're labeled they're they're sitting right here then we added 0.3 molar so 10 milliliters of 3.3 molar and those five fractions are sitting right here and then lastly we added 0.6 molar to kind of wash everything else off the column and in this case if fo 8 was present it would actually be eluted in this stage so the 0.6 molar are in these locations right here so here we have all the samples all laid out and i'm going to start going ahead and walk you through the protocol of what we're going to do so in this protocol what we're going to pl what i'm planning on doing is adding all the enzymes samples to the wells and then after i do all of that then i will be adding a substrate which i have here to all of the all the wells and then it'll incubate for 20 minutes and then i'm going to repeat loading the plate once again but we're going to go ahead and load the same samples in the same order but we're instead of using the buffer here we're going to use a protein reagent in my case today i'm using bradford reagent because the bca region hasn't arrived yet but hopefully we'll be using bca which i think is actually a better protein assay for your studies whenever the class comes up so here let's go ahead and get started so i'm going to have my load 20 milliliters of the lysate in position a1 then i'm going to go ahead and load 10 microliters in a2 and then i'm going to load five microliters in a3 now i'll expose the tip i'm in the tip and now i will go ahead and i will add 10 microliters [Music] of of the 10 millimolar tris buffer i'll add 10 microliters to a2 and i will add 15 microliters to a3 so that one's down so what i'll do here is i'll just return that back to a spot next all of these samples are all interrelated and i'm going to order them in the order they're collected so i will use one tip throughout this whole process so next what i'm going to do is i'm going to take the load one solution take 20 microliters out add that to a4 next i will take the second load buffer we remember we collected two fractions i will go ahead and add that to a5 and so row a is now completed next what i'll do is i'll go ahead and add the next row and what i'll do here to make it a little bit faster is i will go ahead and lift the cap for each one of these solutions and what i'm going to do is as i pipette through them as soon as i take a sample out i'll close the lid so i'll know where i am on the plate you see here this sort this corresponds to b1 this is b2 b3 b4 b5 and so on so b1 20 microliters b2 and this is the wash so i've now loaded the wash one through five next is the point one molar one through five so that'd be b6 b6 b7 and b 10.
next i'll go ahead and open the lids for the next row okay so this is point three molar number one so it goes into c1 number two c2 c5 now we have all the point three molars now we'll go to the point six so the number one six goes into number six which is right here number seven and number 10.
so now on this plate we have loaded all the enzyme assay samples so the next thing to do is uh you'll be loading i did the wow type on top and that's the only one that i had done what i would do is i'll repeat these same things with my wild type but in your in your case you're going to be using the mutant so i'm going to go through here and do the same thing all over again and go through here okay so what i'll do is i'll load 20 microliters of lysate in f1 10 microliters and f2 and five microliters and f3 put that back up get rid of that tip next we'll go ahead and go to the get the buffer 10 microliters of the buffer in f2 and 15 and f3 now we've now we've done the same dilute we did the dilutions of the lysates so we have the undiluted the 50 diluted and 25 so this is 50 the active 50 the amount and this is 25 of the amount and this is just so we make sure we can get them all in line yeah all within the assay range this might be a lot of assay and the essay differences between the protein assay we do and this other assay i'm just leaving everything the same so we have a better shot at being able to get all the data we need so the next step that we need to do is 20 microliters of the load and that goes i'll go ahead and open both of these up so this will be in f4 and f5 next we'll go ahead and pop the caps again so so in g we have the wash one through five and point one one through five so we do the wash goes into g1 that's number one number two goes into g2 number three goes into g3 number four goes into g4 and 5 goes into g5 next we have the 0.1 molar washes that starts off in 6 g6 g9 ng 10.
okay next we'll go ahead and do the second row of the 0.3 and the 0.6 molar washes so these go in h1 to h5 h6 to h10 so this is the 0.3 goes into h1 h2 gets in number five okay next we go ahead and do the point sixes that starts out at well numbers h h7 9 and 10.
so now we have loaded all of the enzyme samples onto the plate the next day next step we're going to do is we're going to add some pnp standard to the to the wells so first we need to go ahead and set our pipette to the right volumes through out this exercise we've we've put 20 micro just to let everyone understand this what we've done is what the idea here is each of these wells currently has 20 microliter samples in them and we're we'll be adding 200 microliter samples to each one of them of the reagent each one of them so we'll start off by making our dilutions we'll add 110 microliters of buffer into d2 3 4 and 5.
and then we'll add the buffer to e2 3 4 and 5.
so if you remember the first experiment what we did we had you doing sterile dilutions in two ways we had one way where we had you add solution to each of the wells on a plate and then we took from the first well and diluted across the plate so that's what we're going to do this time so we're going to go ahead and take 330 microliters of pnp standard and we'll load that in d1 and e1 so d1 and e1 so now the first wheel has 330 microliters and each of these wells afterwards has 110.
so what we'll do is we're going to take 110 out of d1 and add that to d2 i will go ahead and pipette up and down to mix and then withdraw 110 and add that to the next one pipette up and down then take 110 out and then add it to the next next well and to will number five and then well number six we're just going to add 110 and leave it at that change the tip and we'll do this to the the e row as well 110 out dilute up and do by pipetting up and down take 110 out add 110 to the next well add to the next well to the next well and we'll add 110 here next just to create a blank i'll add 110 twice to seven d7 in e7 and this is just to create a blank for our standard curve now we have what we've added on throughout here we've added enzyme to all to number of wells and next stage is to go ahead and start the assay and the assay we're going to be adding 200 microliters of reagent to each well that we've added enzyme to so i have 200 microliters on here and since i'm just going to be adding them into the wells i will not be changing the pipette tip i won't be doing any mixing because i assume that adding 200 microliters to 20 will be essentially instantly mixed so i'm going to start off here we know that we have five wells here we know that we'll add them to b1 all the way to b10 and nice thing about it is you're adding this volume and it's easy to see which wells you've added stuff to adding the to the to g1 through 10 h1 to 10.
okay i've now added 200 microsd across here so currently what we'll do is i'll say put the lid on the plate and we'll let these incubate and you need to let them sit for 20 minutes and then after about 20 minutes bring them to to me or the ta and we will read them on the plate reader for you so go ahead and set your timer for 20 minutes and let it go for 20 minutes and send it to the reader so i'll be back in a few minutes and we're going to go ahead and do the protein assays
Up Next

24:18
MCAT Chem/Phys Passage Walkthrough: 99th Percentile Tips & Strategies
@Shemmassian
3.6K views•2022-05-13
178:38
Whole Brain Architecture: First International Workshop 2024
@thewholebrainarchitecturei9784
640 views•2024-07-22

9:49
FastAPI vs Flask vs Django: Choosing the Right Python Web Framework
@TechWithTim
302.5K views•2024-05-26

1:42
Game of Thrones Opening Credits: A Cinematic Analysis
@gameofthrones
46.3M views•2011-04-18
Related Study Plans & Knowledge Roadmaps
Structured learning paths in General & Interdisciplinary Studies
general-studies
Artificial Light: History, Tech & Human Impact
01The Pre-Electric Era: Fire, Oil, and Gas Lighting
02The Incandescent Revolution and Grid Electrification
03Gas Discharge and Fluorescent Illumination
+ 3 more learning modules
14h6 modules
Explore Roadmap
general-studies
Elevator Engineering: History, Physics & Cities
01From Hoists to Safety Brakes: The Dawn of Vertical Lift
02Hydraulic vs. Traction: The Engineering Physics of Elevators
03Modern Speed, Safety, and Algorithms
+ 2 more learning modules
12h5 modules
Explore Roadmap
general-studies
Rubber: Material Science, History & Geopolitics
01Origins of Natural Rubber & Mesoamerican History
02The Chemistry of Natural Rubber & Vulcanization
03The Geopolitics of the Rubber Boom & Colonization
+ 2 more learning modules
12h5 modules
Explore Roadmap
general-studies
Containerization: Evolution, Logistics & Trade
01Ancient Trade & Bulk Cargo: Amphorae to Barrels
02The Industrial Revolution & Cardboard Packaging
03The Containerization Revolution: Malcom McLean
+ 2 more learning modules
12h5 modules
Explore Roadmap