

















Anamorphic lenses are specialized camera lenses that horizontally squeeze an image during filming, which is then desqueezed during projection or post-production to create a wider field of view while maintaining the economic benefits of standard film formats; these lenses produce distinctive visual characteristics including oval bokeh, horizontal flares, barrel distortion, and softness that contribute to a perceived 'cinematic' aesthetic, though their use involves trade-offs such as increased weight, complexity, and potential focusing challenges compared to spherical lenses.
Anamorphic Lenses Explained: History, Physics & Design (Part 1)
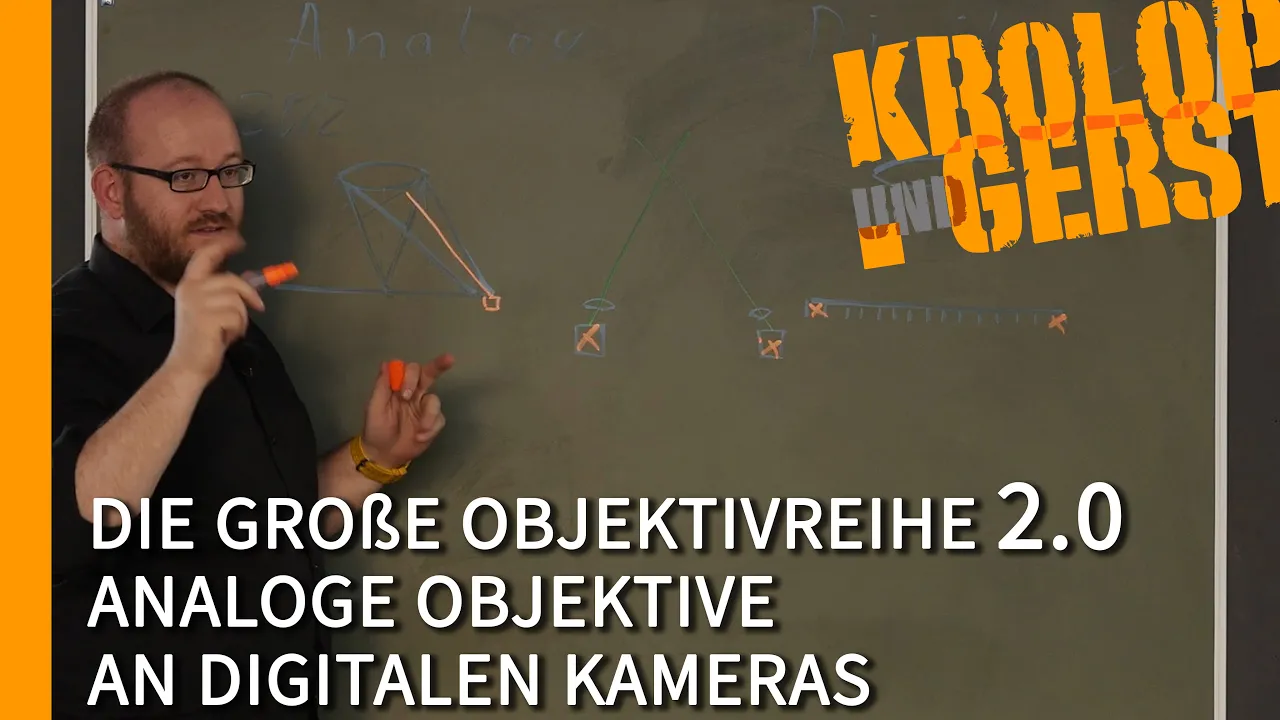
Added:Basic geometrical optics, including how light refracts through spherical glass lenses and the definition of focal length.
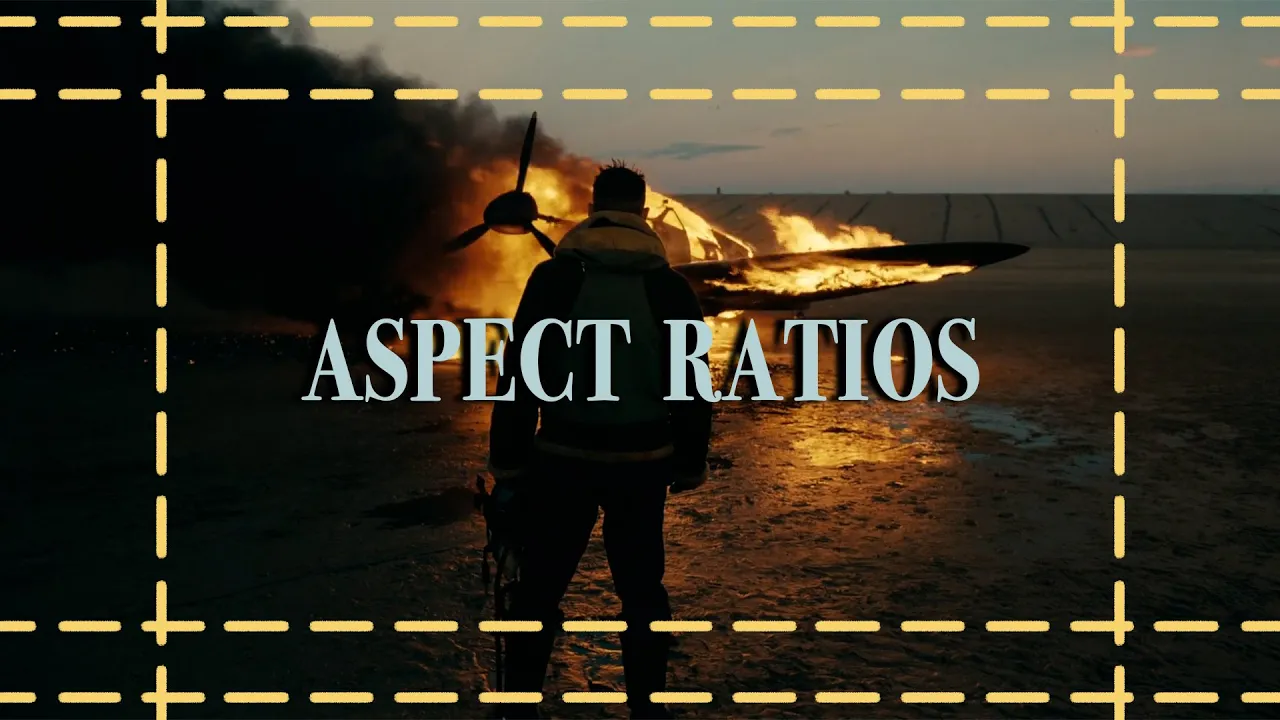
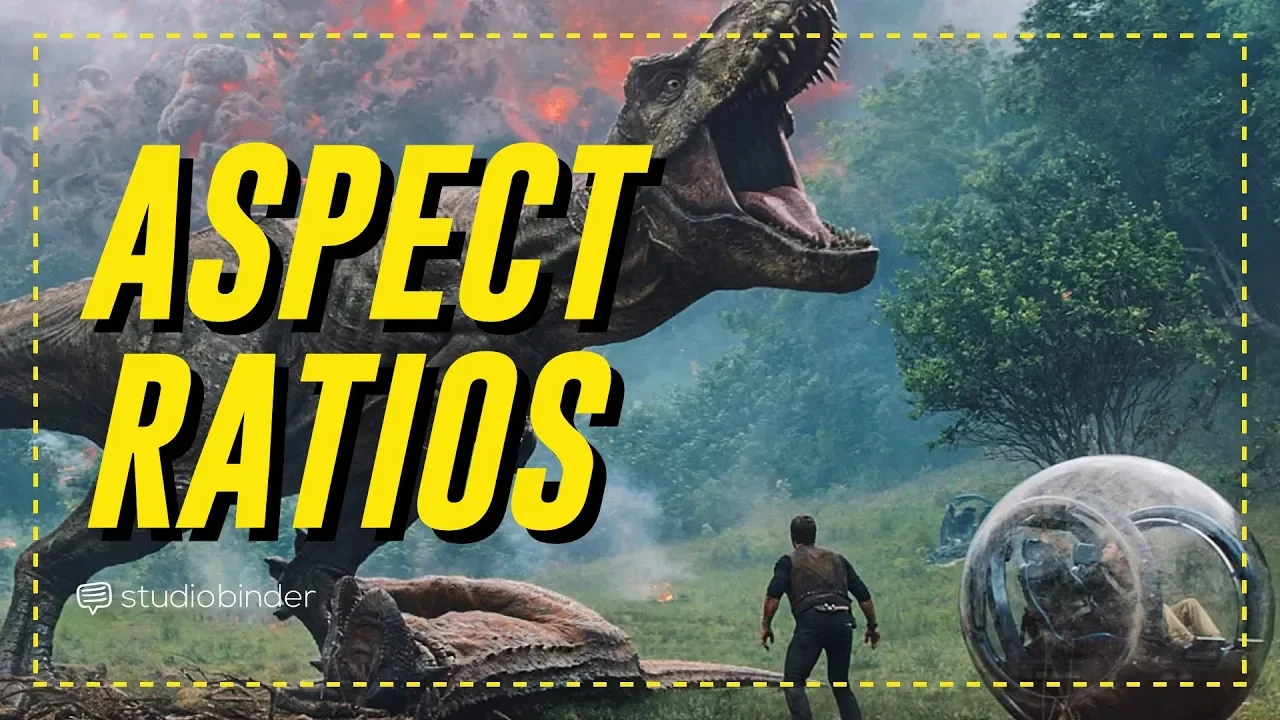
The concept of aspect ratios in photography and cinema, such as 4:3, 16:9, and widescreen formats.
How standard spherical lenses project a uniform circular image onto a rectangular digital sensor or film plane.
The fundamentals of camera sensor coverage and how physical film gates or digital sensors capture light.
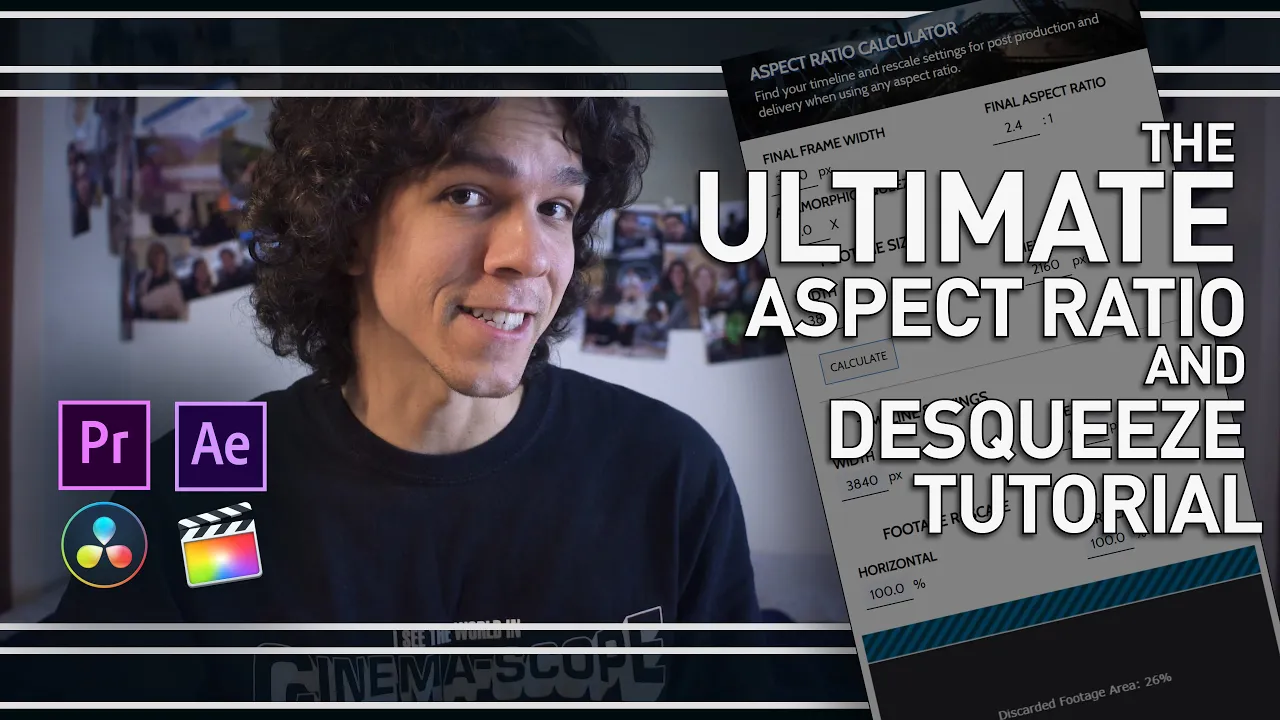
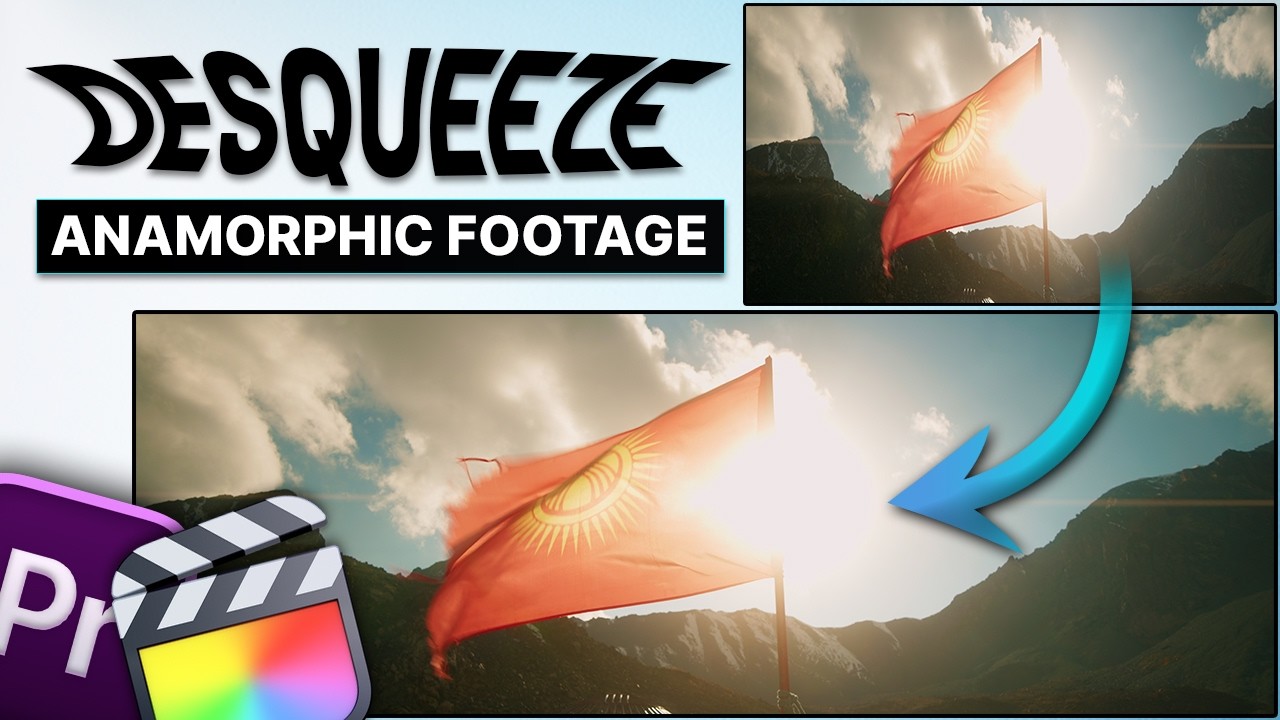
The technical process of 'desqueezing' anamorphic footage in post-production editing and color grading software.
Advanced analysis of anamorphic optical characteristics, including oval bokeh, horizontal lens flares, and unique depth-of-field distortion.
The mechanical and physical differences between front-element, rear-element, and adapter-based anamorphic lens designs.
Compositional and framing strategies used by cinematographers specifically tailored for ultra-widescreen anamorphic storytelling.
191.8K views9.3Klikes1:16:16Original Release: 2021-02-16
Your Eyes are schizophrenic so, why wouldn't your lenses be?
This Episode it as all about anamorphic filming… or… anamorphic photography… for a little bit of cinematic magic.
An epic journey of discovery lays ahead of you… from the simple basics all the way down the rabbit hole… from where few filmmakers return.
In a nutshell, anamorphic is about squeezing an image horizontally during filming and desqueezing that image for viewing… to achieve that, specially designed lenses are used… such a lens is called an anamorphic lens or sometimes simply… … a “Scope”.
When we see movies that are shot in scope there is something in the image that is hard to pinpoint… there is… something… intrinsically cinematic about the image. Something that is not rooted in the movement of the camera, nor in the story. It is not about acting, the wardrobe or the beautiful sets.
Scopes create their very unique aesthetic… and this aesthetic got ingrained into the soul of the audience.
Shall we continue SCOPE CHAPTER ONE is about the background of anamorphic. We show you the different flavours of widescreen cinema from Cinerama, over Cinemacope to 70mm and Techniscope. We show you why anamorphic fell out of hollywoods favour… and why it made it back big… well… wide.
We explain the physics behind anamorphic lenses and what makes the image so diffrent to normal spherical lenses… what problems come with the process… practically and optically… we explore principles different lens designs… the fashion of anamorphic throughout cinemas history. …and while we are at it… we debunk some common misconceptions.
SCOPE CHAPTER TWO is for those who want to shoot anamorphic themselves … from beginners to professionals.
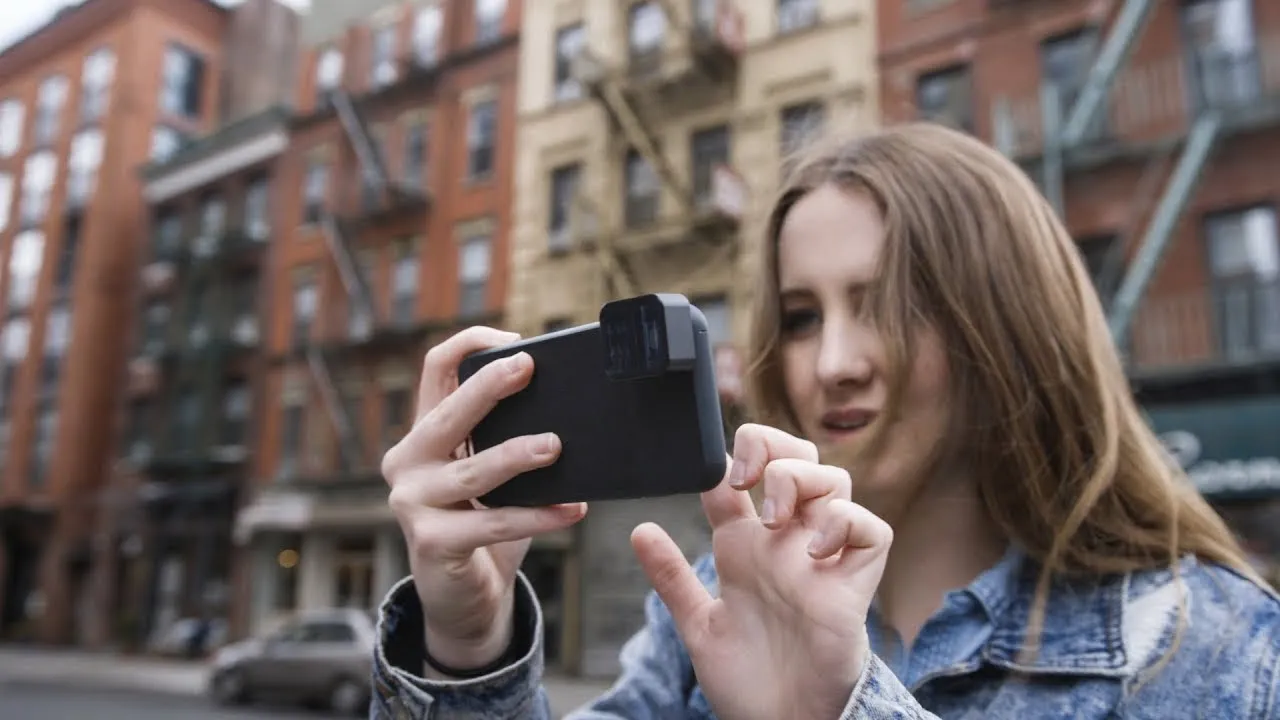
We are exploring the pros and cons of anamorphic adapters, projector lenses, and full blown anamorphic lenses… we are going to show you how to build and use these using a variety of taking lenses.
And we are going put these to the test… so you can decide which look makes your heart sing.
We are going to talk to DIY god Tito Ferradans And if you think anamorphic is only great for filming, let us introduce you to Dick Sweeney and his amazing anamorphic photography.
We give you tips for creative use you might not have considers as well as the do's and don'ts of anamorphic lenses … and of course, we show you how to make the best out of your anamorphic footage in post It’s a whole world for anyone interested in photography or cinematography to discover… For most people there is movie that started it all, for me that was BLADE RUNNER and as it is one of the most iconic movies shot in scope… I thought, why don’t start right there? Holden wants to talk to me… Let’s see what he wants Come in… Why did you call me in…… I am quite occupied doing an Episode for the Media Division Please don’t move OK?!… …we are going to show the difference between anamorphic and spherical lenses Same thing!
Not really… an anamorphic lens has optical elements that squeeze the image horizontally… and in post or during projection it is unsqueezed … so… Doesn’t make any difference You might think so, but it absolutely does make a difference… an anamorphic image has unique characteristics that we associate with big cinema. Why is that Leon… …that is completely hypothetical Well… I think we will be able to show that it's not… and explain exactly what makes the difference Take for example … Blade Runner.
What?
Never mind… by the way… I stoped smoking a while ago and the smoke bothers me a little… would you mind if you… …what was that for?
It’s a test designed to provoke an emotional response…… If you want an emotional reaction… go ask me about my mother These are just questions Leon Shall we continue?
Describe in singly words… only the good things that come into your mind… about… your mother My mother?
Let me tell you about my mother Lets start with what anamorphic is all about?
This is one of our test setups for our practical part… and this is shot with a spherical lens… a Zeiss CP.2… A cine lens as perfect… and in itself… as boring… as it gets. To have a better comparison, we will crop this image to a typical cinema widescreen aspect ratio.
Here is the exact same setup but shot on an anamorphic lens… Doesn’t it feel completely different?
What is anamorphic all about?
It is about getting a wide field of view… Applying an anamorphic lens to a camera squeezes an image … and an anamorphic lens on a projector stretches it back to its normal appearance This is called an anamorphic process. The desqueeze by the projector lens can also be done in post to be displayed on an ordinary display, or to be printed.
The first time you look into the front of an anamorphic lens, you immediately realise that something is very different. The entrance pupil of the lens is an oval instead of a circle. You might think that the lens is actually shaped ovally on the inside, but turning the lens around, shows that something very wired is going on… the exit pupil of the lens is oval too, but now the oval is wider than tall.
The shape of the entrance pupil is not generated by an oval Iris, as that wouldn’t change.
The Oval shape is a purely optical phenomena caused my lens elements, that are cylindrical instead of spherical.
Here you can can see the cylindrical shape of anamorphic elements without housing.
A very simple anamorphic system can consist out of just two elements, like it is the case here Both elements together are called the anamorphic block and are combined with a normal spherical lens to get to an anamorphic lens. We will get to the specifics of anamorphic lens design later, for now it is only important to know, that the anamorphic block squeezes the image horizontally.
But why would you squeeze the image horizontally and what makes it so relevant? The best way to approach the subject is to explore the history of the process… Anamorphic was invited by the french astronomer Henri Chrétien during the first world war not for use in films, but for improved battlefield awareness.
The anamorphic lens, would allow tank crews to have a wide field of view… with only a tiny opening in the armour … with obvious advantages (Go left) "Nach links" (fake german accent) "Nak klings" (fake fake german accent) If you are a SS officer… I am Micky Mouse But let’s concentrate of the use of anamorphic in filmmaking. It all come down to the lust for a wider screen in cinema… and being economic at the same time.
Since the age of silent movies, the 35mm film format was in use… …and the aspect ratio was arbitrarily 4:3. Even in that days, it was obvious that human vision is considerably wider than that Humans have two eyes and even though the field of views are overlapping, humans experience the world in a wide way… Movies are a business and innovation keeps the audience coming to the movie theatres… a wider viewing experience was a surprisingly early goal….
So… how does one get to widescreen?
In 1929, Fox Film Studio introduced the first mainstream widescreen process that even included sound… “Fox Grandeur” It almost doubled the width of the image by using 70mm film, while maintaining the same height.
The resulting quality was nothing short of revolutionary and it is hard to believe that this scene from the “The Big Trail” are from 1930. It is amazing how technology changes the way how a movie works on a very deep level… “The Big Trail” looks, feels and sounds, like something from a much later era. Unfortunately, the format was very short lived … the great depression captivated the audience and the industry.
Fox abandoned the format already in 1930 as not financially viable.
But even with the depression the show did go on… using the economically proven 35mm film With inclusion of audio, the image area on the the filmstrip got smaller and even more square, as it now had to share space with an optical sound track. The transition to color movies drove innovation for the next two decades… Meanwhile cinemas nemesis… Television… gained more and more traction. With color TV on the horizon cinema needed its next innovation. Widescreen was the hype of the day again, spawning different formats with different approaches almost simultaneously.
Cinerama was introduced in1952. It achieved a wide field of view by using three 35mm film strips and three projectors. To not get too wide and to further enhance the image fidelity… the 35mm used a height of 6 perforations instead of the standard 4 The image was projected on a gigantic curved screen.
Cinerama was a sensation and very successful, but the process had obvious problems.
It was technically complex and very expensive to produce and show.
The cameras size and weight was a limiting factor.
As cameras and projectors had necessarily different positions it could create nausea inducing perspective effects. Actors had to look at markers so they would appear to look at their partners given the curved projection.
The images where not quite seamless as the restored versions of today might imply and filmmakers had to compose every scene accordingly… which is probably the reason why Cinerama used Three strips and projectors instead of two… as two strip system would have its breaking point right in the center of the screen where it would be even more obvious. The hole process was more like a gimmick than it was about story telling… …a bit like 3D is today 3-strip Cinerama was later combined or completely replaced by a single camera with 70mm film, we will come back to this in a minute.
All this left room for the first real anamorphic process… Henri Chrétien already developed and patented the basic process in 1926 with a lens called Hypergonar that squeezed the image horizontally to half its width. If the same lens design is used on the camera and on the projector, one can achieve a widescreen image using the exact same cameras and projectors… just by replacing the lenses.
That means that cost for cinemas would be very low and the adoption rate would be fast Not only that, all other elements in the infrastructure, from factories to laboratories could remain basically the same. Twentieth Century Studios bought the patent and called it “CinemaScope” It was introduced in 1953… with “The Robe”. With little technical barriers and restrictions in the composition, filmmakers could concentrate on telling the story. CinemaScope delivered widescreen cinema with the economics of 35mm film The principle of the CinemaScope process… using 4-perf 35mm film with a 2x stretch was often copied and rebranded. Examples are Dyaliscope, Franscope, Totalvision, and dozens of others. There is a list on Wikipedia we will link in the description. While CinemaScope and its later incarnations dominated the market for the time being, other companies and film studios introduced their own widescreen processes some anamorphic, some spherical. To have a selling argument for their process, a better image quality by means of a larger negative was usually the key ingredient.
In 1954 Paramount introduced VistaVision Instead of vertically, the film stock runs horizontally in the camera… like it always did in 35mm photo cameras. Now, a single frame would not use the 4 perforations that it would use normally, but it was extended to use 8 perforations. Many of Hitchcocks Masterpieces like "North by Northwest" and "Vertigo" where shot on VistaVision.
VistaVision delivers twice the negative surface meaning twice the resolution and half the grain size For comparison, here is a 4-perf 35mm production with “Rear Window" ”The stronger grain in the negative is quite apparent.
In 1955 the Todd-AO 70mm process was introduced. It is very similar but not compatible to the Fox Grandeur process using a 5 perforation film running vertically in the camera.
The developer behind it, Mike Todd, was also involved in the Cinerama development and wanted to do "Cinerama out of one hole” but most Todd-AO theatre installations had only moderately curved screens and the extreme wide-angle camera lenses were used only on a few shots here and there. It was also the first high frame rate process with 30 frames per second… as it was problematic to print Todd-AO features to other formats, it was reduced to standard 24 frames per second after only two features. Todd-AO also launched their own flavour of Scope for 35mm with 2x squeeze David Lynchs “Dune” was shot on Todd-AO 35mm… probably the reason, why Dune is often mistakenly credited as shot in 70mm 1955 also saw Twentieth Century Studios venture in larger format anamorphic with a film width of 55mm … coined CinemaScope 55. It was basically immediately abandoned in favour of the Todd-AO process… so, we will not spend much time on it.
Just a year later in 1956 Panavision developed a 70mm process called MGM Camera 65… it was similar to Todd-AO but used the industry standard 24fps from the get go Panavision added anamorphic lenses with only 1.25x squeeze to match Cineramas super wide aspect ratio and make cinerama “out of one hole” a reality. It was used to shoot inserts for Cinerama movies, where a three camera setup was not feasible … like here in the river rafting scene of “How the West Was Won”. In 1960, Panavision changed the name of the process to “Ultra Panavision 70”. Ultra Panavision 70 was also used for normal presentations… The process might be best know for “Ben-Hur” ….and for Taratinos “The Hateful Eight” that resurrected the format in 2015. “Ultra Panavison 70” lenses where also used on an Alexa 65 for Star Wars “Rogue One” Panavision paired the process two years later with spherical instead of anamorphic lenses under the name ”Super Panavision 70” This format saw iconic features like “Lawrence of Arabia” … and of course, Kubricks "2001: A Space Odyssey" "Technicolor" launched "Technirama" in 1957. It used the same concept of horizontal 35mm film that VistaVision used, but combined it with an anamorphic process.
As the negative was already wide, a smaller squeeze factor of 1.5x was used to achieve a standard widescreens image. Release prints incorporated an additional 1.33x horizontal squeeze, to create normal 35mm 4-perf for 2x anamorphic projections. The most famous Technirama film is 1960s "Spartacus" … the only time that Stanley Kubrick touched Anamorphic lenses on one of his feature films.
Technirama used a completely diffrent technical approach than CinemaScope. Instead of stretching the image is squeezed it, and instead of anamorphic lens elements, it utilised a curved mirror optic in front of the camera lens.
In the decades to come, Panavision dominating the anamorphic industry. It was originally founded to produce anamorphic projector attachments for the CinemaScope process in the mass-market, after Bausch & Lomb's couldn’t build them fast enough. Panavision founder Robert Gottschalk soon improved upon the anamorphic camera lenses by creating a lens set that included dual rotating anamorphic elements and was able to avoid the dreaded anamorphic “Mumps”.
This lens set proved to be extremely popular with studios and while many continued to use CinemaScope in marketing and credits, the lenses used where actually build by Panavision.
By 1967, even Fox had begun to abandon CinemaScope for Panavision. We will talk later about Mumps and the Gottschalk Method.
You might have asked yourself all along… what about the obvious alternative to a wider negative to achieve wide screen?
Just by reducing the height of the negative?
In 1960 Technicolor Italia introduced the "Techniscope" film format for low budget productions.
Techniscope is especially famous for being used in the so called “Spaghetti Westerns” like “A Fistful of Dollars” and “Once Upon a Time in the West” It simply reduced the hight of the frame from 4 perforations to 2 perforations. As every frame only takes up halve the hight, only halve the amount of film was needed during photography.
Techniscope was a production-only format, the frame was enlarged from a 2-perf flat ratio to a 4-perf anamorphic ratio for distribution.
Enlarging the image subsequently enlarges the negatives film grain, which gives Techniscope a gritty look but savings for lenses, film, and development are considerable. The 35mm Cinemascope/Panavision process remained the gold standard for blockbuster productions throughout the next few decades… and this is exactly what burned the anamorphic look so deeply into our minds as something epic and desirable. We just associate the look with big cinema… and, how wouldn’t want this in ones own footage So, if everything is so nice and clear, what changed? Why did anamorphic almost made its way to the shelves of cinemas historic curiosities?
1984 was a year that brought something else to the table… and that is "Super 35" Super 35 is a production-only-format on 35mm stock by using the space normally reserved for the optical analog sound track.
Super 35 that was introduced under the name "Super Techniscope"… Techniscope can be seen as super 35s daddy. “Silverado” was the first feature to be shot in Super 35. The larger 3-perforation surface and improvements in the emulsion made anamorphic main technical benefit… a less grainy negative… more and more obsolete. Super 35 is basically a larger and slightly cleaner version of Techniscope. Super 35 is usually shot with 4 perforation instead of 3 to allow alternative aspect ratios, but only 3 perforations of the negative are used for the classic widescreen release. Films shot on super 35 can be distributed with added anamorphic squeeze or as prints for spherical projection with large parts of the print remaining black.
Here we have 3 different 35mm film strips, that demonstrate the interchangeability of processes for different release print formats.
This is a filmstrip of “Dune”. Dune was shot in 4-perf 35mm anamorphic… and this is a 4-perf 4-perf 35mm anamorphic release print. This is a filmstrip of “Shutter Island” that was shot on Super 35 and this a 2-perf 35mm spherical release print… you can see how much of the print remains unused But here it get’s interesting… this is a filmstrip of “Fight Club” that Fincher shot in Super 35… and this is a is a 4-perf 35mm anamorphic release print.
Of course, this doesn’t mean that you can get anamorphic characteristics into the image just by squeezing an image in post. The lens used for acquisition is what matters in that regard.
James Cameron and many others preferred Super 35 spherical as it showed less aberrations. When computer entered the movie scene, anamorphic processes became even more unpopular. Super 35 shots didn’t have the quirky oval out of focus areas… especially those cause problems when computer generated effects are supposed to look seamless. Cameron was a driving force in CGI with movies like "The Abyss" "Terminator 2" and of course "Titanic" CGI and the success of these movies almost killed anamorphic.
Super 35 would remain the preferred blockbuster format for over a decade Anamorphic was still used whenever a nostalgic element was desired.
Ironically it was the computer again, that caused a resurgence of anamorphic lenses.
Digital cameras had their breakthrough around 2010 with the release of the Arri Alexa and the RED ONE cameras. Many deem the digital image too sterile.
A softer, more romantic anamorphic look became popular… once again.
The evolution of CGI brought better models to simulate anamorphic characteristics, and the aberrations can now sell a visual effect as it helps to fuse reality and CGI together. A very beautiful example for the power of imperfection… like here in "Ex Machina". It also invokes a feeling of authenticity, when old instalments of a franchise where shot anamorphic.
The Star Trek and Star Wars reboots where shot with anamorphic lenses as was "The Mandalorian" … primarily for nostalgic reason. We will talk a bit more about that in “The Poetry of Anamorphic”.
A bit of irony lies in the the history of anamorphic. While in the beginning anamorphic was used to “squeeze” more quality out of the given film stock, today it is used to beat up an otherwise sterile digital image.
Now that we have our “reason why” anamorphic saw the light of the projectors, why it became the preferred blockbuster format, and introduced the most prolific names, we will explore what makes the image of an anamorphic lens different – and desirable.
When shooting spherical, lens choice has often surprisingly little effect on the final image. Differences in apparent sharpness, tint, flares, distortions… …most lens characteristics are subtile This is our test sequence shot with a Zeiss CP2 Macro Cine lens…… and here with a Canon FD 35mm f2.0 concave. We chose these two lenses, because these are as different as it gets given our arsenal and the the specifics of this shot.
Most of the time, you will have to open up a lens pretty wide or look for very specific things to tell vintage from modern or cheap from expensive.
With Anamorphic lenses that quite different.
Lenses have way more character and quirks, vastly different sharpness, distinguishable flares with different colours and shapes, heavy aberrations, wonky breathing, wild distortion… shooting anamorphic is to embrace many things that where once considered flaws and are today tools to breath soul into the sterile digital world.
It is often proclaimed that shooting anamorphic generates its own unique perspective… and it really depends what you mean by perspective. In common language that could just mean that it has its discernible characteristics – which it absolutely has. But if you mean perspective in a geometrical way … no.
An anamorphic lens has basically two focal lengths in one… the real focal lengths that is written on the lens, for example 40mm, and with a 2x scope, like in this example a 20mm at the same time.
Many people thing that different focal lengths would have different perspectives, but that is not true. Perspective is generated by the the distance between camera and subject only… which is why the perspective of an image taken with a tiny Phone sensor, can be identical to a full frame camera. That is the equivalency of lenses. As both focal lengths of an anamorphic lens are n Isn’t a longer lens more “flattering” to a human face? A longer lens is flattering because you are further away for the same framing, and that is what causes the compression of ”features”. So… an anamorphic lens is not more flattering… for this reason.
Does an anamorphic lens have a different perspective in another sense?
Typically, the Bokeh of an anamorphic lens is Oval, and as we see, not only the Bokeh but all out of focus areas in the image a more or less oval… Highlights are just more obvious. This creates a very unique perception of dimensionality as the brain has “shape” as one more cue to dicern the distance to an object… a “different perspective” if you want to call it that way. Let us explain why anamorphic produces these oval characteristics. It is a very complex subject and we will try to simplify it as much as possible. First of all… as we showed you in the beginning of the episode. It has nothing to do with the shape of the iris of the lens… it is round just like with an ordinary lens.
The different focal lengths of an anamorphic lens are key to an altered depth of field and the shape of the Bokeh.
You might know that the Bokeh of a longer focal length is larger than that of a shorter focal length with all other factors remaining fixed. One might assume that this is simply du to the magnification of the Bokeh, but that is not the case. The actual size is the magnification squared.
This means that an 80mm lens has 4 times larger Bokeh than a 40mm lens. In a 2x anamorphic lens the focal length have a smooth transition into each other and the resulting Bokeh is oval.
You can also see it this way. An anamorphic lens squeezes the image by it’s factor – in case of a 2x lens, it squeezes it to half the width. The Bokeh on the other hand is squeezed by it’s factor squared – in case of a 2x lens, it is squeezed to a quarter of it’s width. This means, if we apply the same desqueeze factor of 2x in projection or post, the image returns to it’s normal width but the bokeh is still half as wide as it would normally be. It appears as Ovals.
This also means that lenses with a smaller factor will have a much less pronounced effect. For 1.33x you have Bokeh that is 75% the width, for 1.5 it will be 66% the width.
For reasons that are to complex to describe them in this “short” form, you can see oval bokeh that is wider than high in some setups. This basically happens when you manage to mismatch the focus of two blocks when using a DIY setup. As the depths of field is shallower at the same framing, f-stop and format compared with spherical lenses, anamorphic lenses offers visual cues from large format photography with the economy of a smaller format.
Let’s take it this statement with a grain of salt.
While that is technically correct… you usually don’t shoot anamorphic at the same f-stop. Anamorphic lenses are slower than comparable spherical lenses and aberrations are stronger when shot wide open. Lenses need to be stopped down to sharpen up… especially in the corners. Shooting at f2.8 is considered fast for anamorphic. You will have no problem finding spherical lenses that can deliver the same sharpens and even shallow depth of field by just being faster… with the economy of needing much less light. What spherical lenses just can’t do, is to give the “oval of confusion”… as the out of focus areas have a distinctive shape, it gives human vision an extra cue for depths perception There is also another trap that one might easily step into. Does a 2x anamorphic really deliver twice the field of view compared to a spherical lens of the same focal lengths? That really depends.
If you are shooting spherical and and anamorphic on the same negative size or sensor crop… Yes… but unless you shoot on a Alexa 4:3 or a micro four third camera you usually don’t. Most sensors on the market are build for wide screen acquisition.…Like HDTV with 16:9 or DCI with 17:9 aspect… or follow photography standard sizes like Full Frames 3:2 aspect. If you shoot anamorphic, you will shoot a 6:5 or 4:3 crop on those sensors… or crop to something like that in post. Otherwise your image would get “way” too wide and on top of that, the anamorphic lens is very likely to vignettes outside of the crop it was designed for.
If you are shooting 80mm 2x Scope utilising a 6:5 Crop on Full Frame sensor…… you will yield a much smaller field of view than when using a 40mm Spherical lens and the same Full Frame sensor without cropping in.
We will not go into the details of why lenses flare in general. There are many diffrent kinds of flares and reasons why lenses flair, or how coatings help to improve light transmission and reduce flair. Just this much… when light hits the surface of glass to air, part of the light reflects and part of the light enters the lens. Light can bounce inside a lens, reflect on Iris blades or other shiny features of the lens. The color of flares depends on the color of the light entering the lens, and the coatings of the lens elements. Every lens has its very unique flair characteristics that is the combined product of its optical design, number of elements, coatings, glass, mechanical features and last but not least the state the lens is in. Things like scratches, fungus, radioactive decay, or just dust and dirt will alter the original characteristics of a lens.
Anamorphic elements do have their own flare characteristic that add to the characteristics of the spherical elements. Some more, some less.
Lets get to the elephant in the room … horizontal flares Most anamorphic lenses produce a distinctive horizontal flare… so distinctive, that it is usually the first thing that catches the eye. You could say that horizontal flares became part of pop culture… being strongly associated with what many perceive as “the cinematic look”. The are often enhanced for dramatic effect and sometimes faked and stylised … sometimes even in pieces that ARE shot anamorphic like here in Donnie Darko… we will talk about faking flares later. Therefor it is also something that many new users seek to reproduce … this goes so far, that these flares tend to be a bit overused.
In a spherical lens the trapped light is usually reflecting the round shape of your entrance pupil. Same is true for anamorphic, but the trapped light is affected in an opposite way the bokeh is. The streaks that you see are essentially really really stretches out horizontal ovals. If you get very close to the anamorphic lens, you can see the ovals turning into streaks half the way.
As flaring is not a desirable feature with projector lenses… some have very suppressed flare characteristics… like the the ISCO Red star We will show you all sorts of diffrent anamorphic flare characteristics with all our test setups in SCOPE Chapter two.
The anamorphic block of the lens systems will enhance the distortions of the spherical elements, so, a good rule of thumb is, that an anamorphic lens has more distortions than a spherical lens with the same field of view… exemptions apply. A lot of modern anamorphic lenses are corrected to show as little distortions as possible – but very often, especially the barrel distortion is considered one of the key characteristics of anamorphic lenses and embraced as such, like here in “La La Land”. Barrel distortion can have the effect to lead the eye of the audience to the center of the screen. It is basically a “look here effect”. Depending on the design, a lens can also have pincushion distortion, so the exact opposite of barrel distortion. Cooke and Glaswerk lenses show this kind of distortion. These distortions come with a host of problems that we will talk about later. Other distortions are caused by the Anamorphic block itself and produce an uneven stretch factor across the field of view. When you shot a wider field of view than lens design was intended for, or the anamorphic block is just not well designed, the image is overly squeezed on the sides of the image … this is called “over compression”. This is usually not what one wants to embrace. Human vision is particularly good at reading faces, and warped faces a very obvious taking the audience out of the story. Even more distracting is the so called “Mumps” distortion. Certain designs of anamorphic lenses loose their stretch for close objects … a close up of a face looks slightly stretched… giving the talent traits of facial swelling like they happen during a Mumps infection. Panavisions dual rotating anamorphic “Gottschalk” patent and other methods where designed to deal with this distortion. We will talk in our practical part about methods on how to deal with distortions in post.
Lens breathing is usually frown upon in filmmaking, as the changing framing during focus ramping can be quite apparent. Accordingly, cine lenses are designed to minimise focus breathing. This is when an anamorphic lens says “hold my beer”. The two different focal lengths of an anamorphic system exhibit different strengths of breathing… causing asymmetrical breathing. Even modern corrected lenses show considerably more breathing than their spherical counterparts. Wider lenses produce more apparent breathing than longer ones. Anamorphic breathing is sometimes described as more “dramatic” and Panavisions Gottschalk method pronounces breathing which is why anamorphic films throughout history are full of asymmetrical breathing… like here in the “Untouchables” This way or another… there is little you can do about it but to avoid focus ramping all together… so embrace it.
Generally, an anamorphic image is softer than a spherical one. Including cylinders in the optical design results in a small amount of astigmatism – a type of optical aberration that is unique to anamorphic lenses and that we perceive as pleasing softness. There are 16 primary aberrations instead of 5 for spherical lenses. This is one of the major reasons to use an anamorphic lens in the first place – breaking up the sterile looking digital image. Depending on the lens design and the the f-stop used, aberrations become stronger at the sides of the image. An anamorphic lens that stays sharp in the corners while opening up the iris, is usually considered of higher quality. In any case, reframing, digital zooms or punching into the image is usually not a good idea when using Anamorphic lenses, as your crop gets too soft.
If you say that Anamorphic is more flattering to the talent… this THIS would be the reason. Which brings us to our resume of image characteristics of anamorphic lenses.… The characteristic of the oval fall off is unique to anamorphic lenses and can not be reproduced in post without acquiring depth information for an image. The flares, distortion, and softness give the image an emotional touch. Like something that is a part of ones memory rather than something that happens in reality… You should always be aware, that shooting Anamorphic today, also means to degrade the image irreversibly during photography.
As you probably know… you can fake the anamorphic look to a certain degree.
As this is the Anamorphic episode and not the anamorfake episode, we will keep this very brief. We only mention this at all, because we would get a lot of comments complaining that we didn’t. You can create a somewhat anamorphic look in post. You start with applying a crop to match the desired aspect ratio, and after that you simply add distortions and CG flares. Flares are more or less easy to reproduce in post. These ones are made with the Flare Plugin from VideoCoplilot. Taste is a scarce resources and CG flares can quickly look cheesy.
Alternatively, you can go the practical route and use a fishing line attached to the lens that generates light streaks that resembles the horizontal flares of anamorphic… a bit. You can also mod the lens by inserting an oval iris matte to shape your Bokeh. There are filter with that includes the oval iris and fishing line. DIY expert Chito has dedicated videos that show you exactly what to do and what to expect.
Of course, it will never look as good as real anamorphic. This is not to say that one couldn’t make Anamorfake look awesome. David Fincher conjured a 70s feeling for his Netflix series “Mindhunter” by giving the spherical footage an anamorphic treatment ion post. While the overall look is not very anamorphic, he certainly nailed the flares.
By the way… there is Anamorfake Anamorphic… “John Wick” looked very distinctively anamorphic using Vantage Hawks but these lenses didn’t performed to the teams liking in dark scenes, so those where shot spherical on Cooke lenses. The production team behind the sequel decided, they wanted a sharper look and more flare control… so they went for the Arri Master Anamorphic. These tend to flare very little. … so they added a custom streak filter directly to the sensor of their Arri Alexa. The result is a quite unique flavour of the anamorphic look. Love it or hate it… it embraces and amplifies the comic style of the John Wick series.
So, if you choose to go the Anamorfake road… go ahead … make my day.
There a different ways to achieve an anamorphic squeeze or desqueeze. One can use prisms to skew the image, or a curved a mirror in front an ordinary lens, or… cylindrical lenses. We will stick to the cylindrical lenses as it is the only design that is really relevant today.
Let’s get back to our simple anamorphic Block from the beginning to go into the specifics of anamorphic lens design. Like we explained, an Anamorphic lens consists of an anamorphic block that adds a squeeze or stretch, and a spherical block, just like any other lens. Anamorphic lens elements have a cylindrical instead of a spherical shape. You can see immediately, that the alignment of these lenses is from great importance. A spherical lens can be rotated without affecting the image, a Cylindrical element has to rotated by 180° to have the same effect. This is why an anamorphic block and the elements within it have to be finely tuned to align to each other, and the spherical lens.
To focus a spherical block you can move the whole lens back and forth… or you can just move the relevant elements while the rear elements stay in place. With anamorphic, to get a sharp image you need to make sure there is no astigmatism – if you only move your spherical and keep cylinders untouched – you will always get astigmatism and no sharp image at all. Focus can not be achieved by moving the whole system back and forth anymore.
The simplest way to focus is, to move the spherical block as usual, and focus the anamorphic block separately. This method is called “double focus’” There are cine lenses that work in exactly same way, but they have one focus ring. They simply couple the focus systems mechanically – movement of the spherical block back and forth, and movement of the cylinders closer or further This method is called “mechanical synchro” The original CinemaScope lenses build by Bausch&Lomb used this method. Also, the P+S Kowa Evolution that we will test in our practical episode is focused in this way. mechanical synchro has one downside. As your cylinders move closer for close focus, they loose potency and generate less squeeze. Sometimes a 2x lens will become 1.7x lens at 1m close focus, and manufacturers will limit close focus there, because generally the closer you go, the more squeeze you loose. In the old days this was a problem, because the de-squeeze during projection was fixed at 2x, while the squeeze during acquisition varied. Close up shot of actors looked like their faces where swollen, which is why this phenomenon was called anamorphic mumps. These days you can counter this in post, but it's cumbersome. We will talk more about anamorphic mumps later Panavision's has it’s own method. As we mentioned before, it was a key ingredient to their success over Bausch&Lomb designs. The anamorphic block is fixed, while the spherical block moves behind it. Two lower power anamorphic elements are added between the two blocks, or inside the anamorphic block. They are rotated so their effect cancels itself out. When focussing the spherical block, the lower power elements are rotated in the opposite directions focusing the anamorphic block, without losing squeeze. Now you get a constant 2x squeeze. For this reason they are called counter-rotating astigmatizers. While the optical design is by Walin, this focus method is named after Panavision’s founder and lead engineer as the “Gottschalk method”. It is said that first Panavision lenses are Baush and Lomb cinemascope Batlars (that had mumps) with this mechanism inserted in them. These days Caldwell Chameleons and Xelmus Apollo use this focusing method as the patent expired.
Simpler and easier to service is the method used by Todd-AO. The principle is similar to the one used by Panavision – the spherical block moves while the anamorphic block stays in place. Inside the anamorphic block - is a group to correct astigmatism, and this group moves back and forth. While the mechanics are simpler, there are still a lot of moving parts. Vazen is rumoured to use this method fort their 28mm and 85mm lenses.
Using Variable diopters is a simple and elegant concept. The spherical block is fixed to infinity focus, the Anamorphic Block fixed to infinity focus, and they never move. In front of this system two more spherical lenses are added. These two elements cancel each other out when they are very close, but as you start spacing them apart they introduce dioptric power to the system, shifting your focus closer and closer. That's why they are called variable diopters. This is used in Vantage Hawks, Cooke Anamorphic, Atlas Orions, Technovision, Cineovision, Lomo roundfronts and others. An amazing budget friendly lens that does this is the Iscorama. ISCO had a patent on this focusing method for a while.
You can use Variable Diopters from different manufacturers to add single focus to an existing system. We will test that and show you tips and tricks in our practical part. Downsides are size and weight as they need to be large to avoid vignetting … which they still tend to do.
This method can get more sophisticated – Cooke is using more than two elements, spaced to correct for various aberrations. Glasswerk One also uses a variation of this principle, but intricately mixes cylinders and spheres. If an anamorphic lens uses a Variety diopter is revealed by flat surface of the front element.
The bokeh of front anamorphic lenses are elliptical because of the placement of the cylindrical elements. Anamorphic elements don’t necessarily have to be in the front of the spherical Block… in most design, they are, but other put the elements between the spherical elements… like the Arri Master Anamorphic for example. The effect of that design together with coatings tame the anamorphic characteristics a lot. Bokeh ist still oval like you can here see in “John Wick 2” and the images are relatively sharp. The Arri Master Anamorphic flare only very little. This is why they often used im Commercials and movies that don’t go for a distinctive anamorphic look. You could say that they deliver a compromise between spherical and anamorphic lenses. The anamorphic elements can also be placed behind the spherical elements… like the Angenieux Optimo Anamorphic zooms do. If the Anamorphic squeeze happens behind the spherical block, it doesn’t affect the shape of the entrance pupil, the image of the spherical lens with all it’s features gets compressed… so, in this case you’ll see very little anamorphic features (The Nice guys).
BTW, the lens you saw in the beginning of this episode is a massive Bausch&Lomb projection lens that was build for drive-in cinemas. It does work well with longer focal lengths and when you are planning to film something from a 50 meters away. This and the sheer size and weight make it impractical to work with… which is why it is not part of our test. But it is a great way to show optical effects… and knock out burglers.
The anamorphic look resonates with so many filmmakers as something that just gives footage that magical cinematic feel. This is mostly based on our perception. We are just used to see anamorphic characteristics in large scale cinematography… so much, that it just triggers our brain to make that connection if we see somewhat mundane things shot in anamorphic. That is especially interesting as the anamorphic look was or is by no means homogenous… let us explore that with “the fashion of anamorphic” There is one franchise that perfectly reflects the fashion of what a blockbuster feature film should look like … Like no other franchise, the bond movies can take us on a journey through anamorphic fashion. If you are not an expert, it is quite hard to tell which of the bond movies were shot spherical and which ones where shot anamorphic… and I really don’t blame you… because, for the most part, it is intentionally hard to tell. Bond startet of with Dr. No in 1962, followed by From Russia with love and Goldfinger, all these where shot spherical in times where Anamorphic was the gold standart for big cinema. Thunderball changed that and the following Connery Bonds where shot anamorphic. Maybe it took three successful bond movies to give the studio the confidence for a budget allowing the more expensive anamorphic process. What is intersting here is that it looks almost identical, besides the wider aspect of the anamorphic movies. Neither grain, nor sharpness seems to be significantly different. “Thunderball” and “You only live Twice” miss a lot of the characteristics we associate with the anamorphic look. The reason for that is on the one hand, that the scenes are shot relatively flat and at a high f-stop is used to sharpen up the image and create a deep Depths of field. Things like anamorphic flares where considered a flaw and are therefore almost absent … with very few exception… boy had I search for this one. And this is why we watch that one it again… there!
This remained the way to shot anamorphic for the most part until… from 1969 filmmakers slowly started to embrace what was considered flaws in the past, maybe, to add a layer of realism to their images. The same years bond movie shows flaring like no bond did before.
The first Roger Moore Bond “Live and let die” from 1973 didn’t only introduce a new Bond but it also returned to spherical lenses… It seems like Roger had to earn his own rights for the expensive anamorphic process and “The Man with the Golden Gun” remained with the format. After that Bond returned … to the anamorphic process… and it stayed that way, all the way through Roger Moores rain, through Timothy Daltons Bonds and right through Pierce Brosnan era. From a cinematographic point of view I would dare to call the second anamorphic wave in Bond movies the “boring era”… the format was not used in a playful way and didn’t bring anything worth mentioning to the table. Bonds reboot and the desire to turn Bond into a more gritty, more realistic agent thriller brought spherical back to the franchise with “Casino Royale”, “A Quantum of Solace” stayed spherical, and as you might know, Roger Deacons is really not a fan of anamorphic, which is why “Skyfall” was shot spherical. Dop Hoyte van Hoytema is always good for a surprise and his visual interpretation on Specter is a wild ride of mixing digital and analog in different formats from 35 to 65mm, as well a sherical and anamorphic. And it looks amazing. “No Time to Die” will continue with with non conformity recipe.
This brings us to the question if one should… or should not mix anamorphic with spherical footage. Besides what Hoytema does in “Spectre” … it has been done throughout the history of anamorphic movies especially when special effects where used. Special effects from before the times of computers often used multiple exposures for compositing. Multiple exposures causes the natural film grain to be amplified… that’s why special effect shots often used a larger negative format as those had a smaller and therefore less apparent grain to begin with. Star Wars made use of Vista Vision format for the special effects… here are some special effects without the dreaded Special Edition overhaul. Blade Runner used 65mm negative for the special effects. Anamorphic not Anamorphic, Anamorphic and not Anamorphic. That flows quite nicely… doesn’t it? The wider format and little grain of the large negative made anamorphic unnecessary. Also, the Asymmetrical lens breathing, distortions and wonky depth of field would have made the life of the VFX artist a living hell – If it wasn’t that already, as they couldn’t see what they where doing during the multiple exposures. Beyond the special effects there where always situations where the demand for high lens speeds or other technical needs, made the filmmaker drop in spherical shots… probably without you even noticing it watching it the first time. We already mentioned John Wick… There als situations where filmmakers show of with their key sequences shot in large formats like IMAX… shot sherical in contrast to the anamorphic rest… like her in Mission Impossible: Fallout Like we said before… anamorphic can give a vibe of something that is a part of ones memory rather than something that happens in reality… It can work as a poetic abstraction. Which is why mixing anamorphic and spherical can be used to differentiate parts of a story… like diffrent timelines, perspectives, or altered states of mind. In “Interstellar” Christopher Nolans and Hoyte Hoytema utilise anamorphic 35mm to invoke a world in decay in contrast to spherical IMAX as an element of hope.
This is a sequence of “Westword” that is generally shot spherical… but in the Second season, one of the protagonists enters a virtual world that resembles the outside world … still, we immediately know that something is different and that we are not in Westworlds “reality” any more. The scenes work like a dream state… utilising an expressive anamorphic look. This will also give us another opportunity to compare spherical and anamorphic shots, that are otherwise very similar. What looks more “cinematic” to you?
You can count on Wes Anderson to turn this principle upside down … in the fabulous “The Grand Budapest Hotel” The anamorphic scenes are the “reality”, while the story being told within that reality is shot spherical and is presented with a native 4-perf 35mm aspect ratio. So, can one mix spherical with anamorphic… es… and absolutely yes. But like always, you better know exactly why you do and when.
The Grand Budapest Hotel is a perfect example for our next segment.
How does one compose an anamorphic image… just like one would any other widescreen image? One should keep the limitations off the specific lenses used in mind. While 70mm film or an Alexa 65 has no problem to give an accurate image all over the field of view, we already explored aberrations and distortions, also, close focus is a problem. Anamorphic can become a limiting factor regarding placement of objects within the frame depending on the specifics of the used lens. It is usually a bad idea to put an important feature of the image too close to one of the sides. Anamorphic lends itself to centred compositions for purely technical reasons. That doesn’t mean that you can’t or shouldn’t place objects in the corners… one should just have an eye on technical issues in that regard. If we are talking about framing for a wide aspect in general… of course it is a fact that a wide aspect ratio lends itself to different compositions compared to a narrow one, it just offers different possibilities that are interesting to explore. While the human body or face are vertical, widescreen movie have proven again and again that this doesn’t need to be a limiting factor. We could make a dedicated episode just about about composing, but as this is the anamorphic episode, and as anamorphic is not even necessarily wide, we will keep this part brief. It is interesting what the man himself Ridley Scott has to say about framing for widescreen It’s not easy to meat your maker Given todays technology there is usually no technical reason to use anamorphic lenses, and quite a lot reason not to. With most cameras you will not use the whole sensor using anamorphic lenses. Anamorphic lenses are more expensive, larger, heavier, have more flaws, and are harder to focus. On top of that it is harder to add CGI elements They are just way more unpractical compared to spherical lenses.
We talked a lot about how anamorphic lenses can add another layer of poetry to an image… but does that mean that anamorphic images “always” look more cinematic?
One should keep in mind that many legends of the film industry are not fond of the anamorphic process. Stanley Kubrick only shot Spartacus anamorphic and he never looked back… that must have been a horrible experience. While most of his famous work has a narrower aspect ratio. He revisited widescreen with 2001 using spherical lenses on 70mm film.
“2010:The year we made contact” recreated HALs server room, and 2010 was shot anamorphic. This gives us another chance to directly compare the effect of anamorphic lenses with spherical lenses in very similar circumstances.
What do you think? Do you think that anamorphic adds to the cinematic feel of the scene?
Another anamorphic one timer is David Fincher with Alien 3… after he killed all our favourite characters and the franchise he never shot another anamorphic movie… He went on to shoot masterpieces like “Seven” and “Fight Club” that are cinematic. His technique of catching the audiences attention by locking them to the protagonists eyes requires a lot of cropping and reframing that simply doesn’t work well with the anamorphic process.
Roger Deakins famously doesn’t shot anamorphic… stating that this is based on his roots in documentary work. He loves for an image to be as clear and technically clean as possible. His school of thought is thar good cinematography doesn’t need to hide behind aberrations.
Alfred Hitchcock never shot on Anamorphic, though it is not clear wether disliked the process. He was contracted by Paramount, and Paramount was invested in Vista Vision. Four of Hitchcocks features use the wider and cleaner negative of Vista Vision.
… and, of the people … there is Ridley Scott. Having influenced our modern perception of how an anamorphic movie should look… we walked away from it after 1985s “Legend”. He did so for practical aspects. He felt, that scopes would inhibit his freedom in visual storytelling.
We think it is very safe to say that you can make spherical lenses look just as cinematic and iconic as you can using Anamorphic lenses. There are just so many fabulous filmmakers that prefer spherical lenses and so many iconic movies through history that have been shot spherical… it should really sober one up and think out of the oval. Never use anamorphic as an excuse for lack of soul in your cinematography.
Shooting spherical can be liberating… because one thing is sure… shooting anamorphic IS unpractical The lenses are slower and shooting with higher f-stops to sharpen the image up requires more light on set. Most anamorphic lenses are heavier making it harder to move the camera freely.
The softness and wonky depth of field make it harder to focus. It is more likely that you have to repeat a shot just for that reason. With anamorphic movies, you see a lot of “missed focus” like here in Rachels famous walk in scene… here is the plane of Focus… and she walk right out of it. Did you ever notice that before we showed you? It is refreshing, how litte this seems to bother filmmakers and the audience.
It is often stated that anamorphic productions a more expensive because the wider field of view. Sets would need to be larger and more extras are needed. We think this is is a misconception. We can stay with Blade Runner to show that you can shot a narrow field of view with anamorphic. Scott is famous for his love of longer focal lengths and Blade Runner hardly uses wide shots other than Visual Effects shots. This is in part because of the budget. Scott made test shots of the futures LAs streets using wide lenses… realising that the width of the anamorphic frame would reveal that the set was much smaller than they would have liked it to be. Longer lenses gave a confusingly narrow field of view… to many people, too many Neon signs… a claustrophobic vision of overpopulation and a feeling of being powerless. And… this way, the same extras could run trough the frame again and again without it being too obvious.
Anamorphic can work against you… especially when you try to use a camera on a Dolly or a steady cam I did enjoy the movie La La Land… if you missed it, see it… it is a perfect example for big cinema enjoyed best on a large screen. It invokes the feel of old cinema musicals with a modern twist. One of the ways it conjures the atmosphere is by using anamorphic lenses… and as the absolute counter example to Blade Runner … it predominantly uses extremely wide lenses. 35mm Panavision C and E to be precise.
Wide anamorphic can show strong distortions… and while many consider that as character it can be distracting. In a scene like this, it is not a problem, but in the moment a scene gets “graphical”, it does. As a graphic designer by trade I get OCD when I see a street bending of the frame from distortion like here… here… better.
La La Land also shows how important it is to keep the horizon levelled… in this scene the distortions and a moving horizon caused by swinging steady cam caused me to get sea sick in cinema… no really. I started feeling sea sick.
With filmmaking there is always one golden rule Does something help to put the audience into the story… or does it pull them out of the story. In the moment it does the latter… it can become a problem.
Anamorphic is all about taste… do you like it or don’t you like it… and… what about it do you like… what do you dislike? (close) You may like anamorphic images … or you may not. You may find them unnecessary or just don’t think the hassle and cost is worth it. ……… Or… you might simply be in love with anamorphic Today, Anamorphic is simply a matter of…taste Throughout this episode, we showed you that there have been many diffrent Anamorphic stretch factors in cinema 1.25, 1.5, and most commonly 2. Stretches over 2x never played a role worth mentioning in lens design for cinematography. The amount of stretch in a process more or less determines how strong the anamorphic look is, and how clear the image looks in the end. Stretches of 1.5x and above have a quite distinctive look while stretches of 1.33x and below have a more subtile look. All stretches can produce horizontal flares. If you are using a wide sensor or one of the larger LF sensors like Alexa LF and Sony Venice, and you are going for the standard widescreen cinema aspect ratio, a lower stretch like 1.5x or 1.6x will also enable you to use the full sensor instead of a narrow crop. Connoisseurs might tell you that only 2x stretch will give you the classic anamorphic look but it really comes down to your taste and the desired end result. 2x anamorphic might look too soft in a project that aims to deliver pristine image quality. While the stretch factor and the shooting format pretty much determined the final aspect ratio in the past, today you choose one and the other separately for creative or political reasons. For example, Netflix prefers a 2:1 aspect ratio over wider formats. The quality of the image is usually high enough to crop the image to any other final output aspect ratio, than the one you started out with. In Scope Chapter two, we will show you, how you can get a native narrow aspect ratio using a 2x Anamorphic lens… using a little trick.
In our upcoming SCOPE Chapter it is all about the practical aspects of Anamorphic. We will build and test a wide variety of setups using adapters and projector lenses… and we will pith those against full blown cine lenses like the Atlas Orion, Kowa Evolution, and Lomo Square Front. If you dare to use anamorphic lenses in your next project, this should help you to find the sweetspot for your taste and budget. We will also show you some tricks and tips and test some diopters for close focus. We’ll have a talk with DIY guru Tito from “Anamorphic on a budget “ who testet about every adapter and projector lens that is out there, we are going to talk to Dick Sweeny about anamorphic in photography. And of course, we show you how to make the best out of your anamorphic footage in post. If you watch this shortly after the initial release, SCOPE chapter two will be released in the next couple of weeks, please subscribe and activate notifications, if you want us to let you know. If SCOPE Chapter two is already available… just go ahead… we will put a link in the end screen of this episode.
The Media Division wants to thank Max from Exo Optik for his collaboration on this episode. He is one of the admins of the “Anamorphic Shooters” Facebook group and he is an authority on everything anamorphic. He fact checked our script so we don’t echo some of the misconceptions you find all over the web. By the way, Exo Optik rehouses vintage anamorphic lenses. Please check them out and send them your love on Facebook (https://www.facebook.com/exooptik) and instagram (https://www.instagram.com/exooptik/) for some extra cool projects and gear all around anamorphic – they surely deserve it. I’ll put links in the description And while we are at it: Anamorphic Shooters is one of the best places to be for somebody interested in the subject… full of good information, inspiration and nice creative people. So, if you want to to start or grown with anamorphic, this is your first address.
We would also like to give a shoutout to Sebastian Fischhold for generously letting us use his LAOWA Probe lens without the intro wouldn’t have been half as cool, and to Charles Pinto for trading his B&H scope. One slobbery kiss goes out to Christoph Gross-Fengels who used his audiophile wizardry to make my voices better fit the Blade Runner sequences.
We would also like to thank the Marmelade for letting us use their studio and their awesome spike motion control robots for our lens test. Special thanks go out to the studio team with Niklas Eichten and Tom Hauser, as well as Max Hahn who shot a lot of the B-Roll… and Dierk Hagedorn that was our Knight in shining armour. Big Love goes out to Cine One that supplied us with the Anamorphic cine lenses we will use in the test and that shot some of the sequences used in this episode…… all of you get a nice dedicated shout out in SCOPE Chapter two.
So many people gave us great input and we are very thankful for all the love and support we receive from you. It is the community behind the Media Division that makes all this possible. If you want to get in touch with us, you can do in the comments, but if you want to go a bit deeper, please join out closed MEDIA DIVISION facebook group. If you want to see what we are cooking in general or what is in the work for our next episodes, please follow us on Instagram, … you will find links in the description… there you will also find a link to our Amazon store, where you see and shop the gear that we use on our productions.
If you want to support us actively, you can do so by becoming a member of the Media Division YouTube channel. Just click on the “Join” button and choose you tier.
With the Scott Tier you can show us a little love by supporting our work with 99cent per moth… enabling us to make more and better content for you. You will also get access to our members only episodes like the film emulation Deep Dive, and the Anamorphic Buyers guide that will be released with SCOPE chapter two. Also, your name will appear in the end credits of the epic episodes.
With the lynch tier you can really make a difference, for 4.99 a month you will gain access to the action packs, that we release with even episode… this will include LUTS, Footage, Templates and many other cool things related to each episode. This time, we will give you the LUTS we used for the knight sequences as well as the Blade Runner spoof, and a bit of the original Knight footage to play with and to evaluate the quality without YouTube compression. We will also give you the After Effects project of the Lens Design Part, that utilises the Element 3D plugin. Of course, you will gain access to all the action packs of t he past.
The Kubrick tier is our Pro tier… you will support us with 9.99 a month and for that, you and you will get a direct line to us. Kubrick members can consult us anytime. Maybe you have a upcoming project or you want to purchase gear… I am sure we can help you quite a bit with that. Also, Kubrick Members get a shout out at the end of our epic episodes.
And talking about our Kubrick members… the following Kubrick members helped us to make this episode possible Of course we love all our other members two… please consider become one of our supporters by joining one of our tiers In any case, leave us a like gif you think we deserve one.
Thanks a lot for hanging and hope to see you in SCOPE Chapter 2 or any other of our epic episodes… I’m Nikolas, signing out nerdilischous wishes… shoot something amazing!
Up Next

117:31
Constitutional Interpretation Debate: Kenya's Top Legal Minds | UoN Law
@vice-chancelloruniversityo3441
532.4K views•2019-07-05

12:54
Triumph of Orthodoxy Icon: Byzantine Art & History Explained
@BenCallan
2.1K views•2024-08-06

9:49
FastAPI vs Flask vs Django: Choosing the Right Python Web Framework
@TechWithTim
302.5K views•2024-05-26

1:42
Game of Thrones Opening Credits: A Cinematic Analysis
@gameofthrones
46.3M views•2011-04-18
Related Study Plans & Knowledge Roadmaps
Structured learning paths in General & Interdisciplinary Studies
general-studies
Elevator Engineering: History, Physics & Cities
01From Hoists to Safety Brakes: The Dawn of Vertical Lift
02Hydraulic vs. Traction: The Engineering Physics of Elevators
03Modern Speed, Safety, and Algorithms
+ 2 more learning modules
12h5 modules
Explore Roadmap
general-studies
Rubber: Material Science, History & Geopolitics
01Origins of Natural Rubber & Mesoamerican History
02The Chemistry of Natural Rubber & Vulcanization
03The Geopolitics of the Rubber Boom & Colonization
+ 2 more learning modules
12h5 modules
Explore Roadmap
general-studies
Containerization: Evolution, Logistics & Trade
01Ancient Trade & Bulk Cargo: Amphorae to Barrels
02The Industrial Revolution & Cardboard Packaging
03The Containerization Revolution: Malcom McLean
+ 2 more learning modules
12h5 modules
Explore Roadmap
general-studies
Textile Tech: Evolution, Labor & Global Impact
01Pre-Industrial Textiles: Handloom & Cottage Industry
02Mechanization: The Spinning Jenny to the Power Loom
03The Factory System & Global Labor Transformation
+ 2 more learning modules
10h5 modules
Explore Roadmap