![What is a robot? [engineer explains]](https://i.ytimg.com/vi/_VxqJuFoGz4/maxresdefault.jpg)



![3d Matrix Transformations [Yr1 (Further) Pure Core]](https://i.ytimg.com/vi_webp/pkGXRppWAb0/maxresdefault.webp)





![[Morpheus Chair] Gazebo Simulation with MoveIt! for your Robot Arm | S4.Ep.4](https://i.ytimg.com/vi/ALolv6DZSvM/hqdefault.jpg)









![Line Following Custom Robot Project | Webots ROS2 project Tutorial | [Tutorial 6]](https://i.ytimg.com/vi_webp/ZTJa5f5F5fU/maxresdefault.webp)


This tutorial introduces Webots, a robotic simulation software from Cyberbotics, covering the complete workflow from downloading and installing the software to creating and simulating objects. The process involves creating a solid node as the base, adding a shape with geometry (like a sphere), applying appearance properties (color, roughness, metalness), defining a bounding object for collision detection, and adding physics to make objects dynamic. Users can then run simulations to observe physical interactions, such as a ball falling under gravity. The tutorial also demonstrates adding predefined robots like the e-puck, which come with built-in controllers written in C/C++/Python that can be customized for different behaviors.
Webots Robotics Simulation: Beginner Installation & First Steps Tutorial
Added:Basic understanding of the core components of a robot, specifically sensors, actuators, and controllers.
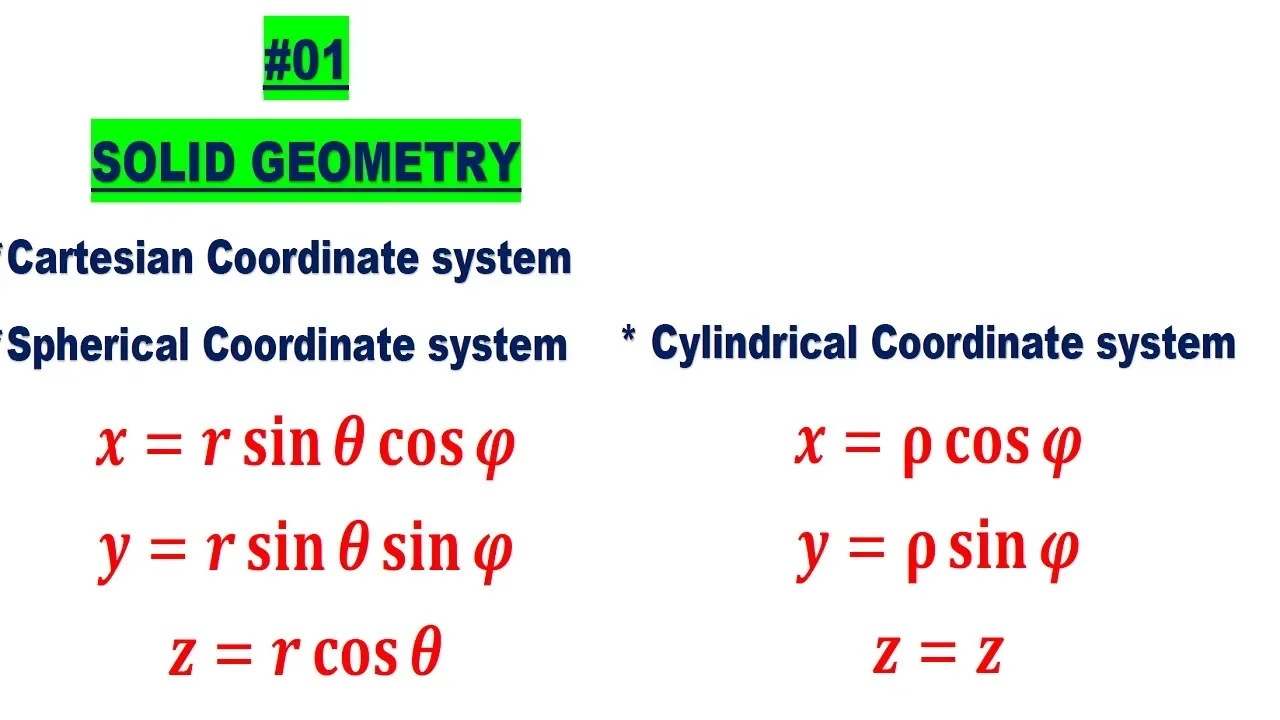
Familiarity with 3D Cartesian coordinate systems (X, Y, and Z axes) and spatial transformations like translation and rotation.
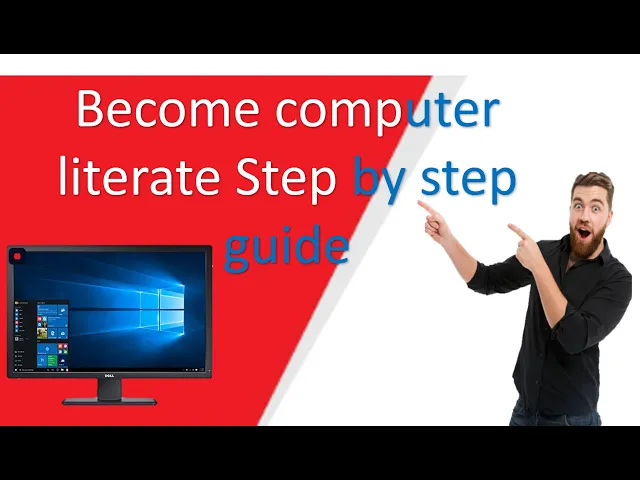
Fundamental computer literacy, including downloading, installing desktop applications, and navigating directory structures.
Basic awareness of what physical simulation is and why it is used in robotics research and development.
Writing robot controller scripts in Python or C++ to program autonomous robot behaviors.
Interfacing with virtual sensors, such as distance sensors, cameras, and LiDAR, and processing their data streams.
Configuring physics properties like mass, friction, density, and collision boundaries (bounding objects) for custom 3D models.
Integrating the Webots simulator with the Robot Operating System (ROS or ROS 2) for advanced control and perception algorithms.
133.1K views1.4Klikes10:07Original Release: 2020-10-30
hey everyone my name is kajal welcome to this channel today's video is a tutorial on Webots a robotic simulation software.
In this tutorial, we will go over download installation and some basic concepts to get you started with using Webots.
I have included all of the timings here and in the description below so without further ado let's get into it: Webots Tutorial we'll start by going to the cyberbotics website and you can see that it automatically detects that i'm on ubuntu and i'm able to download it (Webots software).
I have already downloaded this and you can see it on my desktop.
What i did next was simply double clicked on this which opened up the ubuntu software windows and then by clicking on install i was able to install the software i've already done this step so next is to open it up i opened a new terminal and simply typed webots.
So here we go now some basic concepts up here you can see the simulation has already started so good thing to do when you always start is hit pause and then also do a reset now given that we are starting we'll start with a new project you can do this by going into the options menu wizards and new project directory you can name your project whatever you want i am going with my project and then start with an empty world a good thing to do is add the rectangular arena which will help you get started as you can see the world has loaded with a rectangular arena essentially a floor with four walls so one thing you should do is learn how to zoom in and zoom out this is simply done by scrolling in and out another thing is you can click on it and you can move it around to look at different views.
Webots tutorial for Beginners on the left side you have your scene tray essentially all the parts (Webots nodes) that will go into your world and with this option you are able to change different aspects as well as add new things so for example we can change our floor size to be 10 by 10 and as you can see our arena has grown 10 fold in size we can always change it back to one by one Webots tutorial for Beginners let's create an object of our own we will first go over the steps to create an object and then we will take time to understand what each of those elements mean so let's click on the rectangular arena and then click on the plus sign this will allow us to add a new object now objects in webots are essentially nodes you can use proton nodes which are essentially prototypes or you can create a new one for yourself so let's start by creating a new one for ourselves which is under the section base nodes we're going to start with solid after clicking under solid we will go under children and add another shape ** Webots tutorial for Beginners ** next within shape we will make a sphere ** Webots tutorial for Beginners ** double click on geometry ** Webots tutorial for Beginners ** and you should be able to see different shapes let's start with a sphere click on add ** Webots tutorial for Beginners ** now all the objects are added at 0 0 0. by clicking on the geometry we are able to change the dimensions so we could go from 0.1 to 0.05 and you can see the sphere has reduced half in its size next comes appearance let's use base node pbr appearances click on add within appearances you have multiple options with base colors you can change the color so let's make our ball red in color ** Webots tutorial for Beginners ** next let's change the roughness to 1 and the metalness to zero ** Webots tutorial for Beginners ** so with that we created a first object (in Webots) we need to do more things to be able to make it usable next we have to change the bounding object this is going to be the same thing as your shape so now instead of having to do it all over again you can reuse the same shape so click on shape and using def name it something that you can reuse so let's call it ball now on your bounding object when you double click you can click on use to use this shape that we just created which in this case is ball lastly let's add physics so in this case it's just a simple physics this helps with things like gravity and as you go into more advanced projects you can change this for different features now that was a lot so let's do a quick recap on how to create an object in Webots we first start with a solid node which represents a rigid body simply click on the plus icon and then go into base node solid to create a solid node next we add a child node in similar fashion and select shape under shape we use geometry to choose our shape in this case we chose a sphere we can further modify different parameters such as radius to change the size of our object next we change the appearance we click on appearance and select pbr appearance as a base node with this node we can change color roughness metalness and other features now we want the ability to reuse this shape so we use def to define it as an object next we give it a bounding object in this case we reuse the shape we just defined the bounding object essentially defines the collision bounds for our object lastly we add physics this makes our object dynamic compared to the rectangular arena which is static our object would be dynamic meaning it would have the ability to move around now our ball is kind of in the floor so let's lift it up a little bit you can use translation to change it let's raise it a meter above the floor now that's too much so how about 200 centimeters there you go you can always use the save option to keep saving your work now as you can see the ball is way above the floor now let's run the simulation by clicking on the run as you can see it just dropped on the floor which is to be expected given the gravity it did not go through the floor because floor is static you can always reset your simulation by clicking on reset so that's an object that you created you can also always use pre-existing objects and robots so for example let's create a new one by clicking on the plus sign ** Webots tutorial for Beginners ** going on to proton nodes robots gcstronic e puck ** Webots tutorial for Beginners ** and then add now as we play a simulation the robot continues to drive ** Webots tutorial for Beginners ** let's pause the simulation so again click on the plus sign this time let's go into proton nodes robots gctronic e puck and click on add it plays the robot again at 0 0 0.
now to ensure the ball doesn't hit the robot let's move it a little bit ** Webots tutorial for Beginners ** we moved it 200 centimeters in the x direction red it is x blue is y and z is green let's save let's run the simulation as you can see the robot has started moving around this is because this robot comes with its own controller so let's pause the simulation to see what's going on under the e puck you can see controller and when i double click on it i can see e puck avoid obstacles this is the main program that's running the robot right now you can always change it to run your own software such that the e puck will behave in a way you want it.
When I click on edit I am able to see the software (code) ** Webots tutorial for Beginners ** this code is written in c webots supports C, C++ and even python so you can write in whichever language you prefer this is a basic code to drive the robot around while avoiding obstacles if you want to change behavior you can either edit this file or create your own file and simply change it under the controller tab so those are some basic concepts of webots.
In the next Webots tutorial, we will build our own robot and drive it around thank you for watching and if you enjoyed this video make sure to give it a like and if you haven't already don't forget to subscribe
Up Next

4:48
Infrared Sensor Basics: Arduino Object Detection Tutorial
@sparkfun
78.1K views•2013-02-20

12:54
Triumph of Orthodoxy Icon: Byzantine Art & History Explained
@BenCallan
2.1K views•2024-08-06

9:49
FastAPI vs Flask vs Django: Choosing the Right Python Web Framework
@TechWithTim
302.5K views•2024-05-26

1:42
Game of Thrones Opening Credits: A Cinematic Analysis
@gameofthrones
46.3M views•2011-04-18
Related Study Plans & Knowledge Roadmaps
Structured learning paths in General & Interdisciplinary Studies
general-studies
Elevator Engineering: History, Physics & Cities
01From Hoists to Safety Brakes: The Dawn of Vertical Lift
02Hydraulic vs. Traction: The Engineering Physics of Elevators
03Modern Speed, Safety, and Algorithms
+ 2 more learning modules
12h5 modules
Explore Roadmap
general-studies
Rubber: Material Science, History & Geopolitics
01Origins of Natural Rubber & Mesoamerican History
02The Chemistry of Natural Rubber & Vulcanization
03The Geopolitics of the Rubber Boom & Colonization
+ 2 more learning modules
12h5 modules
Explore Roadmap
general-studies
Containerization: Evolution, Logistics & Trade
01Ancient Trade & Bulk Cargo: Amphorae to Barrels
02The Industrial Revolution & Cardboard Packaging
03The Containerization Revolution: Malcom McLean
+ 2 more learning modules
12h5 modules
Explore Roadmap
general-studies
Textile Tech: Evolution, Labor & Global Impact
01Pre-Industrial Textiles: Handloom & Cottage Industry
02Mechanization: The Spinning Jenny to the Power Loom
03The Factory System & Global Labor Transformation
+ 2 more learning modules
10h5 modules
Explore Roadmap