









![[Nanophotonics] 9. Localized surface plasmons - part 2](https://i.ytimg.com/vi_webp/CDEFOX_4968/maxresdefault.webp)








UV-Vis spectroscopy measures the absorbance of nanoparticle solutions across ultraviolet and visible light wavelengths to determine material properties, nanoparticle size, and sample quality; the technique requires blanking the instrument with the dispersing solvent to account for background absorption, and optimal measurements require diluting concentrated samples to achieve an absorbance of approximately 0.8-1.1 OD for clear, defined spectral peaks.
UV-Vis Spectroscopy Tutorial Part 1: Measuring Nanoparticle Absorbance
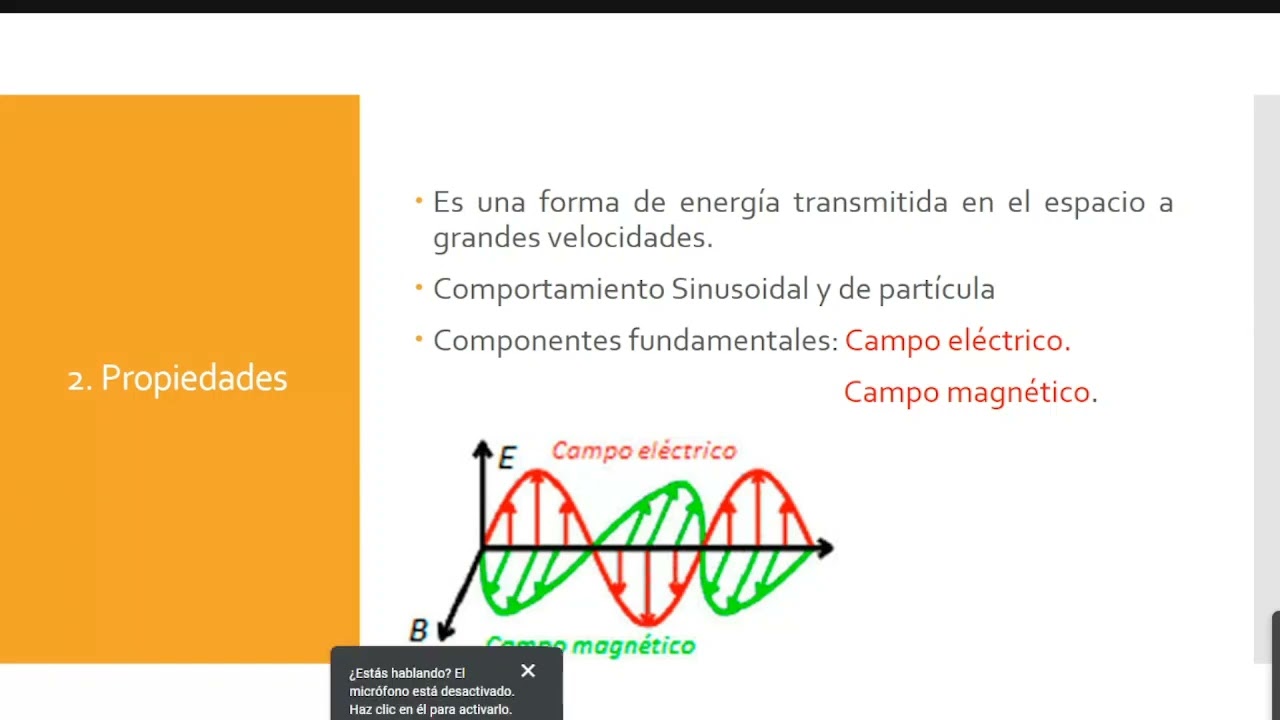
Added:Understanding the electromagnetic spectrum, specifically the ultraviolet and visible light regions, and how matter interacts with light.
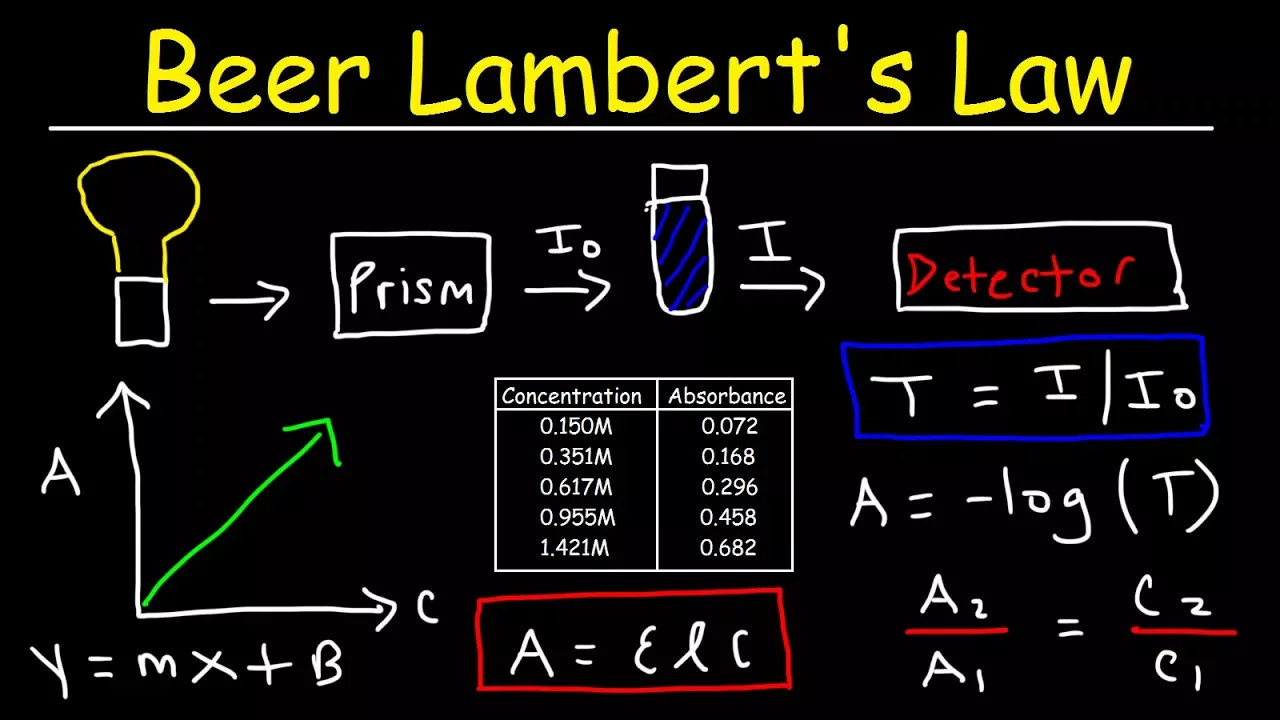
Familiarity with the Beer-Lambert Law, which mathematically relates absorbance to concentration, path length, and molar absorptivity.
Basic knowledge of spectrophotometer components (light source, monochromator, sample holder, detector) and their operational roles.
An introductory understanding of nanoparticles, particularly how their nanoscale dimensions alter their optical properties relative to bulk materials.
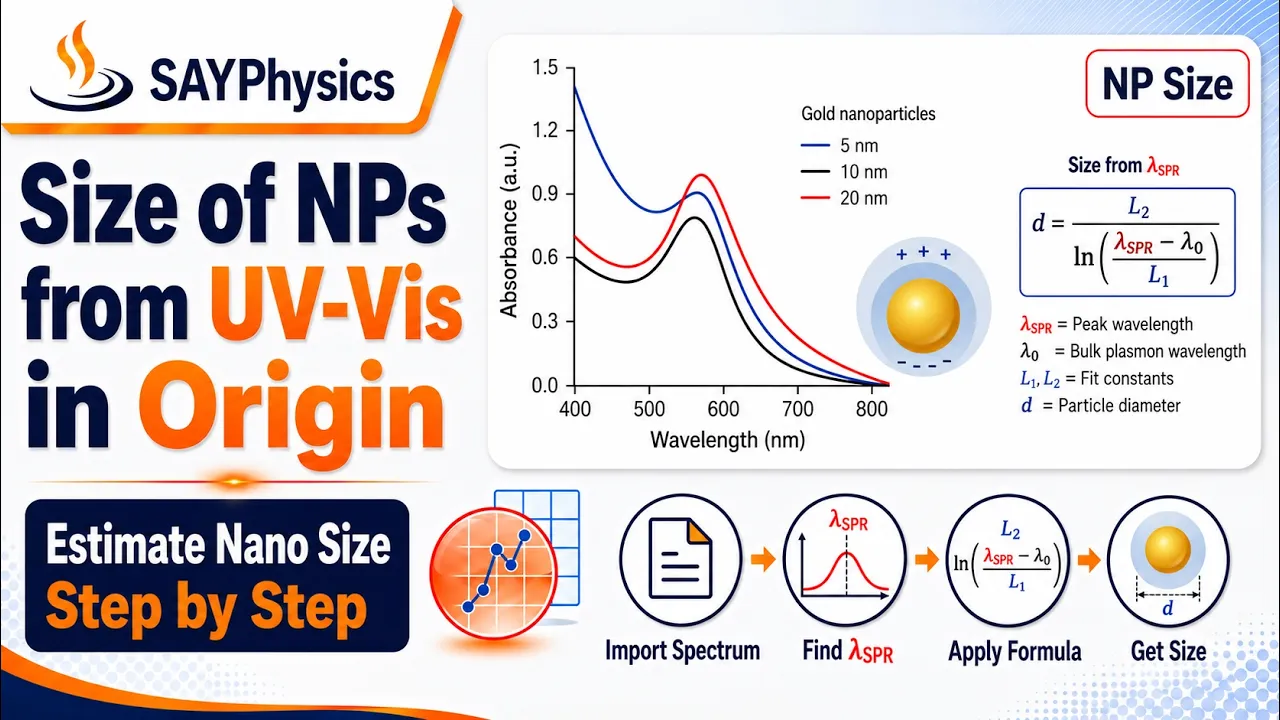
Interpreting localized surface plasmon resonance (LSPR) peaks in UV-Vis spectra to estimate nanoparticle size, shape, and dielectric environment.
Using absorption spectra to monitor nanoparticle synthesis kinetics and stability or aggregation state over time.
Calculating the concentration and extinction coefficients of synthesized colloidal nanoparticle solutions.
Correlating UV-Vis spectral data with complementary characterization techniques like Dynamic Light Scattering (DLS) and Transmission Electron Microscopy (TEM).
100.3K views1.1Klikes9:45Original Release: 2016-11-18
Hi! My name is Martin Miranda and I'm the product manager here at nanoComposix.
Today I'll be demonstrating how to take a UV-Vis measurement of a nanoparticle sample.
This will be part 1 in our UV-Vis series.
So, what is UV-Vis?
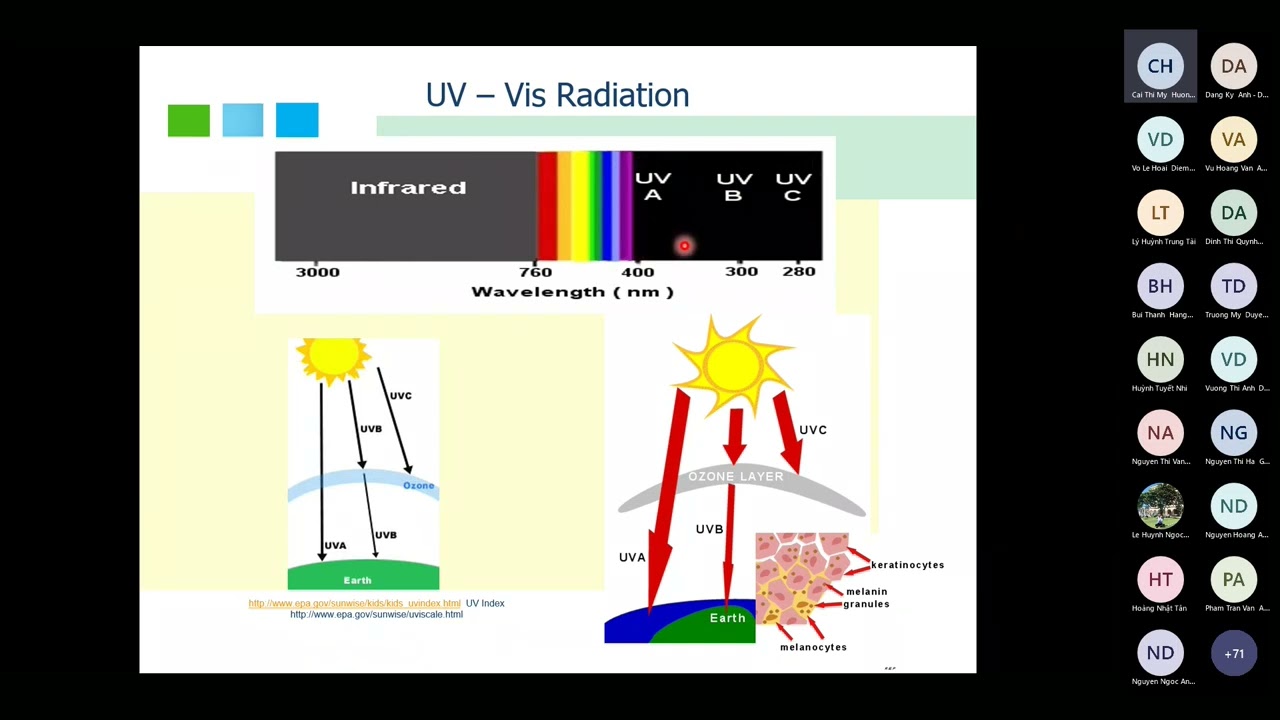
UV-is is a technique that measures the absorbance of a solution across the ultraviolet and visible regions of the light spectrum -- hence the name "UV-Vis".
In our case, it'll measure the absorbance of our colloidal solution in these regions.
What happens is the lamps in the spectrometer send light through the sample and the instrument measures the wavelength-dependent attenuation at the detector on the other side.
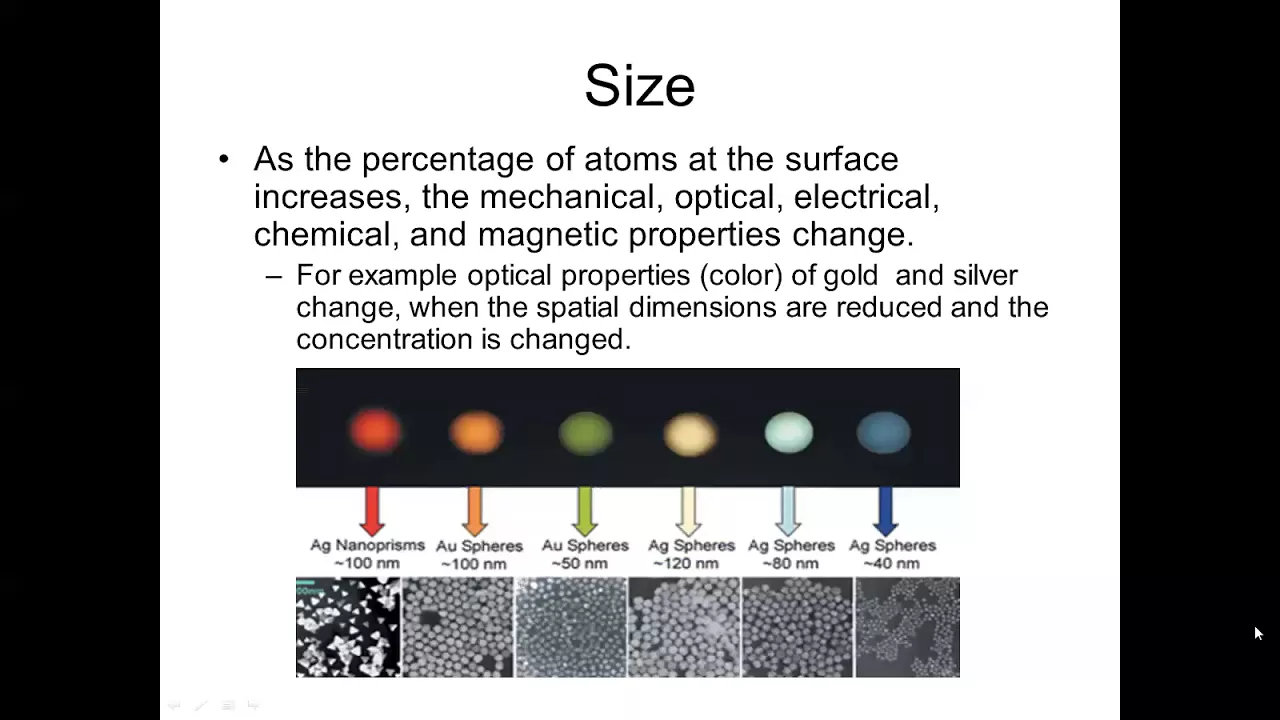
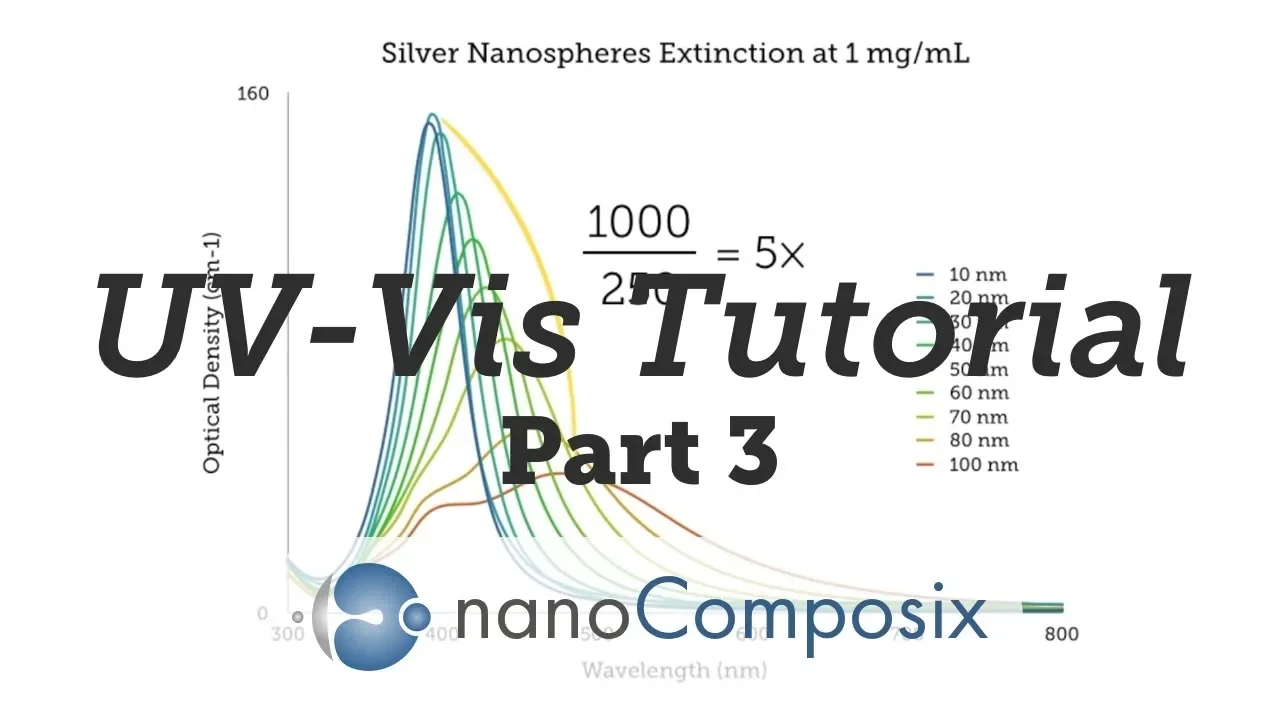
UV-Vis is especially useful for what are called "plasmonic" materials like gold and silver nanoparticles because they have very distinctive absorbance spectra.
These spectra can tell us a lot about a sample such as the type of material that it is, the size of the nanoparticles, and the quality of the sample.
At nanoComposix, we rely on UV-Vis measurements pretty heavily because it's a really quick and easy way to do a quality control check on your materials.
We can measure the UV-Vis of one batch over time or compare it to older batches.
By analyzing the spectra, we can tell whether something is unusual about the sample, if the material has changed, shifted, or it's starting to aggregate.
Because UV-Vis can be quick and easy, we often use this as a go-to quality check control, and if we see anything unusual, it helps us decide if we need to do further analysis like DLS or TEM measurements.
For more information about UV-Vis and plasmonics, you can go to our website at nanocomposix.com and check out our handbooks and Knowledge Base section, or click on the links in the description below.
Now I'll explain a little bit about setting up your instrument.
We use the agilent 8453 spectrophotometer and the chem station software.
If you're using a different instrument, your setup might be slightly different.
The spectrophotometer has two lamps -- there's a deuterium lamp which generates light in the UV region which is between 190 and 400 nm, and a tungsten lamp which generates light in the visible and near-IR regions of 400 and 1100 nm in wavelength.
With those lamps combined, we get a measure read out across 200 to 1100 nm.
Some instruments use different lamps which allow them to measure a broader spectrum of light.
So, once you've got the instrument on & up and running, you're going to want to let it warm up for about 45 minutes to make sure that the lamps are nice and hot so that you get really good quality measurements.
Next thing you're going to want to do is blank the instrument.
You can use a few different types of cuvettes, some of these like this quartz one here has a frosted side and then the other plastic ones that we use regularly that are disposable, are clear on all sides so it really doesn't matter which side you use.
So what you do want to make sure that you orient them in the same orientation when you put them into the sample holder.
As you can see, this one here (left) is frosted on that side and then not on that side, and then this one (right) is clear on all sides.
This one's marked here with a 6Q telling you that it's a quartz.
This can also serve as your marker for which direction you're going to face the cuvette.
You always want the cuvette in the path of the light which is from the rear to the front.
So, you don't have to mark this one up, but this one what you'll want to do is you'll want to mark it with a permanent marker just at the very top... just like that so you can tell the difference once you're ready to blank it, and then you'll also use this one to prepare your sample.
So first we're going to start with blanking the cuvette here.
Just going to use the tip and add a mL of water.. (oops! little bit of error...) You always want to make sure that you wipe the cuvette before you put it in the sampler.
Any oils from your fingers -- you also want to be wearing gloves, of course -- any oils or dust particles or even bubbles inside the liquid can give you an erroneous or imperfect measurement.
And now on this particular instrument the controls are in the front but you can also use the software to initiate the blank so I'm just going to use the blank button on the front.
Once you get a blank that's nice and flat you'll be ready to use this cuvette.
Now the reason we're blanking the instrument is because the cuvette itself -- the plastic that the cuvette is made of, or the quartz if you're measuring it in quartz, as well as the solvent that the nanoparticles are dispersed in will also absorb some light, so what we need to do is subtract that from the total absorbance, and then the difference wil lbe the absorbance from just the nanoparticle.
So, in this case, because the silver is dispersed in water, we're going to blank with water in the same cuvette that we're going to measure in.
But really, depending on what the sample you're going to measure, the solvent that the nano particles are dispersed in is the solvent you want to blank with.
You always want to get all the water out of it if you're going to measure your sample in there.
And now that I've gotten all the water out I'm going to take my nanoparticle dispersion here... and I've already poured this out preemptively, so this is a sealed vial that would go out to a customer potentially.
And then, once again, wipe down the cuvette with the correct orientation facing you into the sample holder.
And then now we can initiate the sample measurement through the outside (in the front) or in the software.
I'm going to use the easy route... And now we have a sample measurement.
Unfortunately, the absorbance spectrum, as you can see, is really noisy at the very peak area is in the ~ 3 OD region.
For most UV-Vis spectrophotometers, especially this one in particular, you do want the optimal OD to be around 1, between 0.8 to 1.1 OD's to really get a nice smooth and really clearly defined peak.
If you were to use this for any sort of analytical measurements you would most likely get erroneous data; you wouldn't have the actual OD, you wouldn't be able to calculate concentration and things like that.
So, what you will need to do is a dilution from this solution and then remeasure it.
So now this, in particular, we already know what dilution is optimal so what we're going to do is a 1:3 dilution, which means I'm going to add 1 mL of nanoparticle solution and then add 3 mL of water.
Now that I've diluted it inside the cuvette what we'll need to do is aspirate to mix it up nice and well, to make sure we have a homogeneous solution.
Once again, wipe it down.
Now we can re-measure.
And now, once we zoom in here, we can clearly see the UV-Vis spectrum is a lot smoother, it's around 0.8.
It looks a lot clearer, and you can really see the peak, it's a bit more defined than in the concentrated spectrum.
And that concludes part one of our UV-Vis series!
So today I prepared a qualitative UV-Vis measurement using these pipetters to measure out all the volumes.
In Part 2, we'll do a quantitative measurement where we'll use an analytical balance to get a more precise measure of the volumes that are actually going into the dilution.
Thanks for watching! I hope you enjoyed the video and that you found it helpful.
If there any other topics that you'd like us to cover, please feel free to leave them in the comments below :)
Up Next

17:39
Arduino Servo Motor Control Tutorial: PWM & Potentiometer
@ProgrammingKnowledge
17.1K views•2019-04-22
178:38
Whole Brain Architecture: First International Workshop 2024
@thewholebrainarchitecturei9784
640 views•2024-07-22
4:42
Covalent Conjugation of Antibodies to Gold Nanoparticles Tutorial
@nanocomposix
16.8K views•2017-01-17

1:42
Game of Thrones Opening Credits: A Cinematic Analysis
@gameofthrones
46.3M views•2011-04-18
Related Study Plans & Knowledge Roadmaps
Structured learning paths in General & Interdisciplinary Studies
general-studies
Artificial Light: History, Tech & Human Impact
01The Pre-Electric Era: Fire, Oil, and Gas Lighting
02The Incandescent Revolution and Grid Electrification
03Gas Discharge and Fluorescent Illumination
+ 3 more learning modules
14h6 modules
Explore Roadmap
general-studies
Elevator Engineering: History, Physics & Cities
01From Hoists to Safety Brakes: The Dawn of Vertical Lift
02Hydraulic vs. Traction: The Engineering Physics of Elevators
03Modern Speed, Safety, and Algorithms
+ 2 more learning modules
12h5 modules
Explore Roadmap
general-studies
Rubber: Material Science, History & Geopolitics
01Origins of Natural Rubber & Mesoamerican History
02The Chemistry of Natural Rubber & Vulcanization
03The Geopolitics of the Rubber Boom & Colonization
+ 2 more learning modules
12h5 modules
Explore Roadmap
general-studies
Containerization: Evolution, Logistics & Trade
01Ancient Trade & Bulk Cargo: Amphorae to Barrels
02The Industrial Revolution & Cardboard Packaging
03The Containerization Revolution: Malcom McLean
+ 2 more learning modules
12h5 modules
Explore Roadmap