
















Wavefront sensors use mathematical decomposition via Zernike polynomials to characterize optical beam quality by measuring wavefront aberrations such as tip, tilt, focus, and spherical aberration; two primary technologies exist—Hartmann-Shack sensors that use micro-lens arrays to create focus spots whose centroid displacements reveal wavefront shape, and quadtree wavefront sensors that employ diffraction gratings to generate four displaced beam copies analyzed through Fourier transform for wavefront reconstruction.
Wavefront Sensor Tutorial: Zernike Polynomials & Software
Added:Basic Wave Optics: Understanding the physics of light propagation, wavefronts, phase, and coherence.
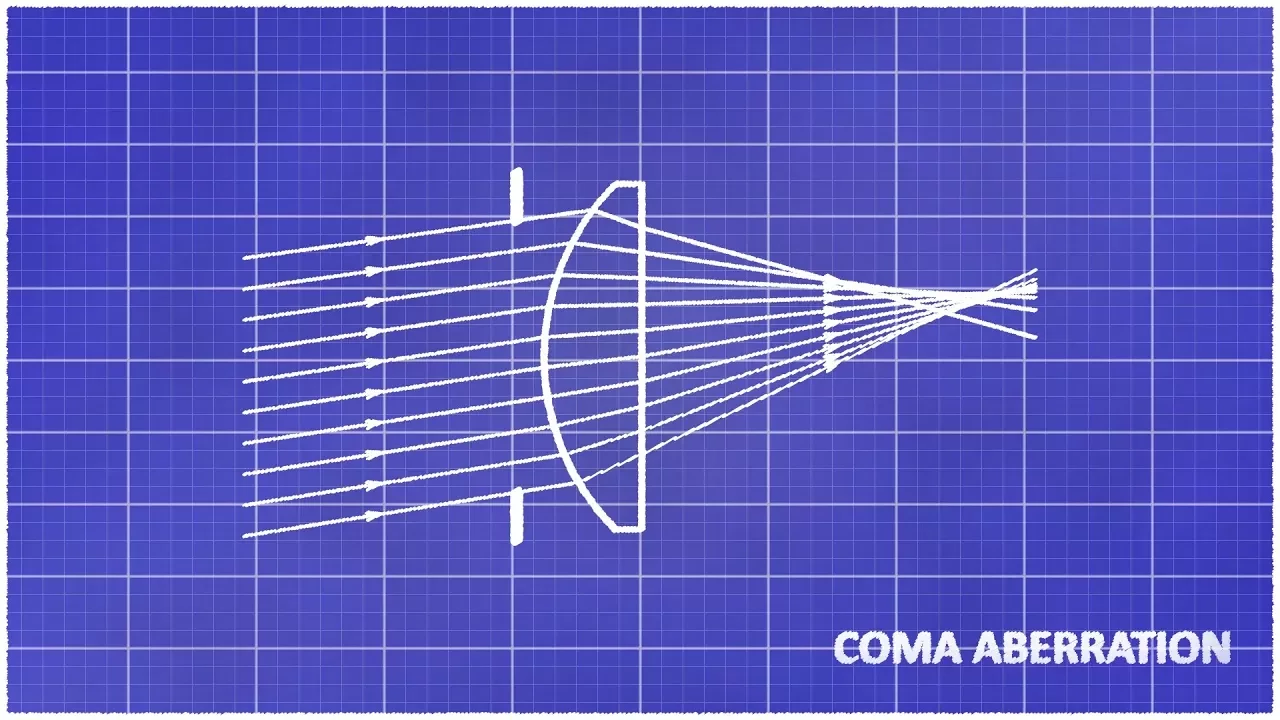
Classical Optical Aberrations: Familiarity with primary geometric aberrations like defocus, astigmatism, coma, and spherical aberration.
Fundamentals of Interferometry: Basic principles of optical interference, phase shifting, and how fringe patterns are formed.
Introductory Linear Algebra and Orthogonal Functions: Understanding how complex shapes or functions can be decomposed into a sum of orthogonal basis functions.
Adaptive Optics Systems: Studying closed-loop feedback systems that use deformable mirrors and wavefront sensors to correct aberrations in real-time (e.g., in astronomy or ophthalmology).
Advanced Wavefront Reconstruction Algorithms: Exploring the mathematics behind modal and zonal reconstruction, as well as alternative polynomial bases for non-circular apertures.
Metrology of Freeform Optics: Applying wavefront sensing techniques to measure and manufacture highly complex, non-spherical optical components.
Laser Beam Characterization: Utilizing wavefront analysis to determine beam quality metrics, such as the M² factor, and to optimize high-power laser delivery systems.
7.7K views75likes17:45Original Release: 2018-09-04
hello my name is just Chapman and we're going to talk about how to do a front sensors in the lab today so here's that outline for the talk first off rent talk about certain key polynomials which is the reason that you build away from sensors to calculate these so they can help you and why it should be and then we're going to talk about two different ways from sensing technologies one is the shock Department technology which has been around for decades and is she Tim then a CCD had one from Philips and the one is a quadtree wave lateral sharing interferometry which we have away from sensitive that's that from the faces so we talked about how each of them works and how to use that and so first up if you don't familiar with is there any key polynomials an orthogonal set of polynomials for the unit disc so you can see some of their profiles over here there's a list of some polynomials so these are useful because each of them can describe a certain aggravation and optical system so for instance some of the first couple or tip and totals just horizontal deflection or vertical deflection and then you also have the focus is diverging or converging and then these other ones come up in lens systems where these are aberrations caused by the lens so many people are familiar with a spherical aberration where this is different parts of the beam will focus at different points along the propagation axis so one of the reasons that decomposition like this is so helpful is because many of these different aberrations are fixed in different ways so for instance tip and tilt or often due to the Hyneman beam focus is to the relative position of certain lenses but why these other ones are due to actual winds construction itself so that is often can only be fixed with better Wednesday's or maybe you could add some more lenses down but in general these have a wide array of different ways to fix them so if you have a messed up beam this can help you tell which parts of that are due to optics and maybe which parts are more to tier one okay so now it's a quickly discuss what a shock Hartman way from sensor does so there's two elements to this wavefront sensor you have a micro lens array just many of lenses and array in front of a sensor like that CCD camera so the way this is set up is if there's a flat wavefront coming into the wavefront sensor then that micro answer a will focus many spots into the center of say a certain section that is the section for each lens so if the beam is deformed then the the spots will focus in different places in the respective areas and from this information the deviation from the center or the calibrated spot is how the wavefront sensor calculates so here's a screenshot Oh laughs - sensor software so like a few things so first off you can see this is the wrong image the CCD camera with the focus spots for the micro lens right and I'd like to point out this the big cross is the centroid calculated from the pink circle is the houses pupil so if you remember the certain keys are defined on the unit disk and so you want the analysis people to be the set to the size of the beam so that you're analyzing the beam and not half the beam or mostly black space so there are options that allow you to set it so it's the right size and it follows it's over here you can see some calculated quantities which we'll talk about some others later and down here they're different tabs to allow you to view different calculations so for instance there's the wine view which is like a one slice the camera view is the reconstructed beam and there's the wavefront either way 3d and then there's the bar graph of the circuit coefficients we go that way and so using the software if you don't click on any of these plots will get a lot specific graph to help you adjust things how you want and then if you right-click you can bring up the setup settings so for instance there's camera settings and these are important when you first install software on a camera because this allows you to change how many images you averaged before it calculates something so if you have low power or if you want a very precise measurement you want to out the number of averages and additionally if you can to raise your laser power up another way you can increase the exposure also you want to set this so it's next this is where it's a people definition page and this is where you know if you lose being with yous being centrally then this will have the Kings Cross and the pink circle the Cross will automatically calculate the being centroid and keep the analysis people sent out on that and they have to use being width it will automatically adjust the circle dangler to follow the beam as it changes say if you're focusing or D focus and it'll change the size so it calculates this very cute right and finally this is the definition of the turkey so on that bar graph from left to right these are the zoning keys that it's plotting so I go back here to refer to remember what so DQ something like that and this is useful because there's actually a few different standards so if you use a different software it's or during installation there's also some errors that you need to be careful about so at the bottom of the screen there was a there's a message bar and you wanted to say no mr. bear's green check box don't get that it's not the life so there's a few things that you need to be careful I want the lights off so there's a lot of contrast you have one background you'll get a message if that powers too high or too low so you need just the right power so it's very helpful if you have a way to adjust your power and the power that you need is often it's not very much additionally the beam diameter needs to be sufficiently large so that there's enough micro lens spots in it that get accurate enough calculation of the wave reconstruction so at this point I'll take questions that's nonsense what's their accuracy that's quite what about the way that friendship so this water so consistently so you're 400 up to use data from 1064 you can but if I remember right that is only as you want to it has to do with like a power doesn't actually see they're correct okay so next we'll talk about Adri waves are all sharing so what this is is the set of micro lens array you have a diffraction grating which makes four copies of your beam that are slightly displaced so the way they do that is they have a face profile that approximates by sinusoidal reading so you get four direct spikes or as close to possible yeah fetching to different levels to do PI plus a nice high station so when you do that then if you're single people on there you get mini fridges like this on the left you can see they slide our way front and right you can see beautifully have really fun and you may notice that frequent the spacing changes that you go across so instead of doing direct measurement of where the spots are on the screen they use a Fourier analysis so they look at 48 spaces so they'll see as you change parameters the wave fronts they'll see the spacing of spikes in Fourier space change and this is what allows them to reconstruct so here's kind of the front front office the main the main window for the physics software there's a calculation of Windows that you can open up here we do this how to set up an acquisition so we're going to talk about first you click on the camera window and this open ups opens up the sees the image and then you need to select the analysis people so for this one actually selected people with 13% then you need to make sure the power side up so it needs to be between like 200 and 250 you can change the exposure to help me do that adjust images additionally this wavefront sensor is a philosopher coded CCD so we use it for IR that then phosphorus down to a higher frequency and then it's detected by silicon city but you can also check this box you can use it by just said New Orleans they don't guarantee that performance as much wavelength ranges of continuous based on the phosphor they used would have used to hide Newsday and it seemed to have early think Airwolf performance of the lives so after you get that then you want to go back to his being widowed and it's real time it's continuous acquisition hit the mass extra feature we added by so that you know it's master to move with to be as it changes during work at that point you're ready to use the way front sensor and most likely you're going to collect one of the button this was from retirement now that's it's the calculation of often just away for the section called us find things buttons beep parameters different X&Y tilts usually don't want to first couples running keys and then you can look at the reconstructed eaves intensity profile to help you know where it is camera select this cross put it at the maximum or went on there leave it there while you look at a different beam trying to use them tell me why you can calculate the radius of curvature and then also the B parameters so these B parameters are calculation assuming a Gaussian beam so this can take your wavefront that's hitting the camera and then give you the Rayleigh range the beam waist and actually the beam waist location so this is helpful if you want some no water here where your waist is and just note that when you have a negative number here that corresponds to a distance in front of the camera so I help see economic locates where the place is and I was told by physics that I want to use measure an accurate an x squared measurement they should reduce the clipping on the camera settings window Fourier analysis mast and fibers so additionally they had a few more calculations so calculate Astro ratio which can be helpful for turbulence simulation and also calculate far fuel what far-field what they mean by that is if you have a lens the size your aperture what does it look like at the focus and they have a calculation of the circle of energy which is if so say or to have it focus down and look at like the diffraction limit spot maybe there was an airy disc pattern so this thermal energy is how much of the powers in the central and finally you can also calculate the certain case which they are surprised to do that one thing to note is that if you want to calculate the certain keys you actually need to turn this off first and open up the JDK window and then turn this back on because this is a little software glitch they break this out in the song but to do it that order so conclusion talks about a few different way throat sensors and their software and how they operate so any questions about experience the power had to be between acuity 251 their Union Clement so yeah you want about one to five milliwatts per centimeter squared statistic so it's actually a lot more power question yes as you go you're trying to have a little phosphor for us that's what his this so the face explained that sensor would also work for the telecom when things correct yeah that's what it's designed for so around 50 power accepted stylist standing are there any obvious reasons to use one wavelength sensor over the other of the thorax one the one that we have is designed for basics one is they do have slightly different calculations as you can see but so the physics one as you can see could be kind of used as a profiler also for the IR which we don't have where we also have we have visible with you profile we have visible wavelength also one thing no clock software you can get from the website we have the physics software and there's a little USB license key that needs to go with it it's already both of these are already installed
Up Next

31:21
DIY Deformable Mirror Design for Adaptive Optics
@HuygensOptics
225.4K views•2025-10-04

12:53
21cm Hyperfine Transition in Neutral Hydrogen: Radio Astronomy Basics
@AaronRobertParsons
12.4K views•2011-10-13

32:32
NMR Spin Physics I: Zeeman Effect, Resonance Condition & Larmor Frequency
@nptel-indianinstituteofsci8064
2.3K views•2024-01-17

27:14
Entropy and the Second Law of Thermodynamics Explained
@veritasium
27.5M views•2023-07-01
Related Study Plans & Knowledge Roadmaps
Structured learning paths in Physics
physics
Nuclear Physics (Decay, Fission & Reactors)
01Atomic Structure and the Binding Force
02Radioactive Decay and Half-Life
03Nuclear Fission Mechanics and Chain Reactions
+ 2 more learning modules
12h5 modules
Explore Roadmap
physics
Soft Matter (Polymers, Colloids & Rheology)
01Foundations of Soft Matter & Thermal Forces
02Polymer Physics and Macromolecules
03Colloids, Surfactants, and Self-Assembly
+ 2 more learning modules
38h5 modules
Explore Roadmap
physics
Analytical Mechanics: Lagrangian & Hamiltonian
01Mathematical Foundations: Calculus of Variations
02From Newtonian Mechanics to Constraint Dynamics
03The Principle of Least Action & Lagrangian Mechanics
+ 3 more learning modules
28h6 modules
Explore Roadmap
physics
General Relativity (Spacetime & Cosmology)
01Foundations of Relativity: Special Relativity
02The Geometry of Spacetime: Equivalence Principle & Curvature
03Einstein's Field Equations: The Mathematics of Gravity
+ 2 more learning modules
55h5 modules
Explore Roadmap