Building Speech AI: ASR & Coqui Voice Cloning
Learning Goal: Develop an end-to-end automatic speech recognition (ASR) and voice-cloning text-to-speech (TTS) pipeline using Hugging Face and Coqui TTS.
- Prerequisites: Basic Python programming (variables, loops, functions), basic terminal usage, and familiarity with managing virtual environments (
piporconda). - Estimated Study Time: 16 hours
Module 1: Digital Audio Foundations & Python Basics
Understand how sound is digitized, visualized, and manipulated using Python. You will learn about sampling rates, waveforms, spectrograms, and how to use basic audio processing libraries to extract features from sound files.
Recommended Videos
How Digital Audio Works - Computerphile
Why this video is valuable: This video provides a foundational understanding of digital audio conversion. It visualizes the shift from continuous analog sound waves to discrete digital samples, detailing how sampling rate and bit depth define the limits of digital fidelity. It introduces the Nyquist-Shannon theorem in a highly intuitive way.
Introduction to Librosa: Audio Waveforms & Spectrograms in Python
Why this video is valuable: This tutorial transitions theoretical audio concepts into Python code. It demonstrates how to import and read audio formats programmatically using the Librosa package, inspect structural properties of audio arrays, and construct basic waveform visualization plots.
How to Extract Spectrograms from Audio with Python

Why this video is valuable: Modern speech AI systems rarely process raw audio waveforms directly; instead, they operate on spectrograms. This video explains Short-Time Fourier Transforms (STFT) and shows how to convert signals from the time domain to the time-frequency domain using Librosa, mapping mathematical formulas to practical Python lines.
Module 1 Knowledge Checkpoint
- What is the physical meaning of a sampling rate (e.g., 16,000 Hz vs 44,100 Hz), and how does it affect digital audio representation?
- How do you write a Python script using Librosa to load an audio file, override its native sampling rate, and verify the shape of the output array?
- Describe the components of a spectrogram (Time, Frequency, and Amplitude) and explain how they are visually mapped.
Module 2: Introduction to Machine Learning & Hugging Face
Learn the core principles of deep learning and navigate the Hugging Face ecosystem. This module teaches you how neural network weights operate and how to use Hugging Face Pipelines to download and query pre-trained neural networks.
Recommended Videos
Neural Networks Explained: Architecture, Weights, and Biases
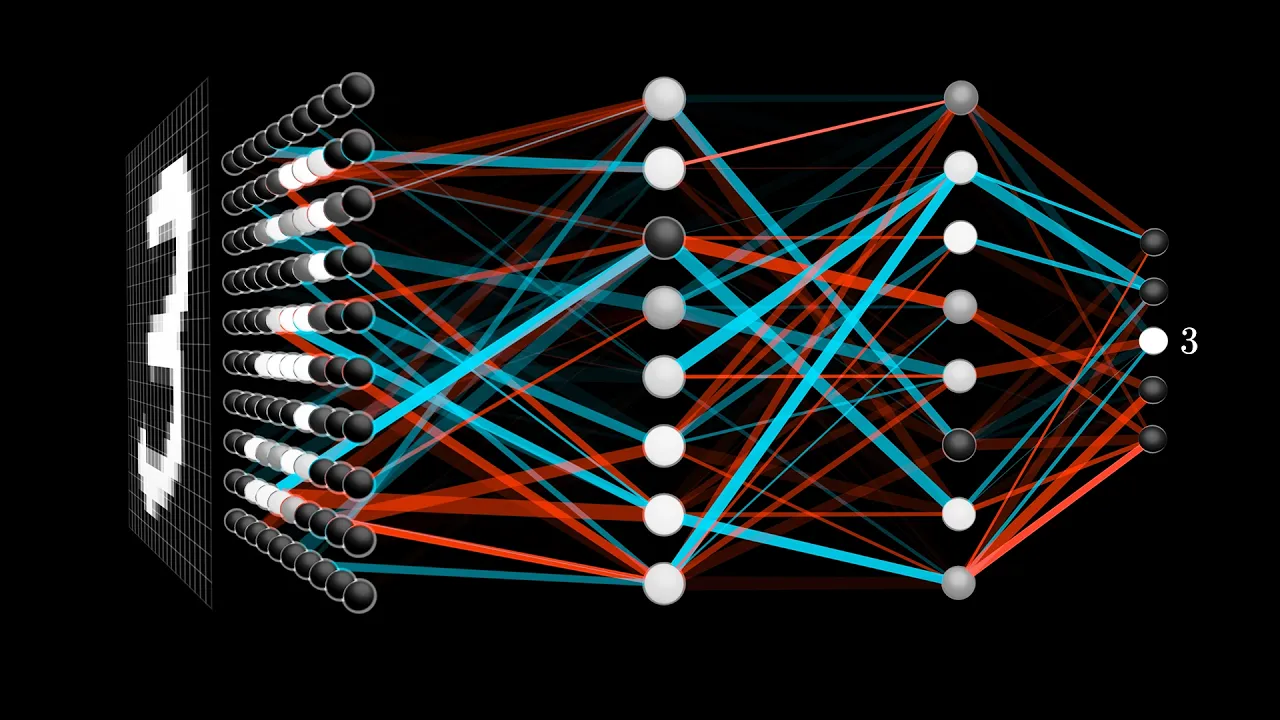
Why this video is valuable: Before implementing high-level speech APIs, you need to understand how neural networks operate. This world-class visual animation details how raw inputs pass through layers of hidden nodes, influenced by weights and biases, to generate structured model outputs.
Hugging Face Transformers: A 15-Minute Introduction to NLP Pipelines

Why this video is valuable:
This tutorial explains the structure of the Hugging Face transformers library. It covers the pipeline paradigm, illustrating how tokenizers transform raw inputs and how the model executes inference in just a few lines of code.
Access Open-Source AI Models Locally with Hugging Face and LangChain

Why this video is valuable: This short, direct guide shows how to interact with Hugging Face programmatically. You'll learn where the platform hosts open-source models, how to set environment access tokens, and how models download and cache locally on your machine.
Module 2 Knowledge Checkpoint
- Explain how weights and activation functions interact to process input values within a neural network layer.
- Write Python code to import
pipelinefromtransformersand configure it for a specific task using a custom-defined repository model. - Where are Hugging Face models saved locally, and how do you authorize secure downloads via environment variables?
Module 3: Automatic Speech Recognition (ASR) with Whisper
Explore the mechanics of speech-to-text transcription and implement OpenAI's Whisper model using the Hugging Face Transformers library.
Recommended Videos
Audio to Text Converter in Python Tutorial with OpenAI Whisper from Hugging Face Pipeline

Why this video is valuable: This video walks you through running OpenAI's Whisper model locally via Hugging Face. You'll learn how to write a simple Python script to load audio, pass it to Whisper, and extract clean text.
OpenAI's Whisper Model Showdown: GPU vs. OpenAI API - Which Transcribes Audio to Text Faster?
Why this video is valuable: This comparison shows the performance trade-offs between hosting Whisper locally on your own GPU versus querying a cloud-based API endpoint. Understanding these differences helps you make informed choices about system speed, latency, data privacy, and operational costs.
Module 3 Knowledge Checkpoint
- How do you configure Hugging Face's
automatic-speech-recognitionpipeline to run Whisper locally on a CUDA GPU instead of a CPU? - What are the memory and speed trade-offs when selecting different Whisper model sizes (e.g.,
whisper-tinyvs.whisper-large-v3)? - How do you extract structured timestamp outputs along with raw transcription text from a Whisper pipeline object?
Module 4: Text-to-Speech (TTS) & Coqui Voice Cloning
Learn how Text-to-Speech synthesis works and perform zero-shot voice cloning using the open-source Coqui TTS engine.
Recommended Videos
Coqui TTS - Clone voices within seconds for free!

Why this video is valuable: This video introduces Coqui TTS as an open-source framework for voice synthesis. It demonstrates how to initialize model setups and covers the basic steps required to clone custom target voices.
FREE Voice Cloning in Microsoft Windows with Coqui TTS

Why this video is valuable: An excellent, deep-dive technical setup guide. It walks you through building the necessary environment dependencies on your local machine, including setting up C++ compilers, managing system paths, configuring CUDA wrappers, and handling Python-specific packaging requirements.
Developer Focus: Programmatic Python Voice Cloning
Coverage Note: Most online video resources focus on third-party desktop apps (like SillyTavern) rather than developer-focused Python execution. To meet the goals of this curriculum, you should focus on implementing Coqui XTTS v2 programmatically inside Python scripts rather than using consumer GUI wrappers.
1. Setup the Local Developer Environment
Install the Coqui TTS package via terminal, ensuring your virtual environment is active:
pip install TTS
2. Implement the Python API Script
Write a Python script (clone_voice.py) to initialize the multilingual XTTS v2 model and clone a voice using a short reference audio clip:
from TTS.api import TTS import torch
Check for GPU acceleration
device = "cuda" if torch.cuda.is_available() else "cpu" print(f"Loading XTTS Model onto device: {device}")
Initialize the model (downloads automatically if not cached)
tts = TTS("tts_models/multilingual/multi-dataset/xtts_v2").to(device)
Synthesize a personalized cloned audio output file
tts.tts_to_file( text="This is a test of zero-shot programmatic voice cloning using XTTS v2.", speaker_wav="path/to/speaker_reference_5_seconds.wav", language="en", file_path="cloned_output.wav" ) print("Synthesis completed successfully!")
Recommended Independent Developer Queries
For more advanced setups, search for:
"XTTS v2 Python developer integration guide""Coqui TTS API script voice cloning"
Module 4 Knowledge Checkpoint
- What is "zero-shot" voice cloning, and how does it generate a new voice without retraining the model's core weights?
- What are the recommended audio characteristics (length, background noise, file format) for reference voice samples to get clean cloning results?
- How do you write a Python script to import
TTSand synthesize speech directly to a local.wavfile?
Module 5: End-to-End Integration & Gradio Deployment
Combine your ASR and TTS modules into a continuous speech-to-speech pipeline and build an interactive web interface using Gradio.
Recommended Videos
Gradio Crash Course - Fastest way to build & share Machine Learning apps

Why this video is valuable: This tutorial teaches you how to quickly build machine learning web interfaces using Gradio. It covers how to map user input components to back-end Python functions, making it perfect for creating a speech-to-speech UI.
LM Studio Ai Speech to Speech Local Assistant Tool

Why this video is valuable: This video breaks down the logical architecture of an end-to-end local speech-to-speech system. It shows how the data flows sequentially from speech input, through translation modules, and out as synthesized audio response.
Local Low Latency Speech to Speech - Mistral 7B + OpenVoice / Whisper | Open Source AI

Why this video is valuable: When building real-time speech systems, latency is your biggest challenge. This video explores the practical issues of running local speech pipelines and provides tips on how to structure your code to reduce response delay.
Developer Focus: Connecting ASR & TTS in Gradio
To connect Whisper and Coqui TTS into a single interactive pipeline, implement the following programmatic template. This maps microphone input, runs local Whisper transcription, routes that text directly to the Coqui XTTS v2 engine, and outputs the cloned speech:
import gradio as gr from transformers import pipeline from TTS.api import TTS import torch
1. Initialize Whisper ASR pipeline on GPU if available
device = 0 if torch.cuda.is_available() else -1 asr_pipeline = pipeline( "automatic-speech-recognition", model="openai/whisper-tiny", device=device )
2. Initialize Coqui TTS model
tts_device = "cuda" if torch.cuda.is_available() else "cpu" tts_model = TTS("tts_models/multilingual/multi-dataset/xtts_v2").to(tts_device)
def speech_to_speech_cloner(user_microphone_audio, target_speaker_wav): """ Receives user microphone recording path, transcribes it, and synthesizes a clone using the reference voice. """ if not user_microphone_audio or not target_speaker_wav: return "Please record voice input and upload a cloning target reference.", None
# Step A: Speech-to-Text Transcription via Whisper
asr_result = asr_pipeline(user_microphone_audio)
transcribed_text = asr_result["text"]
print(f"Transcribed Input Text: {transcribed_text}")

# Step B: Voice Synthesis and Cloning via Coqui XTTS v2
out_filepath = "output_speech_to_speech.wav"
tts_model.tts_to_file(
    text=transcribed_text,
    speaker_wav=target_speaker_wav,
    language="en",
    file_path=out_filepath
)

return transcribed_text, out_filepath
Build the interactive Gradio Application interface
app = gr.Interface( fn=speech_to_speech_cloner, inputs=[ gr.Audio(type="filepath", label="Step 1: Record Your Voice (Microphone)"), gr.Audio(type="filepath", label="Step 2: Upload Reference Target Voice (.wav)") ], outputs=[ gr.Textbox(label="Intermediate Whisper Transcription"), gr.Audio(label="Final Cloned Speech Response") ], title="End-to-End Cloned Speech Pipeline", description="Record your voice, transcribe it with Whisper, and hear it spoken back with a target cloned voice." )
if name == "main": app.launch()
Recommended Independent Developer Queries
For more details on connecting these pieces, search for:
"Build a speech-to-speech pipeline Whisper and Coqui Python""Gradio interface audio components file path parameters"
Module 5 Knowledge Checkpoint
- Explain how data moves through a speech-to-speech pipeline, from raw microphone input to the final cloned output.
- How do you configure Gradio input elements to return file paths (
type="filepath") instead of numeric data arrays? - What are two ways to reduce latency in your local Speech AI pipeline?
Course Map
This flowchart shows the dependency path for this curriculum. Ensure you complete the foundations of digital audio (M1) and machine learning (M2) before attempting to link the transcription (M3) and voice synthesis (M4) systems into the final pipeline (M5).
Key People Index
- Brian McFee: Creator and maintainer of the Librosa library; his academic and coding work forms the basis of modern audio processing in Python.
- Valerio Velardo: Lead educator of The Sound of AI, known for detailed visual explanations of digital signal processing (DSP) and machine learning for audio.
- Grant Sanderson: Creator of 3Blue1Brown; his visualizations make the complex mathematics of deep learning, weights, and biases intuitive.
- Jeremy Howard: Co-founder of Fast.ai, whose work has made deep learning and pre-trained models accessible to developers worldwide.
Final Self-Assessment
Test your understanding of the complete pipeline by verifying you can perform each of the following tasks:
- Write a script to load any audio file using Librosa and display its duration, sampling rate, and numerical array shape in the console.
- Generate and plot a log-mel spectrogram from a custom audio clip.
- Programmatically load OpenAI's Whisper model via Hugging Face using the
pipelineAPI. - Run Whisper over a noisy local audio file and verify transcription accuracy.
- Set up the C++ compiler dependencies, CUDA wrappers, and Python packages required to run Coqui TTS locally.
- Programmatically run Coqui XTTS v2 with a custom 5-second reference
.wavfile to clone a target voice. - Build a local Python script that passes the output text string from a Whisper transcription directly into Coqui TTS.
- Build and launch a web interface using Gradio that accepts raw microphone input, runs the speech-to-speech cloning pipeline, and plays back the cloned audio.