
![انكسار الضوء [ شرح + حل أمثلة على كل فكرة ] | فيزياء تانية ثانوى الترم التانى 2026 |](https://i.ytimg.com/vi/-EoSh7u_3l4/maxresdefault.jpg)











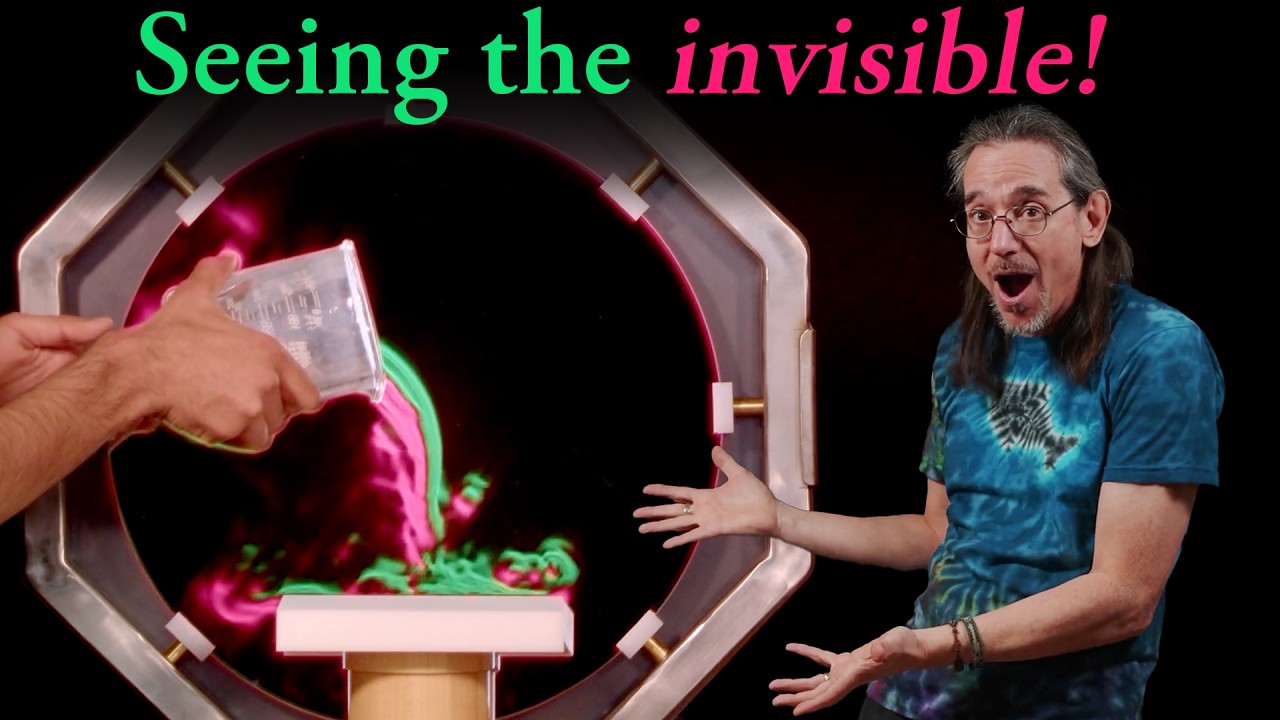
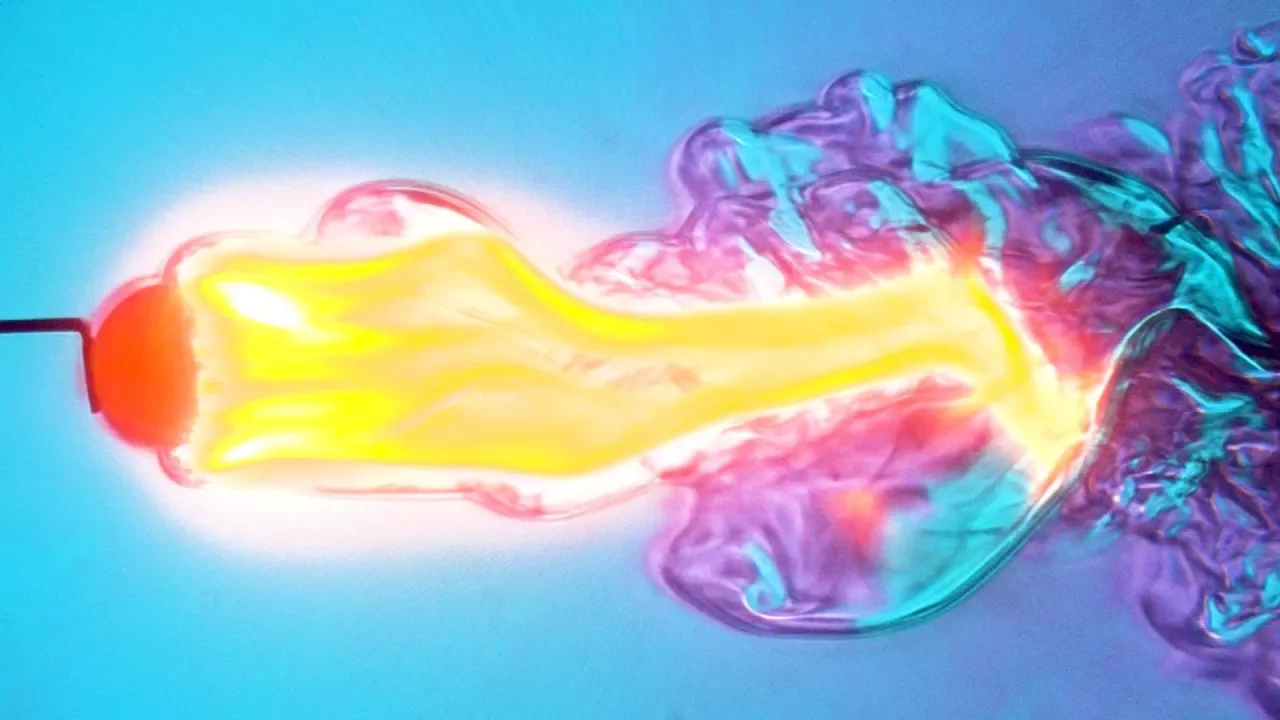






Background Oriented Schlieren (BOS) is a visualization technique that captures invisible density gradients in fluids by analyzing pixel shifts in background images caused by light refraction through density variations; the method works by comparing a reference image (without disturbance) to an object image (with disturbance), using cross-correlation to detect sub-pixel displacements that reveal shock waves, heat plumes, and other density variations, making sophisticated fluid dynamics visualization achievable at home with free software like ImageJ, Python, or MATLAB.
DIY Background Oriented Schlieren Imaging: Step-by-Step Guide
Added:The physics of light refraction and Snell's Law, specifically how light bends when traveling through media of varying densities.
Basic concepts in fluid dynamics, including air density variations caused by temperature changes, pressure gradients, and shock waves.
Fundamental camera optics, such as depth of field, focus, and shutter speed, which are crucial for capturing clear background patterns.
Elementary digital image comparison concepts, as Background Oriented Schlieren relies on comparing distorted images to a reference image.
Quantitative Schlieren Analysis: Learning how to calculate actual density and temperature values from displacement vectors using optical flow algorithms.
Advanced optical setups, such as traditional Z-type Schlieren imaging utilizing high-precision parabolic mirrors and knife-edges.
High-speed videography integration to capture transient aerodynamic phenomena like supersonic flow, ammunition dynamics, or blast waves.
3D Schlieren Tomography, which uses multiple camera angles to reconstruct three-dimensional density fields of fluid flows.
29.2K views614likes46:02Original Release: 2019-10-21
hey everyone I'm sure you've all seen the images or videos that NASA posted of the shock waves generated by one or a pair of t-38s in flight in this video I'll be walking you through step by step how to take these kinds of images at home and process the images to get something that looks like the ones taken by the pros a few years ago I made a video about how to make your own schlieren system at home to get nice images or videos from that system you needed a high quality mirror which is not always easy to find and when you do find one it might be quite expensive the method in this video is called background oriented schlieren or vos for short I'm not going to go into the math behind boss but here's a quick explain like I'm 5 version of it let's say you're looking at a tree in the distance and there's nothing between you and the tree it looks like a normal tree now let's say you decide to make something on your grill so you fire it up and take a step back and enjoy that view of the tree again but now you notice that it looks distorted and kind of wavy this is because there is now a density gradient or index of refraction gradient that the light rays from the tree need to pass through before getting to your eyes and so they get bent and distorted along the way we're gonna take advantage of that distortion or what looks like a shift of the pixels on our camera while you can generally see boss signals when the gradients are strong enough the code used in vos processing allows us to see much smaller gradients as well in addition to this video I have an extensive document that goes through everything I talk about here so if you'd like to read at your own pace you can go ahead and download it from my website let's go over a quick outline of what's covered in this video first we'll go over the programs that we'll need you can do everything in this video with free programs so anyone will be able to do this at home I also have code in MATLAB for those that want to use that next we'll cover how to use ffmpeg to convert videos from one form to another downloaded YouTube videos and my phone's videos my Samsung s6 are in the mp4 format and videos from my DSLR camera are in MOV format to load into image J for further processing we will need these to be an avi format then we'll pre-process our videos and images an image J we will go over how to work with stacks and images cropping image registration which is just a fancy way of saying image alignment and using macros to speed up our workflow for repetitive tasks now we can get to the code I have both MATLAB and Python code that I'll be shown they have mostly the same exact functionality but MATLAB has a little bit more the code can be found at my website or github with links in the video description I'll be using the NASA air boss images as the example finally we can take our own images at home and use the previous steps to analyze our data first I'll show you the programs that I use and where to download them I'll be using ffmpeg for the video conversion then I'll be using image j or more specifically fiji which is just image j for the image and video processing i'll just be calling it image j from now on to perform the boss analysis I'll be using Python as long as you have Python installed you should be fine I personally like to use anaconda however which then looks like this after opening and then I use spider which is an IDE for Python which then looks like this after opening however you can just run the code without downloading anaconda by using the command line let's get started with our NASA video processing I have the video in mp4 format as you can see in this folder and I also have image j opened up so let's try to load the mp4 video into image j by dragging and dropping like this this opens up this import options dialog we can just leave the defaults press ok and you see that we get this error and so instead we can use the avi reader in image j so we'll need to convert our video you can generally just convert videos with a couple commands as shown on the ffmpeg website however we can use a few other commands to make sure we get the best quality and only convert the portion of the video that we want here I've opened up the video and you can see it's a minute long and scrubbing through there's a lot of stuff in this video that we don't necessarily care about for our processing so we just want the raw images that we can process with our boss code so from about I would say 33 seconds and if I let this run to about 43 seconds when the plane gets up to here this is what we actually want to process and keep and convert to avi first let's open up the command window in the same directory that the video is in so we can do that by holding down shift right clicking and then selecting open command window here and this opens up the command window now we can use ffmpeg to convert the videos we're going to type in ffmpeg - I whoops for the input video and this is the NASA underscore boss mp4 using tab to complete then - SS and this is the starting time and we said that was 33 seconds so we set 33 seconds and then we used - T and this is the duration which is not 43 seconds it's 10 seconds from the 33 so we get to 43 seconds then we set the pixel format to NV 12 and then we set the output file to avi and then we set the compression so that we don't get any losses in the conversion and then we make sure that the codec is copied from the raw video and then we set the output file NASA underscore boss dot avi I just called the same thing and we press ENTER and this only takes a few seconds and now you can see in our folder up here we have the new video file NASA underscore boss but this is an avi now we can try to load in the AVI file - image J again by dragging and dropping into the image J window and we get in this dialogue box opening up and we can see that it says first frame last frame so it's showing that there's 301 frames in this video without changing anything in here we can press ok and now you can see that we do in fact get a successful load of the video that we tried to load it so when the file is loaded in through the avi reader it's loaded in as something called a stack and this stack has 299 slices this nomenclature will become important later so you can see that we're on slice one of 299 you can also see the resolution and the type and also the size the first thing we're gonna do is change the type from RGB to 8-bit and this just makes sure that it can be successfully loaded into both of my programs so we'll go up here to the image J window go to image type and then just click 8-bit and it converts to 8-bit and it takes a little while depending on how many frames you have but when it's done you can see that it's the same exact thing over here it's just changed to 8-bit and that also significantly reduces the size for reasons that will become more when we go through the image registration let's just say that instead of taking all the 299 slices I just want maybe a hundred slices so how do we do this let's go up here I'll click image stacks tools slice keeper first slice we want to keep as one the last slice as a hundred and the increment as one these default values will be different when you do this and this will actually default to two but we actually want it to be one because we want every single slice then we press ok and this now pops up with this name of the stack so it's the kept stack and you can see that we only have a hundred slices and the last one ends right here so for my code we're going to need to have images and so what we can do is extract these slices as images so let's first try to just save this as a tiff file so I'm gonna do file save as TIFF and it opens up a dialog so you can save it and we'll just keep the same name like this and it saves it out if you go here you could see that it's it hasn't saved every single slice as a separate image it has saved it as essentially like a multi-page TIFF file which is not what we want for loading into my programs so the way that we're gonna save individual TIFF files from these slices and this stack is to use the slice keeper tool again so making sure this window selected first we can go up to image stacks tools slice keeper again and let's just say we want to save the first slice so we can just do 1 1 1 press ok that opens it up there's only one slice in here and if we do file save as TIFF again and again we can just leave that default filename for now now you can see it saves it as its own separate image as you've probably noted this gets extremely tedious if you want to save more than just a couple images out from a stack and so later we're gonna go through a macro that will do all this for you now you might have noticed that this has some text on it and as we scroll through here they give you the final output over here and so we don't want all this in our final images that we export so what we're going to do is crop this and the way that you can crop this is to use this rectangular selection tool that's by default selected I'm just gonna draw this box something like this that only includes what we want in this stack and then we can go up to image crop or press control-shift X and that just crops the image the way that boss processing works is by comparing the pixels and two images one of the images is what I'll call the reference image which is our tree before we start the grill and the second image is the object image which is our tree after we start the grill so if i zoom in here kind of on the plane and I scroll between a couple frames you can see that the pixels where the shock is are sort of shifting a little bit which is good however what happens when the background which should not be moving is in fact moving as you can see clearly here when I scrub through you can see the background up here which should have no boss signal is shifting well you end up getting erroneous boss signals which will likely overshadow your actual boss signal depending on how much that background moves from frame to frame and this is where image registration comes into play you can perform image registration in MATLAB and Python but I'm going to show you how to do it here in image j because it's not quite obvious at first we will be using a plugin which we can access by going to plugins registration correct 3d drift and if i click it right now you get an error message that says cannot register because there's only one time frame please check image properties and this is where I said that the nomenclature where I'm said that we had a stack with a hundred slices comes into play so based on that error message suggestion let's go to image properties or press ctrl shift P and it'll bring up this dialog here and you can see that we have a hundred slices but only one frame and that's the time component here and if you follow this note it says C times Z times T must equal a 100 then what we can do is just put one slice do a hundred frames and press ok and it hasn't done anything here but it has changed it so that we have a hundred frames instead of a hundred slices ok now the nice thing about using this plug-in is that you can select a region of interest to use instead of using the entire image because we don't want to register this image based off of the plane that's moving and the stuff that's happening down here so what I'm gonna do is I'm gonna go to the end slice and I know that nothing's moving above the plane nose and so essentially I'm going to just select a region of interest around here and that is what we will be registering the image to now let's try this plugin again so we'll go to plugins registration correct 3d drift and now we get a dialog menu that pops up so we don't get any errors anymore and what you'll need to do for this is to select all three of these these are just what worked for me in the past and then we can press ok and it starts running now if you start seeing zeros here when this pops up you might have not changed the type from RGB to 8-bit so make sure that your an 8 bit and not RGB because this will not work if you have an RGB image so now you can see the output from that image registration in a new window here and you can see that there's a black bar at the top maybe you can see there's a slight one on the left hand side and as I scroll through now we have a black bar in the bottom maybe a slight one on the right-hand side and this is just showing that the registration worked it's sort of like image stabilization and so if you scroll back and forth you know maybe the background moves a little bit but it's much better than the than what we had previously and so to get rid of that black bar because we don't care about that for our final versions we can just crop this and so I'm gonna crop it based off of the upper edge here and then I'm gonna go to the final one and I'm gonna bring that edge in a little bit like that and again we can go to image crop and this is our final registered stuff that we want to save out now because there was quite a bit of effort involved and going from the original image video file to here I like to save this out so I go to file save as TIFF and I like to save this out as the video file and then just registered so as I mentioned before if you want to save to images so a reference in an object image for instance we can go into image stack tools slice keeper and we can do you know maybe the first slice okay save that out we can go back to this one go to image stacks tools slice keeper and then take the next slice press okay and save each of these out as their individual images into the folder but this takes a long time this is tedious so what we're gonna do is look at a macro that I wrote I don't make available on my website and github as well and see how to run it so to edit macros you have to go to plugins macros edit and it opens up in here sometimes it'll actually open up into the plugins folder so you just need to back out and go to the macros folder and here is my macro it's a dot ijm file and so I'm going to double click open that and so here is the macro that I wrote so my macro is going to ask you which directory you want to save the output images to so what I do before I run the macro is I just make a new folder here and I call it frames so first the macros asks you to select the save directory which is just the frames directory that we just created then it actually runs the slice keeper and the default is to go from 1 to 5 but if you wanted all of the slices in your stack you type in 100 here then down here it runs the slice keeper converts to 8-bit converts the stack to images and then runs through the all the images and saves it out to the desired directory with a certain file name and then at the end it'll close all those images so you don't worry about it if you have a hundred images it's not gonna keep a hundred windows open on your computer so when you try to run the macro you'll go to plugins macros and you can see that it's called boss save sequence so it shows up here but generally when you download and install fiji it will not by default show up here what you'll have to do is to go into install and then double click on this and then it'll be and then it'll be active in here and you can go to plugins macros but if you want to have it always be open when you open up a new instance of Fiji then you can go to edit and you can edit something called the startup macros and in here this is where I put in that same boss save sequence macro so that it's always available upon startup so I don't have to install it every single time okay so now that you have the macro available click this window here go to plugins macros and just click this it will open up the select to save directory and I'm going to select the frames directory and select then it opens up the slice keeper dialog I'm just going to go from 1 to 5 and in an increment of 1 press ok and you can see they pop up and then they go away and in the frames directory now we have raw underscore 1 all the way to 5 note that this will close the registered video file which is why I always save it here because if you want to do this again all we need to do is just drag this in and see now we have the registered file here and if I again run this plug-in and I'll do all of them now if I go to here I want to go into frames select and now if I go all the way to 100 you can see now they're popping up and then once it gets to 100 it will start saving them out and then will start deleting them and then if we go to the frames folder and now you can see we have all hundred in here ok now I know that was a lot of background on image j and and pre-processing to get ready for the boss stuff but you can use all this methodology for all videos and images that you take on your camera so first we're gonna start with the Python code and you can see it here and it's extensively commented so if you have any questions you can probably find the answer in the comments and to run it we'll just press the Run button or f5 and it brings up the GUI window and this window looks a little cluttered but it has four sections up here is the loading section this is the computing section middle here is the plotting section and here is just the post plotting processing section now I know I just went through an image J how to get the NASA images ready to go for processing and we'll get back to those but just to show you how this GUI work so I'm going to use two test images from something called the PIV challenge and so these are the two images here and if I scroll back and forth you can see that there's this rotation that goes clockwise around like this and you can kind of see it better when I when I play this in a jitters okay so first things first we're going to load the images so we can load it by pressing these buttons every button is blue and when it's in use it'll go to black and then when it's done it'll return to blue so here we're gonna load in this first one then we're gonna load in the second one and if you want to show the images after you load them in just to make sure you're loading in the right ones you can check this checkbox and load it in and it'll pop up with the figure now the two most important options in this GUI are the window size and the search size so for a little more detail into how the boss code works it essentially breaks up the image into smaller windows called windows in my code and the window from the object image then gets essentially moved around in relation to the reference image and the most likely shifted position using something called cross correlation is the pixels shift of that window and so to speed up processing and since the shifts tend to be pretty small we can narrow down that searching size in the reference image by something I call the search and that's this here the search always needs to be bigger than the window and I generally keep it at double the window size the window size dictates the resolution of your final boss signals and the search size pretty much speeds up the processing time since for every window it doesn't need to search the entire image so I'm gonna leave the window and the search size is the same and you don't need to worry about these two buttons to start with I'm just gonna press compute and you'll see the iterations over here and that was pretty quick since these window and search sizes are pretty big and you can see that it goes all the way to all of the iterations here and so the next we want to do is plot a solution it hasn't plotted anything yet and so these checkboxes will plot different things and you can select multiple at the same time but first I'm just going to show you the velocity vectors which are actually displacement vectors but I just I'm too lazy to change this and so if I just click plot here now you can see that we get the dots here the black dots are at the Centers of each of the windows that split up that image into these separate windows and then at each one of these windows centers it plots the pixel shift and you can see that we do get that clockwise rotation of the pixels instead of the velocity vectors or displacement vectors we can plot the X displacement and so you can see that here and you can see that for a positive value so these are positive these are negative positive values in the X Direction this is X displacement it's going to the right which makes sense because it's going around clockwise and then down here it's going in the negative x direction which is going left now if we plot the Y displacement now you can see again that the more yellow is positive the more purple is negative and we know that it's going around clockwise and and so you think over here oh it's positive so it's going up but if you look at the y-axis over here you can see that it's actually going positive is going down so a positive over here means that it's going down and we do get that characteristic clockwise rotation and then the next one we can plot here is the total displacement and that's just the norm of the x and y displacements and so this is going around and clockwise but it's harder to tell what the total displacement this just shows the absolute velocity or the magnitude of the velocity vector or displacement vector so my favorite one is is actually the second one here and so if we click on this you see there's a few options there's the X displacement Y displacement total displacement and there's also a transparency or alpha value and so if we plot this one you'll end up seeing in the background the original image that you're using and in the foreground you'll see a transparent plot of whatever you selected in this drop down menu so right now we're looking at the total displacement overlaid on the original image you can change the transparency value and plot it and you can see now it's even more transparent a little harder to see so I usually keep this at about 0.6 now my program auto sets the color bar limits when it's plotting these contours and so if you plot this here it'll pop up with the color bar limits in here and if you want to change these this one's actually fine but for some other plots you might want to change the color bar limits because the auto doesn't really do the image justice and so what you can do is you can change it in here and once you click enter it'll change and so if I just go to like 2.5 for the maximum and I press enter you can see that it Reap Lots it now with the color bar limits going between 0.85 and 2.5 and you can set this one down to zero as well and you can see that it changes the color bar limits so that's just more fine-tuning and you can also note that these are lined up next to their respective contours here so if you do the Y contour and plot it you can see that it pops up here and you can you know go to 0 that's gonna blast it out on the on the positive side here but you can change the limits based off of which one selected okay last couple things to mention here is that this just gives different color maps for when you're plotting so if you want to do like grayscale essentially you can plot this one and it comes up as grayscale and there's a couple other ones in here but plasma seems to be a good one so I defaulted to plasma and the last thing that you'll see here is the threshold and this just has to do with threshold amount vectors that are displacement vectors that are too big or suspiciously large so that you don't get erroneous displacement vectors that overshadow your boss signal and now the last thing in this gaming that I want to show you is over here that we just skipped over before is selecting sub regions so sometimes you'll have an image that's way too big that all you care about is a smaller image and I'll show that when I go over my candle images and because it'll just take too long to solve for all the stuff that you don't care about so we can enable this checkmark select a sub region and when we do that we can click this button and it brings up a the default image and we can left-click to select a top left boundary for this box and you can see down here it says selected top left and then we'll right-click to select the bottom right boundary of the box and we'll right-click on it says selected bottom right and you can keep doing this it'll just use your last two left click and right clicks and then we can click the check sub region and you can see the sub region you just selected was this red rectangle and then it also plots the window and search sizes so the window size is in dark blue and the search size is in cyan and then you can click you don't actually need to click the check sub region it'll work without it anyway and then you can click compute again it'll run through their computations and now if I plot the you know this one for instance now you can see it only plots the region of interest that we cared about so here I'll just go through the MATLAB code I'm just going to run it and the GUI will pop up and it looks similar to the Python but a little bit nicer because it's easier to make gooeys in MATLAB we have the loading section compute plot and post sections I'll go through the video stuff in a second same to how we did in Python we'll just load the reference image load the object image and then here I'll just go to what the Python one was was 32 64 for the window search we have the Select sub region this sub pixel resolution is available to enable in MATLAB it's not available in the Python version because it's automatically enabled but here you have the option then when we press compute it'll pop up with the image and then the window in search sizes and it asks you if you want to continue if you say no it just backs out you can redo your window and search in your sub region but if you do want to run it then we can press yes it'll just run through those iterations and then similar over here we can do our plotting so we'll do the velocity vector if I open that up you can see that we get our clockwise flow threshold here is the same as in Python the interpolation factor will give you essentially its smoothing the signal it has no impact on the raw boss signal that you get it just lets just smooth it a little bit that's not available in Python yet this uses a jet color map but you have other options as well but the jet one generally looks pretty nice and again you can plot anything in here with the drop down menu of the XY total displacement with a certain transparency one of the bigger differences between the Python and the MATLAB is is how the post-processing here is done so if I just plot the this particular contour it'll pop up with the X displacement and a transparency of 0.6 and so in here what you can do is you can set the color map limits in here but you can also select a region and then you click your left click the top left and you left-click the bottom right and it'll auto adjust based off of the values in that region this obviously doesn't look good because I used a lot of the portion up here and so you can you know you can also go back and select the whole thing and it kind of resets itself but this is useful if you if you have some erroneous displacement vectors that are sort of large and you want to get rid of them ok so what does the interpreter doing let me plot the total displacement it's very pixelated because our window size it's quite big and and so right now it's showing the values at every single window and so if I bump this up to 2 for example and I plot it again you could see it kind of smoothes it out and you might think oh that's a better signal but it's not doing anything different in the actual solution is just interpolating by a factor of two between the window grid points so it's just for visualization it's not for getting an actual better signal if you do want an actual better signal then just remember this plot here then what you want to do is enable sub-pixel resolution you'll just compute again press yes it'll go through and run it and then we can plot this and now you can see that we get a much nicer plot and that's a actually a real change in the boss signal because you're using sub pixel resolution versus just interpolating between the actual data points last thing that's a little bit different is when you select the sub region will enable this checkbox press compute and this pops up with the figure and now what you want to do is left-click and drag out and then you're gonna have to right-click once you've set this to whatever bounds you want right click and press crop image then it pops up with the it's hard to see on this image but it's easier on the others are there's a dashed black box showing you the region that you selected and again the window size in green and the search size in red asks you if you want to continue if you don't you can redo this and maybe select a different region like this crop it say yes it'll run through and again you can plot the total displacement okay finally let's get back to the actual NASA images so I'm gonna load the images I'm gonna go into the frames I'll select the first frame as the background and I can select the you know doesn't really matter I'm gonna scroll down select a random frame here as the as the object I'll leave these the same for now I'll select a sub region and I'll use sub pixel resolution you should pretty much always be using a sub pixel resolution I don't know why you wouldn't press compute and I don't care about this stuff up here there shouldn't be any signal up here so all I really care about is this region right here right-click crop image yes it's gonna run through it's pretty quick because these are big as you'll see so if I'm plotting the total displacement then you can see on here yeah we're starting to get something like the shockwaves forming but you could see that the resolution is pretty terrible because our window size and search size are so big so what we're gonna do instead is going to change the window size down to 8 I'll change this to just double that 16 and we'll compute again and I need to select that region and we'll crop and you can see now this is much smaller so that's better continue yes it'll take a little bit longer because there's more to solve for and then again we'll plot here and it looks a little dark here there's not as much contrast and that's where the selecting the region comes into play so select the region and I'll just left-click left click and now you could see that we get more defined shocks in here and and you'll know it's still kind of grainy and that's just what you're gonna get with this taken off of a video that I I downloaded off YouTube essentially and so it's a little bit grainy but you'll end up getting good results when you take images yourself I just want to show you what happens if you don't use sub pixel resolution for something like this if you go back uncheck that compute again select a region right click crop yes it'll run through and then you plot it and then again you look here now you can see that it looks really bad and looks like they're the only three values really and that's just because those shifts are so small compared to the window size that and search size that we use that you're you might only be getting a full pixel or two pixel shift and so the sub pixel resolution gives you real signals that are smaller than the pixel shifts that you could possibly be getting without using the sub pixel resolution in a video I made a little while back I looked at the boss signal from the heat from a Formula one cars engine and I process the data using a MATLAB code called pivot or PIV lab I'm using that same video and just processing the frames with my code now so what I've done is I've loaded frame ten here and I've loaded frame 11 here window size eight and sixteen and then I'm computing and I'm selecting the region of interest which is right here cropping and saying yes and it's going to run a little bit slower just because the image has higher resolution and then I can plot here and it doesn't look too good but then I can adjust the color map by selecting this region here and now we can see the heat off of the the back of the Formula One car and so that looks pretty good now we can also process with instead of doing the previous frame we can process with the first frame and again I'm selecting this region of interest here cropping saying yes it'll run through and then I'll plot again and again I will select the region and this also looks okay I select it a little bit too far and so this also looks pretty good so you'll note that those two results looked very similar either using the first frame as the reference or using the previous frame as the reference however I'm going to open up a video that I process using my video code and now you can see this is processing using movie f1 car reference to first image this is what happens when you reference every single frame in here to the first image you can see we get buildup over here and back here because the trees were swaying a little bit more and so when you reference to the first image for all the successive frames you'll get displacements where they shouldn't be popping up even though you do get the the good data from from behind the car you also get this back here so if we then process and we reference to the previous one this is what we get now you really only see the f1 cars engine heat and you don't see that build up here or back here so the reason I showed you that was because it's relevant for these two settings in the video section now you can either use the background image which I'll get into after I talk about this one or use the previous image so I'm using the f1 car example again and what I've done is I've just dragged in to make this not take too long I've dragged in frames 8 through 14 from all those frames from that video and so what I'm doing is I'm using the previous image as the background and so the way that you use the video processing section as you select the video directory now you don't click in you have to select the video directory so it says it down here and press select folder I'm using the previous images of the background because we know for this example it'll give us the best results however not always then my notes here says that use its using the same window search and threshold and alpha as over here so you have to make sure that you set those over here that's just to not be redundant by putting too much extra stuff in here so it's using 816 he's using a threshold of 5 and an alpha of 0.6 for the results now here it's the starting frame and we have the number of frames and you have to make sure that the starting frame is not just saying oh I'm starting from frame 1 it's it has to be the number that's associated with the actual image so again I start from frame 8 and go to 14 so I'm gonna put in frame 8 as the starting frame and the number of frames is 7 it's not 14 it'll give you an error here if you go to 14 and then what you do is you press compute video this is asking you to select the region now and you can see that you can see the car here and you can see the car here as well and that's because it's just a compilation essentially an overlay of all of the images that you've selected from the starting frame to the ending frame and so this just kind of shows you where to put your of interest and so I'm making sure it covers the front one and the or the first one and the final one and then I'm gonna do crop image and then you can see that it's while this button is black it's still computing the iteration has shown you here every single iteration here is looping through the full iterations for that particular frame so we have to wait a little bit longer here now you can see that it has completed finished all the iterations this goes back to blue and now we can assemble the frames and so this is the color axis and so the way that I do this is for a small number of images here we can just do assemble frames and you can see that it opens each one up and actually my cursors gonna be in these but it opens each one up we can see that the color axis is not actually the best right now so what I can do is I can change this down to like two potentially and reassemble and it'll pop up and we can see that looks a little bit better and it's assembling the frames and then now the last thing that we can do is set the frame rate that we want to output the movie to and then the movie name I'll just call this movie out right now and then we can save the movie and this will save it to the folder that you have your raw images in and so if I bring that over here see we just saved movie out and if I open that up now you can see it just loops over those frames that we saved so the last thing I want to talk about before getting into how to set up your own experiment at home is why we'd want to use this option here well I took some Campbell data and you can see this data here frames 1 2 3 4 and in this case you can see this frame has no candle in place so this is a true background now it's better and you can do this yourself it's better to reference these particular images off of this background now one thing you'll also know is that this says use a raw underscore BG as the background and right here we don't have any images named raw underscore BG so this is what you get when you output from my image J macro because it starts at image 1 and then goes to the ending image and so what you want to do is just copy paste and then in here I just changed this name to raw underscore BG and if you don't have this it'll give you an error when you try to run this but then you can run this now using this option and so the way you'd run this is again select the video directory click but don't click into the folder select it make sure this is selected starting frame now I'm starting with frame two because the frame 1 is just my background image and I have three frames so I'm going from starting from two number of frames three and then I compute the video and now I have to select a region of interest so I'm just going to like this because nothing's happening out here and since the resolution is quite high it's going to take a longer time and so I just select a smaller sub region and then it'll go through the iterations a little bit more slowly than before and then once it's done you can use the assemble frames again you can see it's popping up with the candle signal so here's the setup we have the candle on the stack of books and the lampshade in the background and this is what my camera view is gonna look like so if we back out here's the camera I'm just gonna turn it on and then I'm gonna switch to live view mode and here you can see the view that we're gonna have in our video we want the sharpest focus so what I'm doing is I'm zooming in on the background in Live View mode and then I'm manually adjusting the focus ring to get the sharpest background you can also do this on auto but I I like to do this on manual because the image is a little right I'm just adjusting the exposure compensation down a little bit so now we can take our video so I first start recording and now this is getting some background frames then I take my lighter and I light the candle and I wait a little bit for the flame to settle out and then when I'm done I can stop the recording and that's our video so I'm taking that same video that I just took that I just showed me taking on my DSLR and that's what's shown right here I just renamed it candle and you could see it's an MOV file and so I'm just gonna go through all the steps you need to go from that super simple set up to a final result and this is based off of the stuff that we talked about earlier in this video so the first thing I'm going to do is shift right-click open command window here we're going to use ffmpeg with the input of the candle video I'm going to use the pix format and v12 and I'm gonna use the output avi make sure the quality is high and make sure the video codec is the same note that I don't need to worry about the start and stop times because I'm just going to do the whole video and I'll call this one candle down AVI it's gonna go through and you can see now it's finished and its output the AVI file right here so we can open up image J take the AVI file drag it in it's four hundred five hundred forty seven frames and so we're gonna press ok open it up and so you can know that there's not a lot happening beginning because I'm taking some background images right now and so essentially what I'm gonna do is just what I like to do when I take videos like this is just to start at a frame like right here it's a it's slice 117 and we'll just do stacks tools I'm going to go through this quick because you should know how to do this by now slice keeper I'm gonna keep 117 117 1 okay I want to change the type to 8-bit and then this one I'm going to save as a tiff out into the frames folder here and I'll save this as raw BG just in case I want to make a video later now I don't need that anymore I solve the original stack right here and now what I really want is just the flame images here so I could say I really just want to keep maybe some of the interesting stuff like 385 to maybe you know 410 or something like that so I can go back in here tools slice keeper 385 to 410 in stacks of increments of 1 it saves like that and then do 8-bit adjustment here it's faster if you do it on the on the kept stack because otherwise has to go through the whole thing so these are the frames that I want I'm just scrolling through to show you now I can use my macro so I'm gonna go to make sure this was the last window selected and then go to plugins macros boss save sequence I'm saving it into frames so we can lips double click into frames we're already in the frames select that and then there's 26 slices so 1 to 26 increment 1 it'll go through and then it'll delete all those and now we're all good so if we go into the frames folder you can see 1 to 26 and we also have that raw BG as well next we want to go into the Python program I'm using Python now you can use either one we'll run the program and it'll pop up and we're going to load some images in so we're gonna go into here into frames I'm gonna use the background and then I'm gonna load another image in from here in the frames doesn't matter and just start with the first one I'm going to decrease the size of this just because it's quite large right now it's like the sub-region click here so left click and then right click and then we'll show it and yeah that looks good and we're going to run the compute even though I can't see it down here I know that this will be blue when it finishes and then I'll plot total displacement for example in here doesn't look like much but then we can change this and maybe go down to 1 I think or even lower maybe even like point 5 for example I mean that's a little bit too low Oh point seven five for example and there you go that is really all it takes to get a boss signal from a quick setup I mean from start to finish that might have been like five minutes I just want to point out that in that example I did not have to do image registration an image J because I made sure that my camera was on a tripod so the background was not moving from the background to the to the object images that I cared about so if you can try to make sure that your camera is on a tripod or at least fixed to something so it's not moving these are just some of the other setups that I've used in my document so here is one winner where I'm using the chair as a background and I'm using the blow-dryer I've also draped my blanket over the chair to use as the background in this example you can see I'm using my DSLR with a candle with the chair as the background and then this other example you could see I'm using the lampshade with my DSLR on a tripod and I'm putting in a mug of tea so now I just want to make a quick note about the displacements that you see in these plots I'm gonna plot I'm using some candle data from before then I'm gonna plot the x contour so if I plot this here that's a little dim so I'm going to adjust these limits here to something like this and so now you can see that we have on the left-hand side we have the positive values on the right-hand side here of the candle we have negative values and this is just saying because this is the X displacement plot it's saying that and these pixels over here the pixels have been displaced in the direction of the positive x-axis so they're actually shifting in then over here they're shifting left so they're shifting this way and then you can see in here if I sort of zoom in now in here there's very little gradient because it's kind of it's kind of coming over a hump in here and so it should be the same color as the background which is what you see right in the center of the flame now if I switch this over to the Y contour this is why this is such a good example problem is that even if I shift this down to you know limits that are more reasonable like the other one everything looks the same and that's because you don't have any gradients in the Y direction the gradients from a laminar candle that are oriented in this direction are only going to be in the X direction so you have nothing showing up for the Y displacement plot now when you plot the total displacement however now it looks similar to the X displacement but you'll notice that we don't have any you got anything going from negative to positive and that's because of the way that the total displacement is defined and again that is it's it's the square root of the sum of the squares of the X and the y displacement so it's the norm of the of the x and y displacements and so really what it goes from is negative at 0 it can't be a negative number up to something and so in this case again we'll just adjust it to something a little bit more reasonable and so in this case the background should be zero it should have no displacement so that's just showing 0 and then in the flame it'll be on both the left and the right side even though the left side is actually getting shifted to the right and the right sides gonna shift it to the left you see that it's about the same magnitude which again you would expect in a laminar flame so I mentioned the threshold before and you can sort of just leave that at five it generally works for pretty much everything but one thing that's nice about it is that it provides sort of an automatic masking you can see in this plot where I've run this with a threshold of five and if you just zoom in here you could see that the the candle is shown here and it sort of already masks the candle automatically now if I bump this threshold up to something higher so a larger threshold then you would get from the window in the search sizes and I plot this again now you can see that it doesn't really mask it out down here it has these large vectors because you going up to like 15 right in the center here and those are just erroneous so the threshold and provides a nice arbitrary masking that you don't have to worry about now this video is already quite long as it is so what I'm gonna do is point you to my PDF document that I'll be posting with a link in the description and this goes through some different combinations of objects backgrounds and cameras and you can see I've also used my phone and it does have good results and also a few studies talking about pixel versus sub pixel resolution distance between the object in the background f-number changes on the camera image interpolation and a more advanced code than mine and so you could see here I've shown you the candle that lighter the blow-dryer and the the mug of tea and then also the different backgrounds that I've used along with the two cameras that I've been using and you can see some examples and I'm showing them generally for both the Python and the MATLAB code for example this is the candle with the lampshade and my phone and you can see it's actually quite good I'm also showing the a lighter now with the lampshade you can see the blow-dryer with a blanket you can see the tea with a lampshade and then I go into some of the details about you know where do you want to put your your object in reference to the background and so you can see I have my camera a candle on a tripod and then the chair that I uses at the background and I show you the results as well I also do an F number change so you could see how the candle gets blurry versus sharp depending on the F number you're using and also the results that you get some interpolation that I had mentioned before and then a more advanced code so I hope that this video has potentially inspired you to try this out at home if you do and you post something on YouTube feel free to link to it in a comment so others can see what you've done thanks for sticking it out this long and good luck and thanks for watching
Up Next

6:33
Digital Focusing Schlieren Setup with sTube and SchlierenView
@spectabitopticsnowaunitofm4755
995 views•2019-02-13

30:32
Ultrasonic Transducers: Resonant Frequency Measurement and Horn Design
@imajeenyus42
229.9K views•2017-02-22
3:54
Schlieren Knife-Edge Placement: Finding the Focal Point
@JoshTheEngineer
18.9K views•2017-10-02

33:39
How a Student's Question Saved a NYC Skyscraper from Collapse
@veritasium
22.8M views•2025-04-26
Related Study Plans & Knowledge Roadmaps
Structured learning paths in Engineering
engineering
Building Acoustic Levitators: Physics & Arduino
01The Physics of Sound and Standing Waves
02Piezoelectric Transducers and H-Bridge Drivers
03Arduino Programming: Generating 40 kHz Signals
+ 2 more learning modules
14h5 modules
Explore Roadmap
engineering
Building Peltier Cloud Chambers: Particle Tracks
01Cosmic Rays & Cloud Chamber Physics
02Thermoelectric Cooling (TEC) Fundamentals
03Custom Liquid-Cooling Loop Design
+ 2 more learning modules
18h5 modules
Explore Roadmap
engineering
Yagi-Uda Antennas: Modeling, Build & VNA Test
01Introduction to RF and Antenna Fundamentals
02Yagi-Uda Antenna Design Principles
03Antenna Modeling and Simulation in 4NEC2
+ 2 more learning modules
18h5 modules
Explore Roadmap
engineering
ECG Monitor Design: Op-Amps, Filters & Noise
01Electronics & Breadboard Basics
02Op-Amps and Instrumentation Amplifiers
03Bioelectricity and ECG Fundamentals
+ 2 more learning modules
18h5 modules
Explore Roadmap