















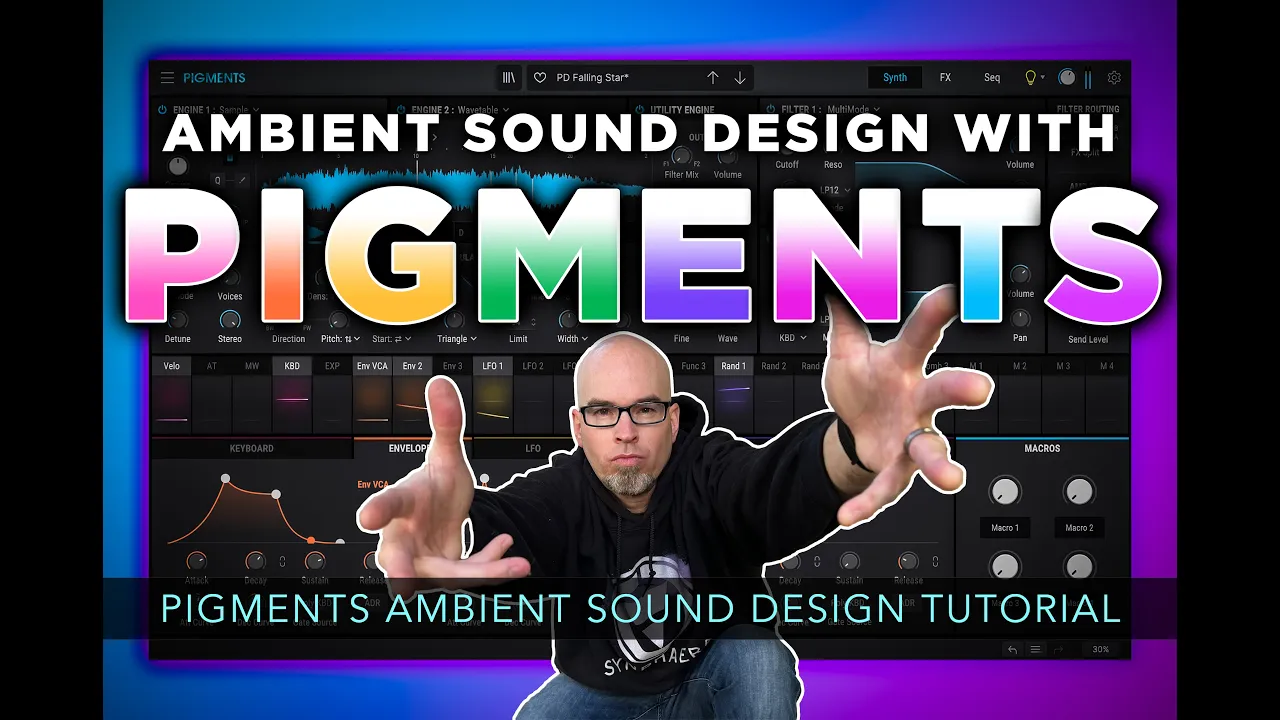

The modal engine in Pigments 6 is a versatile physical modeling oscillator that can create glassy, ethereal, and ambient tones through parameters like friction mode, granular exciter, and warp settings; combining it with filters, sub oscillators, and effects such as compression, bitcrushing, delay, and reverb creates rich ambient pads, while complementary tools like Myth for wave table synthesis and Vital for bass provide additional sonic layers for complete ambient track production.
Ambient Sound Design with Pigments 6: Modal Engine Track Tutorial
Added:Fundamental concepts of synthesis, particularly the roles of oscillators, filters, envelopes (ADSR), and LFOs.
The core theory of physical modeling synthesis, specifically how exciters (e.g., impulses or noise) interact with resonators to mimic acoustic structures.
Basic navigation of a Digital Audio Workstation (DAW) for hosting software synthesizers, MIDI sequencing, and routing.
Core principles of ambient music production, including the creative use of spatial effects like long delays and lush reverbs.
Advanced modulation mapping in Arturia Pigments, including the use of function generators, randomizers, and combinators.
Generative ambient music design techniques, such as configuring self-playing patches and probability-based MIDI routing.
Mixing and mastering strategies specifically tailored for ambient music, focusing on frequency management and dynamic range control for dense textures.
Integration of multi-engine sound design, combining the Modal Engine with Wavetable, Granular, or Harmonic synthesis engines in Pigments.
4.6K views311likes31:21Original Release: 2025-02-09
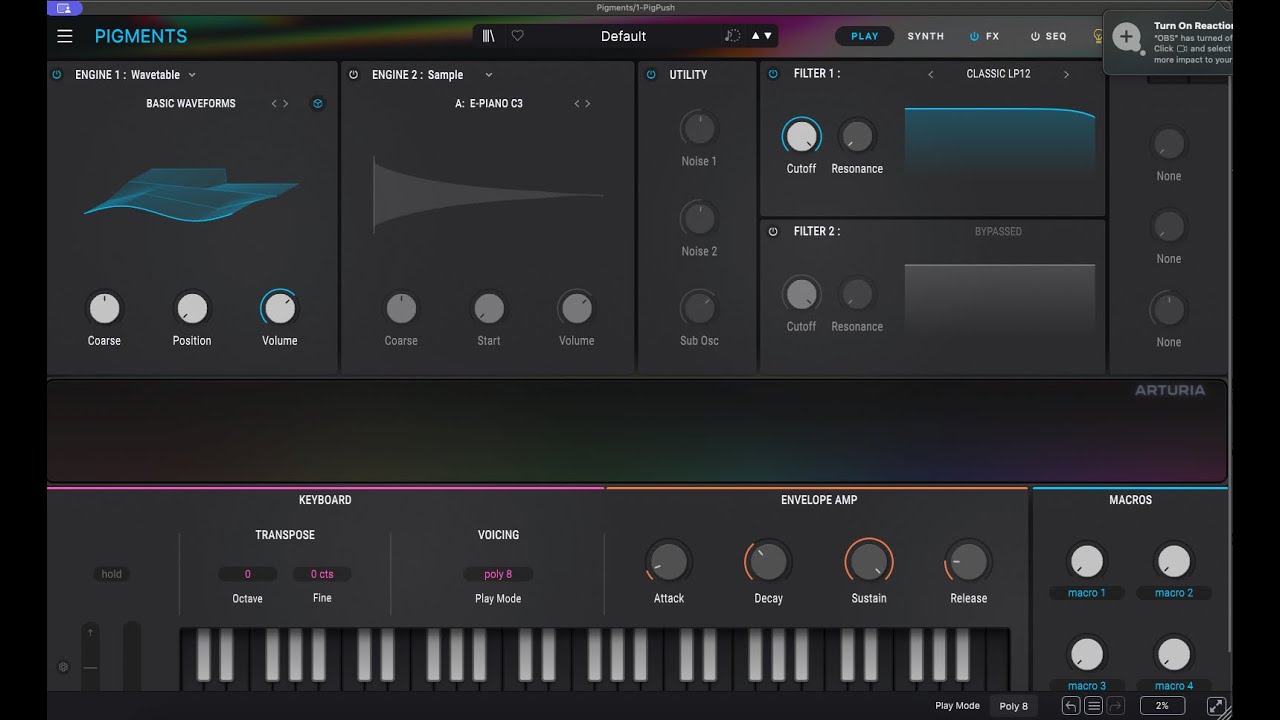
and light up pigments and here we [Music] go [Music] yeah that's what I'm talking about oh that is such Vibes oh my goodness we nailed it we nailed it [Music] hey guys I am about to start working on a track I'm working on a live performance and instead of just working on the track here in the studio I thought I would turn the camera on and uh make a video so here we are um I'm working on the next entry in the live performance series um I've landed on track number three of I don't know maybe four or five uh and the way I'm doing this is I'm sort of following the circle of fists uh if you guys don't know what the circle of fist is I'll put it on the screen right now and you guys can see that there is a logical order to these Keys they're arranged by their fifth note going in One Direction and their fourth note going the other direction and what I like to do for my live performances is follow the circle of fists naturally uh I play in minor Keys uh for these types of performances so um we've landed on the key of A minor and so that's what we're going to do uh and uh yeah I thought I would start out this video by showing off the modal engine and the new pigment 6 you have artua their flowers uh everybody really loves the new motal engine and we're going to start there and then whatever happens after that happens so anyway thank you for being here and uh yeah let's go ahead and get started okay here we are in Ableton Live 12 this is going to be an ambient SL chillam tutorial for whoever this is for there's no skill requirement for this video if you know you know so feel free to follow along in any other do or any other software of your choice I'll be playing in 93 beats per minute and I'll be playing an a/b flat minor okay where I thought we'd start is with pigment 6 and the new modal engine so if you don't have pigments I'll leave the link Down Below in the description and uh yeah pigment 6 is an amazing free update for all pigments owners and uh what I'm going to do is just go here and go to the top and go new preset and we're going to switch engine one to modal and the first thing I'm going to do before I even touch the modal engine is uh up the release Here of our main amp envelope to like a second and a half and I'll switch the resonator type in the middle from string to beam all right and that's going to give us like a kind of glass-like tone right away um one thing you can really you know kind of go hard on is this whole physical modeling thing this modal engine can be like really glassy and icy or it could be really weird uh it could be like really ethereal I mean there's so many different tones they really gave us some really nice uh options to play with here so what I'm going to do is I'm going to change the friction mode or the friction exer mode from friction to granular right and I'll turn turn up the volume here and you can hear that when I play now okay it's almost like I'm Bo really slowly or really fast if I turn up the rate okay which is cool and that sounds like glass to me okay we can uh quantize the warp here and adjust the warp to [Music] taste that's really nice almost sounds like metal right and we can do is change the tber here from like pure to I don't know like full change the shaper from Square to something else play with them see which one you like kind of like e piano it's kind of cool right so there's a lot of tones here we get up the base still doesn't quite sound like glass yet we're getting [Music] there there we go nice excellent uh so it's really quite a versatile oscillator I again if you just want to go for glass tones you want to do something else um but what we're going to do is we're going to create a pad out of this and the way we do that is just by upping the right here on the granular Exciter if you will to the point where it just starts resonating full time love that right because what we can do with that is we can you know put some effects on it we can go all kinds of crazy so let's adjust our amp envelope once again we'll go say like 5 Seconds here here 5 Seconds of Decay lower the sustain down up the release to like 5 Seconds adjust the attack curve there we go you play chord and if that's too high for you you can either play lower down on the keyboard or what I'm going to do is just kind of lower it down2 semitones just play the same keys there we go oh yeah interesting so there's all kinds of little tweaks and that's one thing that really surprises me about the modal engine is that you know just little subtle touches to the knobs can really change the tone of it uh like I said it can be really weird or it can be really uh glassy in ethereal like we have now so that's cool um now we can filter this out I've got a low pass uh 12 DB filter here I can kind of lower this down right now it's in analog mode we can switch it to digital oh yeah really nice let's go ahead and add a sub oscillator to this by coming over to the utility engine adding a triangle sub oscillator and lowering down the volume here I like that now let's do some modulation all right this might be fun so what we're going to do is come over to the random tab we'll use this new random modulator we'll smooth it out up the distance here we'll change the rate to like two over one let's change it to straight only find two over one there we go and we'll use that on different par parameters inside the motal engine so we'll say sort of randomize the morph here randomize the shape ever so slightly [Music] okay just the range to like five oh yeah that's really nice love that and we can even use the random on the actual rate of the granular cider which might be kind of neat kind of give us a hint like you know it's still being bowed right that's cool I like that and we'll also use that random on the actual cut off itself there we go now let's add some effects all right so we've done a lot of work here on the motal o motal oscillator let's go ahead and add some effects here uh first thing I'm going to do is put a multibank compressor add a little bit of detail very nice uh I'll add a bit Crusher here and maybe we'll lower down the dry wet and put that same random on the down sample [Music] oh yeah that's kind of interesting right I love that um and we'll add a delay here we'll just go with the ping pong delay I'm going to go with the classic delay science pingpong again which is just basically the stock ping pong preset with just a little bit more dry wet a little bit more feedback okay and for Reverb what I'm going to do is just add a subtle Shimmer here okay very subtle Shimmer like maybe 10% again this is feed back up size up pitch shift is at plus 12 semit talent and for Reverb you know the Final Touch here is I'm going to add a preset from super massive from remote Visions Aster um this just came out on material I'll leave the link Down Below in the description for this one 24 production ready presets um and they're really quite amazing uh they really take super massive to the next level if you will and I'll come over here Aster and the preset I'm going to use here is the one I'm obsessed with dark pades oh yeah I'll listen to that that's so good oh my goodness oh so good so think about it I mean you know you're in the middle of a set like we're doing I mean this is track three of you know many and this just comes on that's exactly what's going to happen all right let's go ahead and make a mini clip here uh we'll go ahead and uh adjust this let's make a 16 Bar mini clip oh I love this switch this to two bars all right there we go I'm uh using the right arrow keys to input notes here as I'm I'm changing the keys on my push I'm just hitting the right arrow and that's changing the actual notes that are coming out there we go let's go ahead and play this so there's the start of our track gorgeous glassy tones coming from that modal engine oh my goodness I mean it's just they've given us just such a nice new pallet to work with I mean you combine that with all the granular stuff going on the analog stuff they have in here I mean pigments it does it all really does it all now uh fantastic all right cool uh happy with that and what I'm going to do is add a secondary pad here cuz I feel like it's kind of thin so we need something to kind of you know thicken it up a little bit and what I thought we'd do is use myth all right we got myth here loaded up and what's great about myth is not only you have one but you have two irises um if you don't have myth you can feel free to use zop which is the little sister to myth the free all alternative um so what I'm going to do is I'm going to grab a wave table I'll grab one of those star Forge wave tables again let's go and grab these down here I'll grab star Forge number four and drop it into resynthesize version two here on the left hand side and what I'll do is right away I'm going to adjust my adsr my main adsr here to say 4 and 1 half seconds 4 and a half seconds here add some release and lower down the slew amount here there we go let's go go and play this very nice right click on that Iris and create and use new LFO very nice so it sounds like you know your standard you know wave table oscillator right but it's got something to it like I really love the way that when it's scanning through let's adjust the way it's scanning so we come to the main a flow here at a pear L there we go oh yeah really nice stuff love that maybe we can add a soft after that which adds sort of a mellowness to the way that it's rising and falling excellent let's go ahead and start filtering this we're going to turn on the filter engine here add a multi mode filter lower on the cut off oh yeah excellent we can come over the oscillator tab activate the oscillator section We'll add a wave generator here for some more synth like tones of the Dune up the spread so now we have a saw tooth after our [Music] Iris oh yeah really nice we can add another LFO here so we'll come over the uh right hand side add another LFO we're going to sync this up and uh turn off retrig mode and make it a four bar LFO and we'll use this LFO over here on the filter so we'll select the cut off and then we're going to select lfo2 and just add some amount here so now our filter is moving really nice we can use lfo1 which is our now random LFO on the FM amount here so we'll add some Randomness to the M love that fantastic again this is all pre- effects so we haven't even added any effects yet fantastic all right so let's add a second Iris now um so we're going to right click on here we're going to say rein V2 mono because we don't want to affect the leftand side we'll say fm3 here this is just one of the stock there we go we will use LFO one here that's kind of crazy actually let's use LFO too I love that wow wow what happened there let's adjust that that might have been a bug I don't know there we go oh [Music] yeah I love it let's come over to oscillator too uh maybe we even pitch this up an octave how about that we'll add another wave generator here let's add a uh octave negative one and we'll change it to a triangle there we go we'll turn on the mix oh my God that's wild oh yeah love that that must have been a bug huh that's crazy either way now we got two Iris is working he what that's doing now let's add some effects all right cool a lot of grains delay here up the glitter oh my gosh let's add a traditional delay here we'll sync it up make a dotted eighth note make a ping pong up the feedback oh fantastic let's add a gain here after oscillator 1 find it up here in the [Music] utilities see how that gain is actually grounding us now now we're up in the level here oh I love that combine that with the motal oscillator that's what I'm talking about all right let's add another preset from Aster got to go hard on Aster today again link Down Below in the description these are fantastic presets for super massive um let's find one that we like here let's go with ice Planet Hoth good choice oh yeah oh yeah oh yeah put that through the pad bus I love it so if you combine those two pads together you hear now we've got a nice thick atmosphere so when the track opens up that's what you're going to land on I love that all right we'll do another mini clip here let's just make this one an eight bar we're going to do very simple cords okay so we'll go one bar here on the fixed grid let's go ahead and just add a cord here nothing to that all right we'll restart the scene there we go excellent all right so again myth the bomb diggity again if you don't have myth use cyclop here uh we barely even scratch the surface I mean there's so much modulation we could do here with you know key tracking and I mean all kinds of stuff it's wild myth just gets really crazy really fast almost too much to pack in a video right add some purify to this what do you modulate that let's modulate the FM out make it a little dirtier oh yeah beautiful stuff beautiful stuff fantastic o let's add a sweet here got add a sweet let's add a sweet little bit of sugar sprink a little sugar on it you know final touches awesome all right cool now let's add some Rhythm because we've kind of set the atmosphere it's very ambient like but again this is 93 beats per minute it just came after a dub techno track let's set some Rhythm here so what I'm going to do is grab some kick drums your kick drums may vary you might just have some laying around um but I'm going to use my own little drum rack here uh full of kick drums cuz you know that's how I roll so with a kick I mean you kind of want to be like all right not overly selective but you want to make sure your kick kind of fits your track so again I'm going to find one that I like here this is just a drum rack filled with samples from triaz who like that one right there right there and what I like to do with kicks especially with like these you know kind of signs of Lifestyle tracks is I'll I'll leave it on 16th notes and I'll make like a two bar mini clip all right and what you can do is just use one of these random you know generators here in Ableton all right so we're playing the Deep kick Punchy I think that's what it's called um make sure we're on the right one let's go ahead and make a pattern here no we're on let's go down one more there we go so we can change this to let's say yeah and just kind of mess with the step duration until you're happy because what I'm going to do is I'm going to use you know one half of it going here and then I'll select this side of it and do another pattern all right so we're kind of getting something random every time all right go ahead and play [Music] and that's kind of cool like that gives us a sense of Rhythm there right and again that's just using the midi generator here Rhythm I'm already feeling that though all right let's put a snare in there let's rename this before we get started kick and uh we'll call this myth and this one over here is the P6 there we go let's put a snare in our CPU is really starting to hover I might have to freeze the track all right we'll put a snare in here we'll go to drum racks snares and so we're just going to put a snare in and that snare is going to kind of set the foundation if you will and then we can adjust the kick to taste all right I'll show you what I mean so what we're going to do here is just make a one bar you know simple snare track okay I'm going to put on the one two and the 14 all right and I'll come over here to device view I'll hit play oh yeah put on classic Mode lower down the release very nice come back over to one shot transpose it gosh we nailed that kick J right away like that was just I'm feeling that [Music] and the lower you make the decay in the release get very ambient likee that's cool Up the Volume a little bit nice I like it I like it digging it sounds good one thing I like to do is add automaton to my snare drums fans of the channel know I love my automaton it's a free plugin from audio damage go ahead and drop it on the snare track switch the preset to addition beats take out the bit crush and modulate and up the effects [Music] level if automaton doesn't work on your system because it is a legacy plugin you can use replica 3 also from audio damage you can also use the native beat repeat inside of Ableton for the same effect very cool all right now let's make some glitch percussion over here all right now what I've got is a rack full of glitch percussion that I made myself uh out of some Tri ass samples um and what we're going to do is use some mini generators and Transformers to create our glitch percussion track all right so I'm going to make a new Mini Clip here and what I'll do is I'll use even seed now even seed is from Philip Meyer I'm going to leave the link to his mini packs down below uh volume one and two an even seed unlike the seed from Ableton gives you a much more even result you know so you can see some of the notes really really nicely set there um we're going to switch our base to something around where our percussion is is maybe we'll kind of spread this out with the pitch here a little bit if you're not happy with it just go ahead and you know move some down move some up maybe add some that looks good okay happy with that um let's go ahead and select all what we're going to do is come over here to the Transformers and we're going to use divs now div is also from philth Meer again I think this was in volume one and what I'm going to do is make eight sliders okay and what what this does is it gives us that instant ratchet effect so this repr presents every eight notes so we can say like every two notes we're going to get a a double chop here again we got to select all to this to happen we'll go every two put on auto there we go select all there we go every two we get a chop here chop this one chop this one there we go and just go ahead and play here nice so you can see that like it it just gave us an instant ratchet without much work right let's go and adjust this one I'm going to transpose this up to like plus 24 oh yeah put that through the drum bus that's instant Vibes now one thing I'm also going to do is put one of my own custom racks after that uh I'm going to grab it here this is for patrons on my patreon you guys know I love my glitch percussion effects rack this is a rack full of um the beat repeat plugin from Ableton uh with the micro fills preset over here um little autopan the compressor but just listen to that I mean I'm a solo it real quick that's the result that's what I'm talking about really nice stuff um you can adjust a raid here adjust a pitch I made little macros for it oh yeah sounds great again this is just you know some samples from triaz that I made really really short uh I transposed them using the transpose knob here and um yeah put them through my little effects rack with some AEL baton that's the recipe guys now one thing this track needs is a base I'm going to rename this glitch uh let's go ahead and put a base here let's add vital to our track why not we'll go with vital for a base and with a song like this I really want to you know modulate the base right so I'm going to kind of see what I feel like after we create this Basse sound so so let's go ahead and change the filter to 24 go ahead and adjust the resonance here um we're going to leave envelope one as it is make a secondary envelope here Decay is around half second drag it over to the cut off filter lower down the amount here and we'll play a nice low note let's go ahead and find where that is B flat zero oh yeah cool all right oh yeah just kind of jamming see what's up all right let's go ahead and add a compressor here we'll adjust the mix adjust the attack and release that sounds good we'll add a distortion we'll go sfold Distortion up the drive a little bit lower on the mix down there we go maybe we'll add some Unison to this base three voices Unison lower down the Dune lower down the spread here oh yeah very nice [Music] oh yeah excellent now again that's just a filter Sawtooth right let's go ahead and add a sine wave here for little Vibes let's add some sine wave make sure it's going through filter one lower down the mount here maybe we can make that an octave uh lower or a deeper oh yeah oh dude I love [Music] it let's just go with that let's go with that there we go record new let's go ahead and see how we did here open it up oh yeah we'll switch this to Quan ties right here go ahead and make sure our grid is all set start and end we'll transform it there we go excellent oh yeah nice so there you go switch this to the base bus oh there we go fantastic that is VI right there oh I love it add a little more drive to our Distortion there we go little drive to our Distortion awesome that's Vibes now what's left of course we got to out a sequence you got to out a sequence right let's rename this it's our base we'll make a new midi track here and let's call this our sequence sequence one very nice and what I'm going to do is I'm going to use pigments for this all right I think everybody knows pigments they love pigments it's a great synthesizer for doing basic sequence work like this so what I'm going to do is just switch engine one to a wave table and make it a Sawtooth here so move the position around 666 and then uh turn on engine two and we're going to make it a wave table as well and leave it on sinewave uh we're going to leave it on 24 low pass filter and drag the cut off down around 500 htz all right and what we're going to do is take the sustain out of it leave the Decay around say a second that's good and then with envelope two we're going to leave the Decay at 500 milliseconds and drag envelope to up to the cut off filter ever so slightly there we go very nice we'll take an LFO and we'll switch the rering source to free running okay and now we're switch the rate to trade only make it four over one drag it up to the cut off filter and switches up polarity to positive polarity meaning now we have a uni poolar sine wave LFO moving our cut off filter that's free running that's the key um cool all right uh let's actually add some volocity here to the cut off filter as well and you know velocity to the fold mod never hurt or velocity to the pulsewidth mod why not you know any any little bit that you can do uh especially when you start adding some sequence notes okay what are we going to do you know all right cool I'm feeling that I'm feeling that all right let's go ahead and add steppic uh you know when I start to sing you know my sequence that's when I that's where you know I'm feeling it right you know I'm like I'm in the vibe right okay so let's go ahead and uh in stepic we're going to switch the root note to a sharp number three and we'll switch it to Natural Minor and let's go ahead and add some notes um let's see here we'll go with C go f there we go and we'll do this again and maybe we'll go up here that's cool and maybe we'll add a couple octaves here we'll randomize the velocity and we'll randomize this purple dice means there's no possibility that it's going to repeat um this is looking good I'm happy with this maybe we'll add one more note there and yeah is that it that might be it that's all we need so again I I kind of try to hear the notes as they're passing by that'd be cool all right let's go let's hear how we did okay I'm going to lower down the game a little bit we're going to add a healthy dose of delay and Reverb to this and uh light up pigments and here we [Music] go [Music] yeah that's what I'm talking about oh that is such vibe oh my goodness we nailed it we nailed it off the resonance a little bit here you going to play with the cut off filter to taste hell yeah oh my goodness all right I mean listen if you guys follow along this far thank you for watching I truly appreciate it you know sometimes when I go for a free form tutorials like this I just want to kind of get in the vibe get in the mood make a track and to have you guys along here on the road with me I mean that is just that is signs of life that's what I'm talking about anyway listen I do tutorials like this every single week on patreon you guys would love it over there check it out link is down below in the description um if you haven't believed it by now your power is rising all right take every advantage that you possibly can to create the life that you want to live create the dreams that you want to live create the music that you want to make everything is in your hands now the power is inside of you so don't forget that okay um there's a lot of people who are watching this channel I realized my voice is going far and wide across the land and I'm really just honored and inspired to be here on this platform with you guys so thank you for being here thank you for watching and uh let me know what you guys think in the comments down below I love hearing your thoughts I love hearing the positivity that we're creating on this channel cuz that's what it's all about and uh yeah I'll be back again soon with more Ute tutorials just like this one in the meantime take good care and as always keep your heads in the clouds and your feet planted firmly on the ground my name is Chris from Signs of Life and we'll see you guys in the next video peace [Music]
Up Next
22:10
Creating Ambient Granular Pads in Arturia Pigments 2: A Step-by-Step Guide
@VenusTheory
81K views•2020-05-22

12:54
Triumph of Orthodoxy Icon: Byzantine Art & History Explained
@BenCallan
2.1K views•2024-08-06

9:49
FastAPI vs Flask vs Django: Choosing the Right Python Web Framework
@TechWithTim
302.5K views•2024-05-26

1:42
Game of Thrones Opening Credits: A Cinematic Analysis
@gameofthrones
46.3M views•2011-04-18
Related Study Plans & Knowledge Roadmaps
Structured learning paths in General & Interdisciplinary Studies
general-studies
Elevator Engineering: History, Physics & Cities
01From Hoists to Safety Brakes: The Dawn of Vertical Lift
02Hydraulic vs. Traction: The Engineering Physics of Elevators
03Modern Speed, Safety, and Algorithms
+ 2 more learning modules
12h5 modules
Explore Roadmap
general-studies
Rubber: Material Science, History & Geopolitics
01Origins of Natural Rubber & Mesoamerican History
02The Chemistry of Natural Rubber & Vulcanization
03The Geopolitics of the Rubber Boom & Colonization
+ 2 more learning modules
12h5 modules
Explore Roadmap
general-studies
Containerization: Evolution, Logistics & Trade
01Ancient Trade & Bulk Cargo: Amphorae to Barrels
02The Industrial Revolution & Cardboard Packaging
03The Containerization Revolution: Malcom McLean
+ 2 more learning modules
12h5 modules
Explore Roadmap
general-studies
Textile Tech: Evolution, Labor & Global Impact
01Pre-Industrial Textiles: Handloom & Cottage Industry
02Mechanization: The Spinning Jenny to the Power Loom
03The Factory System & Global Labor Transformation
+ 2 more learning modules
10h5 modules
Explore Roadmap