













![[Webinar] What are the three benefits of real-time monitoring and management of your products?](https://i.ytimg.com/vi_webp/1FKpwShbpnM/maxresdefault.webp)

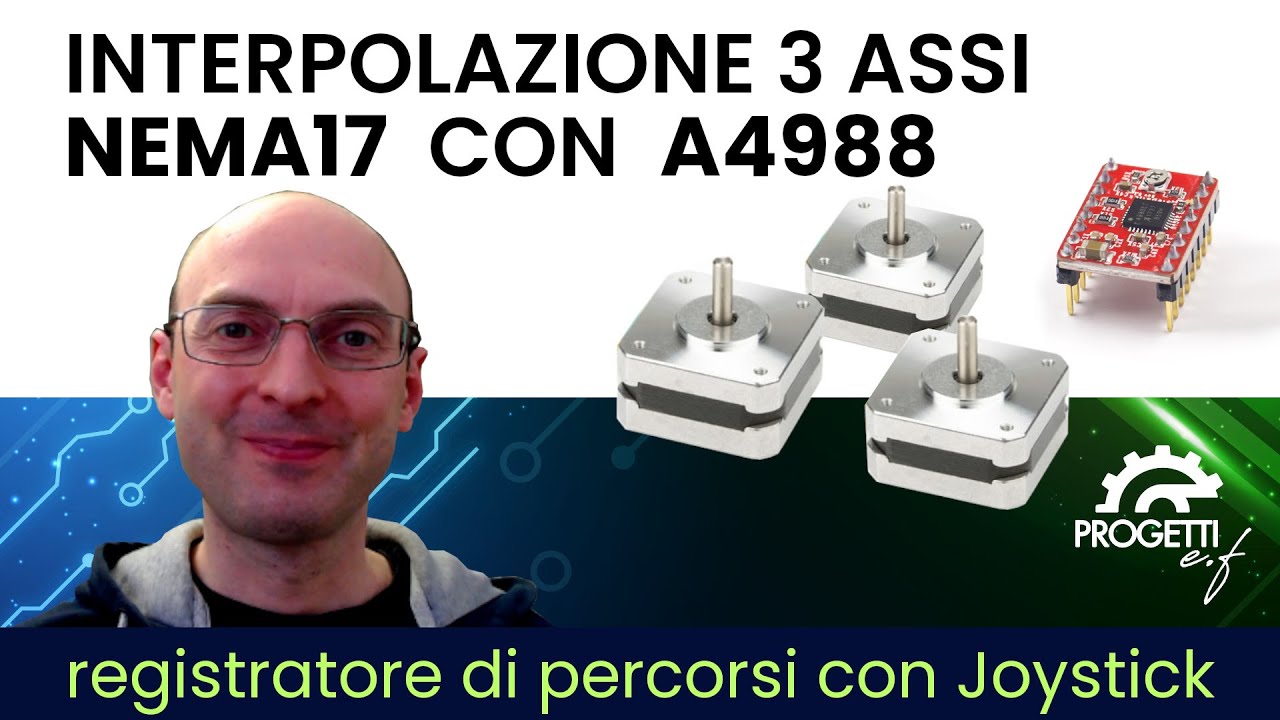
This video demonstrates how to implement coordinated multi-stepper motor control on Arduino using A4988 drivers, where multiple motors can move simultaneously with synchronized acceleration and deceleration profiles, preventing jerky motion and ensuring smooth, coordinated movement by calculating optimal step timing intervals using mathematical formulas for linear acceleration.
Arduino Coordinated Stepper Motor Control with Acceleration
Added:Understanding of stepper motor fundamentals, including steps per revolution, microstepping, and hardware driver interfaces (e.g., A4988 or DRV8825).
Proficiency in C/C++ programming for Arduino, particularly with timer interrupts, register manipulation, and Interrupt Service Routines (ISRs).
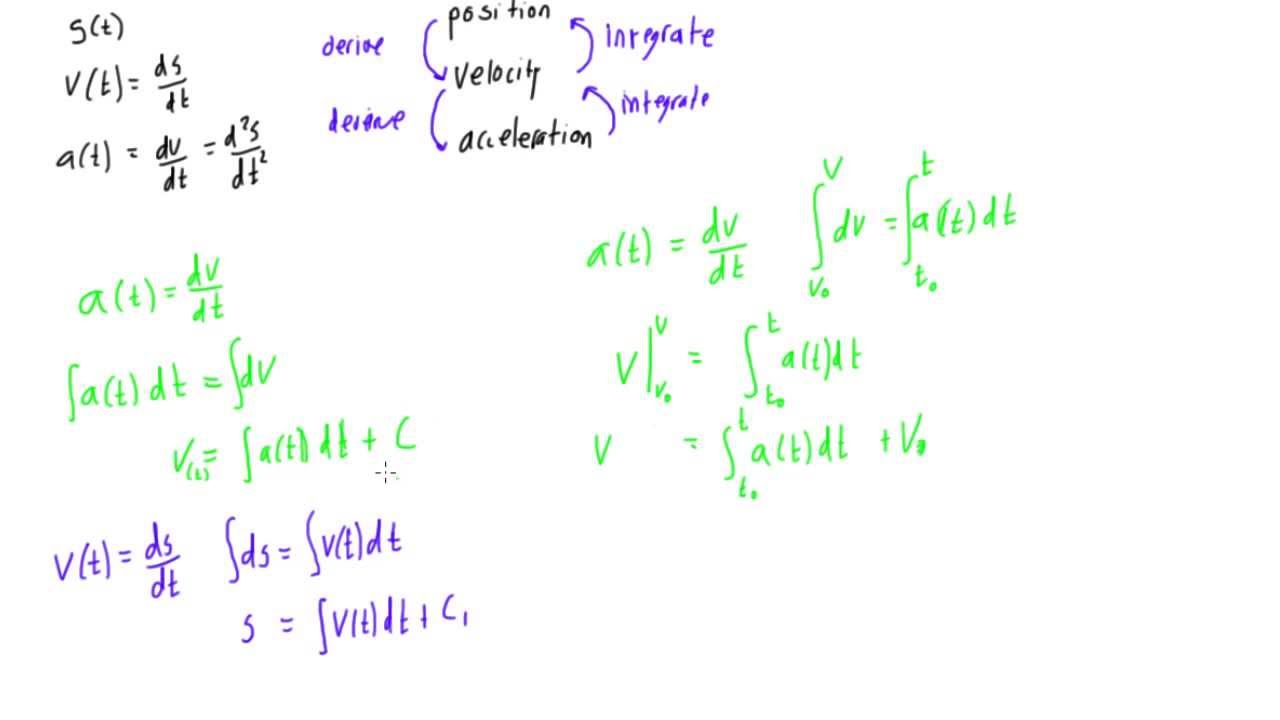
Basic kinematics concepts, specifically the mathematical relationships between position, constant velocity, and acceleration over time.
Multi-axis interpolation algorithms, such as Bresenham's line algorithm, to achieve coordinated linear and circular paths (CNC/3D printer motion).
Implementation of S-curve (jerk-limited) acceleration profiles to reduce mechanical resonance and structural wear.
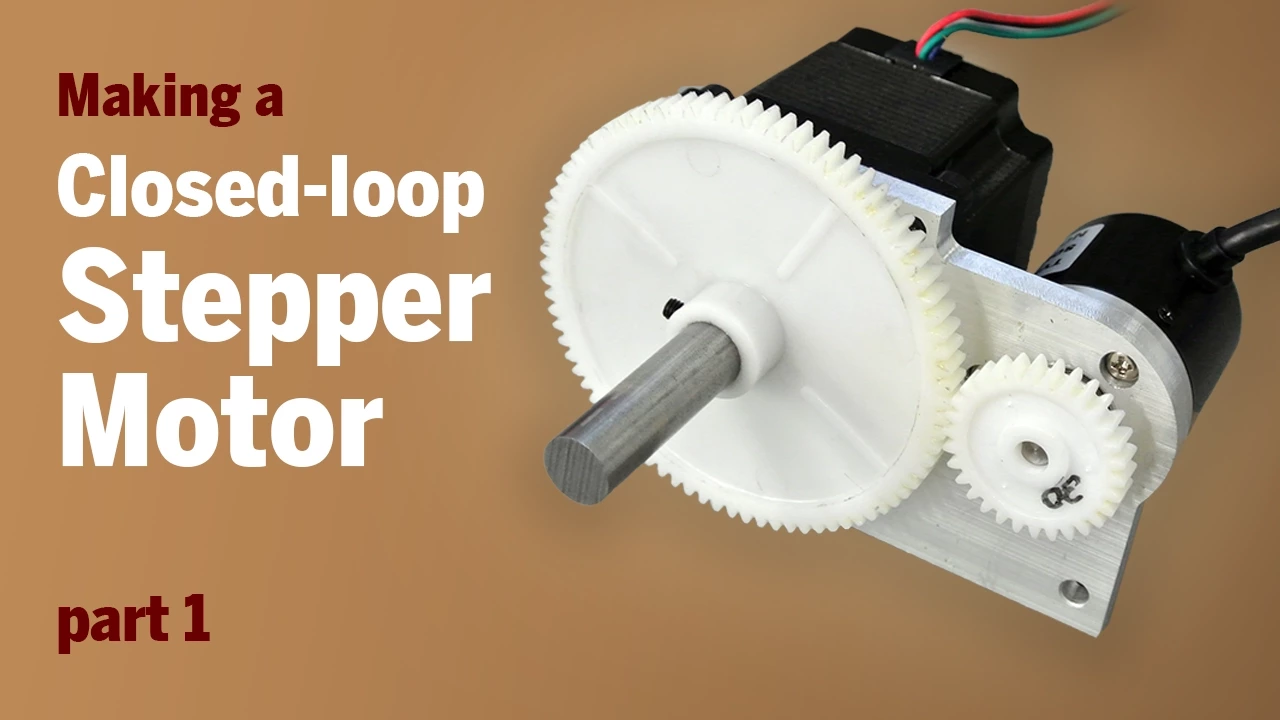
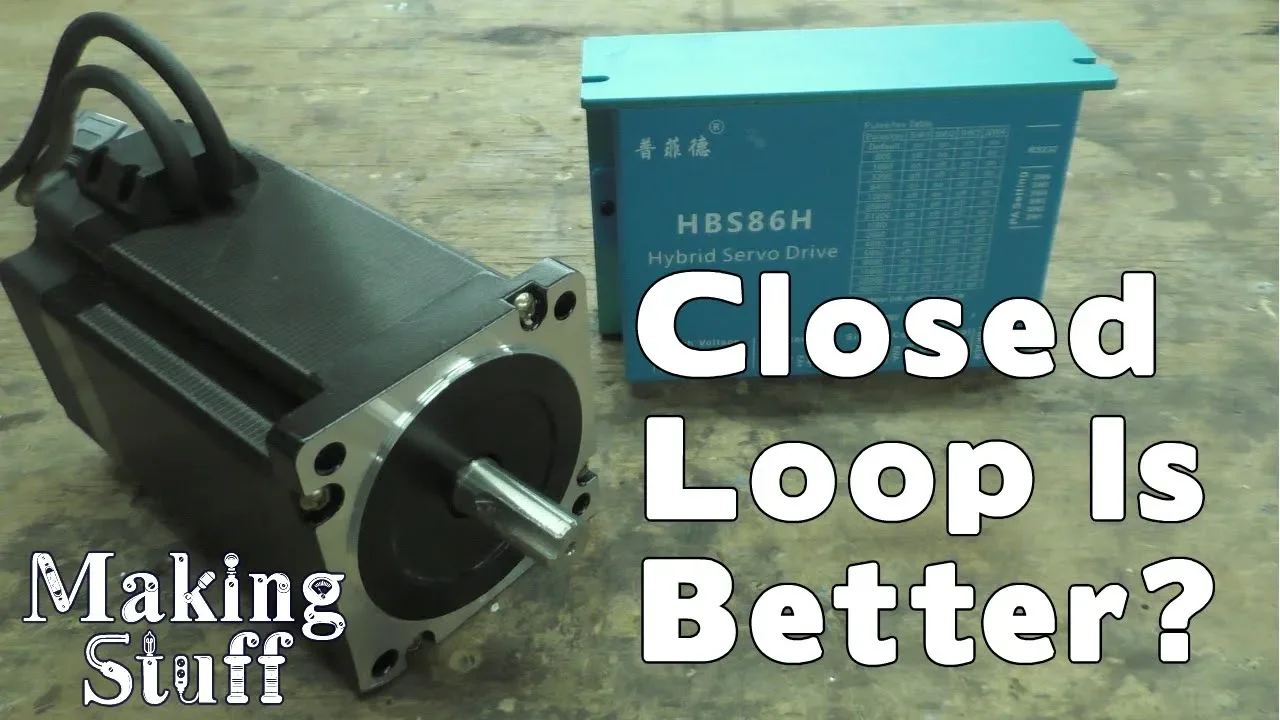
Transitioning to closed-loop stepper motor control using rotary encoders to detect and correct missed steps.
Integrating real-time communication protocols (like G-code parsing) and RTOS (Real-Time Operating Systems) to manage motion control alongside other system tasks.
367.7K views6.1Klikes47:10Original Release: 2017-09-10
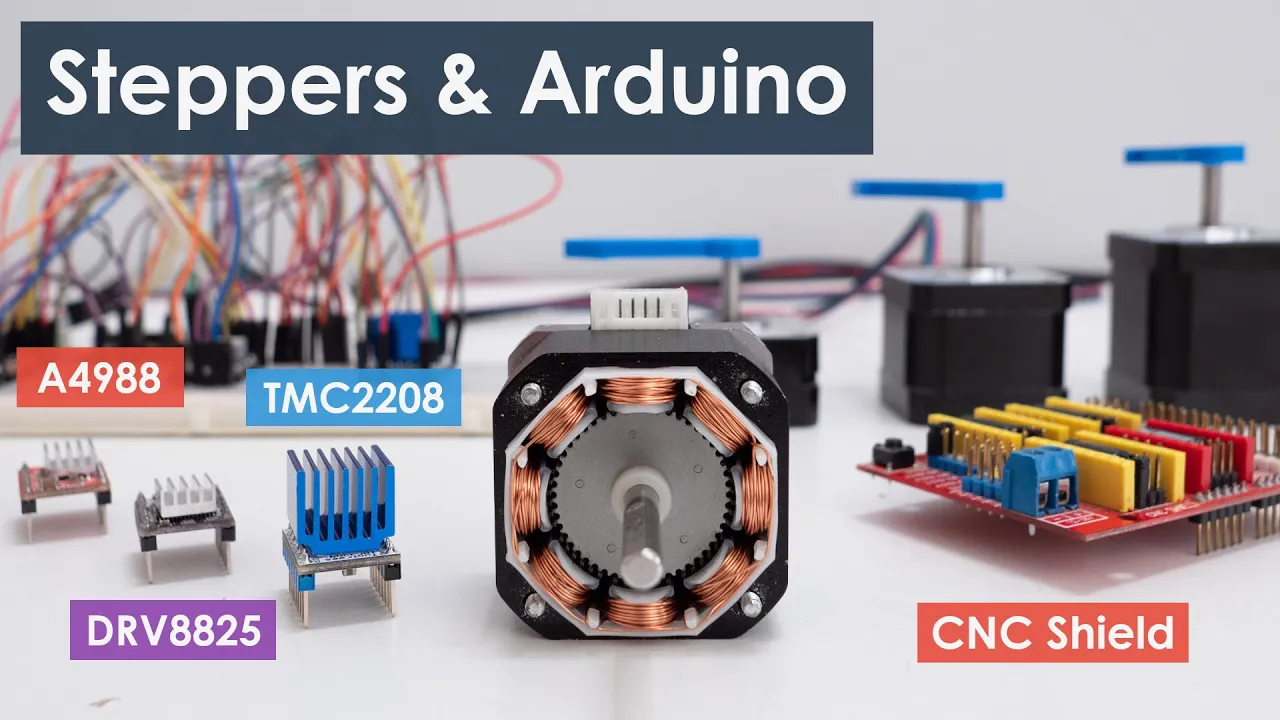
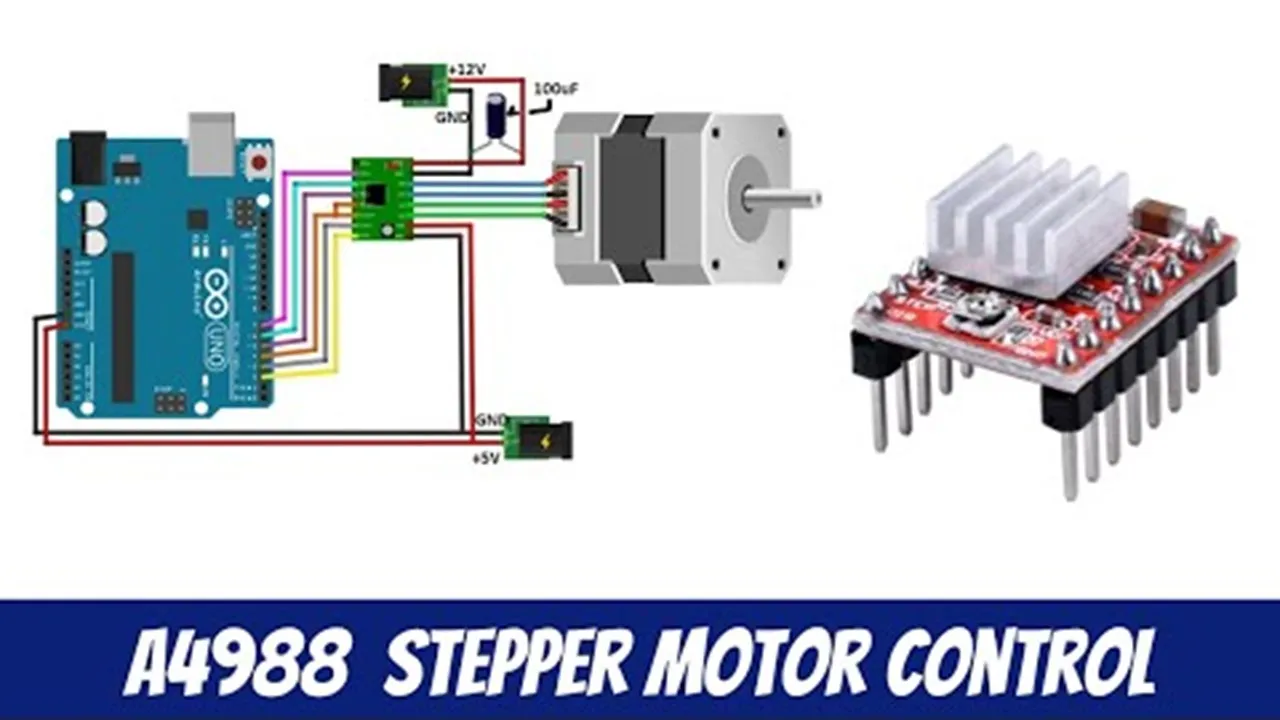
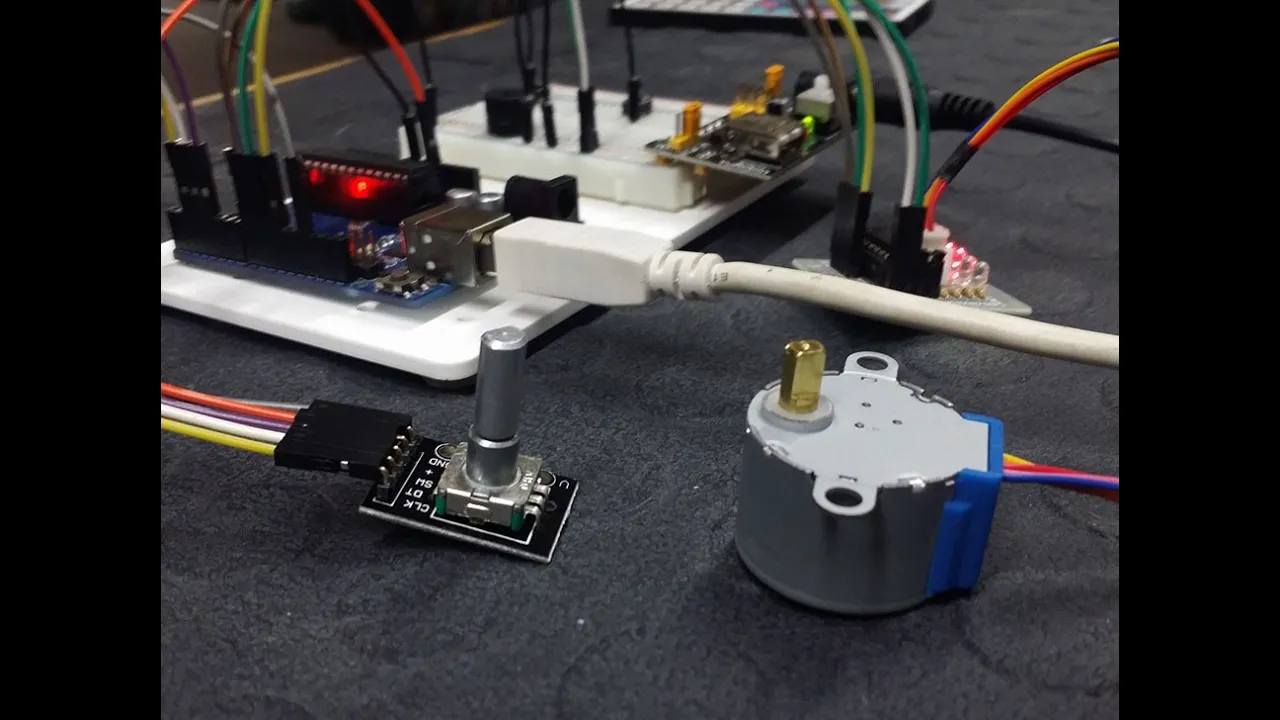
oh I wrote some code for Arduino recently to control stepper motors and turned out to work fairly well so I thought I'd make a little video and explain a little bit about it and put the code up there just in case people wanted to try it out so the goal for this exercise was to control multiple stepper motors and have them move in a coordinated fashion so for example if we have one motor here that needs to move 90 degrees and another motor that needs to move 360 degrees even though if they did that individually they'd take different times when they do it coordinated they both start and stop at the same time so that's one goal another goal was to have the movement accelerating and decelerating so instead of just jerking into a into motion and keeping a constant speed and then suddenly slamming to a stop it would start and ramp up the speed a little bit more gradually and then ramp it down at the end when it came to a stop so that was another goal I wanted to do this for six motors which is what I've tried it with and it seems to work pretty well with six it could work with more although I think you'll find that the movement will start to get a little bit scratchy not quite as smooth as it would with less motors and another goal was to do this in an interrupt routine so that the main program of the Arduino could keep going doing other things well the snippets were moving so that was the goals seems to be working all right now I have to admit I didn't check if there were any other stepper libraries out there that can do all of that stuff they probably are and they're probably better implemented than what I've done but I just kind of wanted to try making one myself so don't take this as an attempt to make a better wheel or anything like that it was just sort of for my personal amusement I guess so in this video I'm going to explain some of the steps or the progress that I went through while I was working on this and it's going to start off pretty simple and get quite complex and at the beginning of the video I will explain the simple bits because it sort of explains why it needs to get complex later on but as it gets more and more complex I'm gonna explain less and less of it obviously otherwise this video would just be incredibly boring and I think that people who have the aptitude to follow this further that will no doubt look into the code themselves anyway and maybe you can ask me there's any specific details that you want to know a little bit more about so these stepper motors have four wires here and depending on which way the current is flowing in and out of those wires will the motor will either be stepping or it'll be sort of partway between steps and so on but managing this stuff here is pretty complicated and to be honest if I had to do that I wouldn't have even bothered doing this but what I'm using is these a four nine eight eight stepper drivers and they make everything quite a bit easier because all we have to do we really only need to control two pins so we have this direction pin and that whether that's high or low will determine which direction the motor will turn and then there's a step pin there and you just take that high and low to make the motor step I think it's winner when it senses this pin going high it will step but you obviously have to take it low after that before the next step to make it go higher gain see what I mean and then we have this enable pin on there as well and you don't actually need to control this one you can hold it high as a high or low I'm not sure hold it what either high or low to enable the motor but the point is that you don't need to keep you don't actually need to have any intelligent signal on there you can just connect this to high although whichever it is to make it work I'm not sure anyway the point is that you only need two pins per stepper motor to make this work which is pretty cool because that means that even something like this Arduino Uno could handle six motors a few if you wanted it to of course you need six of these drivers to do that so to start off with I'm just going to look at controlling one stepper motor because that will get a lot of the main concepts out of the way and on here I have some wires connected to digital pins two three and four and they are going to be the direction step and enable respectively and let me just get that connected up let's have a look at what is probably the simplest program that you can write to control one of these stepper motors I have defined the pins that I'm using there so this is just digital pins two three and four as I mentioned before and I've set those to the outputs and then I'm taking stip pin which is three I'm taking that high and low and then I'm waiting for 10 milliseconds between pulses now this delay or the interval between pulses will define the speed of the motor now this is actually running at the moment so I'll just turn I just have this little switch here that I'm using to turn the battery off and on so that I don't have it running all the time but that's what this program does so this is worth 10 milliseconds between steps and if I take it down to just one millisecond between steps it gets predictably about 10 times faster so the speed of movement as you can see is inversely proportional to the delay between the steps that's kind of the point that I wanted to look at here let me just turn that off by the way the enable pin does have to be held low to enable the motor not high I just checked that before and I realize that I don't have that in any of my examples that I'm about to look at but what I should be doing is something like this at the beginning of each sketch would be bitter too just to make sure that it's going to work here's another sketch which is very similar to the one that we just looked at except instead of letting it run continuously we have a function which is going to take a number of steps to move by and in we use that to loop over this step high and low thing that we were doing before until it's reached the required number of steps and then it will just stop and we're also using the direction pin we're setting that to either low or high depending on which direction we want the motor to turn and I've got a couple of examples here I'm going to step 800 steps now this motor is a 200 steps per revolution motor so normally 200 steps would be a full revolution but in the stepper driver I have it set to quarter stepping so it's actually going to take 800 steps to do a full revolution so if we look at the tip of the pointer this orange thing there you can see that it's lining up pretty much right on there into section in the lines of the grid on the table so if I just turn this on and reset the Arduino to run this you'll see it goes right back to where it started and the speed is pretty similar to what we had before when we were doing one one millisecond delay so again this interval that we have between steps is going to determine how fast it goes so to make it faster I can make this number smaller right but we are not doing any acceleration yet so let me just run that again just in case it wasn't clear it's not speeding up and slowing down it's just immediately jumping to that 1,200 speed so that's a bit of a problem because jumping from motionless to a speed requires a certain amount of energy and if we take this down I think 400 should still be okay let's try 400 so it's three times faster you could see it sort of jerking the motor a little bit there because of that inertia that it's that instantaneous speed that it's trying to do and I think I might be able to get it to go twice as fast as that again I'll just hold the motor this time no I can't so this is where we start to strike problems even though I know this motor can go that fast it cannot accelerate that fast so there's a difference between top speed and the highest acceleration that it can manage so the point of doing acceleration is to instead of just immediately jumping to that speed we want to gradually work our way up to that speed and I'm pretty sure I could even get it to do stepping at intervals of 100 microseconds like that once we get the acceleration sorted out now let's have a look at a basic rather naive form of acceleration this is not really what we want but it should illustrate how even a rudimentary kind of acceleration can help get us past some of the problems that we just saw so in the loop function we have kind of the same thing as what we just had except for this time we're going to be turning 2,400 steps which is three full rotations in each direction and we're using this function called simple acceleration so all that simple acceleration does is it says there's a low speed that we're going to start at we want to work towards a high speed but we can't do it immediately so we're going to start at an interval of 2,000 microseconds and we're going to work towards a high speed of 100 microseconds which is what we tried to do before but it couldn't do it because it was missing steps and with every step that we take we're going to change this by two microseconds so the first step we'll take the interval will be 2000 the next step will be nine 1998 then the next one would be 1996 and so on until we get to the top speed of 100 and then we'll hold it at 100 until we get hitting until we get towards the end of the movement and then we'll have to slow down again so it will go from 100 to 102 104 and so on back up to hopefully it'll be right about 2000 just before it stops moving so to calculate the points where we need to stop this ramping up behavior we can take the total or the difference between those two speeds and divide that by how much we're going to change each step and that will get us that will let us know how many steps that we need to take for that ramping up portion of the movement and then the ramping down portion will be the same number of steps at the end so in my code I'm not doing any different lengths of ramping up and down the acceleration at the start and the acceleration at the end or the deceleration if you like are going to be the same the same sort of acceleration so then we have this value D which we start off as our low speed and of course these numbers are kind of backwards low speed is high number and high speed is a low number because this is the interval just keep that in mind so D is going to start off at the low speed and then we're going to do that step in high-low and then we get awake for the duration then we're going to check if we are currently before the point where we have to stop ramping up and if we are then we'll decrease the interval or the delay by that change value there otherwise if we are on the ramp down section then we'll increase the delay to slow down otherwise we do nothing so if we're in the portion of the movement where we are neither ramping up or down we're at full speed then we just leave D as it is anyway enough talk let's see what this does so it goes back to the point there where it should and it starts off moving slowly and it goes faster and that first point in between is actually at 100 microseconds per step so we can manage to do that without losing losing steps and we go back to where we should be so that's not a bad for a start and it might be kind of ok for some purposes but if you listen to this if you listen to that sound hopefully you can hear that kind of it's not a natural sounding acceleration curve and the reason behind that is if we graph what's going on here so the first step the duration or the interval or the delay is 1,000 microseconds for this example here hmm excuse me I had two thousand and 100 there but just for this graphing example I'm starting from 1,000 and I'm decreasing in steps of 4 so it's 996 992 and so on just so that we we don't have too many values to graph but here this is the delay I guess you could say and this is the speed that results from that and to calculate the speed I've just divided that or this is just the inverse of that so it's 1 over 1,000 to get that number 1 over 996 to get that number and so on and then if i graph this speed by not sure why those are down there but this is the portion that I wanted to graph when we get to 100 now you can see that that is not a linear ramping up of the speed it's sort of a exponential curve almost so that we start off and we go in quite slow for quite a long time and then all of a sudden right at the end we do most of the increase in speed all within a very short space of time so this is not not a natural way to ramp up the speed ideally what we want is a straight line that just goes from points straight up to there like that in the speed will increase linearly but how to calculate that is a bit of a tricky thing because this side is what we actually inputting so how to get this as a reciprocal of that and still be linear is the tricky thing which led me to a little bit of Investigation and my investigation pretty much ended when I came across this document which explains everything quite well and included all of the info that are needed to use or needed to know it has some source code which I couldn't really make head nor tail off but that's okay because I was trying to write my own anyway but regarding what I was just saying before about a linear speed ramp the graphs here this is acceleration so that the W is rotational speed nice is it up there this is acceleration so what we're looking for is a constant acceleration which will result in a linear speed increase like that so we're going to linearly increase the speed hold it constant for some duration and then ramp down again and what I was saying before is the ramp up time and ramp down time for what I made will be the same so in this graph this takes longer to ramp up than it does to decelerate so my out the code that I wrote does not do that it's going to be symmetrical and this is the position it's sort of a smoother position change and when we listen to the movement in a minute you'll see that it sounds much more natural too so this document if I just look a little bit further down here I'll try and speed this up a little bit but basically everything is explained in detail in the appendix as it says there and I'm pleased to say that I could actually follow every single thing that was in the appendix which is I think it's first for me actually when I look at these sort of white paper type documents usually they lose me after the first few lines of equations and stuff but this one was not too bad and the way it works is we need to know how to calculate the time delay for each interval between steps based on the previous time delay and the way that we do that is we have a starting delay in my code just before I picked something like mm so this is kind of what we're gonna start off with our first delay and they have formulated this like using these variables here because what they're trying to do is put in some numbers to get an exact degrees per second speed and I have not worried about that because what I'm gonna do is I'm just gonna put some numbers in or put a number in for this look at what kind of speed it gives me and then adjust it and make it fit whatever I want it to be without knowing that it's going to be X degrees per second when I put these numbers in here so that's another thing I should mention about my library call it a library didn't I my code you will not be able to get an exact specific degrees per second speed from your step as you'll just have to adjust these numbers to suit so for my purposes I'm just going to use a constant for this now this one this next one here is really the meat of the whole thing this stands for the delay at step in and that is based on the delay in the first step multiplied by this little thing here and in being the number of steps so the nth step this is and as they say here the computational power of a microcontroller is limited calculating these two square roots is time-consuming so they have used a less computational computationally complex approximation using the Taylor series for that to basically do the same thing without using square roots it's not as exact of course but that's perfectly fine actually have to admit I didn't follow the Taylor series part because I kind of missed I must have been sleeping when they did that at university but I heard of it I know what it does but I don't know how to do it so anyway when you want to write this in code in a weaker CPU like one that doesn't have a floating-point unit and so on you're going to do something like this you'll take the previous delay which for the first step will be that that delay there and then you'll do this so to times the previous one what you can see it right there and the point is that this is much faster than double square root it does increase a little bit of arrow which I haven't bothered about I just sort of let it run and it works perfectly well for what I'm trying to do so for my first attempt at using this method I just used this formula to fill an array with the delay intervals that I needed and then I just ran through that our array forwards and backwards to do the stepping so just look at this one quickly so we do the same thing we do forwards and then backwards for the directions and then the function that I've written you'll notice I'm not passing a number of steps to do here because I've just made it a little bit simple and I have used the fixed number of steps so that's 400 steps or 400 array values because this is where the arrow is declared where we're using that number of integers now some of these things here angle acceleration and so on these are the things that I initially started using from this formula and in this c0 is going to be that there and you'll see that I've used all that stuff there but in later versions of the sketches I've just replaced this with a constant number like that or whatever it is and again we have a high speed of 100 there so all this does is it runs through that array and uses this formula to put numbers for the delays in that array and then it runs through that array Ford's doing the stepping and then backwards and because there are 400 steps or 400 values in that array we're going to get a total of 800 steps so again it's going to do one full turn in each direction but this time when we listen to this you should hopefully be able to tell that it sounds a lot more natural when it moves so let's run that that's a bit more of a smooth sounding motion so that works okay but obviously filling a fixed-length array with the interval values is not very practical for the general case and I also wanted to have this running in an interrupt routine instead of taking up the main code path of the program so that's what I did next and this is where it starts to get a little bit complicated if you're familiar with interrupt routines maybe not so complicated for you but it's quite a big change and the sketch suddenly gets quite a bit bigger and probably this is the last one that I'll explain in any great detail but anyway starting from the top we have same stuff that we had there defined a macro here so that we can use port manipulation rather than using digital right to take the step in high and low it just makes it a little bit faster so this macro will do what it says it will do just another convenience macro to turn timer interrupts on and off then we do kind of a similar thing that we did before except we have to do a little bit of extra setup to say what kind of timers we want to use here so I'm going to be doing the compare to counter style timing so that whenever whenever the timer one gets to this value here I forget what these are called but whenever timer one gets to what timer counter there gets to that value the interrupt routine will trigger and run and this is the point where I stopped using this calculated version for the acceleration well essentially this is the acceleration but you could also think of it as the slowest step that the motor will do when it starts so sixteen hundred microseconds is going to be my C zero for this case now down here we have the interrupt service routine itself which I look at in a second but in order to make that work we need to have a bunch of variables that are going to be looked at by the interrupt routine end by the main code as well and seems like they need to be volatile for the most part I've made pretty much all of them volatile not sure if that was entirely necessary but I was having a lot of problems at some point so I've made them all volatile and it's been working okay so I just left them like that so this is mostly quite a bit of housekeeping that goes on inside the interrupt service routine direction is going to be I think one or negative one depending on which way you want the motor to go max speed is 20 here so this is the number of microseconds that will that the program will wait before triggering the next step now you might think 20 is very very small compared to those ones that we just saw before because we were having trouble making it even do a hundred microsecond pause before so how can we make it 20 now that's going to be much shorter and the answer is that some of the time is taken up and running this interrupt routine itself so it's not just 20 microseconds it's 20 microseconds plus however many ticks it takes to do this oh and that's a that's the other thing it's not microseconds it's count its timer ticks - that's yeah that's true so we're talking about a totally different measurement of time here now anyway so there's a bunch of variables here and we're keeping track of how many steps we've done so far total steps total steps necessary I think that is and also the position of the motor so if it's starts here we call that zero and then we turn 500 steps we know we've turned 500 steps and we know where to go to get back to zero so it's just sort of keeps track of the absolute position of the motor and then we have a variable - we've set that to true when the movement is finished so that the the main program will know that the motion has been completed anyway inside the interrupt routine first thing we do is check if the number of steps we have done is enough to finish and if it's not in other words the step count is less than the total steps we need to keep stepping so we do step high step low increase the number of steps and we also increment the step position to keep track of where we are in absolute position otherwise in other words we've moved far enough we've done enough steps then we set that movement down value to true and turn timer interrupts off so that this interrupt routine is not gonna be couldn't not going to be called any more after that and then we do a similar thing to what we just looked at we need to figure out if we are still in the ramping up phase or not and I've determined that just by having this ramp up step count value just set to be zero or not so that's off as zero and as long as it's zero we're still ramping up so increment the step number and then we do this thing that we were just looking at there this one so this is D in my code so that's that's it there so basically we're using the D or the delay of the previous step to determine what the delay for the next step is based on this in which is the step number and then if we are still less than the maximum speed sorry if we have reached the maximum speed then we set this ramp up step count so this value now will no longer be zero so next time we're not going to come into here the other condition that we should meet should check is if it's a very short movement we might not have enough time to reach the maximum speed before we need to start slowing down again so that thought that's what this next check does if we've done enough steps to get halfway basically that's what that says then in that case also we will say that the number of steps in the ramping is going to be however many we've just done and then in the ramp down phase we need to do the reverse of that so we determine in and then I calculated with a pen and paper this formula here is basically the inverse of that so I basically solve this equation for C n minus 1 and that will allow us to step downwards if you like down that ramp it's not precise but it doesn't really matter and then at the end of all that we set the the timer counter know what is called the compare register I think it's called something like that we set that to whatever the interval we want to wait for until the next time we come into this interrupt so it's pretty tricky if you the tricky thing about trying to make a video like this is if people understand how these interrupt service routines work doesn't really require a whole lot of explanation explaining but if you don't really know how they work then what I just said probably wouldn't make any sense to you anyway so a little bit further down here we have a function called move in steps this time we are actually taking a parameter to move a certain number of steps so we just do a bit of housekeeping again we set some initial values before the move starts D is going to start off at the c0 that we just said as some value there 1600 my slowest step do they bunch of values have to go to 0 like that movement down is false and then we turn timer interrupts on so that that interrupt service routine will start being called and then since we have a value called step position which we're keeping track of the absolute position of the motor we can also make a convenience function like this I should really call us move to absolute position that would be a little bit a name but it's just a helper function to let you get back to 0 I guess there's probably winners most useful anyway and then in the loop here I've just got a bunch of examples where this is just calling over and over to do some movements towards the end I have set the max speed to 600 which slows it down quite a lot because it was 20 or something before there and again this is not microseconds anymore this is ticks and then 400 makes it a little bit faster 200 makes it a little bit faster again and then finally 10 makes it really fast and we should move back to position 0 so we should get back to exactly again let me just line that up so that's going to be on that corner of the cell on the graph on the disk with a bit of luck so it's turning us on and run it that's the slow ones just moved a bit it just moved a little bit at the end of it but you can see that it's it's keeping track of all the steps properly and it's moving pretty fast I mean could go faster let me just make a girl over faster so you can watch the game because we're accelerating now we can set this max speed to be quite fast and we shouldn't lose track of it the other way but I'm really hoping you can hear this because looking at it doesn't really show you - well what's going on but the sound really gives it away anyway hopefully you can hear that it's accelerating quite nicely so some of you may be thinking what on earth was the point of all that complexity just to do basically what we were doing already before well the advantage of doing something in an interrupt routine like that is that it lets the main part of the program continue doing something else while snipper is turning so if we have a little bit of a look at this move to position function that I was using to do all those movements there's actually a line in here if we pass Orwell the default parameter here is true so if we give no second parameter it will come in here and it will just wait until that movement down value goes true from up there there before continuing but we could issue this move to position command and then just keep going here doing something else so let me just illustrate that with another sketch there so this is the same sketch that we just looked at but we'll just upload it except okay so you can see it's moving 8000 steps which is 10 revolutions hold on and I just wanted to now let me just reset this now notice that it says starting and finished at the same time that's because this starting command happened then this one happened in this one happened all pretty much at about the same time so the program here is able to continue doing whatever it wants to while the interrupt routine is also running kind of at the same time and I have a couple of other illustrations which might help to show this a little bit more interesting way so let's say we have a value called count and we want to do something while the smooth movement done value is still false so we can print out the value of count and increment it and then wait half a second and I'll just put this over here so let's run that so you can see that value is being printed out there so it's again not not very exciting example but another very important thing that lets us do is if we wanted to stop that movement halfway through for some reason I'll just paste this in so let's say look we've got we've got we've got up to five there but let's say we wanted to stop it when the count gets to three so this in reality this might be a user input like there's some kind of a button that the user can push to stop the motors turning if they see something's going wrong or whatever so let's try that there's a little bit of a delay there because it gets to do one more iteration of this loop before it stops but the point is it didn't get all the way through and if we were to print out how far it got tip position isn't it yeah actually we can print that out while we're moving to let's try that this might be a better illustration let's try that yeah okay so even though we told it to move 8000 steps we're also able to run other jobs concurrently and interrupt it while it's working so those are the the main points that we gain by doing things in an interrupt routine like that so the next step in this whole procedure is to did I just hear somebody yawning coulda sworn I heard one of you guys yawning out there hang in there we're about to get to the the good stuff so the next step is to of course do this with multiple stepper motors that was part of the goal so I can't use just a single driver board thing here I'm now using an Arduino mega underneath there and it has this shield thing on it which is mainly used for 3d printers I think but not necessarily the only thing it can do but it only has five of those drivers on so I do actually have to use this single board on these auxilary pins here but it works perfectly well no trouble with it the sketch for this is going to change a lot and this is the point where I'm not really going to explain too much of it hopefully people who are interested in this will be able to follow it a little bit further themselves otherwise just let me know if there's something in here which is a bit strange but I'll just quickly go over quickly here I'll just go over the pertinent points of it that we're different from before so obviously we have a lot more pins to deal with but basically the same way we deal with them we deal with them the same way as before major change is that now that we have multiple stepper motors we need to keep a set of these housekeeping values like you know what step we're up to in each one the delay value step count total steps all that kind of stuff and each motor needs to have its own set of these values so I've put that into a struct and I'm keeping an array of six of these structures to check or two anywhere in the program that needs to deal with the stip motors will use one of these structures and probably just skip over most of this it is quite a bit longer so here is a Hello Sigma so we have an array of step is there so anytime we see step as that's what we're dealing with so down here we have the first step motor and we are sitting a function which will tell it which pin to use to change the direction and this function tells it which turns to use when stepping so that'll be one of these for example it's that one there like that and the structure has a function pointer to store that so that's why we are assigning a function to that value there and then we have values also for the acceleration so this is basically determining how fast it starts out at and how fast it accelerates and then this value is obviously the top speed or now called the minimum step interval so I've tried to give things a little bit more relevant names at this point so we do that for each motor as we see fit and then as a whole bunch of stuff which I'll probably not look at too much but one main thing we need to do is when we are setting the time for the interrupted trigger we need to figure out which motor is going to trigger for because we have six motors and we can only trigger one step and the next interrupt so that's what this function does and then in the interrupt service routine itself we know one of the steppers is triggered and we need to figure out which one it is so we've got to do all this kind of stuff in here and figure out which one it is and I'm using this fairly remaining snippers flag this is a bit flag to keep track of which dipper's have yet to finish their movement so there'll be a bit set in that value for each motor that's still moving and yeah let's just skip over this a you want to look at it working right yeah let's just look at it working [Music] that's that's that whole sequence there that we can see all of this stuff just finished so it's pretty quick and you can see that the motors are all moving they're not coordinated yet but the reason they look like they're coordinated is because if we look up here I have the same acceleration and top speed set for all of them so it's a thousand and fifty all the way down so it's just run that one more time you can see when they move together they're all moving at the same speed so it looks like they're coordinated but if we change the it's changed the top speed for a couple of them this should be a couple of the ones in the bottom row and one of the ones in the top row I think this is the middle one in the top row I'll make that start off slower all right so let me run that now we should see that they're not coordinated anymore [Music] okay so hopefully you can see that that one and that one and that one we're slower than the others and this one is the slowest because we sit that ones maximum speed two must be that one here 450 anyway so they're not coordinated but they do work together and move together quite nicely so basically the only step left to get them coordinated is to figure out which one is the slowest and how long the slowest one is going to take to finish it's not necessarily which one is the slowest because it also depends how far you're telling them to move because each each motor might have to move a different distance so it's how long it's going to take to finish which one is the slowest one to finish that's that's what we want to find out and then we want to just slow all other ones down by whatever factor they need to to finish in that same time as well and I'm not going to explain that sketch but I'll just load it up and run it for you all right here is that sketch this is the last one I promise and it just has an extra step in it before it gets to actually doing the movement and that is to adjust the speed scales so in that structure where we have all those values stored for each stepper motor there is an extra value called speed scale and if this value is one it's just going to move at the normal speed if it's less than one it's going to slow itself down to match the speed of one of the slower motors and this function will calculate that before each movement now unfortunately I've used a very slow brute force method to calculate how long the motors are going to turn so I'm still sort of in the process of trying to improve that but let me just run this and we'll you'll probably see what I mean in between each individual movement there's a pause of about a quarter of a second or maybe not that long but there's a slight pause that we'll see and that is probably going to be get gotten rid of soon sometime see how there's a pause between each but now [Music] those movements are all coordinated so even though some are moving a lot like that one was moving like ten move ten revolutions some of these other ones were just moving one I think [Music] but whatever it whatever distance or whatever time it takes them to move they're all matched you should be able to see that by the way just in case it's not clear why we might want to have a coordinated movement like that suppose that one of those motors is controlling the x axis of a CNC machine horizontally and another motor is controlling the y axis vertically like that and we want to move the spindle between these two positions there and there if both of those motors were allowed to move at the same speed the path that the spindle would take would be first it would go down here like that because both motors moving at the same speed would make it diagonal movement like that and then the Y movement is finished but the X needs to keep going so it would move like that that might be okay but if you want it to move in a straight line directly between these two points you'd have to slow down the Y motor to 1/3 of the speed of the X motor in this case because there's three times as much distance to travel in the X distance so if you did that correctly then the spindle would actually go like this and a straight line between those two points little delay in it because it wasn't too obvious what's happening but a one-second delay in the middle of those two coordinated movements and I don't have many examples here because it's kind of a pain in the butt you can't really put it in a loop just so ii have to type them out by hand to have some interesting movements to look at but let's just run that again [Music] so it's working quite nicely still some improvements to be made though but I'll put my code up on the website for those who want to look at it and if somebody can help me with one of these questions that I had actually there's an idea maybe I can ask for a bit of help from you on this if you are still watching this obviously you are interested whether you would be able to solve this for me or not is a different story but this is the function that I'm using to estimate the time that it will take for well I'm calling an acceleration yeah acceleration so basically all I'm doing is looping through a certain number of steps because we know how many steps it's going to take but what we want to know is the total duration that that will take and the duration is the sum of every value along this series so the way I'm doing it is I just do do that for in times by just repeating this over and over and over and adding the value at each point so think if you were to write that out formulaic ly or a little bit you know in mathematical notation it would be Sigma like that big Sigma sum of all of those values from in being zero up to K or whatever I think would be something like that I haven't really tried to figure that out yet but that's probably the next thing that I need to do to make this a little bit more professional or to get rid of this brute force calculation at least so if you know how to do that let me know in the meantime I'll try and figure it out myself because there's got to be a better way to do it then this nasty brute force thing that slows it all down anyway that is the end of this video at last I'll just let you watch that one more time because it's kind of cool I think it's cool Spencer bloody lawmaking and I'm gonna watch it [Music]
Up Next

10:12
Build a Scalable XY Plotter Polargraph: DIY Guide
@dorkmode7655
27.5K views•2020-04-13

30:32
Ultrasonic Transducers: Resonant Frequency Measurement and Horn Design
@imajeenyus42
229.9K views•2017-02-22

54:16
Polymer Environmental Degradation: Mechanisms & Stabilization
@iit
1.8K views•2012-07-10

33:39
How a Student's Question Saved a NYC Skyscraper from Collapse
@veritasium
22.8M views•2025-04-26
Related Study Plans & Knowledge Roadmaps
Structured learning paths in Engineering
engineering
Building Acoustic Levitators: Physics & Arduino
01The Physics of Sound and Standing Waves
02Piezoelectric Transducers and H-Bridge Drivers
03Arduino Programming: Generating 40 kHz Signals
+ 2 more learning modules
14h5 modules
Explore Roadmap
engineering
Building Peltier Cloud Chambers: Particle Tracks
01Cosmic Rays & Cloud Chamber Physics
02Thermoelectric Cooling (TEC) Fundamentals
03Custom Liquid-Cooling Loop Design
+ 2 more learning modules
18h5 modules
Explore Roadmap
engineering
Yagi-Uda Antennas: Modeling, Build & VNA Test
01Introduction to RF and Antenna Fundamentals
02Yagi-Uda Antenna Design Principles
03Antenna Modeling and Simulation in 4NEC2
+ 2 more learning modules
18h5 modules
Explore Roadmap
engineering
ECG Monitor Design: Op-Amps, Filters & Noise
01Electronics & Breadboard Basics
02Op-Amps and Instrumentation Amplifiers
03Bioelectricity and ECG Fundamentals
+ 2 more learning modules
18h5 modules
Explore Roadmap