





![Библиотека SDL2. Подключение, создание базового окна [C++, 1й курс]](https://i.ytimg.com/vi/vHUXuZ5Uplo/maxresdefault.jpg)
![[Ep. 1] What is the Simple Directmedia Layer (SDL) and how to get started | Introduction to SDL2](https://i.ytimg.com/vi/QM4WW8hcsPU/sddefault.jpg)




![[Ep. 35] Simple SDL Audio API tutorial (Not using SDL Mixer) | Introduction to SDL2](https://i.ytimg.com/vi/hZ0TGCUcY2g/sddefault.jpg)






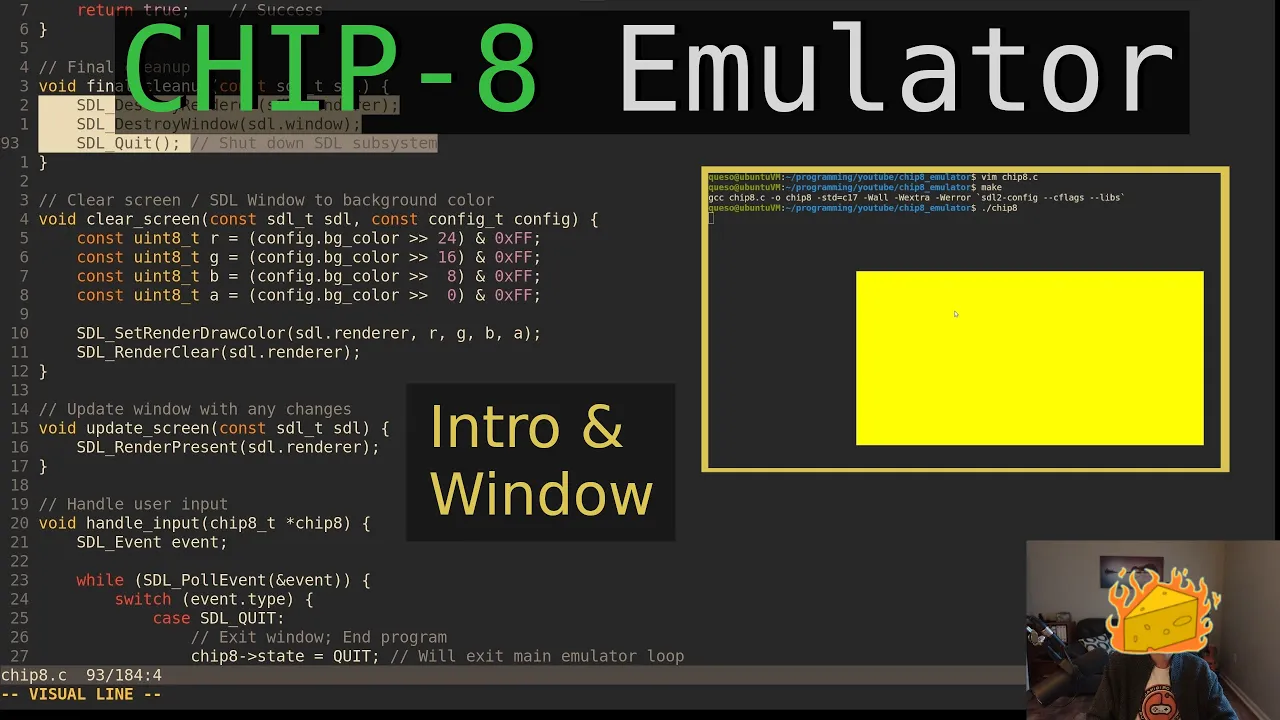
This tutorial demonstrates how to implement the DXYN instruction in a CHIP-8 emulator, which draws an 8-pixel wide by N-pixel tall sprite from memory at coordinates specified by registers VX and VY, using XOR logic to toggle pixel states and setting the VF flag if any pixels were turned off (useful for collision detection). The implementation involves reading sprite data from memory address I, clamping coordinates to prevent screen overflow, and rendering pixels to a display array that is then drawn to the screen using SDL. The tutorial also covers loading test ROMs, initializing the CHIP-8 machine with memory, registers, stack, timers, and display components, and implementing basic instructions like clear screen (0x00E0), return from subroutine (0x00EE), set index register (0x6XNN), set register (0x6XNN), add with carry (0x7XNN), and jump (0x1NNN) to enable drawing the IBM logo correctly.
CHIP-8 Emulator in C and SDL2: Drawing a Logo Step-by-Step
Added:all right let's continue with this chip eight interpreter or emulator as you will uh where I left off I was about to get into I think fleshing out the chip eight abstract machine as far as how it's laid out with memory and registers in the stack and timers and everything and actually emulate instructions and get on with that I'll probably add some debug output as well so we can see what's actually or what should be going on when we run the instructions so before I get to the code I want to get some test ROMs so that we can run and some actual code and see if we're executing the instructions in that code correctly or not right I need to get some code to run to be able to test if it's running correctly and I haven't written my own chip 8 instructions I don't have a I don't have a debate assembler or disassembler like octo or anything but that's all right some kind people on the internet have their own this guy creepod tripod however it's got a demos games programs and things and this sort of repo here so I'm going to use the at least to start off with the IBM logo chip 8 code here and you can't really look at it's just raw you know bytes the op codes but it'll display the IBM logo but there's also a bunch of other programs and he's got games like airplanes bowling okay if you want to play bowling breakout brick rocket something tank uh he's got Tetris down here somewhere so we we have some good things to test some of these surely have sound as well to test that later so I'll be taking his you know some of the ROMs from here graciously put on the internet cj1128 I'll be using for the VT test sort of a test ROM here which will display it can display an error code according to some instructions that are good or not or at the end if everything's good it'll say I think Bond code or good test but there's also a test op code um ROM that tests other things which in pushed out a little bit more core x89 this guy's repos persons repo this tastes this sort of we can say category of instructions although they aren't really split by category they're kind of random in the chiv8 spec that doesn't really say you know 80 and hex like this range is for the aou on the cosmic or anything I think that's what it was for but it doesn't I don't think it necessarily says that and the uh and the thing here you know the instruction listing it doesn't there they're sort of randomly laid out sort of not but anyway I'll be following and emulating hopefully up to all these instructions I'll probably use the Wikipedia page instead of this one and just because they have it laid out and they say the most common ones in use rather than how it was originally was as laid out here I'll be doing that but as far as the test ROMs are concerned I went ahead and get cloned I got the test op code from this repo I got the BC test from this person's repo and I got the rest of the ROMs from this guy's repo just to you know have some different things to test with and run later so I did that on Ubuntu so that was where I left off I think I just put them and extracted out here yeah some cheap eight ROMs which is what I call the the tripod stuff so I got those there so I'm just going to move her coffee I'll copy over rather the IBM logo into my current one here and then I'll also get the test ROMs which I call Chip 8 test ROMs yeah it should be test rounds whatever I have in there VC test we'll add here and we'll do the op Code test as well all right just so I have some test ROMs to work with but I guess I'll probably start with the IBM logo that's all right so I want to be able to run that and execute the instructions in there so I'll get to that but we need a place to put the instructions and to run and we need a machine to run them so I can lay out the machine here first I'll probably follow along with yeah like I said how chip8 has their uh well Wikipedia has the chip eight thing laid out here and there so memory originally they had 4K memory I can just go with 4K as well that's fine so we'll say that's going to be the ram of our chip 8 machine our object here we're gonna have 4096 a thousand in HEX or we can have 4096 units you know that's the ram that's the memory of the machine we had some registers I mean parts of the ram we're reserved for display refresh and the call stack and things I might just keep these separate just to make things easier to work with in case I don't think we'll find ROMs that use opcodes up in this range but as far as having like a pointer to an area and RAM that we can offset as an array or just having separate arrays outside of the ram like for display refresh or the subroutine stack or for the variables the data registers it doesn't really matter either way it doesn't use a bunch of memory either way really so I'll probably just keep them separate to have a sort of simpler solution when I say that I mean something like you know for display refresh for the graphics we can say we have a display here and ultimately we're going to check if a pixel is going to be on or off so I can make it Boolean that's fine and we'll have 256 well originally is 256 bytes really will have one value for each pixel that we're affecting which originally it was 64 by 32 this should be more Dynamic according to what we have in our config of course so I might change that in a bit so we can either do it this way or we can have say a pointer or something and the pointer can be towards a location in Ram so later on we can say like we made that a pointer the display can be the location and RAM of um ff0 right or F zero zero rather the uppermost 256 bytes of ram f-00 to FFF right below the 4K limit so we could do it like that and then later we can offset by like display 10 or wherever our XY coordinate is going to be and check the value in there bit by bit when we're drawing an xor with a Sprite that we're drawing on the screen for the display later on for the dxyn instruction right or it can have a separate array out here filled with we'll say however many pixels that were ultimately going to be emulating and we can say is the pixel on or off and I feel like that's an easier way to do it this is 2048. of course this would have to be different if we were doing a super chip or a different extension that had a larger resolution right this wouldn't be hard-coded to 64 by 32 would be something else so there's that aspect as well I could make this uh the Boolean pointer and then dynamically allocate as needed and then we'd have to remember to free it later but that may be a better thing to work with if we want it to be more configurable like for Superchip later I'll just start off this for the simple thing doing 64 by 32.
and we'll just say this is the original chip 8 resolution that we're going to emulate later on if we do Superchip I can change it to the pointer example and dynamically allocate or we can have just a separate struct or something so we'll do and let it original lead original shift 8 pixels I guess original chip 8 resolution pixel sure that's that's fine we'll be checking if these are on or off later so figure Boolean that's fine if it's true or not that's the Raymond display other than that we did have a stack a subroutine stack which originally was only 48 bytes uh in the machine I guess I can go it's 36 37.
where the registers originally before so we could make an array for the registers that is just a pointer to Ram or just a separate array again the 256 byte area was for display refresh it was 256 bytes because it was checked a bit at a time so 256 times 8 is 2048 and 64 times 32 is also 2048 so originally the display must have checked bit by bit with the the pixels and the display refresh those bytes the bits in there along with the bytes from from the Sprites Holden data somewhere below here in the user ROM that was loaded but okay the stack was put down that's the instructions the stack was put down here 48 bytes for 12 levels of nesting which I was kind of confused about because if you're if you only need to store one address at a time like if you call a subroutine you need to store where you're at and then you jump to where you're going and then you retrieve the location of where you were when you returned from a subroutine to really just have to push one address and then pop it back if each op code in each address is going to be only two bytes you know 12 times 2 is 24. I'm not sure why it uses 48 for 12 levels of nesting on if they're storing two addresses somehow I'm not sure why they're storing two addresses but I guess I need to read up on that more I figured that would only use 24 bytes but anyway that uses 12 levels of nesting the addresses typically in use are only going to be three three hex digits or 12 bits and for the instructions later they're only going to use sort of 12 bits for the address as well I don't remember what page it was on this page 15.
so when we go and we jump to an address they're only using 12 bits right when we do a subroutine it's only using 12 bits so we only have to refer to 12 bits at a time for an address okay but what also what I mean by that is that we can use 16 bits so we know we'll always have enough room so I can use 16 but say for the for the subroutine stack and it originally only had 12 levels of nesting we can increase this if needed but I'll just put it there we'll have these all be separate arrays and not just pointers to Ram although that would be more correct and more to how it originally was a developed that's all right other than the stack we had registers as well which were bite size I believe 16 8 Bits so single byte data registers v0 to VF of course those are stored in Ram originally as well I'll just make it a a separate array VF as well doubles as a flag a carry flag in some situations or a not borrow flag and one subtraction situation uh or well multiple just in subtraction it's the no borrow instead of being set on borrow but that's okay and it's set upon pixel Collision there's also an address register I which is 12 bits wide according to the addresses being 12 bits but I'll make it a 16-bit address yeah we just did the stack 12 levels that's okay so let's do the V registers right let's lay out the we'll lay out these data registers here this would be zero to be F these 16 registers and we'll do I the I register so the v1s were all just one byte and we'll have 16 or you can think of it 0x well 0x1o either way I'll just say 16 that's fine these are data registers the V 0 to the f and we'll have I I will be the index register which will index memory from okay what else did we have what else do we have here we have timers two timers a countdown at 60 hertz the delay in the sound time or how large are those well if you look to where the instructions are that use them delay in the sound timer they're used with or for some abstract data register VX and VX is one byte and we're adding to these we're taking from there and we're setting things to it I think somewhere along there I guess these are the only two that said oh here we go VX is equal to the delay timer and you can select the set the delay timer to the X the value in there so I'm assuming it's just as big as one of the data registers just one byte so max of 255.
so I'll set the timers up for that I'll have one bite for the delay timer as well as one bite for the sound timer we'll say decrements at 60 hertz twin above zero yeah I'll just do that that also does and play a tone into this decrements at 60 hertz and plays tone went above zero that'll actually play a sound when it's above zero the delay timer is just used for like game or program delays like if you need a a static Sprite for an enemy to move across the screen like in Space Invaders or something every so often so many timer takes or you know however many hurts and then you would have a delay time read so you set it to 10 so that every 10 times 60 hertz every 600 Hertz it would move across right the screen something like that is there anything else we have up here there's one more thing the keypad right input traffic graphics and sound we have the display array so that is all right beeping sound is played yeah we'll do the hex keypad 16 Keys zero to f really these can also be like if it's pressed or not so on or off to a binary state so I'll make these booleans as well called a keypad 16.
xcxa decimal is that how you spell it accessible keypad 0 to F and that I think right now is all we need I might add one more thing and that's just the name of the ROM that is currently loaded which we can get from like a command line argument or instead of default or something this could be malloc or if we pass it on the command line this can just be like Arc V1 or something but I'll say we have a currently running ROM in here okay just the name of that the name of the file that's loaded that this is or will be emulating we have that there I know I had init chip Eights we set the state here all right so we can set the other things or just set them to zero and that wouldn't be too bad it's already set to zero before we call this so is there anything that has to be initialized here rules will take zero which will be counted as false so that should be okay other than that it would just be the ROM name that we're going to load so I guess I can pass that in just have that be maybe this that might be all right include ROM to chip a memory well we need a font as well I did have a font so let's load fonts as well for say load font and load ROM and then we need to set the defaults I'll just set this down here set the defaults the state will be included within there because we'll have to set the program counter at least oh I did not set that that's what I forgot forgot to set our program counter because it's not technically in the reference as well as these things but these will be per instruction but the program counter is sort of an abstract notion that we're pointing to a certain location in memory that we are taking and running an instruction from or while getting an OP code from these two bytes and we're running that and emulating that instruction so we need something for that a register otherwise it's all just include it and here is a sort of separate abstract register it'll be as wide as an address at least which is 12 bits I'll just make it 16.
it'll be pointing and retrieving the currently executing op code or instruction so I'll just call PC for program counter can't believe I forgot that wouldn't be able to run anything without it but that is all right smack down here and it should fate that'll be set to some location generally for chip 8 programs were loaded at hex 200 or 512 so I can set it there and I will also be loading the ROM to that point so I'm just going to set a little constant here called the entry point for the ROM yeah ship eight ROMs will be loaded to X200 we'll just say that and the program counter will load there so that when we start off emulating we'll we will be taking instructions from here which is where the ROM will be loaded so Start program counter at ROM entry point okay so we do need a font I can lay that out just statically up here I guess I don't know if anything Global needs it though so maybe inside of Chip eight it'll be a decent size I'm trying to think I can't set static data within the type diff right because it's kind of just like a templated type this doesn't really have data like I can't do I can't do this right I can't set the data there no it doesn't like that okay all right that's okay I'll just put it within the initiate function then that's all right so we'll say we have a constant number of bytes here a sort of compile time array sort of I know c23 is going to have like embed so make an easier way to do this but that's all right this is not the best way but we'll say we have a font and it'll be a certain number of bytes here and the font is I think laid out well they don't have it on this page I think it's in here somewhere in here I don't remember using the display instructions that kind of explains you know like this is an eight like we have these bytes in memory and those are laid out in bits there's one one one one zero zero zero zero for f zero and so on for the rest that way when we read it and display on screen the bits that are on that are one will be drawn if it's that are off won't it'll be sort of the background color the bits that are one will be the foreground color so that's what will happen when we draw things on the screen but I just want the data laid out for all of these I know that's in here I just don't remember um I don't remember where that's at I think it's this standard digit display format yeah so these so this kind of lays out how the the characters are zero to f so zero for example is f zero ninety ninety ninety F0 so I I can just take these bits and lay them out as they would be and I think or I know that uh some other Pages have the ROM already laid out like this guide might probably does yeah he already has the the bytes laid out so I'm just going to go ahead and copy this over and you know we'll just load it into into the ram all right so I just typed in or copied over and all the numbers here for the fonts they're actually laid out in groups of five bytes each and 16 by five so this is 80 bytes overall I'll just have you know laid out it's an array of unh's and it's just going to be constant I think that's laid out correctly yeah it just says it's unused and on the variables here okay again these are bitmapped so F0 again is four ones and four zeros 90 being I'll just eight and one and then all zeros but these are laid out you know top to bottom left to right these five bytes so in effect we would have when drawn on the screen you know we'd have X 90.
followed by another X90 and another hex 90.
and then another F zero which is a great series that needs more games Nintendo but that's all right so when we draw it on the screen if we draw eight pixels at once it would have a sort of gap between them but if you just look at the first sort of nibble here the ones are laid out you know in form of the zero so visually it will depict to the zero when drawn later on the screen because we'll we're basically taking bit mapped Sprites here when it's drawn it's just we have some Sprites already made if we say we have a font that's already going to be here so that's the default font for tip a of course you can make your own and load it right and draw your own characters if you want that's just the default that I'm going to work with um to load the font uh we can just do like a mem copy that should be all right we'll copy into the RAM and the chip eight so Chip eight Ram we can put it at zero we can put it wherever we actually don't need that the Ampersand if we just put it directly in zero because it's going to be a pointer to the start of ram so we could just do that but I'll say you know explicitly we're putting it at the zero address here that's all right so it'll be 0 to 80 or 0 to 79 since these are 80 bytes sixteen by five I'm going to copy in the source which is going to be the font and I think we just do size of font I think that's all I need to do there I never remember the order in which things go yeah destination source and in okay they're not going to overlap and we're using that ROM name is unused that's okay so we'll load that next so let's say we have a file pointer for the ROM and we're going to open whatever name we passed in I'll open it for reading and we're going to do plain bytes we'll say binary read that binary data if we don't have the ROM then I'll I'll say we failed if we pass like a bad file on the command line or something we'll definitely have that as an error condition so I can do sdl log I guess since we're using that in other places say um say ROM file ROM file percent s is invalid or does not exist I think that's reasonable I'll pass it the wrong name and it's storming today that's nice so that way we have those unused variable errors those will disappear too few arguments that's all right so assuming we loaded things all right then we'll be good to go we do need to load it though so how do we load it well first I need to get the size assuming it's opened all right we do need to close at the end remember to do that um but how do we get the size let's just seek to the end the classic C way of doing it we'll seek the ROM offset zero at seek end so go to the end of where the file is opened effectively moving nowhere but we're still at the end of the file and we can have I believe it's long but F tell will say where we are at F tell is long so we'll have long ROM size let's say that's a constant and that will be F tell ROM so that'll get the number of bytes that we need to read from the ROM into the ram that's the size effectively well first I can rewind to make sure that when we read we won't be at the end of the file from this FC call so let's just get and check ROM size this will be so we open the ROM file so let's say if the size of the ROM is greater than whatever maximum size we have I guess I can do that as well let's do that as well I have a constant um the max size will be the size of ram so I can have size of well if we do size of these will have to be size of so that's okay make them size t size of returns a size t so I have the size of ship 8 RAM and I don't need no need parentheses if it's not a type because size of is an operator so we'll subtract off wherever the entry point is so that's the maximum amount of bytes we can stick in the ram so if it's greater than that amount then we'll have an error of the file we chose is just it's too big we can't load it so if this is greater than the max size I'll have a similar thing don't do that can I go back to where I was okay I don't like it when the jump list is jumbled up if it's greater than the max size I just want to you know put another error here ROM file is too big this ROM size percent z u do this and we'll say Max size allowed percent z u and we'll say that is the name we'll have the ROM size and the max size okay so we'll at least print it out on the printed out for the on the terminal for the user to see on standard out or standard error we did rewind okay so we can read it in so let's read that sucker in if I remember the order that things go in we're reading into a pointer a certain size number of members of that size and stream okay let me just grab this because I forget things all right there we go so let's read into RAM at the entry point starting at the entry point reading that ROM the size will be the ROM size and the number of members let's just say it's one and the file stream will be from the ROM file okay assuming that was good then we read it we could check the return value for f read as well I suppose if it's not equal to one because that's what it should be equal to a lot of error handling do I need all of it I mean it's good to have rain it's good to check things could not read could not read wrong file into shift eight memory I'll just say that okay assuming we could though we would be all right with that and we'll have clothes at the end make sure that's cleaned up then we can set some defaults so we should only need to set these things we could set the ROM name as well I guess that's what I was doing up here right I called it ROM name in there so I could set that and it should be namespaced from the type def struct so it's okay that they're named the same thing these will all be set to zero other than the PC I don't think we need to set the values for the rest of these so that should be okay this card is the const qualifier oh yeah I did make that a constant didn't I um yeah so we'll be passing around the RX that's not the best way to handle this but we'll just uh fudge that right now so in at chip eight we also need to pass the ROM name which is going to be on the command line we'll say it's Arc V1 or we can grab say the wrong name is ARG V1 if that reads a little bit better maybe that'll read a little bit better we'll see I could make it a constant though and just set that that's true I actually could do that we would just have to set it as a constant within here but I think that'll work of course this will say it's a variable length array right because it's at the end of the struct which is not really what I want to do it's an invalid initializer regardless yeah flexible array member I don't really want to do that we can just set it be a to be a pointer and I can't initialize it to that that's lame that's okay we can do that that's fine so we're loading a ROM given a file name on the command line we loaded the font so if we need to print font characters or Sprites with those we can do that so we need to actually emulate something now now that we have a ROM loaded so I can do that here I guess we can do this and set the state that's all right as well if we don't have it to where it's paused but paused would be good for debugging so we can know what's happening so that would be good to set that state and we're passing in shape eight already and setting the state so let's have this be like the space bar which I believe is the space key so let me just do this all in here that's fine let's do a steel case space space bar and this will pause the the emulations that we can look at debug output and things when we're you know going through here I'm assuming if I pause and the sound is playing the sound would play forever so that that part might not be good but other than that this this should be all right so I want to set the state deposit or not so if it's not paused and it's not quit then it should be running so if it's currently running I want to pause I'll say or say if it's running we'll set the state to paused you know pause else it should already be paused because it's not quit so I will set the state to running in and that will be like a resume and the reason I have those is because I want to print out to the screen otherwise we don't know nothing's going to be going on so I'm going to also print out and we'll just say like print out a message that says paused so you will have to have this running or at least look at the terminal output unless we want to make like a a p or something that we put into Data maybe after font or something and we said I we can use chip eight instructions we could put the data for you know the word pause to repeat or some Sprite or something and then we can put in code where The Interpreter originally was maybe after the font data at the start of RAM we can put in chipmate instructions to make a sub routine you know to draw a paused on the screen that might be something we could do later and this code would like jump and run that subroutine that would be fun but I'll just write out something to the terminal right now so we can determine um after we set the state I'll just return so I don't get errors for fall through or anything and that should be okay no member name running because the state needs to be running if the state is running so if we the reason I did that is so that this would work so if it's paused we'll just have a busy Loop so we can see right now it's not going to emulate anything but that is okay we can at least test that pause works and we don't have anything that we're passing on the command line we're not loading a ROM so this will probably give yep the ROM file doesn't exist so we could set a usage that would be good let me do that before I forget just do like um default usage message for args so if argsy is less than two they need to pass at least one thing on the command line I can do sdo log but it's not initialized yet so let's just say do the F printf the standard error say usage and we'll give the name of the program and we'll load a ROM name so later on we'll have other you know other flags and things but this is okay for now and that will be ardv0 to exit exit failure you failed okay so if we run it with nothing it'll say hey we need to pass in something okay so let's pass it in the IBM logo it technically will load it it just won't be doing anything but I'll test if uh yeah pausing works every two times I press space it toggles right now it's paused press it once to toggle it off and again toggle it on it'll be paused and halts emulation and this will be yellow if we don't change that back so um is it set config yeah it's change that back now that we know that's working set that back to black okay back in Blacks let's emulate the instructions here let's have a function called emulates instruction we'll give it the chip eight machine so it can affect the state and go through and emulate we can just start emulating one at a time okay that's key down let's do it here so we'll say emulate one chip eight instruction okay so how do we actually load and get stuff from the instruction well the ROM is set up at the entry point the program counter is set up at the entry point so we'll need to grab instructions from that entry point according to the program counter we'll need to grab some op codes and things and we don't have we don't have an instruction laid out for you know how the instructions are going to look how we know how to interrogate the op code and run what it's trying to tell us so I will actually again before we emulate we got to set up something else I'll put it before the chip eight here we'll have chip eight instruction format another type def struct if you will call it an instruction T that might be all right so I'll have we know they're two byte big Indian op codes we'll say we have an OP code there we can mask and shift out the bits for the other values but I can also have them just separate here so that we pass this around and we can say we have like an instruction dot X we can use instruction.nnn for the address so it matches the instruction sort of listings that we see on Wikipedia or elsewhere so I can lay it out like that originally I wanted I wanted to do a union and do bit Fields but I was reading and like if I did an anonymous Union or an anonymous struct here the union with the op code if I had like and then n is the first 12 bits and then just padding so don't worry about it and then we add another one that had like NN as eight bit you know so on and so forth we did stuff like that for structs for each of these I think that would work but technically bit Fields aren't they aren't guaranteed to be one right after another even if they're all like in the same sort of addressable alignable space however you you want to say that so even if I laid them out like they would be all packed together they're not guaranteed to be all packed together it's I think it's implementation defined and GCC and clang should work to her that does work but I don't trust it because the spec doesn't really say that it's going to work that way so I'll just have these be separate Fields it'll take up a bit more memory that's life we're not using too much here so that's okay but I know for the instruction format you know we'll have these basic pieces we'll have the lower 12 bits being an address up to nnm or the lower eight bits can be and then the lower four bits can be this or the lowest four bits X and Y will be four bits as well and that'll be it so an instruction light like 8xy3 the first four bits will be eight and we'll grab the values for X and Y the shift to mask off these four bits and the three the three would correspond to This n c n and n is this n and so we'll lay out the instruction format like that so 12 bits we'll say the max is going to be 16.
I don't like doing this I wanted the bit fields to work but I feel like I'm just asking for trouble and somehow I'll mess up it just means we need to do the shifting and masking ourselves but that's okay we can also hold larger values than 0 to 15 which is not great so I could make these all actually structs they just won't be unions I should change that back we can make these things like x y and N these four bit values we could make these you know four bits un8t and that would be okay that way we would constrict this to a 0 to 16 but I don't know I guess in regards for Simplicity I'm not going to worry about it unless we have some ROMs that are faulty and behavior on and we'll just lay it out like this so far this will be a 12-bit address or constant this will be an 8-bit constant this will be a 4-bit constant this would be a 4-bit register identifier the same for y EP that'll be our instruction format and I can also carry around within chip8 just so it's not separate we'll say we have an instruction T well I have an instruction so this will be the currently executing an instruction that we can use for debug purposes and just to have it all wrapped up in one nice struct here this is a strut not a union yet to change that okay so when we go to emulate and we pass it in there up here to get the current op code say this op code will be reading from Ram at the program counter that's where we're currently executing instructions from or gathering or gathering data from and it'll be two bytes big Indian and I'm on x86 this is a little Indian architecture so I will have to grab the first byte shift it over to the left grab the next byte and or that in for it to read and execute as a big Indian value so I need to grab this from the program counter I need to shift that over by eight I need to order that with the program counter plus one the next byte that should be okay has no member named op code does it not instruction chip8 instruction dot opcode that's what it is and there's no PC so the one disadvantage of doing things like this is that you will accrue some more uh boilerplate right just sort of with the syntax here but it does keep it all wrapped up nicely so I do like that um wrong Ram so we're getting the next op code from Ram from the ROM so I'll just say Ram and if we want to read the next opcode on the next go around I will increment the P the program counter by two since although all of these are two bytes and length so program counter so I'll do pre-increment program calendar for next op code if we don't increment it now we'll have to do it later so we might as well do it now to make things easier as well as there are some instructions that check for Value check for a condition rather and they will skip an instruction like for jumps conditional branching and it's easier to just increment it here than we can increment it again or not later on for those instructions it makes it a little easier to to reason about if we just do this first here okay so if we emulate the opcode here I'll there's not many there's only 35 op codes so normally it would be good especially if you have like let's say another older architecture the z80 the 8080 something with more than 30 some odd op codes you probably want to have like instructions for different classes like binary operations like add minus subtract conditionals and things or you can have like an a function per single instruction in this case we only have 30 some odd op codes I'm going to take the easy way out even though it looks kind of ugly and just have a giant switch statement that we evaluate in but each op code will only really take like a line or two other than stuff like the display of code oh we can mask off we can switch on the op code the top four bits if we sort of want to go by you know different sort they're not really put into categories but we can think of the first four bits as like a sort of category of the instruction so we can say if the first four bits are zero we know we'll be doing a a clear screen instruction or a return from subroutine if the first four bits are eight we know we're doing some sort of bid operation assignment something for like the aou here and so on so forth so I could do that we want to fill out the the constants and the register IDs and things if we got them so I'll do that here as well so let's fill out instruction format current instruction so this will be chip 8 instruction we already have the op code we'll do n and n for example that will be the op code this is why I wanted bidfields to work you wouldn't have to do this manually but bit Fields do work I just and I just feel iffy about them maybe I'll get over that and just put it in later because it makes things easier but we have the op code masked off with the lowest 12 bits that should be n and n although it isn't hard to do this and then we'll just be the lowest eight bits there yeah and the singular end will be the lowest four bits there so that should be okay and then we have X and Y which will need to be shifted if we have an original instruction which might make more sense we have like d x y n to get X we'll have to shift over actually no we can we could isolate um and mask off this and then shift over by eight that might be easier or we or I can just shift over by eight and mask off the lowest four bits so either way I could end with 0 f zero zero and shift over by eight or I can shift over the top code by 8 and and with zero f i don't they're both kind of the same so I'll just do that we'll shift over by eight and I'll do this for both of these except y will be over by four yeah so this will end with f and this will end with F yes okay so y will shift over by four so it'll take the place at the end and we'll just grab these four bits yeah that'll be all right say I add something else and make it like the category or the class let's just say category and let's shift over by 12 and I'll grab the top four bits here I don't know why I don't really need to do this since I can just do it within the switch statement so it might really not matter yeah never mind never mind that's that's more work that I need to do I'll just do it once in the switch statement that's that's fine foreign defaults uh we don't have the op code let's do put s if we write everything out to the terminal we'll just say this is unimplemented Maybe or we'll just do nothing um I can have debug output that says it's unimplemented let's just do that unimplemented or invalid okay okay so we grab the top four bits there so let's say we start off with like well not this one because we don't have machine code for the RCA 1802 so that one will be invalid we can start off with display this will clear the screen effectively setting all the graphics pixels and everything off or to zero or our Boolean display array we can set those all to false what we do here pretty simple then when we get when we go to draw later every 60 hertz we can check if the pixel is true or false this will set them all to false so we'll just draw a background color if any aren't true or on then we can draw the foreground color for Sprites and things but we can start with this so if the top 12 bits are zero so zero we can see which instruction we have because we have either clear screen or return from subroutine so let's say we only have two cases and if else would be okay here or we can do another switch but I'll just say if if the lowest 12 bits are e0 so this is zero zero e0 and this will be clear the screen foreign function that we did which I don't really need because we can clear the screen like this or we can clear it by setting the display refresh which is kind of emulation wise what we should be doing so this is sort of uh for sdl but I'm not going to call it that but that's okay so I go back to where we were eventually down here down here okay clear the screen let's just clear all the graphics pixels there so we'll have chip eight display and I'm just going to memset all those those will all be booleans so I will mimset that let's say we grab the starter I think it's zero and length so it's yeah the pointer NC size and the first n bytes with C okay the value I'll put zero or false and how many will do the size of display which I think will be a pointer but I'm hoping that works as an array suggest parentheses around assignments Truth uh equals I need double equals forget that okay otherwise let's say if the instruction equals EE which that is returned from a subroutine will have to implement that I don't have well I do have the subroutine stack I don't have the call sub retain function to n and n we could do that as well returning from a subroutine I'm going to assume something's on the stack so it's kind of weird doing this out of order doesn't make too much sense but if we start at the bottom that's kind of what we're doing we're we'll retrieve a value from the subroutine stack that is where we were returning to assuming we called something if I could set this up here if we're going off to I'm not gonna have these all be double digits I could do that first that's the only one that starts with two so that's okay so we can assume that we have so I'm assuming there's no invalid op codes for these ship 8 ROMs instead of needing to do like if if the instruction equals two in and in or not but okay we'll just assume that this is going to be correct going forward cost of routine at nnn so if you clear the screen this one will be turned from subroutine okay so let's use the subroutine stack here so we have the stack let's shift eight stack and I'll sort of need to keep track of that though right because that just points to the start of the stack so actually let me this one might have been easier just making a pointer to Ram because I could decrement and increment a pointer but that's okay let's just say we have a value that's either like 0 to 11 or we can have a pointer that points to the stack we can do that let's say we have a stack pointer okay so that I will set up within init shift eight so I'm already over engineering things to a bad degree that's all right what's the address the chip eight stack right um you got 16t is incompatible from 12 okay let's do zero started off at the start yeah okay so the stack pointer points to the start of the stack and I want to add an address to the stack which is where we need to return to that needs to be the program counter so if we're adding to that dereferencing the pointer that needs to be the program counter but is that going to be the incremented value or not the current address that we're executing for this auth code we've already incremented past it so we're pointing at the instruction right past the call instruction that's where we will need to return when we return from the subroutine to keep executing if we didn't increment the program counter here and we added it to the subroutine stack then we would just be executing the same call and doing an infinite loop with a subroutine so incrementing that incrementing it here is okay we're pointing to the instruction that would be executing if we weren't jumping but when we return we'll have to execute that so I'm going to add that as a sort of address to the stack and then I'm going to set the program counter equal to n n in this instruction because that is the address where the subroutine is that we need to execute next so the program counter will equal the n and n value in the instructions so that way the next instruction that we execute that we grab an opcode from will be at the address where the subroutine is so we will execute the the subroutine starting after this point okay store current address to return to on subroutine stack let's do just put it here and set program counter to subroutine address select the next opcode is gotten from there I guess that hopefully that makes sense so that's not too bad it's only like two lines when we return from the subroutine we'll have to grab the last value that was put on the stack grab blast address from subroutine stack we'll say pop it off the stack and oh let's say this set program counter to last address On The Stack so that next op code will be gotten from that address yeah okay so the PC will be the stack pointer so down here I also need to increment this set the value and then increment it not that much so the value then increments it so that points to the next location on the stack push it on the stack and when we pop it off we'll grab the value [Applause] from the stack pointer but since it's already been incremented here we'll have to we'll need the decremented value looks a little odd but that should work decrement and then grab it store it in the program counter and that will be ready to go okay and we'll break assuming we're in a loop or something well it's only running one instruction that should be okay but next time we run this function it'll grab from that address that should be all right and then we'll increment past it so that'll be good so I know we're not doing other instructions but this is an example and also using the subroutine this is this is an example of how the instructions can be emulated and laid out just in a basic switch but I also want to check if we're doing the right things or not and have debug output if it's implemented or not or what have you so I'm going to do that before we execute this let's say we make a different make file Target or something or otherwise we have a macro to find some environment variable Maybe say if we have debug then I'll print debug info for the current instruction so I'll get that from the chip eight I'll just pass the chip eight in there and then we'll emulate and see if we actually get the right result within our sdl window oh let me I'll just put it up here that's fine we'll only compile and put this in the binary if we're doing like a debug not a release print debug info given a chip a pointer and what I'm going to do here is basically just do the same thing that we're doing when emulating instructions so it's not the best way to do this probably but that is all right instead of actually running the code I'm going to print it out like to the terminal so if we have this example I'll just print out we'll say clear screen or clear the screen they won't do anything but then and this will be returning from the subroutine let's say we print out the current address that is happening so we'll say address it could be in HEX Maybe 0x that would be X let's say address can be up to four even though it's 12 bits we'll just say it's up to four if the four hex nibbles here if I do capital x it'll be capital I could do the hash here to put the zero X I just I like the X being small instead of large so that's why I don't do that here it's kind of annoying though we'll say that's the address let's say we grab the op code as well and we have a space and let me do description urges desk and let's put those arguments in there so if we have the chip eight that would be chip a program counter for the address although that's been incremented by two so we'll probably have to subtract two to get the original one then the op code is going to be the instruction Dot opcode okay and then when we run the instruction we'll say the description is going to be for this one clear screen for this one this will be return from subroutine say some of these have new lines in them just for debug output if we get something we haven't implemented we'll say it's unimplemented unimplemented op code so we know if we have a bunch of unimplemented opcode messages that we haven't done those things yet in the current ROM Rama's instructions we're not doing correctly so I'm trying to think do I want to have the values here like for things that are taking from the stack pointer return from subroutine to address to a new address which will be this value yeah I can do that that'll be more that'll be better um debug output here so if we've already well we're printing this out before we run this so we would have to do the stack pointer -1 as well and pointer arithmetic provenance will say that that'll be 16-bit and that should get the last value there so we'll grab the value from stack pointer -1 because that will be what this will be we just aren't decrementing it yet because I'm calling the Dibo function before we actually run the code so it will be V4 current value on the stack so that should be -1 there that should be okay I believe okay all right otherwise if we don't have anything and we haven't done the instruction yet we'll say it's unimplemented so I know I haven't tested this yet but we should be grabbing the op code from PC and incrementing it so it should be at 512.
from initi B8 from the entry point that we set X200 because I set the program counter there okay and we're testing the IBM logo so we can see what that does that should probably start drawing the logo somehow it might not be working but we can just see if that works as far as like telling us what's wrong we should be able to pause it doesn't say anything so I know that that's not working so that's not good that's okay nothing's going wrong somewhere I'm not actually doing what I thought I was doing that's all right oh so let's just print out what we're doing so far so that I can see if we're actually doing anything because this Center oh I'm not printing out debug info because I don't have the debug macro duh it may be working duh let me make a debug Target here let's just do the same thing I could make this line into a variable and just add the macro but whatever I'll just copy paste do the same thing and I'll put Dash the debug so we can do make debug no run debug and then we can run chip 8 with the IBM logo and we should have output now there we go so I'll just pause there so we have a bunch of unimplemented opcodes we did start with clear screen I should put a space there to look better but address starts at 200 so we know that that's correct e-e or well zero zero e0 clear screen then we have this a22a yep we don't implement the a or six or D's or sevens but we do have debug output which is nice now this isn't right code f which is this is all printed on one thing there which is not great but okay I guess because the op code starts with zero when we're not handling those and that might be data that we're not getting looks like some stuff messed up there okay but our debug info prints conditionally that is nice let's put here else put that there else will do this it's unimplemented okay so it looked like the one was a that was not implemented yet so we can just start with the ones that are actually being used in the ROM and we can go from there I'll put these in ascending order here so that was it started with an a it was a224 I believe but there's only one a instruction anyway and that's for setting I to n and n so let's Implement that that sounds very straightforward said index register I to n n we can do that by setting chip 8i because I do have I right yeah set that there index register so we'll set I equal to instruction Dot N N Easy enough and then I will add that to the debug as well so let's say that I to n n and let's say we have the value of n and n I will have the 0x percent o4 to print that out and I'll just print the value here so I could say what I was before but it'll be this value after so this should be fine that'll be all right and that is how we're going to go through and add instructions and go through with debugging so that didn't do debug so we won't see that there so let's at least see if that instruction is there set I to n and n which is 0 2 2A is that correct 22A that is correct so there we go I was going to put in a space there wasn't I but we see we're setting index registers and then we're calling seven something and then we're calling D which I know is the draw or display instruction we're calling six and then drawing calling seven setting I again and drawing okay so I think I is being set to a location on the screen that we're going to draw at is how this works but I'll just go through these in order we'll do six zero zero C next as well as put a space here so that looks better but that's this is sort of a for me an easy and simple way to print debug output conditionally for debug release well not not release the debug you know executable whatever not a release production exe hopefully that makes sense hopefully this is an easy enough way for you to get ideas for that if you don't do that I've recently started doing this so I think it's it's good it's not great but it's okay I don't have a live environment and a hot reloading of my code so this is the best I'm gonna get right now but okay we'll do case six which I think has a couple different op codes no actually I was wrong only has one so that's vx to n n okay I can do that so six is it vxn or 6xnn so VX is a register this means we're setting the data at register VX equal to NN so it's not X we're using X as a a sort of register offset so V offset X the data the bytes in this register is going to be set to the value NN so we can use the data in that register later on so this is the chip eight instruction dot x equals shift 8 instruction dot NM and I'll put that in debugging as well so we'll say set register VX and X I can do just X that should be all right to n n which is going to be yeah I'll just say this is n n so I was considering just putting the hex digits here but the instruction has specifically eight bits so I think it makes more sense in debugging to say or setting these eight bits and that'll be 2x instead of four so we'll say it's like that so X we can just grab X so we'll set VX equal to NN which will be NN okay exit out of that see if we're still good to go chugging along here so 6 0 0 C should set v0 to the value C so the sets V 0 to NN which is C so it's V1 to NN which is eight B ones and N okay and then we have d01f unimplemented opcode okay so then we'll go across D oh the display out code which is probably uh the most difficult one so that's okay we'll get it out of the way early get that out of the way early that's all right and we'll actually get something to display on the screen for our efforts so that is good as well so this is d x y n which is described as draw a Sprite at coordinate vxby width of 8 and height of n okay draw a Sprite at coordinates x y let me put it this way draw in height Sprite because it'll be for in rows at these coordinates it's red for memory location I but we'll just save that um red from memory location I do this VF is set the f is the carry flag is set if any well let's see how this works here I'll say screen pixels are xored with Sprite bits yeah so they will be screen pixels will be set off if the Sprite bit is on and it is on otherwise if the screen pixel is off and the Sprite bit is on it'll be set on it'll draw on the screen and if the Sprite is off but the screen is on it will stay on because that's how xor works okay yeah carry flag is set if any screen pixels are set off this is useful for Collision detection or other reasons I know it's used at least partially for Collision detection so that's why I'll just try to explain that there so I had trouble with this and when I've done one of these emulators before which is why I have a guide because I don't like doing things myself because I'm not a smart person so he has a dxym display he has a decent explanation this is what I'm going to try to draw the IBM logo is a decent explanation here somewhere I'll just click on it some pseudocode you know we want to get the original values and draw from there so there is no wrapping on the display at least originally so if we're drawing a Sprite we want to stop at the right edge of the screen even if we're going to like overflow we also want to stop at the bottom edge of the screen for the Y value so if there's only half of the Sprite that's on the right side of the screen we're not going to draw the other half you know wrapped around we're just going to stop drawing where it gets cut off so that's something here we need to have modulos set off the carry flag and it will be set on if you know this Sprite pixel is turned off according to the instruction we're in rows get the byte of sprite data from I okay so let's set some values here so let's have the value and and VX so Chip a instruction X we'll just grab that original value and we'll take that modulo 64 or and 63.
either way and this this will be the sort of resolution that we're working with so I could say we do this with the dynamic resolution so let's say we pass that in as well just have a lot more stuff on the stack just deal with it not great we could just pass a pointer that's all right we'll pass the config there and go back down let's end it with config Dot don't remember what I called it window width yes okay modulo we could and it with with minus one if we if we're certain it's a power of two which it should be but that's okay let's also get the Y and these will be coordinates so we can put x coordinates and y coordinate speed y modulo window height the carry flag to zero and go for n rows let's set it to zero first off the f equals zero these aren't booleans initialize carry flag to zero so for n rows then we know n is four bits but it's una defines we'll say I we can go zero to n that should be okay so we read each row of the Sprite here Loop over all in rows of the Sprite so we need the nth byte of sprite data from the memory address in I but do not increment I okay so we need the nth byte of sprite data let's say U and a t let's say Sprite data that's fine equals the data for memory from Ram where the memory location is I so I but we need to offset from I I is the Base address of the Sprite that we're drawing so we need to add sort of the iterator or the the increments or whatever you want to call it here I the little I will add to the big eye it makes bytes slash row of sprite data or in yeah infixel is tall so for each row we'll get the next byte for each of the eight pixels or bits in this row if the current pixel is on and the pixel at the coordinates in the screen is on turn it off and set VF to one so we need to Loop through the eight pixels or bits in this row so let's have a an inner loop here J or what have you will start it at seven make it be an INT have it go down to zero inclusive and we'll subtract so if I want to see if that bit in this data is on we'll say if Sprite data and one shift left by J so we're testing the bit left to right because we'll ultimately we'll be drawing left to right anyway so one shift left by seven will be the topmost bit and then it'll test one shift left by six which will be the you know the next bit so on so forth to get to Bit Zero which is the first one but if that is on we need to get where the display data at X Y we need to check that as well so that's a Boolean I can check that that's fine I know originally it was x-ord so I'm trying to think of the simplest way to do this not necessarily the least amount of code because I could just xor it right xor screens data with Sprite bit and that would set it on or off but I do need to check if it's on first so I guess that's what I'm doing here if this is on and the screen data is on which is Chip a display of X and Y so that would be y coordinate times the width which is window height it's a Boolean so we can just check this this is true and the y coordinate times the window height plus x coordinate that's how I convert 2D to 1D space then those both would be on and we had set the carry flag in that situation and we'd set this display off but let's just set the carry flag here which would be chip eight V 0 f equals one so let's just say if Sprites pixel bits is on and display pixel is on set carry flag okay but if we want to export we can do that exclusive or display pixel with Sprite pixel slash bits let's just do that because that is how it was configured originally let's just grab this I like code to be explicit so you don't have to guess what it's doing but you know we may have to take one for the team here and say this is going to be exclusive ORD with the Sprite data here I could just get a pointer to this as well so I won't have to type it out repeatedly that may look better but that will set it on if it's not on and this is on because exclusive or so if they're both opposite it'll be set on if they're both the same it'll be set off if it's off it'll already be off if it's on it'll be set off if this is also on because that's exclusive or that looks a little Jank though I mean it's not but I don't I don't know it looks a little bit Jank I can do this right grab this foreign might be a little bit easier to understand instead of writing it out repeatedly less chance for mistakes as well set it on or off okay I mean I could I could make a thing for the bit as well on the Sprite bit if we want to be really obvious with it you can make that a Boolean as well it's only going to be zero or one really may not be needed though right this is the is this the ACT shaving to the nth degree like do we really need to go this this deep does it make more sense is it easier to understand though if the bit is on and the pixel is on then this will be on otherwise we can set that equal you know xored with the bit of course it's constant but it's a constant pointer so probably have a bunch of errors here in terms of this yeah because I'm not doing that and compatible types pointer using type Bool yeah and read-only location yeah full pointer using type pool interesting oh I need to say it sorry I need to have the address of it duh there we go it's a pointer so if the bit and the pixel are on the carry flag is set and we'll export with there and which will set the data within the display and that should be okay that seems simple enough so I don't actually know I don't want to just set this to the equal like if I set this to this expression if I did this and just set it to the value of the expression this would be this would be evaluated every time in the loop and I only want to set it if it's on but if it is on I do not want to set it off and that's what this would do if any bits are off so actually yeah I don't want to set it equal to the expression just conditionally set it within here that should be okay all right and then we'll export to set it on or off yeah okay hoping that's right we'll see if it is if it draws correctly or not of course after we Implement drawing current pixel is on and it's not we'll draw it at X and Y that's xored if you reach the right Edge stop drawing this Row in increment X the X is not incremented increment X okay these won't be constant then but we'll get it on the next data I'll have to get it here oh we got the no never mind never mind yeah we got the original ones so we'll increment X and that's after this whole row or in this Row for each of the eight pixels in the row we'll increment X okay we'll also say stop drawing if hit right edge of screen uh go all the way back all right so we'll say if plus plus X chord is greater or equal maybe just greater I don't know greater or equal to the right Edge which is the window with then we will break we'll stop drawing this row for n rows yes this happens outside the loop yeah and then we just draw there I probably will have to reset it though won't I VX is not incremented yeah because we're key we keep drawing each row okay so we'll stop drawing if we hit the right Edge but we do need to read it that initial point to draw from for the next row let's do this constant U and a and just add another variable that's fine I'll do the original x value which will equal x coordinate and each time we draw this before we're doing this stuff what's that the x coordinate equal to the original X set X for next row to draw all right that will ensure that we stop drawing at the right Edge but it will also start drawing at the correct horizontal position for the next row of data so we also want to increment v y after a row because we'll go down but we won't reset y we'll just keep drawing down the screen until we have to stop so that's after this I'll do if plus plus y coordinate is greater than equal to the window width or sorry the window height because it's y up and down vertical and we'll break stop drawing entire Sprite and do this row stop drawing the entire Sprite it's hit bottom edge of screen okay otherwise we'll get there and we'll break the switch is that all we have to do I think yep that's the worst one well that's not too bad that's not too bad assuming I did it correctly so what what does that do ultimately it sets true or false it says the carry flag for game logic or program logic but also sets not true or false if the pixel is on within the display array and that ultimately is used within the update screen right yeah so we'll have to read through the screen which is going to be reading through the display in ship 8 so I'll have to pass that here as well yeah I think having that be a constant will be all right so update screen if we actually draw the thing I'm presenting the render so I'll have to go through all the pixels and draw them on the screen on the chip 8 display so I think I'm going to use a rect for that actually draw each pixel as a rectangle we get to go back to our our old friends the sdo wiki okay let's just go to the start I don't remember how many pages deep I was wrecked we'll draw rectangles uh we'll do fill in there's fill and draw N I have these in here I guess they're in the renderer functions render yeah render fill wrecked or fill Rex for an array which would probably be faster I could fill out the array I could fill out an array of rectangles first and then draw them all or I could go through check each pixel one by one and draw a rectangle there that's probably slower but effectively pretty much the same speed as we're still drawing singular rectangles but it'll be fast enough on our machine even in a virtual machine that I'm doing that's okay you can fill or draw a rectangle fill rectangle will use the last draw color set for the renderer and it'll fill in the whole rectangle with that color draw erect will only fill in sort of the outline of the rectangle where the kids used to do Square it'll fill in the Square fill Rex will fill in the whole thing with you know the color but okay so I'll do probably fill rectangle with whatever the last color was set and the color that will be set will be our foreground color so I probably have to pass in config into here as well let's do that as the second one uh we'll do config T config this will be a big big function because I need to know what color to set I can move the color into the chip eight some things I'm not sure if they should be config or I could just put everything within ship 8 for configuration instead of having it be separate that might be better I'm not sure I don't know we'll just do it like this I already went down this path Sun cost fallacy is starting to sink in that's all right so we'll have istio wrecked wrecked and rectangles have X Y just off the top of my head I think they have X Y width and height yep X Y width and height so I know dot X will have b0 that y will have to be zero width will be foreign and height will be something oh the width and height will be the scale factor because that's how big one pixel is going to be so that should be all right but X and Y will have to fill in like through a loop as we go through things so let's just set 30 32 TI 'll be less than the size of the display so for all of the pixels here I is going to be um I is going to be an index into our pixel array but I will be a sort of one-dimensional index we'll have to translate to that to 2D X and Y coordinates to fill out where the rect is going to go so we'll do this here and we'll present our changes at the end yes let's do that let's do Translate one-dimensional index I value to two dimensional X Y coordinates so that would be X would be I modulo the width so this would be I modulo window width and I think Y is divide by the width so how many rows can fit on the screen you can divide by but we want to constrain the x value from 0 to you know the max zero to the width minus 1 because it will be zero based indexing so 0 to 63 effectively X will be constrained to but each row 0 to 63 will be Row 1 64 to 127 will be row two so on and so forth we want to divide so that the second I hits 64 we we know we're in the second row so dividing will be well dividing will be one because it's zero base but when I hits 128 it'll be two because this would be 64. yeah so I think that'll work so I'll do that so we'll direct dot X will be I modulo config window width and rect Y will be I divided by the window with okay and then we already have the width and height so then we just need the color to draw we have the foreground and background color already don't we just set up things because we'll have to shift and mask anyway so I'll just grab uh color values to draw just do that as well so let's do foreground rgba just doing this a little a little different way in case I have to draw multiple things I want to set them up first so I don't have to recalculate them within the loop so this might save some computation later so it's FG color right yes and that was shifted left by 24. I could have a helper function to just grab the things like I do up here or I can just do this that's fine but I want these to be for the this is the background color for example so let's have background rgba and I'll also do this for the foreground rgba so we go through and the pixel is on I want to draw the foreground color if it's off I want to draw the background color so that's why I'm doing this so and I will be the offset into the display so we can check if the display I value if it's on because it's a Boolean array and then we'll draw pixel is on draw foreground color otherwise we can have an else pixel is off draw background color this won't be an if we already have that yeah okay so we can do sdo is it render draw rect a render fill rect render fill wrecked given the render and the rectangle okay render fill rect given sdl that's a constant sdl renderer and the rectangle which is just ripped of course we need to set the draw color to draw it at set render draw color given the renderer and given we'll do fgr FG G rgba B and f g a okay so set it to the foreground color draw that otherwise we'll do it for the background color let's just do FG or change the BG there we go substitute that okay I think that's all we need to do and then we'll present the changes at the end so hopefully we're emulating the things correctly I know I'm not debugging the info yet we're emulating that okay so let me write that in the debug info and then we can see if we can actually draw something which would be pretty nice it would be pretty nice um I guess I didn't need that whole paragraph there I can just say you know we're drawing the thing say we're drawing percent X height Sprite draw in height Sprite uh chords this can be actually just a number 1 to 15.
of course it could be you I think it's unsigned yeah that coordinates X and Y this will be VX so we'll have the VX value and then I'll also put the value at VX because that's what value will be gotten am I getting that here here down here I'm getting the data at VX right yeah the data at VX and then at v y okay we're not drawing it if it's d357 we're drawing at the data at V3 and V5 we're not drawing that coordinates three and five we're drawing at coordinates v x v y which is V3 and V5 so if I didn't say that before sorry it's a little confusing so VX let's do percent o2x and V percent Y which will do that and 0x percent of 2x from memory location I should be percent of 4X memory location uh yeah that seems okay I don't know if VF is going to be set on or not but we'll just do that set VF equal to one if any pixels are turned off I'll just say that might be too long across the screen as a debug message but that is okay that's all I'm gonna put there a little bit verbose construction.in and we'll have chip eight destruction dot X and we'll have V offset by instruction dot X and we'll do the same for y instruction dot y EP eight offset from V by chip eight instruction dot y and then we have I chip eight I okay phew are we about done with this a lot of code here dot h equals config.scale Factor 185.
shipping display yes invalid type argument 199.
really oh I have the constant it's not a it's not a pointer that's what I was trying to think it's not a pointer same thing at 206 probably yes renderer is Undeclared it needs to be sdl render of course that is true and rectus sdo wrecked is that not Phil Rex and compatible type expected erect pointer oh okay well we'll make that a pointer then hey now it's shut up about it okay all right let's see if we get anything displaying on the screen if it's a painful or not my programming and debugging is surely painful but we'll see if I get anything drawn oh no I well I get something but it's very tiny probably because I'm not doing the scale factor right that would probably be why that might be correct but it's so tiny it's not there okay let's see if the debug output is all right and d1f F is 15. so draw 15 might Sprite at coordinates V 0 which is set to C and V1 which is set to eight okay from location I which was set to 22A okay so we know that at least looks correct and I should put a new line there otherwise the debug output is pretty bad okay yeah I did neglect to think about I didn't neglect thinking about scaling by the scale factor but that is all right I drew something it was just very very small so the width and height well the width and height should be the scale factor actually no that's correct right these should be 20.
oh The X and Y I have to multiply them by that though oh that's true yes I have to multiply I think right because I have to offset into the screen so X is yeah mod so it's 1 to 63 all right but then the window is pixels you know well sorry 0 to 63 because it's modulo but the the window width is pixel 0 to 63 but scaled by 20.
so yeah I think I have to multiply this by the scale factor which is you know why I did that so that drawing would be better so let's see if that makes any bit of a difference meant to make debug a tiny bit of difference oh we drew things and then it uh you know messed up the things but we're drawing things I mean that's good ultimately probably because we're not doing these seven instructions so it's probably overriding and that's not great because it's not resetting v0 and V1 that sounds about right yeah so it's drawing things what it's drawing it over itself and it makes kind of a weird effect there and then we're unimplementing other things so okay what is left here seven zero so let's Implement that and see if that changes anything hopefully it does makes it look a bit better we'll just grab this and copy that increment that so what is seven X and N add n n two VX carry flag is not changed okay said register VX plus equal and then and that's a one character change there put that in the debug output as well just copy this set register VX plus equal this I can do equal that's fine VX plus equal nn so let's set whatever this was originally we'll do 0x percent O2 X X so let's do chip eight v offset by instruction dot X and then we have NN I guess I could have result we'll just do that so I'll set these separately and then the result would be the V offset by X plus NM so I'm not going to set the values but I will add them so that we can see what the result would be in case we need to check that later for debugging all right that's the seven there hey we got IBM Printing and some manner that's good I don't think it's scaled vertically correctly maybe seems kind of squished but it is printing something I mean that's good probably some other unimplemented things but okay yeah set register v0 plus equal result is 21 because that is 12 plus 9 that's true so this is the 239 then we draw the Sprite gotcha nice then we have unimplemented one two two eight okay that's cool so what is one um jumps to address n n okay let's just Implement whatever else is here and then I'll call it because this is probably going on way too long but that's okay I'm getting tired my voice is starting to die more than usual that doesn't mean I can't be cheery and chipper One n n is jumps to address n and n jump to address and then in so jumping to the address not calling a subroutine but just jumping is pretty simple we're just going to set the program counter to that so what's that program counter so that next opcode is from nnn so that's easy enough actually let me grab that and we'll go down here jump the address nnn which would be percent 04x hopefully I've been remembering new lines in places I probably have not foreign got new lines in places okay see it is jumping to the address work a little bit better still does IBM jump to address 228 okay so that is effectively an infinite Loop because it's just jumping to the same address so it draws IBM and then does an infinite Loop that makes sense that's not too bad pretty easy thing to start off with I don't think this is correct or maybe it is correct actually I don't know how it's supposed to look scaled I know there's supposed to be lines so that's why I don't think it's quite absolutely correct but I mean it's pretty close so that's good it's supposed to look like um supposed to look like this a little less squished so I think I'm not doing it exactly correct but it's pretty dang close modular by the height for y that makes that makes sense initialized to zero so the original X data we're going I is 0 to n so 0 to 15 Max I Plus whatever that is that's one byte pixel in the bit would be the data ended with one shift left by J I know it's y times the height plus X just sets the original and then it's incremented here pixel is X ORD with maybe this xor is wrong or something or this pixel is not absolutely correct because every odd row is not correct right it's like it probably just needs to be like twice as tall so I'm doing something wrong with that okay I found the issue it took about a minute of course once you actually look at your things and you're not trying to talk which uses half your brain power believe it or not unless you get used to it and then you're better at this than I am but that's okay my issue was I was multiplying by the window height for y to get the right display pixel when I'm in the drawing instruction when you offset into a one-dimensional index into like a two-dimensional space right you need to do y times the width of your row plus X and I was doing y times the height not the width so if I change that to the width of the window it magically works Auto magically you know it was squished vertically so I figured that was an issue and yeah so here we go it prints the lines out and it's not squished anymore so I did have the code correct so that is awesome we got the IBM logo printing if you want it like pixelated sort of like how the guy in the in this guide has it like with the pixel lines that's easy enough to do we can even make that like a config option oh it is control C work or do I still have the the window up I didn't even think of control C does that actually kill the window oh that's awesome man I could have saved face earlier if I had done that that's okay when we're drawing when we're updating the screen if we want like that pixel effect sort of screen door effect if you will we can have that be a config option let's add that in let's say if uh if user requested drawing pixel outlines draw those here and that's easy so if we if we filled in a solid color rectangle all we have to do is draw over that with the outline of the rectangle in a separate color and that will outline it so we can outline it in the background color and it'll be equivalent to sort of like scan lines but they're kind of a grid array not not horizontal only but that's okay so if we set the draw color to the background values and then instead of fill Rex we call draw wrecked that will draw over the outline of the filled rectangle with an outline of the background color effectively so I'll say we'll put that behind an if put that mine in condition let's say if we have we'll just say if pixel outlines we'll make that a Boolean or something then we'll draw that so let's put that in config up here where I forgot up here say we have a Boolean pixel outlines draw pixel outlines yes no and we'll do that in I think it sets can't type set config we'll do pixel outlines equals true draw pixel outlines by default okay and I didn't even think I was going to make errors and I did not so that should draw over the field rectangles hey with the outline you get sort of this effect we could increase the width and be like a little bit more you know Fancy with it if we wanted to do variable with outlines and stuff maybe you can do that for like Shader effects or other things you move them around I don't know but we got the IBM logo Printing and we have debug output we have some manner of op codes being emulated as well as I think the correct addresses so that should be good to go right now of course we only have what one two three four five five six op codes maybe seven if I'm counting correctly probably six or seven op codes emulated and that's all right and we have 35 minus that number lift to go so I will get to those on the next part in the next video because this one's probably like two hours already so sorry about the long video but you know I wanted to get an end product of drawing this so that's where we are the next part of this will be you know emulating more instructions maybe all of the rest of them and if we can get that far within an hour or two all the rest of the instructions and the keypad input so we can actually draw and display like a game and move a guy around if it doesn't take too long I'll also try to do timing like at the end of the next video or that will be in the video after the next one but regardless we'll emulate more instructions next time hopefully you found this somewhat okay or entertaining or my voice put you to sleep or otherwise but hope you enjoyed watching and I'll see on the next one though cheers foreign
Up Next

Gale-Shapley Algorithm: Stable Matching with Step-by-Step Examples
@samuelwhitehouse4513
134.2K views•2014-01-13

Introduction to Secure Multiparty Computation with Yehuda Lindell
@fhe_org
7.7K views•2021-02-04

HTTP Requests Explained: GET, POST, PUT, DELETE
@codecademy
103.1K views•2021-10-07

Enigma Machine Mechanics: WWII Encryption Explained
@JaredOwen
13.2M views•2021-12-11
Related Study Plans & Knowledge Roadmaps
Structured learning paths in Computer Science