
















![Big Thinkers - Robert Langer [Biomedical Engineer]](https://i.ytimg.com/vi/BBVPBi055Nw/hqdefault.jpg?sqp=-oaymwEmCOADEOgC8quKqQMa8AEB-AGSBYAC4AOKAgwIABABGEogUyhlMA8=&rs=AOn4CLDrgU6fW91dVwJEy1rYROIgnEUqOg)


This video demonstrates the complete process of creating PDMS (Polydimethylsiloxane) replicas through replica molding and bonding. The process involves mixing PDMS base with curing agent in a 10:1 weight ratio, thoroughly mixing for one minute, degassing the mixture under vacuum to remove bubbles, casting the degassed PDMS into a 3D-printed mold, performing a second degassing after filling, curing at 65°C for two hours, demolding using a spatula technique, creating inlet/outlet holes with a punch tool, cleaning surfaces with scotch tape, applying corona treatment to oxidize surfaces for bonding, and finally bonding PDMS layers together on a 95°C hot plate to create sealed microfluidic devices.
PDMS Replica Molding and Bonding | Fluid Mechanics Lab Tutorial
Added:Fundamentals of polymer chemistry, specifically the cross-linking and curing mechanisms of elastomers like Polydimethylsiloxane (PDMS).
Basic principles of microfluidics, including fluid behavior at the microscale, particularly laminar flow and low Reynolds numbers.
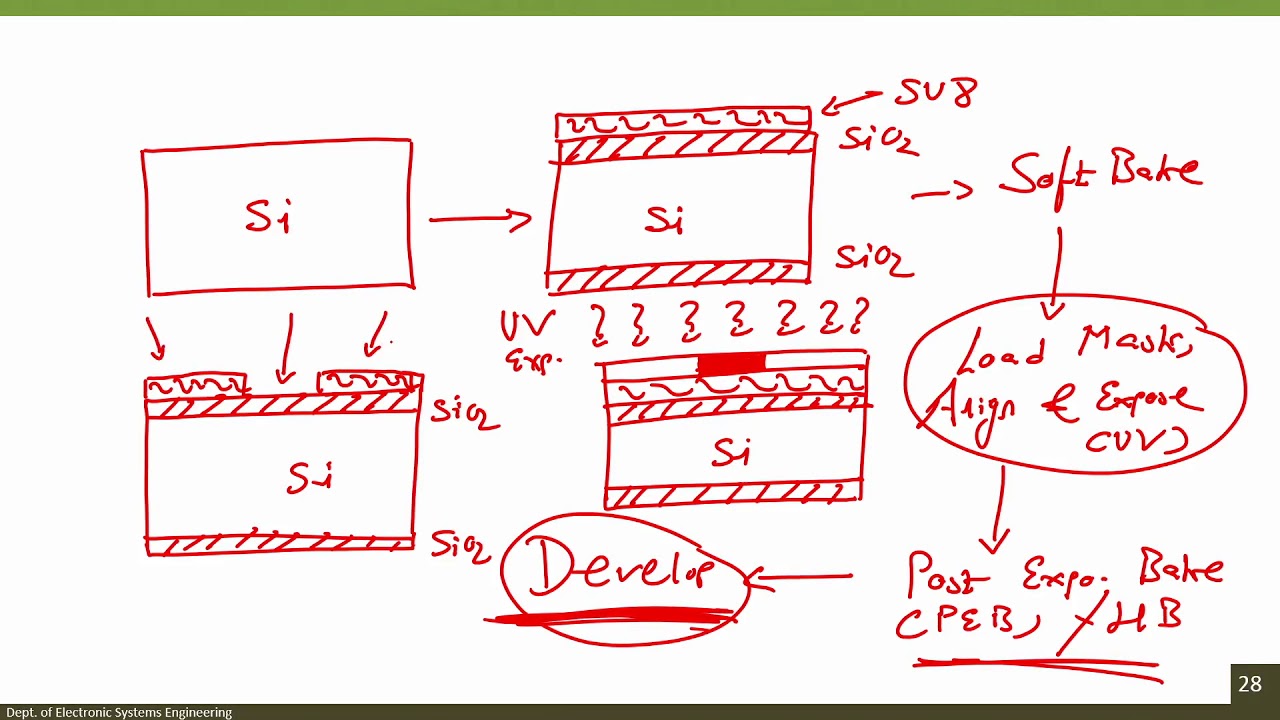
The concept of soft lithography and how master molds (typically fabricated using SU-8 photoresist on silicon wafers) are structured.
Standard laboratory safety practices regarding chemical handling, vacuum desiccator usage for degassing, and high-voltage plasma cleaner operation.
Advanced surface chemistry modification techniques to control the hydrophilicity or hydrophobicity of PDMS channels post-bonding.
Characterization of microscale fluid dynamics, including droplet generation, mixing control, and micro-particle image velocimetry (micro-PIV).
Integration of active components into microfluidic platforms, such as pneumatic valves, micro-pumps, and embedded sensors.
Practical applications of fabricated devices in Lab-on-a-Chip (LOC) systems, Organ-on-a-Chip technologies, and high-throughput biological assays.
21.1K views376likes13:00Original Release: 2019-03-23
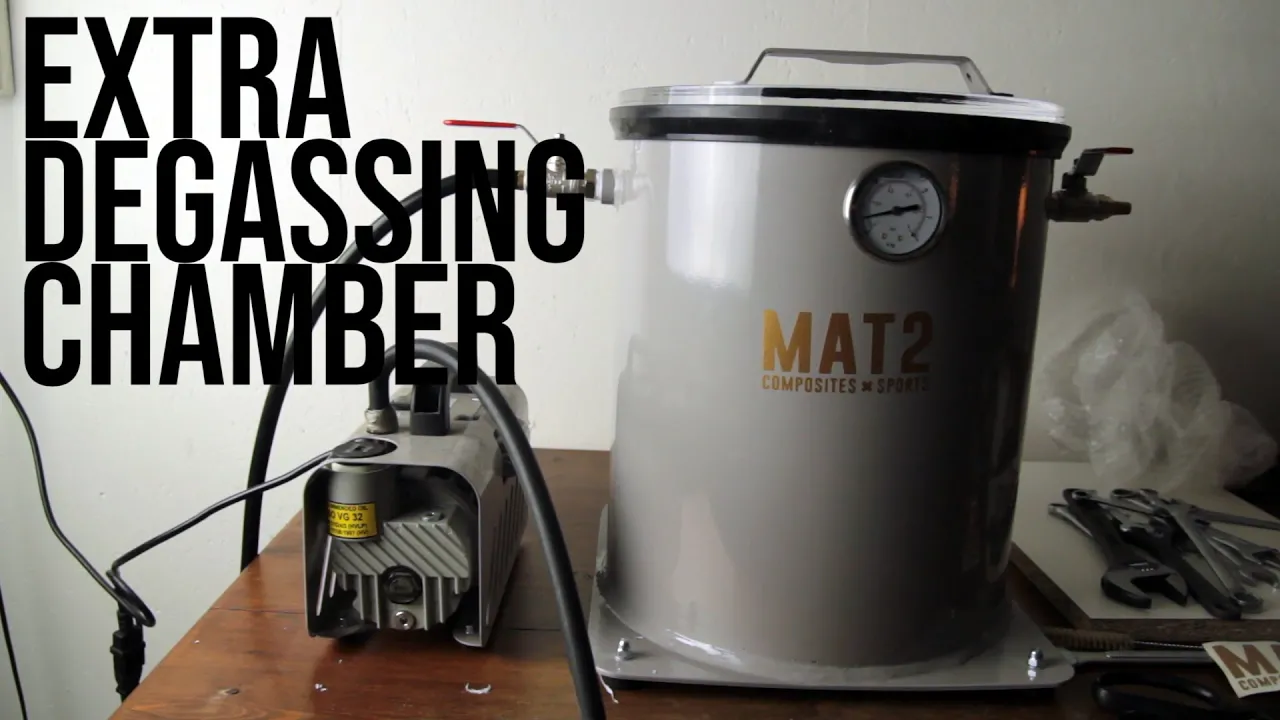
okay so let's make PDMS so in this process you are mixing to the agent of the PDMS this fine is called base this line is called the curing agent and then you mix it at the weight of ten to one okay so first come to the this scale they you place the cup and then turn it on so zero it with with a cup okay then you can put this let's actually put maybe twenty grams okay so this is actually good okay so you can zero again and make sure to keep it clean now because this is the 10 to 1 by weight you are putting 2 grams of the curing agent okay so let's so this is a two gram okay again just make sure to wipe it once you have both base and hearing agents you go to mix it okay this mixture makes it really well so that all you know both of them this is really business you can see it's a business so make sure they are well mixed fully mixed so maybe for one minutes also you just keep mixing make sure to scrape off whatever is on their side and them trying to mix it together so now you can say this is really bubbly okay so this is you know the after you mix both of both of those chemicals they are really bubbly so now we would like to remove the bubble you can put this into this chamber this is so-called buck investigator okay here putting the top and then open the turn on the system open the back in line okay and then this is going to be gas so the inside of the chamber now this is lower pressure so the bubble is going to rise you have a meter here this is going to dig this and then it is getting closer to the vacuum here eventually the gauge is going to stop I mean it's going to be saturate okay so the once it stops you can also close the vacuum line as well okay so love's escapes point oh seven - hotel salon so you can cause the vacuum line and doesn't matter you can also a know close of the chamber as well okay now this inside of the chamber has a lower pressure than the surrounding this is going to the gas is PMS which means the water bubbles which is trapped in the PDMS is going to rise and eventually that's going to be a clear PDMS so let's wait here for some time so after most of the bubble is gone we can open the vent line here okay so now you can take this PDMS but you can see most of the bubbles are gone okay now you can test PDMS onto the mold you create it in this case we created a mold by 3d printing okay now this is the way so you can simply cast there are some still some bubbles are remaining but don't worry about this we are going to dig ass again Hey Hey so now most of the bubbles okay this is the PDMS here so the entire mold is now filled with the PDMS okay now we put this back to the chamber again during the second degassing okay the second the gassing just make sure to remove any bubbles that is trapped on the top of the mold okay and after a while you know all the bubble rise here again okay so let's wait here let's first wait here until this reading become - 4007 and then after that's okay you can fold the bottom line and wait again so after most of the bubbles are gone you can now take a look inside it now most of the bubbles are gone here okay now you can open the vent line here slowly so so this is the PDMS okay it's the PDMS which is the placed on the top of the mount okay now we are going to put this entire mold into the oven you will have a oven that is set at 65 degrees so simply place this inside of the oven here okay so after two hours at 65 degrees in oven we can take it out so the device now is this PDMS it's really cured which means now this is more like a rubbery and then no longer liquid so once you take it out of the oven you can take the PDMS out of the mold here to do so gently is right the this spatula and you can see this is the air is coming in okay and then you can go around all four sides of the mold or any shape of the model depends on the how you design it okay you start the singing will go all the way and this is tried to delaminates the PDMS from the mold you don't have to cut anything and then once you go all the way now you can take adults you can see mold here [Music] once you come here all the way you can simply pay to dance so this is the PDMS twisty micro shadow patterns transformed after you take PDMS now you can create Inlet and outlet you place this PDMS on the flat surface on the flat clean surface and using this okay called Vioxx punch okay you can directly place things down okay you it's paint right okay and I am creating this image now so the outlets in the same way you can create image after you make a hole you can use something not this smaller and then to push things out okay therefore each a for each horse there is a plaque of the PDMS that's remaining then you can simply push it out you can either preserve what other tools to take things out but make sure from all of the holes you can remove those PDMS plug and after doing this okay now your PDMS slab is ready for using okay one additional step here is the cleaning by the scotch tape okay you can take out the scotch tape here and then place them on the surface of this videois make sure it covers the entire surface you can keep this until you use for the next step but this is going to do two things wise to prevent the dust come income coming in contact sooner surface but otherwise to remove the dust when you take out this tip so let's go to the next step for bonding now we come to the chemical peel foot then we are going to make a bonding between this PDMS and the last one before using most of the surface was - dick okay let's take it out here place the surface that is going to be bonding on the top we are using this two-port fertilizer this is going to by doing this is going to create the discharge from the tip of the instrument [Music] I thought your looks dice bo staffs together you can month you can now put them into contact make sure do not make sure not to touch the surface now you bring those two surfaces together after the after doing this corona treatment the surface is supposed to be oxidized and it is adhesive at the molecular level okay by bringing them to the surface together they are supposed to make a chemical bond and this is going to be sealed device so let's go to the let's bring it to the hot plate and to make sure the erection is complete finally you have both the device and then by placing this onto the hot plate in this case we use 95 degrees hot plate okay this is going to accelerate the bonding reaction between PDMS and glass you can actually leave it for the few minutes one took one or two minutes okay and then after living there the device should be resealed you
Up Next

56:53
Microfluidics Introduction | Micro & Nanofluidic Devices
@iit
37.1K views•2015-06-22

30:32
Ultrasonic Transducers: Resonant Frequency Measurement and Horn Design
@imajeenyus42
229.9K views•2017-02-22

54:16
Polymer Environmental Degradation: Mechanisms & Stabilization
@iit
1.8K views•2012-07-10

33:39
How a Student's Question Saved a NYC Skyscraper from Collapse
@veritasium
22.8M views•2025-04-26
Related Study Plans & Knowledge Roadmaps
Structured learning paths in Engineering
engineering
Building Acoustic Levitators: Physics & Arduino
01The Physics of Sound and Standing Waves
02Piezoelectric Transducers and H-Bridge Drivers
03Arduino Programming: Generating 40 kHz Signals
+ 2 more learning modules
14h5 modules
Explore Roadmap
engineering
Building Peltier Cloud Chambers: Particle Tracks
01Cosmic Rays & Cloud Chamber Physics
02Thermoelectric Cooling (TEC) Fundamentals
03Custom Liquid-Cooling Loop Design
+ 2 more learning modules
18h5 modules
Explore Roadmap
engineering
Yagi-Uda Antennas: Modeling, Build & VNA Test
01Introduction to RF and Antenna Fundamentals
02Yagi-Uda Antenna Design Principles
03Antenna Modeling and Simulation in 4NEC2
+ 2 more learning modules
18h5 modules
Explore Roadmap
engineering
ECG Monitor Design: Op-Amps, Filters & Noise
01Electronics & Breadboard Basics
02Op-Amps and Instrumentation Amplifiers
03Bioelectricity and ECG Fundamentals
+ 2 more learning modules
18h5 modules
Explore Roadmap