LFIA: Gold Nanoparticles & Assay Design
Learning Goal: Developing and optimizing a paper-based lateral flow immunoassay (LFIA) for point-of-care viral detection, from gold nanoparticle conjugation to analytical sensitivity testing.
- Prerequisites: Basic college-level biology (immunology basics are helpful but covered in Module 1) and introductory chemistry.
- Estimated Total Study Time: 14 hours
Module 1: Fundamentals of Immunology & Viral Structure
This module establishes the foundational molecular biology required to design an immunoassay. You will explore the structure of antibodies (immunoglobulins), study how they specifically bind to antigen epitopes, and understand viral architecture (capsids, envelopes, and spikes) to identify target biomarkers for diagnostic development.
Recommended Videos
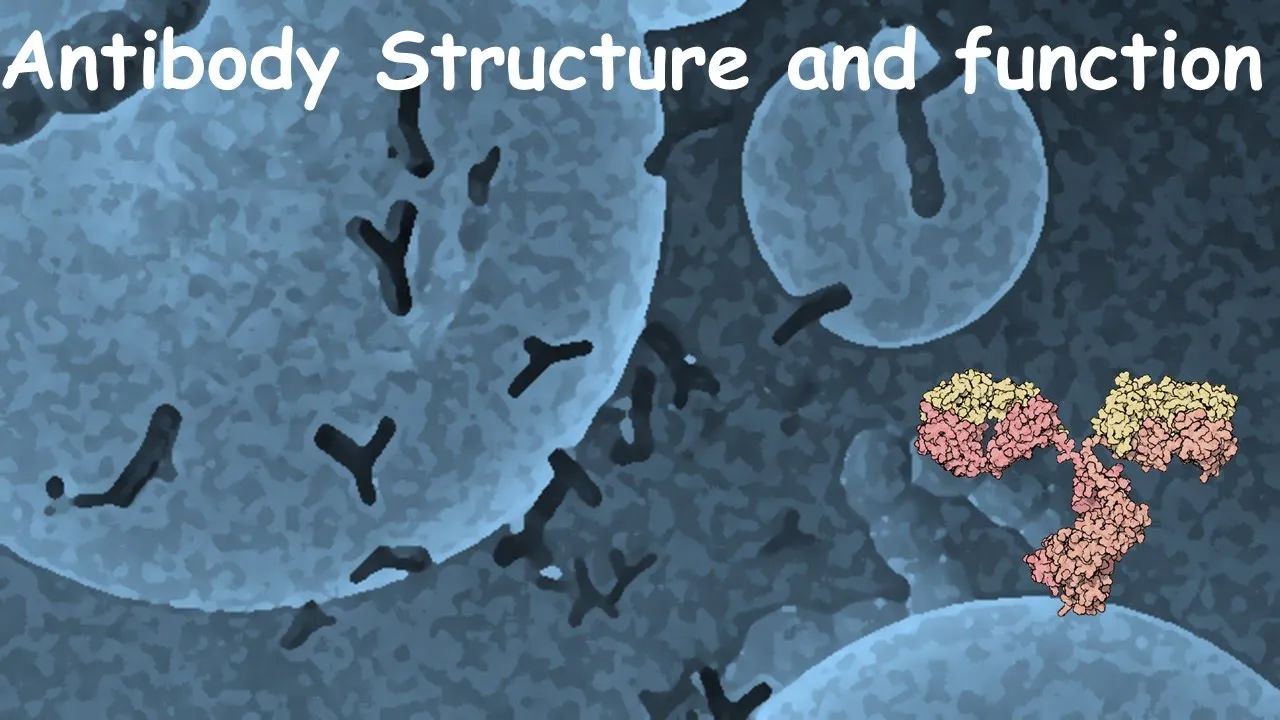
Why this video is valuable: This animation provides a detailed breakdown of antibody anatomy. It covers the structural differences between heavy and light chains, variable and constant regions, and explains how hyper-variable loops form the antigen-binding site (paratope). This level of detail is critical for understanding how antibodies are oriented on both the conjugate pad and the test/control lines of an LFIA.
Knowledge Checkpoint
- Identify the heavy and light chains on a Y-shaped antibody model and locate the disulfide bonds.
- Explain the structural difference between the Fab (antigen-binding) and Fc (crystallizable) regions.
- Describe how the hyper-variable loop region determines specificity for a target viral antigen.

Why this video is valuable: To design an LFIA for viral detection, you must understand the target organism. This concise explainer illustrates the basic elements of a virus—genetic material encapsulated within a protein shell (capsid). This serves as a quick primer on viral structural targets, which usually constitute the antigens detected in rapid assays.
Knowledge Checkpoint
- Differentiate between enveloped and non-enveloped viral structures.
- Define a viral capsid and identify why capsid proteins make highly stable biomarkers for diagnostics.

Why this video is valuable: This video dives deep into the biophysical chemistry of antigen-antibody binding. It discusses the non-covalent forces (hydrogen bonds, electrostatic forces, Van der Waals interactions, and hydrophobic interactions) that govern the affinity and avidity of the binding. These thermodynamic principles dictate the performance and sensitivity of your eventual assay.
Knowledge Checkpoint
- List the four major non-covalent forces that drive antigen-antibody interactions.
- Distinguish between antibody affinity (monovalent binding strength) and avidity (overall multivalent stability).
- Explain how environmental conditions (such as pH or ionic strength) can disrupt these interactions.
Module 2: Principles of Lateral Flow Assays (LFIA)
Here, you will transition from molecular interactions to paper-based microfluidics. You will study the physical components of a lateral flow strip, the fluid mechanics of capillary flow through porous membranes, and the structural differences between sandwich (non-competitive) and competitive immunoassay formats.
   [Sample Pad] -> [Conjugate Pad] -> [Nitrocellulose Membrane] -> [Absorbent Pad]
                                        (Test & Control Lines)
Recommended Videos
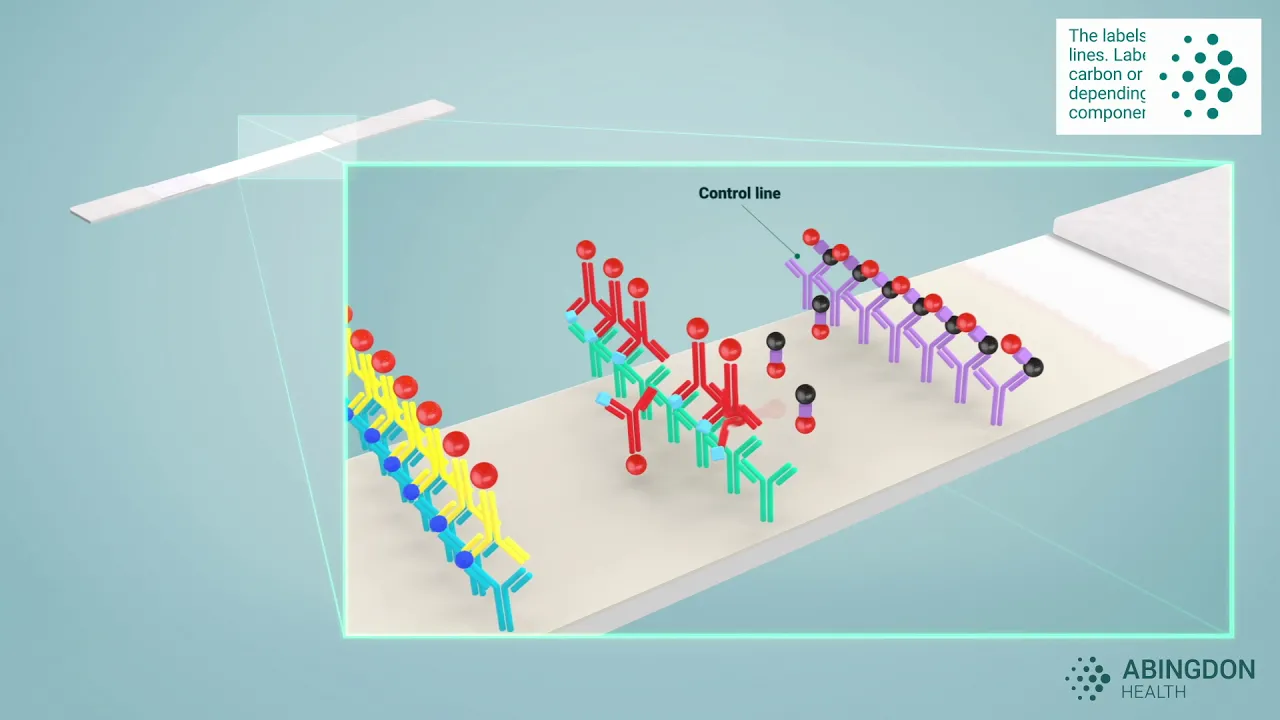
Why this video is valuable: This highly visual animation tracks a sample fluid as it moves through the consecutive components of an LFIA. It illustrates the sandwich assay principle in action, showing how gold-conjugated antibodies bind the target analyte and get trapped at the test line by immobilized capture antibodies, generating a visible red band.
Knowledge Checkpoint
- Name the four primary physical pads/membranes that compose a standard lateral flow strip.
- Describe how capillary action drives sample movement without the need for active external pumping.
- Contrast how a visual band is formed at the test line versus the control line.

Why this video is valuable: This animation provides another perspective on the mechanics of strip assays, demonstrating how antigens in patient samples interact sequentially with conjugated gold nanoparticles on the conjugate pad and immobilized antibodies on the membrane. It highlights the importance of the control line in validating that fluid has successfully migrated through the entire strip.
Knowledge Checkpoint
- Why must the control line always show a signal, regardless of whether the target antigen is present in the sample?
- Explain what happens to conjugate nanoparticles that do not capture any antigen as they pass the test line.

Why this video is valuable: While sandwich assays are standard for large multivalent pathogens, small monovalent molecules (like hapten targets or some drugs) require a competitive format. This video introduces the concepts of competitive immunoassays, detailing how signal intensity correlates inversely with analyte concentration—a fundamental concept for broad-spectrum assay design.
Knowledge Checkpoint
- Explain why a competitive assay format is chosen over a sandwich format for small molecules.
- Sketch the expected line intensity versus analyte concentration for both a sandwich assay and a competitive assay.
- Describe the components immobilized on the test line in a competitive LFIA format.
Module 3: Gold Nanoparticles & Conjugation Chemistry
Gold nanoparticles (AuNPs) serve as the primary optical reporters in LFIAs. This module explains how to synthesize AuNPs, why their optical properties are governed by Localized Surface Plasmon Resonance (LSPR), and how to chemically conjugate antibodies to their surfaces via passive adsorption or covalent bonding.
Recommended Videos

Why this video is valuable: This short tech explainer defines Localized Surface Plasmon Resonance (LSPR), the physics behind why nanometer-scale gold displays vibrant ruby-red colors instead of a bulk yellow-metallic appearance. This is vital because shifts in the LSPR band are used to confirm successful protein conjugation and to detect molecular binding events.
Knowledge Checkpoint
- Define LSPR and explain how collective electron oscillations interact with incident light.
- Why does changing the local refractive index (e.g., binding an antibody to the surface) shift the LSPR absorption peak?
- How does nanoparticle size affect the observed color of colloidal gold?
Why this video is valuable: This video provides a complete laboratory protocol for covalently conjugating antibodies to carboxylated gold nanoshells. Covalent conjugation is generally more robust and stable than passive adsorption. The video walks you through activating carboxyl groups using EDC/NHS chemistry, reacting them with antibody amine groups, and neutralizing unreacted sites.
[AuNP]-COOH --EDC/NHS--> [AuNP]-Active Ester --NH2-Antibody--> [AuNP]-CO-NH-Antibody
Knowledge Checkpoint
- What are the roles of EDC and NHS in carboxyl-amine coupling chemistry?
- Describe the step-by-step process of cleaning and recovering conjugated nanoparticles from unbound antibody excess.
- Explain why a blocker (like BSA or PEG) must be added after the coupling reaction is complete.

Why this video is valuable: This comprehensive webinar discusses the critical parameters involved in optimizing the antibody-to-nanoparticle ratio. It details how to perform salt-stability challenge tests to find the optimal pH and protein concentration to prevent colloidal aggregation when exposed to electrolytes.
Knowledge Checkpoint
- Describe how to perform a salt titration to determine the minimum protective concentration of antibody.
- Explain how pH affects the charge state of both the gold surface and the antibody during passive adsorption.
- What are the signs of nanoparticle aggregation during conjugation, both visually and spectrophotometrically?
Module 4: Assembling and Fabricating the LFIA Device
This module focuses on physical manufacturing. You will learn about card assembly, preparing and blocking conjugate pads, and dispensing reagents onto nitrocellulose membranes.
Curriculum Gap Note: High-quality videos demonstrating bench-top manual or industrial-scale nitrocellulose membrane striping (test/control line dispensing) are rare. To address this, we rely on automated multi-line dispensing demonstrations and specialized physical striping concepts below.
Recommended Videos

Why this video is valuable: This video highlights physical device construction. It explains how raw materials—including sample pads, conjugate pads, nitrocellulose membranes, and absorbent wicks—are laminated with precise overlaps onto an adhesive backing card before being cut into individual strips.
Knowledge Checkpoint
- Why is precise physical overlap (typically 1–2 mm) between the pads critical for continuous fluid flow?
- Describe the function of the plastic backing card in maintaining strip structural integrity.

Why this video is valuable: This video demonstrates a multi-line dispensing machine applying reagent lines to a lateral flow membrane. This illustrates the physical process of using contact or non-contact dispensing tips to stripe precise micro-volumes of capture antibodies onto the nitrocellulose membrane without damaging the material.
Knowledge Checkpoint
- What is the difference between contact and non-contact (aerosol/dispenser) striping of nitrocellulose?
- How does reagent dispensing speed and pressure affect line width and consistency?
- Why must the striped membranes be thoroughly dried (and sometimes baked or desiccated) post-dispensing?
Why this video is valuable: This detailed walkthrough shows how to prepare and treat gold conjugate pads. It covers physical application, stabilizing the dried conjugate on the pad using sugars (like sucrose or trehalose), and ensuring the pad releases the conjugate cleanly when it encounters the sample liquid.
Knowledge Checkpoint
- Why are lyoprotectants/disaccharides (e.g., sucrose or trehalose) added to the conjugate pad treatment buffer?
- Explain how blocking the conjugate pad prevents non-specific binding of proteins during assay run-time.
- What physical materials are typically used to construct conjugate pads, and how do they differ from sample pads?
Module 5: Optimization, Troubleshooting & Sensitivity Testing
Developing a functional LFIA requires rigorous optimization and performance validation. This module covers buffer optimization (pH, surfactants, blocking agents), troubleshooting false positives, diagnosing and mitigating the prozone/hook effect, and calculating analytical sensitivity (Limit of Detection, or LOD).
Curriculum Gap Note: Specific videos on optimizing LFIA buffer chemistry are scarce. To bridge this gap, apply the general analytical validation principles and direct troubleshooting guides provided below.
Recommended Videos

Why this video is valuable: The Hook Effect (or Prozone Effect) is a common cause of false-negative results in samples containing high concentrations of target analyte. This video explains the molecular mechanism of this phenomenon and shows how sample dilution can resolve it.
Normal (Sandwich): [Capture Ab] -- [Analyte] -- [Conjugated Ab (AuNP)] -> High Signal Hook Effect: [Capture Ab] -- [Analyte] [Analyte] -- [Conjugated Ab (AuNP)] -> Low/No Signal (Both binding sites saturated independently; sandwich cannot form)
Knowledge Checkpoint
- Draw a molecular diagram showing how excess analyte saturates both capture and detection antibodies, preventing sandwich assembly.
- Describe a practical dilution strategy to confirm whether a weak or negative signal is due to a hook effect.
- How does adjusting conjugate density or striping concentration help mitigate the hook effect?
Why this video is valuable: False positives compromise assay specificity. This presentation outlines how changes in membranes and buffers can alter flow dynamics and binding kinetics. It suggests concrete steps to address non-specific interactions, such as optimizing blocking agents (e.g., BSA) and surfactants (e.g., Tween-20).
Knowledge Checkpoint
- Identify two common causes of false positives in lateral flow assays.
- Explain how surfactant concentration (like Tween-20 or Triton X-100) in the running buffer affects capillary migration and non-specific binding.
- What is the role of blocking proteins (like Bovine Serum Albumin or casein) in treating nitrocellulose membranes?

Why this video is valuable: This tutorial covers the statistical validation of analytical methods. It details how to calculate the standard deviation of blank measurements to determine the Limit of Detection (LOD) and Limit of Quantitation (LOQ)—essential metrics for characterizing the analytical sensitivity of your diagnostic strip.
Knowledge Checkpoint
- State the mathematical formula used to calculate LOD based on the standard deviation of blank samples ().
- Distinguish clearly between Limit of Detection (LOD) and Limit of Quantitation (LOQ).
- How would you design a serial dilution series of a target viral antigen to determine the LOD of your LFIA?
In-Depth Optimization & Troubleshooting Guide
To ensure assay performance, use this reference guide to adjust buffer chemistry and strip design:
1. Running Buffer Optimization
- Surfactant selection: Typically, to of non-ionic surfactants (e.g., Tween-20, Triton X-100) are added to the running buffer. These reduce surface tension to maintain consistent flow rates and minimize non-specific hydrophobic interactions with the nitrocellulose membrane.
- Blocking agents: Bovine Serum Albumin (BSA) at to , casein, or fish gelatin are used to block open hydrophobic binding sites on the nitrocellulose membrane and gold conjugate surfaces. This reduces background noise.
- Ionic strength and pH: Buffers like PBS (, ) or Borate (, ) keep the pH close to the isoelectric point of the targeting antibodies, helping to maintain their active conformation.
2. Membrane Striping Parameters
- Reagent Concentration: Capture antibodies on the test line are usually striped at concentrations of to . Higher concentrations can increase sensitivity but may raise background noise or exacerbate the hook effect.
- Dispense Volume: Typically, is striped. If stripes are uneven, check for physical clogs in contact tips or clean the aerosol nozzle on non-contact systems.
Course Map
Below is the recommended learning progression for this curriculum. Note how the core biological concepts feed directly into mechanical design and physical assembly, culminating in chemical optimization.
Key People Index
- Michael Faraday (1856): First to synthesize stable colloidal gold in a laboratory setting, initiating the scientific study of nanosized gold particles and their optical properties.
- Rosalind Franklin: Her foundational X-ray crystallography work on the Tobacco Mosaic Virus (TMV) helped reveal the structural layout of viral proteins and capsids.
- Sir Gregory P. Winter (Nobel Laureate, 2018): Pioneered phage display technology for producing fully human and highly specific monoclonal antibodies, which are key reagents in modern lateral flow diagnostics.
Final Self-Assessment
Test your understanding of the complete design, fabrication, and optimization process with this self-assessment:
- I can describe the complete flow path of a sample on a lateral flow strip, including the purpose of each pad/membrane.
- I can explain the difference between sandwich and competitive assay layouts and when to choose each format.
- I can explain Localized Surface Plasmon Resonance (LSPR) and how it creates a visible red signal on gold nanoparticles.
- I can outline the steps to covalently couple an antibody to a carboxylated gold nanoparticle using EDC/NHS chemistry.
- I can perform a salt-stability test to determine the optimal antibody concentration for passive absorption to gold nanoparticles.
- I can explain the function of blocking agents (e.g., BSA) and surfactants (e.g., Tween-20) in both membranes and running buffers.
- I can identify the physical elements needed to assemble a lateral flow test strip card.
- I can diagnose a false-negative result caused by the prozone/hook effect and describe how to fix it.
- I can design a serial dilution protocol to calculate the Limit of Detection (LOD) using the standard deviation of blank measurements.