Mastering POCUS: Emergency & Critical Care
Learning Goal: Master Point-of-Care Ultrasound (POCUS) to rapidly evaluate critical patients. By the end of this curriculum, you will be able to optimize image resolution through knobology, detect occult hemorrhage and pneumothorax via the eFAST exam, utilize the BLUE protocol to diagnose respiratory failure, acquire the four core cardiac windows, systematically evaluate undifferentiated shock using the RUSH framework, and confidently perform ultrasound-guided vascular access and deep vein thrombosis (DVT) diagnostic compressions.
- Prerequisites: MD, DO, PA, NP, or advanced nursing/EMS clinical background; basic knowledge of cardiopulmonary anatomy and physiology.
- Estimated Total Study Time: 22 Hours
Module 1: Ultrasound Physics & Machine Knobology
Understand the foundational physics of acoustic waves, how different transducers work, and how to optimize image quality using basic ultrasound machine controls.

Why this video is valuable: This foundational lecture provides a clear transition from dry academic physics to practical medical instrumentation. It breaks down the piezoelectric effect, acoustic impedance mismatches, and how these concepts determine frequency selection. Understanding these mechanical properties allows you to select the correct probe and anticipate how tissues will scatter or reflect the ultrasound beam.
- Explain how piezoelectric crystals convert electrical energy into mechanical pressure waves.
- Contrast high-frequency (short wavelength) and low-frequency (long wavelength) transducers in terms of depth penetration and image resolution.
- Define acoustic impedance and explain why ultrasound gel is physically required to eliminate air interfaces.
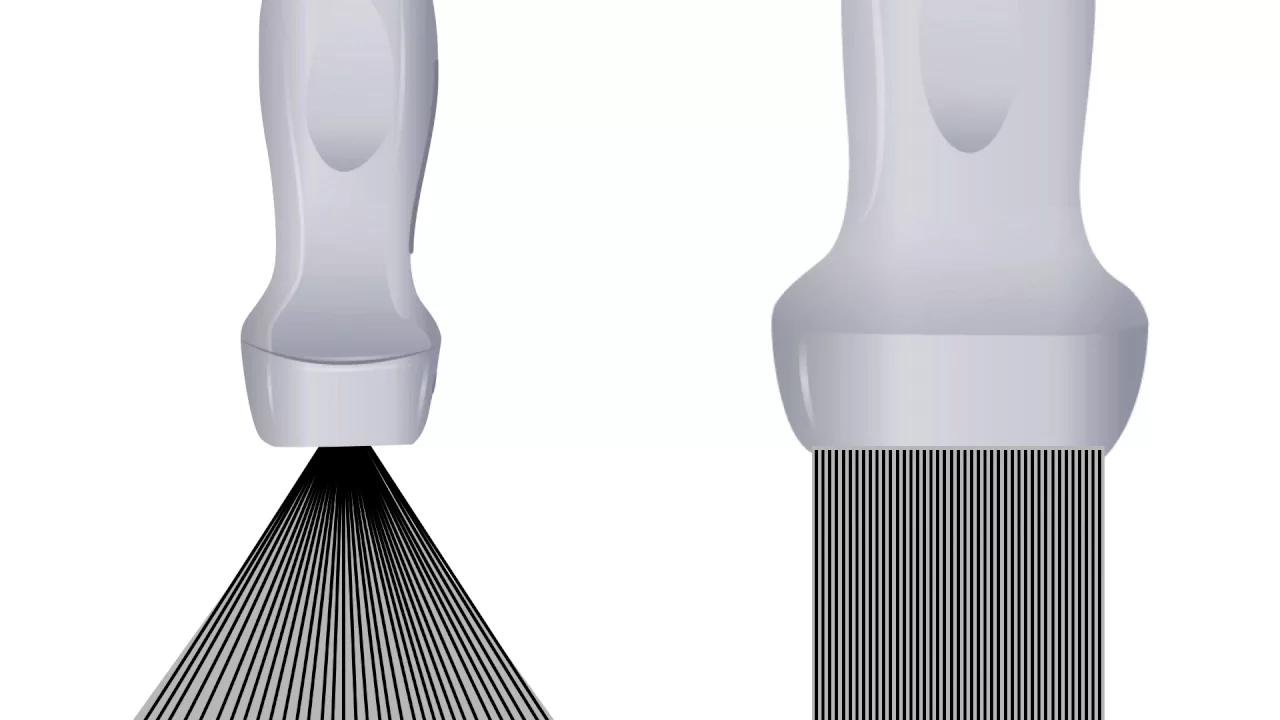
Why this video is valuable: This high-yield, emergency medicine-focused breakdown of physics simplifies complex concepts into actionable clinical rules. It provides a crystal-clear guide to how sound behaves in different tissues (attenuation, refraction, reflection) and introduces vital artifacts that clinicians use daily to identify pathology.
- Differentiate between hyperechoic, hypoechoic, and anechoic tissue appearances.
- Identify common artifacts including acoustic shadowing (e.g., behind gallstones) and posterior acoustic enhancement (e.g., deep to fluid collections).
- Explain how sound velocity changes across different media like air, water, and bone.

Why this video is valuable: Physics must be translated into direct action at the bedside. This practical tutorial teaches machine interaction ("knobology") using a standard clinical machine. It covers how to optimize gain, depth, and choose the correct probe—the three linear, phased, and curvilinear arrays that constitute the standard POCUS toolkit.
- Select the correct probe (linear vs. curvilinear vs. phased array) for abdominal, lung, vascular, and cardiac applications.
- Manipulate total gain and time-gain compensation (TGC) to normalize image brightness across different depths.
- Properly orient the probe indicator relative to the screen marker when scanning in transverse and sagittal planes.
Module 2: The eFAST Exam for Trauma Assessment
Identify free fluid in the peritoneal, pleural, and pericardial spaces, as well as detecting pneumothorax using the Extended Focused Assessment with Sonography for Trauma.

Why this video is valuable: This is an exhaustive, masterclass-level walkthrough of the Extended FAST (eFAST) protocol. It details probe placement, normal anatomy, and pathologic deviations for all seven standard windows. The depth of clinical instruction here is ideal for understanding how to avoid common scanning pitfalls in a high-stress trauma resuscitation.
- Recall the exact anatomical landmarks for the seven standard views of the eFAST exam.
- Describe the sonographic appearance of Morrison’s pouch and identify how free fluid (hemoperitoneum) appears within it.
- Adjust probe angulation to fully visualize the splenorenal recess and the pelvic (retrovesical/rectouterine) space.

Why this video is valuable: High-quality graphics and real clinical ultrasound clips make this video exceptional for learning how to spot pathology. It emphasizes the subtle signs of free fluid and explains the "extended" thoracic portion of the exam, which looks for hemothorax and pneumothorax in the pleural cavity.
- Differentiate between normal pleural sliding and the complete absence of sliding indicative of a pneumothorax.
- Visualize the diaphragm to distinguish between intra-abdominal free fluid and an intrathoracic pleural effusion.
- Demonstrate how to use M-mode to identify the "seashore sign" (normal) versus the "barcode/stratosphere sign" (pneumothorax).

Why this video is valuable: The pelvic window of the FAST exam is highly operator-dependent and can be challenging due to pelvic anatomy. This concise, focused tutorial provides clear instruction on utilizing the urinary bladder as an acoustic window to evaluate the rectouterine pouch (pouch of Douglas) in female patients.
- Position the transducer correctly (sagittal and transverse) superior to the symphysis pubis.
- Use the bladder as an fluid-filled acoustic window to inspect for free fluid in the rectouterine space.
- Differentiate between normal fluid physiologic levels and pathologic free fluid.
Module 3: Point-of-Care Lung Ultrasound
Master the identification of normal lung sliding, A-lines, pathognomonic B-lines, consolidations, and pleural effusions using the BLUE protocol.
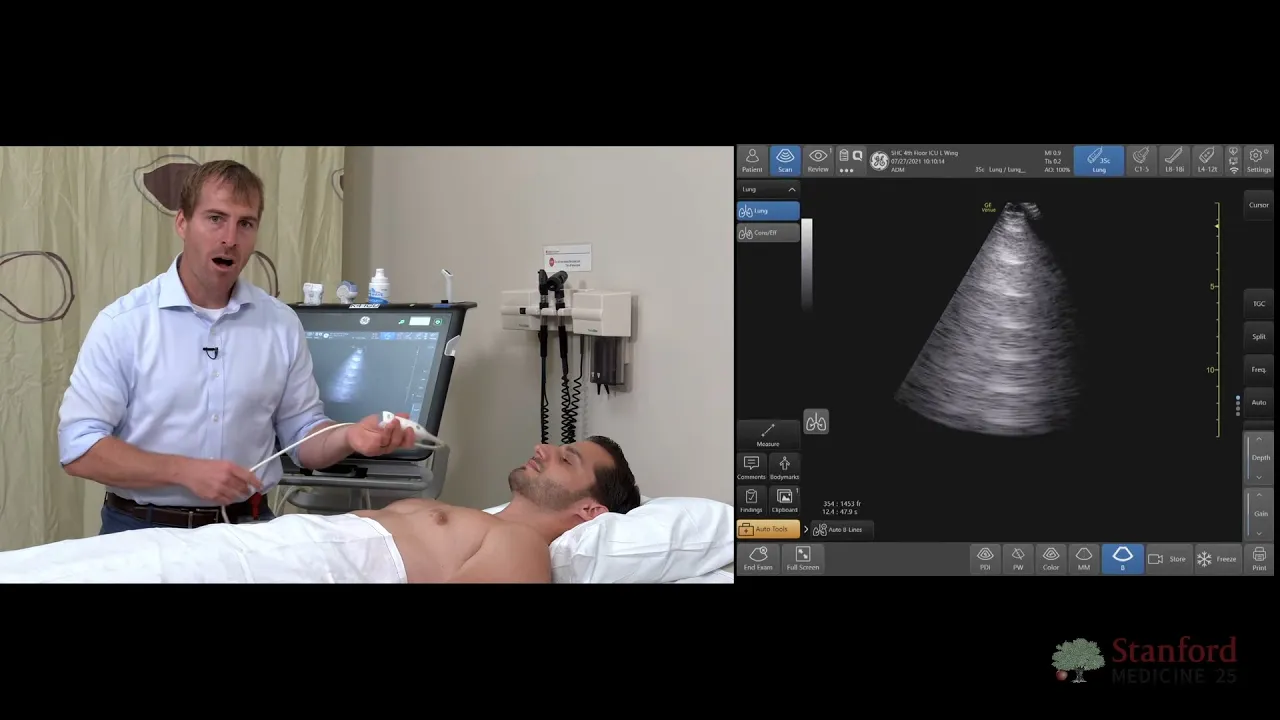
Why this video is valuable: A highly educational introduction to lung ultrasound basics from Stanford Medicine. It details the anatomy of the pleural line, how to identify the "bat sign" (the acoustic shadow of the ribs flanking the pleural line), and clarifies the difference between normal artifacts and real tissue structures.
- Identify the "bat sign" using the ribs as anatomical landmarks to locate the pleural line.
- Define "A-lines" and explain why they represent normal, dry, air-filled lung tissue.
- Characterize pathologic "B-lines" (vertical, laser-like, arising from the pleura, moving with respiration, erasing A-lines).
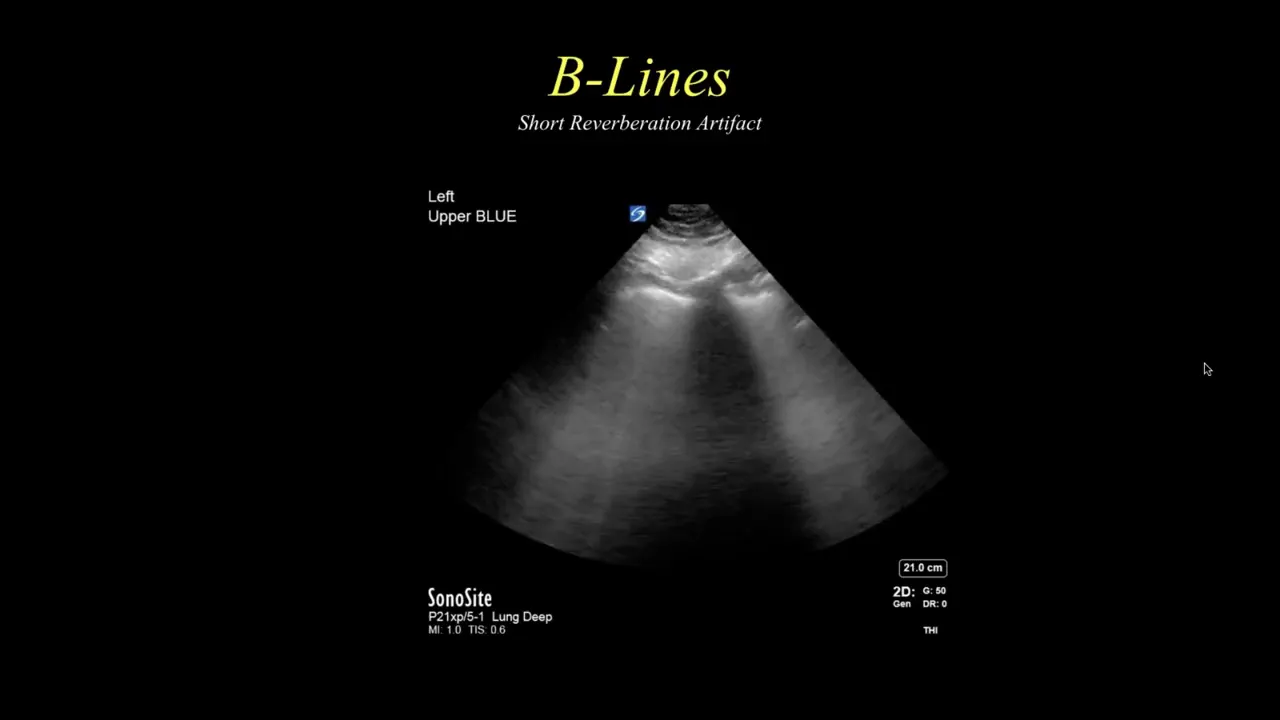
Why this video is valuable: Addresses Feedback Gap #1. This is a dedicated, highly detailed clinical lecture on Dr. Daniel Lichtenstein's BLUE (Bedside Lung Ultrasound in Emergency) protocol algorithm. It explains how to systematically move through the designated lung points (upper blue, lower blue, PLAPS point) to diagnose acute respiratory failure with over 90% diagnostic accuracy.
- Locate the three standardized BLUE protocol scanning zones on a patient: the upper blue point, lower blue point, and PLAPS (Posterolateral Alveolar and/or Pleural Syndrome) point.
- Map clinical findings to the BLUE protocol profiles: A-profile, B-profile, A/B profile, and C-profile (consolidation).
- Apply the BLUE protocol decision tree to differentiate COPD/Asthma, Pulmonary Embolism, Pneumonia, and Pneumothorax.
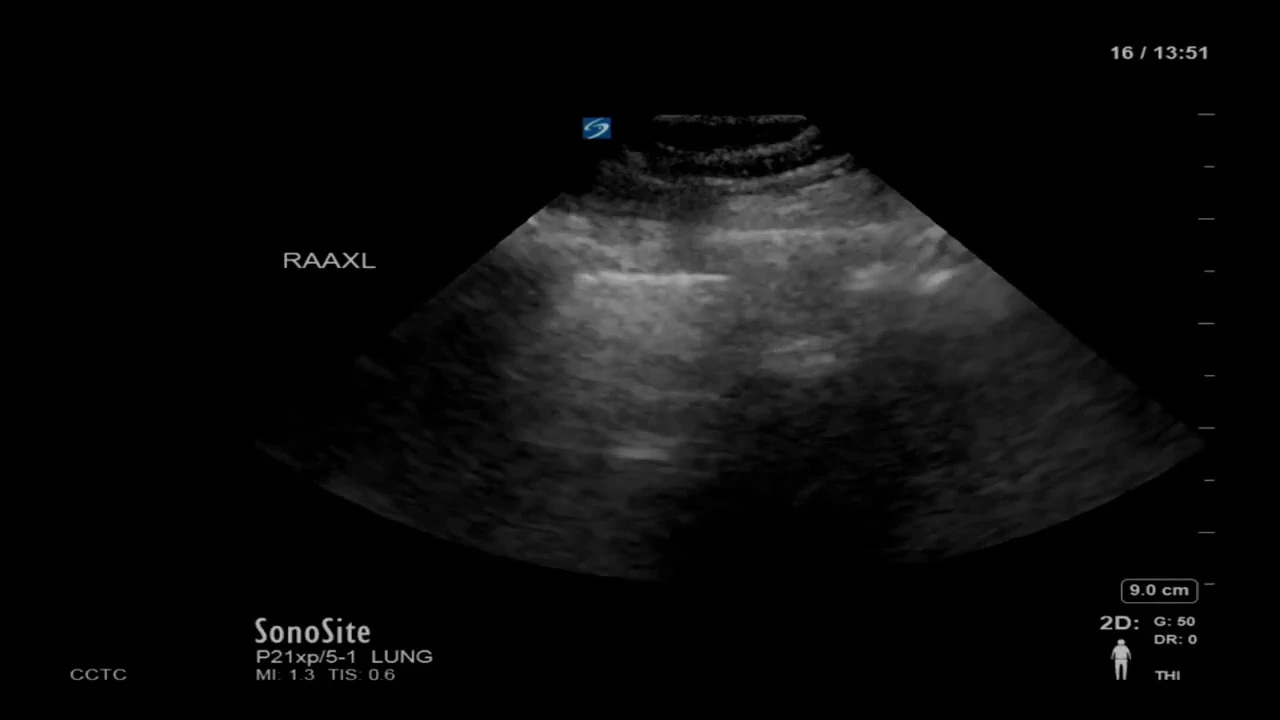
Why this video is valuable: This concise guide provides high-density image loops demonstrating advanced lung pathology. It is ideal for visual learning, helping you quickly identify consolidate lung tissue (hepatization of the lung) and trace the jagged borders of pleural-based consolidations (shred sign).
- Recognize the "shred sign" and "tissue-like sign" (hepatization) as diagnostic features of lung consolidation/pneumonia.
- Identify the "quad sign" and "sinusoid sign" on M-mode to confirm a pleural effusion.
- Identify a "lung point," which is 100% specific for confirming a pneumothorax.
Module 4: Focused Cardiac Ultrasound (FoCUS)
Acquire and interpret the four standard cardiac windows to evaluate gross left ventricular function, right ventricular strain, and pericardial effusions.
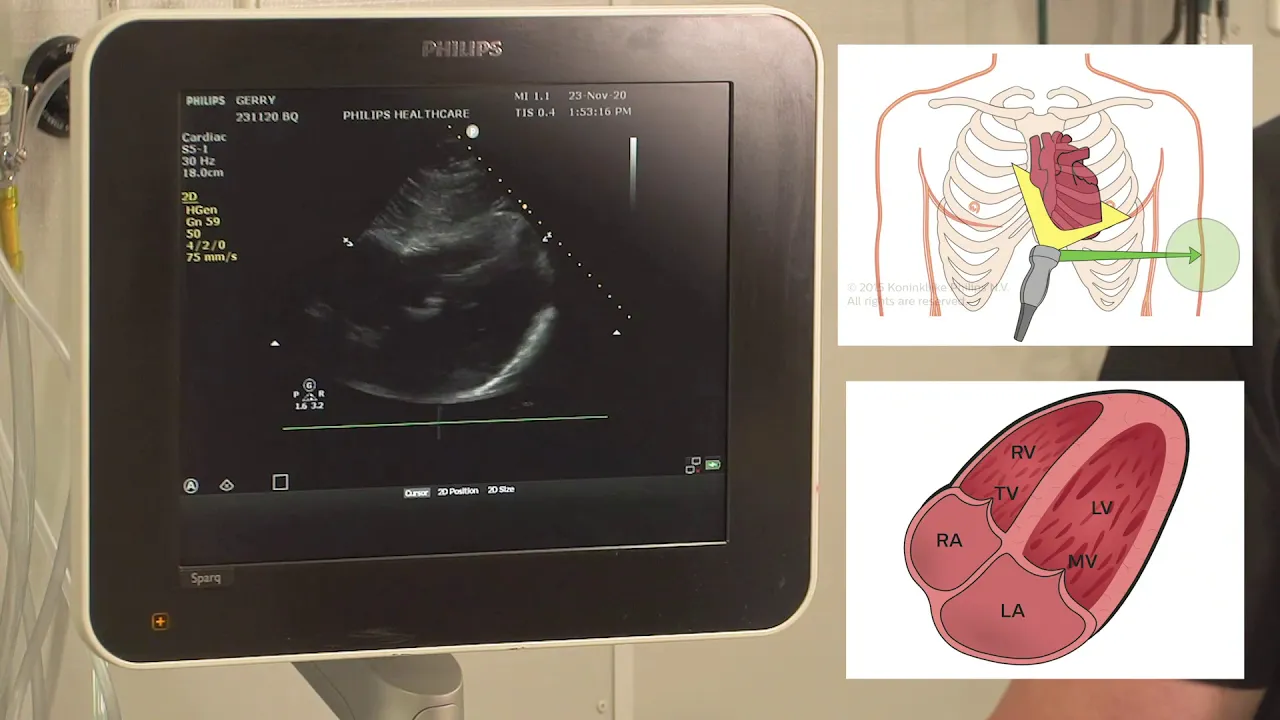
Why this video is valuable: An excellent, step-by-step masterclass showing how to obtain the primary cardiac windows. This tutorial is phenomenal because it utilizes dual-screen views showing both the exact hand position/probe orientation on the patient's chest and the resulting real-time ultrasound image.
- Perform the transducer movements (sliding, tilting, rotating, angling) required to optimize cardiac imaging.
- Identify the anatomical structures visible in the Parasternal Long Axis (PLAX) view, including the left ventricle, left atrium, mitral valve, and aortic valve.
- Locate the descending aorta in a PLAX view to differentiate between a pleural and pericardial effusion.

Why this video is valuable: This tutorial breaks down advanced concepts of Transthoracic Echocardiography (TTE) into simple, actionable steps. It goes deep into the Parasternal Short Axis (PSAX) and Apical Four-Chamber (A4C) views, which are critical for assessing ventricular size ratios and gross chamber dynamics.
- Transition smoothly from the PLAX view to the PSAX view at the mid-papillary level by rotating the probe 90 degrees clockwise.
- Describe the "fish-mouth" appearance of the mitral valve in PSAX and identify papillary muscle landmarks.
- Identify right ventricular strain (dilated RV, flattening of the interventricular septum creating a "D-shaped" left ventricle).
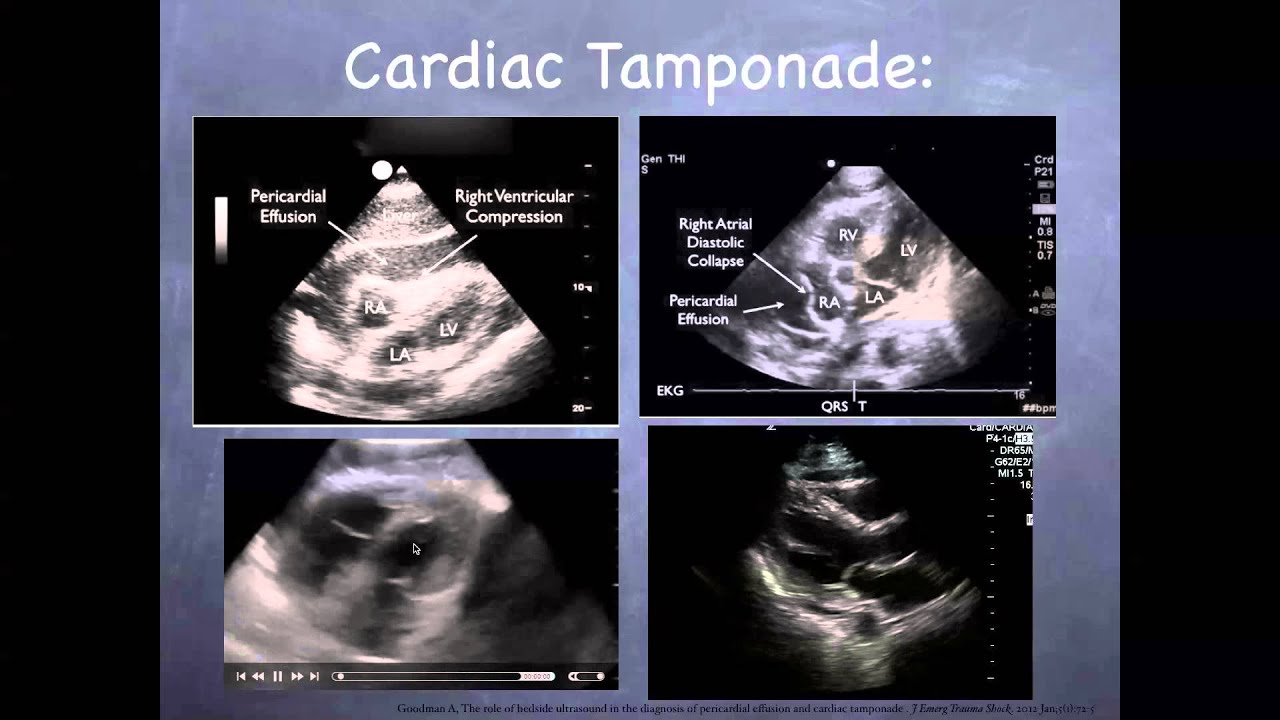
Why this video is valuable: Built specifically for emergency and intensive care settings, this clinical guide centers on rapid, goal-directed assessments. It teaches the subcostal four-chamber window, which is crucial for evaluating critically ill patients because it avoids mechanical ventilation artifacts and does not disrupt chest compressions.
- Obtain a subcostal four-chamber view using the liver as an acoustic window.
- Assess the Inferior Vena Cava (IVC) in the long-axis subcostal view to grossly estimate volume status and collapsibility.
- Rapidly evaluate for signs of cardiac tamponade (pericardial fluid coupled with right ventricular diastolic collapse).
Module 5: The RUSH Exam for Shock and Hypotension
Integrate cardiac, lung, and abdominal ultrasound findings to rapidly differentiate the etiologies of shock using the "Pump, Tank, and Pipes" framework.

Why this video is valuable: This is a stellar, comprehensive academic lecture on the Rapid Ultrasound in Shock (RUSH) protocol. It outlines the physiological triage of the "Pump" (heart), "Tank" (intravascular volume/pleural status), and "Pipes" (large arterial/venous conduits) to accurately differentiate between hypovolemic, cardiogenic, obstructive, and distributive shock.
- Explain the physiological framework of "the Pump, the Tank, and the Pipes" during a clinical evaluation of hypotension.
- Assess "the Pump" for contractility (hyperdynamic in hypovolemia/sepsis, sluggish in cardiogenic shock).
- Assess "the Tank" by evaluating IVC dynamics, lung profiles (A vs. B lines), and scanning for abdominal/thoracic third-space losses.

Why this video is valuable: This in-depth clinical seminar focuses on the real-time cognitive integration of bedside POCUS findings. It teaches you how to think through conflicting signs (such as a flat IVC with good cardiac squeeze vs. a dilated, non-collapsible IVC with poor contractility) to narrow down a precise diagnosis in a crashing patient.
- Apply the RUSH protocol to differentiate between obstructive shock etiologies (tension pneumothorax, massive pulmonary embolism, cardiac tamponade).
- Recognize ultrasound patterns of distributive shock (e.g., hyperdynamic heart, flat IVC, variable lung sliding).
- Formulate a immediate clinical resuscitation plan based on combined POCUS findings in shock.

Why this video is valuable: Focusing heavily on the "Pipes" phase of the RUSH exam, this video provides excellent clinical imaging examples of aortic pathology. It teaches how to identify abdominal aortic aneurysms (AAA) and aortic dissections at the bedside, which are catastrophic, can cause sudden hypotension, and are often misdiagnosed.
- Systematically scan the abdominal aorta from the epigastrium to the bifurcation at the iliac arteries.
- Accurately measure the outer-wall-to-outer-wall diameter of the abdominal aorta to screen for an aneurysm (diameter > 3 cm).
- Identify an aortic dissection flap within the lumen of the thoracic or abdominal aorta.
Module 6: Ultrasound-Guided Vascular Access
Perform ultrasound-guided peripheral IV insertions and central venous access safely, understanding the key physical mechanics of needle guidance.

Why this video is valuable: This procedural masterclass covers probe orientation, sterile barrier preparation, and target vessel selection for central venous access. It reviews how to use a high-frequency linear probe to cleanly map vessels and avoid accidental arterial puncture.
- Identify the internal jugular vein and common carotid artery using physical compression and color Doppler.
- Explain how to maintain a strict sterile field while utilizing an ultrasound probe cover.
- Contrast short-axis (out-of-plane) and long-axis (in-plane) views of target vessels.

Why this video is valuable: Addresses Feedback Gap #2. This video is a dedicated, highly detailed mechanical guide on the "in-plane" needle visualization technique. It provides exceptional visual examples of how to align the needle shaft directly with the ultrasound beam to visualize the entire path and tip of the needle, significantly improving procedural safety.
- Align the needle parallel to the longitudinal axis of the probe to ensure the entire needle shaft and tip are visible in-plane.
- Use minor fanning motions to keep the needle centered in the thin ultrasound slice.
- Explain why the in-plane approach offers superior safety by preventing dynamic "blind" advancement of the needle tip.
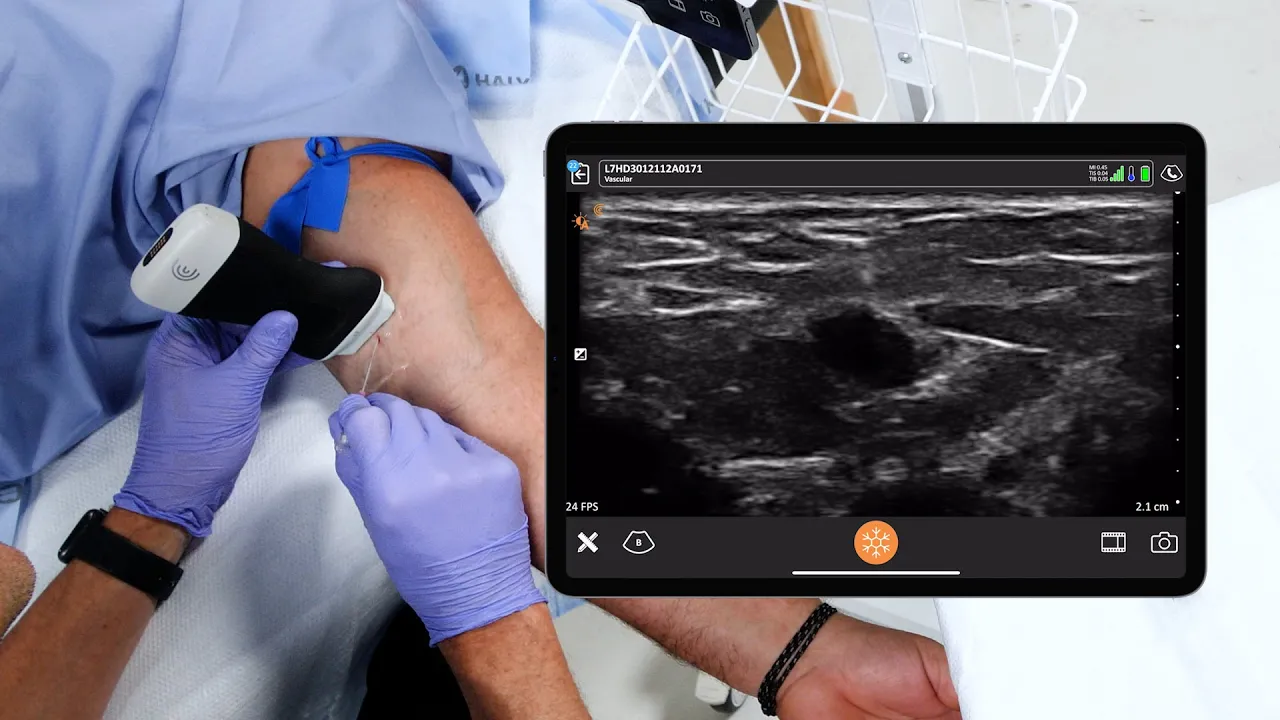
Why this video is valuable: Real-world guide to inserting a peripheral IV under ultrasound guidance, particularly in patients with difficult access. It breaks down the dynamic "out-of-plane" tracking method (sliding the probe slightly ahead of the needle tip) and demonstrates the exact hand movements needed to guide the catheter into the center of the vessel.
- Select a deep peripheral vein (e.g., basilic or cephalic vein) suitable for ultrasound-guided cannulation.
- Apply the dynamic out-of-plane tracking technique, sliding the probe to constantly visualize the needle tip as a hyperechoic dot.
- Verify successful catheter placement by visualizing the catheter inside the vessel lumen and confirming saline flush turbulence.
Module 7: Deep Vein Thrombosis (DVT) Assessment
Utilize compression sonography to evaluate patients for deep vein thrombosis using standardized 2-point and 3-point compression protocols.
Why this video is valuable: A highly practical, resident-targeted tutorial on performing a rapid 2-point compression DVT exam. It shows you exactly how to position the patient and where to press, demystifying the anatomy of the femoral and popliteal regions.
- Position the patient's lower extremity (hip externally rotated, knee slightly bent) to optimize vascular imaging.
- Locate the common femoral vein and popliteal vein, identifying the anatomical relationships with adjacent arteries.
- Apply direct downward compression with the probe to prove complete collapse of a normal vein's lumen.

Why this video is valuable: This deep-dive anatomical walk-through shows the real-time scanning mechanics of the proximal leg. It covers the crucial saphenofemoral junction (SFJ) and explains how to systematically compress the deep venous system every 1-2 centimeters down to the deep femoral bifurcation.
- Locate and scan the saphenofemoral junction (SFJ)—a high-yield site for DVT formation.
- Explain why incomplete compressibility is the primary and most reliable diagnostic criteria for DVT.
- Distinguish acute, hypoechoic, free-floating thrombi from chronic, hyperechoic, scarred vascular wall changes.

Why this video is valuable: This comprehensive clinical review emphasizes the diagnostic accuracy and limitations of emergency physician-performed DVT scans. It provides exceptional split-screen anatomical graphics showing the popliteal trifurcation, and teaches how to avoid false negatives when scanning the distal popliteal vein.
- Locate the popliteal vein in the popliteal fossa, identifying its position superficial to the popliteal artery.
- Utilize color Doppler and spectral Doppler waveforms to confirm normal venous flow and respiratory variation.
- Detail the pitfalls of DVT ultrasound, including mistaken identification of superficial veins or deep muscle hematomas.
Course Map
Key People Index
- Dr. Daniel Lichtenstein
- Context: Widely regarded as the pioneer of critical care lung ultrasound. He developed the BLUE (Bedside Lung Ultrasound in Emergency) protocol in 2008, which fundamentally changed how emergency and ICU physicians diagnose acute respiratory failure.
- Dr. Scott Weingart
- Context: A leading voice in resuscitation and emergency medicine who heavily popularized the systematic implementation of the RUSH exam (Rapid Ultrasound in Shock) to guide mechanical and fluid resuscitation in hypotensive patients.
Final Self-Assessment
- M1: You can explain how to select and adjust Depth, Overall Gain, and Time-Gain Compensation to resolve a dark/muddy image at a depth of 12 cm.
- M2: You can systematically locate and scan all seven standard windows of the eFAST exam during a high-acuity trauma scenario.
- M2: You can differentiate a true pelvic hemoperitoneum from physiological fluid or a fluid-filled bowel loop in a female patient.
- M3: You can identify a "lung point" and explain why this finding is 100% specific for confirming a pneumothorax.
- M3: You can execute the BLUE protocol algorithm, mapping A/B profiles to rule out or rule in PE, COPD, asthma, or pneumonia.
- M4: You can rapidly acquire the Parasternal Long Axis (PLAX) and subcostal views to evaluate a hypotensive patient for cardiac tamponade.
- M4: You can identify right ventricular strain (D-sign) on a Parasternal Short Axis view.
- M5: You can run the entire "Pump, Tank, and Pipes" RUSH protocol and formulate a targeted resuscitation pathway for cardiogenic versus hypovolemic shock.
- M6: You can demonstrate how to align and advance a needle using both the dynamic out-of-plane tracking technique and the in-plane approach.
- M7: You can perform a rapid 2-point and 3-point compression ultrasound of the lower extremity, proving complete venous lumen collapse to rule out a deep vein thrombosis.